The Arduino built-in LED
By Flavio Copes
Learn how to use the Arduino built-in LED, referencing it with the LED_BUILTIN constant and controlling it with pinMode and digitalWrite to make it blink.
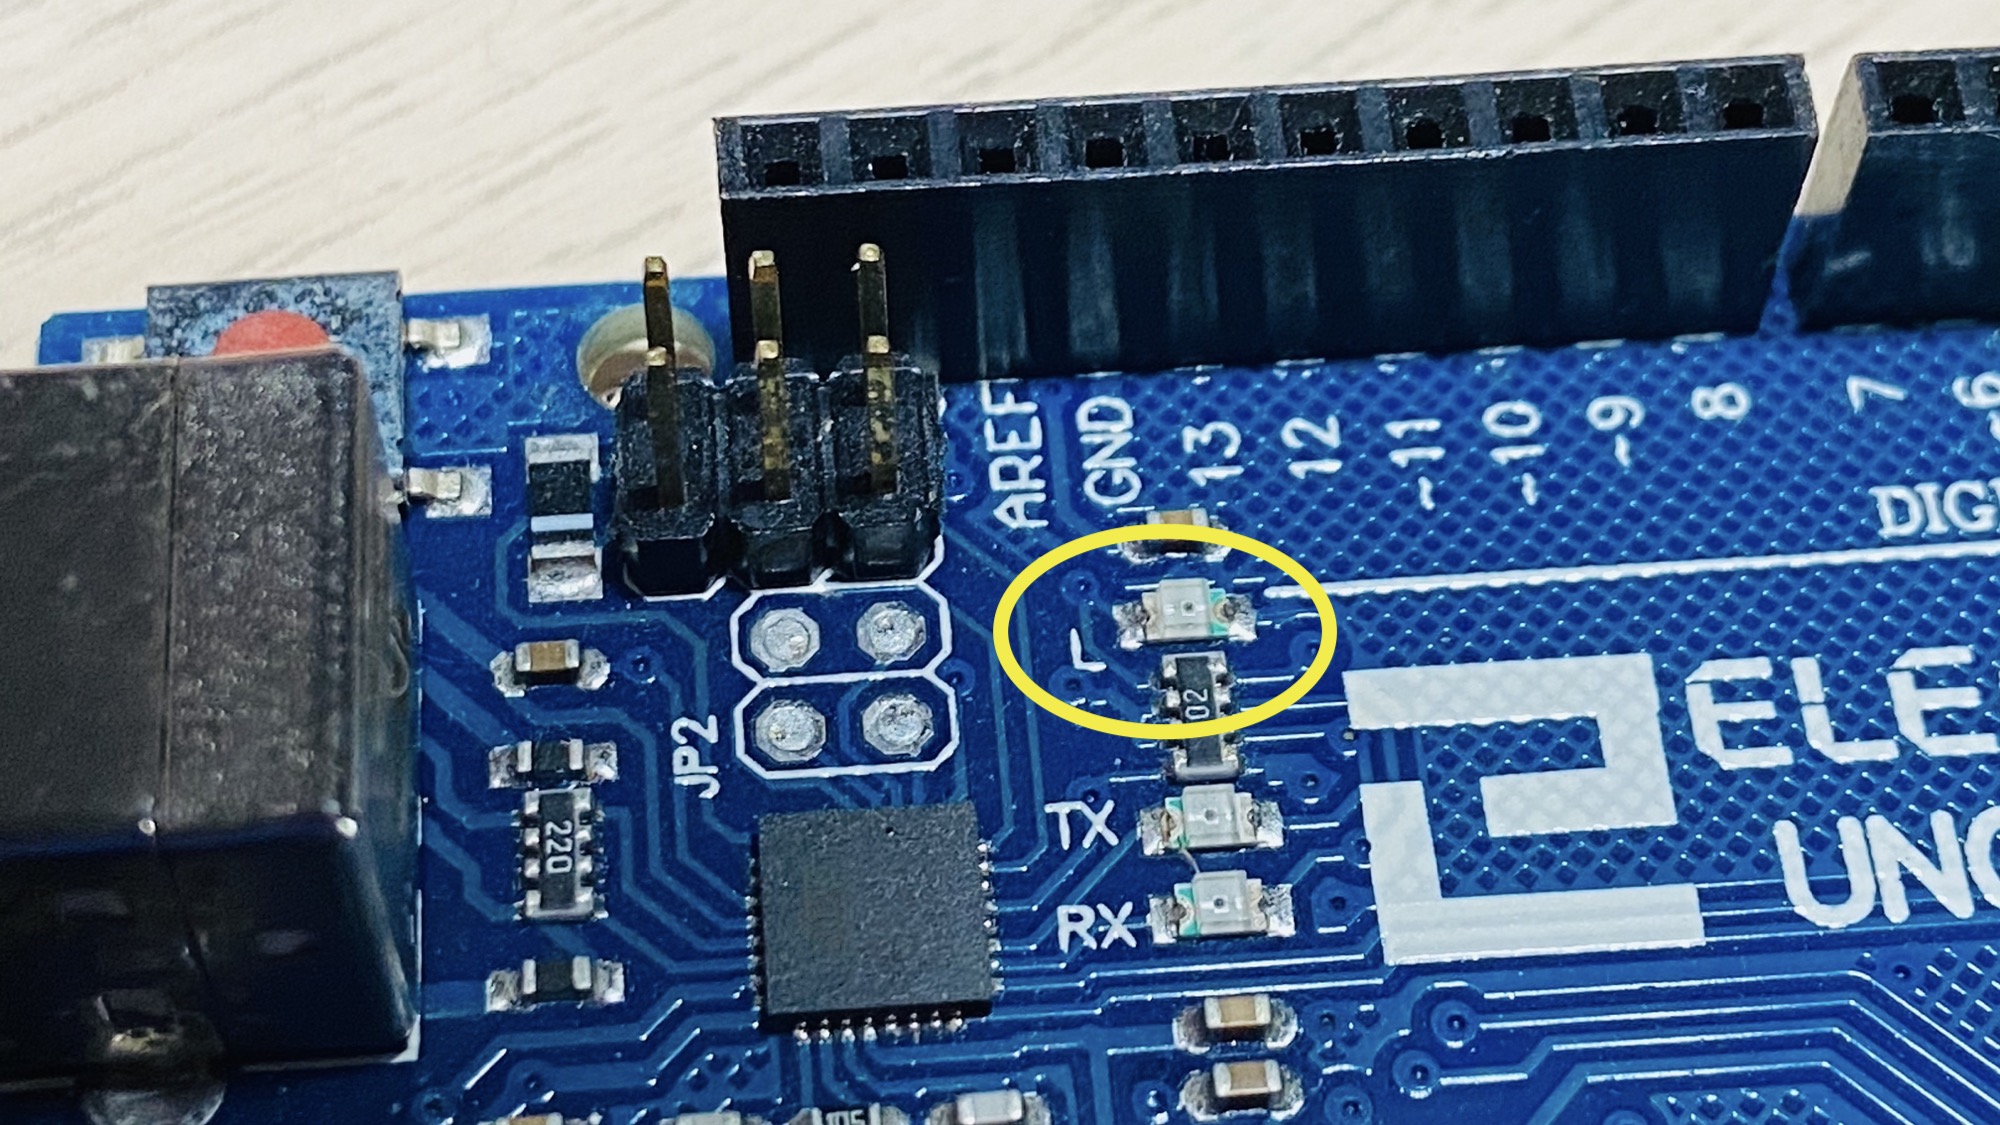
Arduino boards come with a little utility: the built-in LED.
It is identified by the letter L next to it. On the Arduino Uno, it is near pin #13:
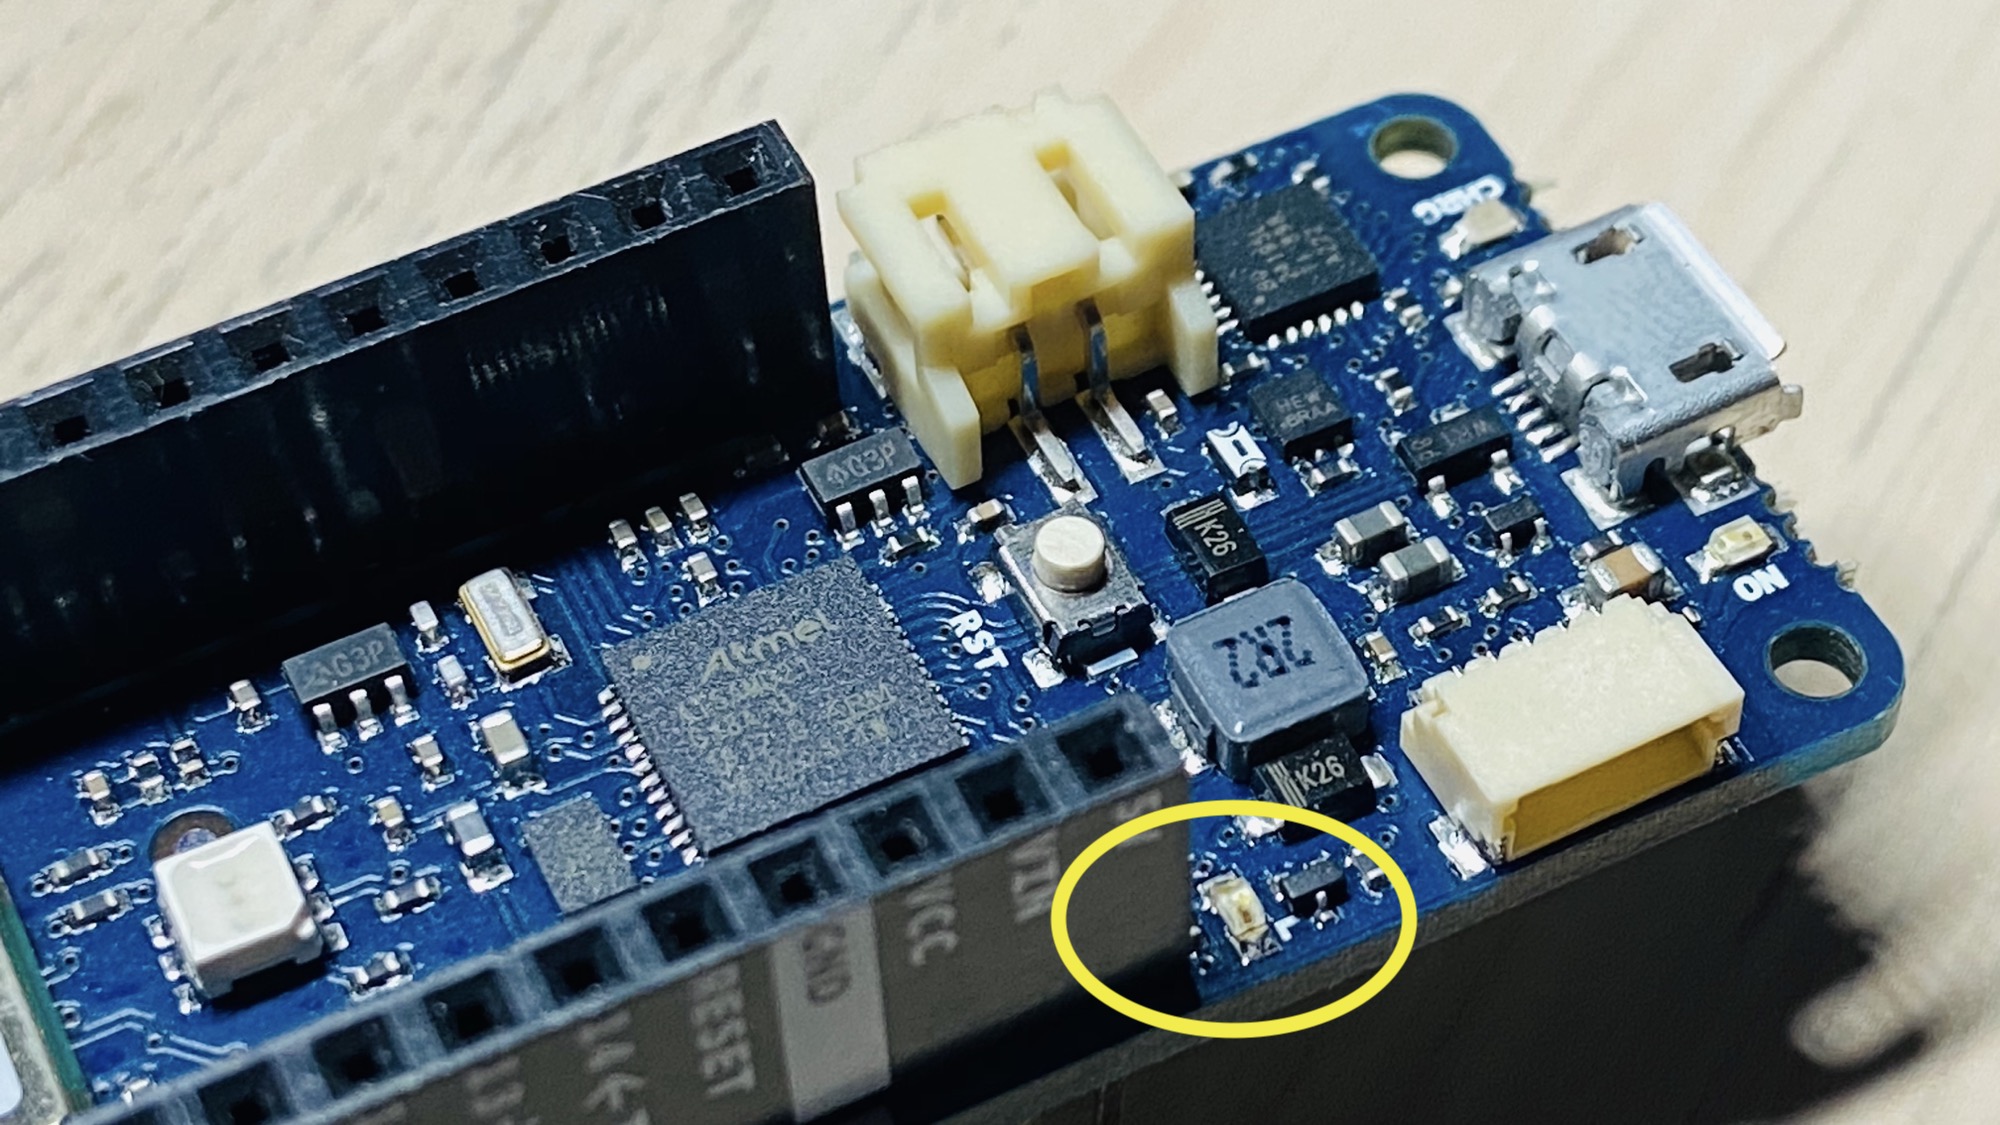
On the Arduino MKR 1010 WiFi it is near the 5V output pin:
This LED is connected to the digital I/O pin #13 in most boards. In some boards, like the Arduino MKR series, it’s linked to the pin #6.
In any case you can reference the exact pin using the LED_BUILTIN constant, that is always correctly mapped by the Arduino IDE to the correct pin, depending on the board you are compiling for.
To light up the LED, first you need to set the pin to be an output in setup():
pinMode(LED_BUILTIN, OUTPUT);Then you can send it a HIGH signal:
digitalWrite(LED_BUILTIN, HIGH);or
digitalWrite(LED_BUILTIN, 1);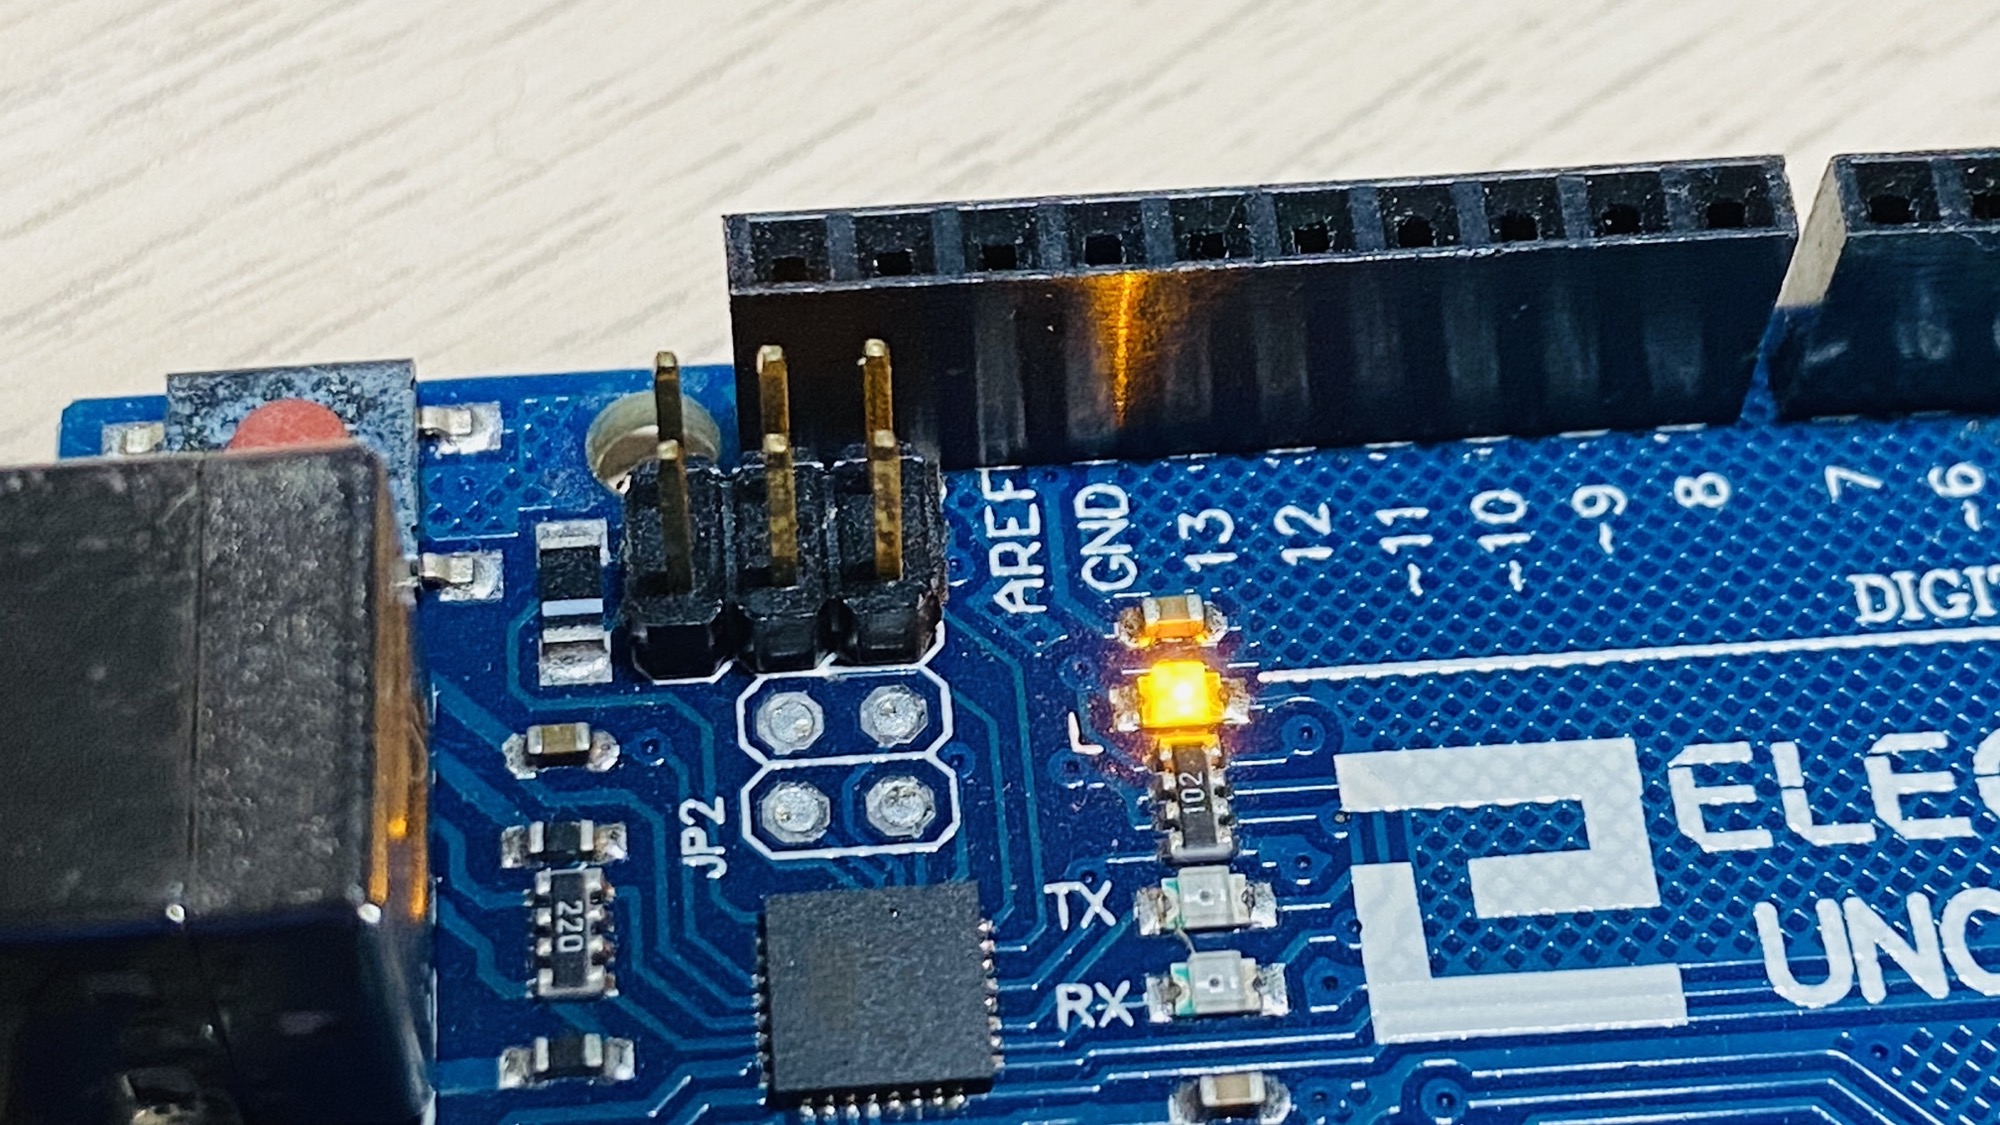
Here is a simple program that makes the built-in LED blink every second:
void setup() {
    pinMode(LED_BUILTIN, OUTPUT);
}

void loop() {
    digitalWrite(LED_BUILTIN, HIGH);
    delay(1000);
    digitalWrite(LED_BUILTIN, LOW);
    delay(1000);
}Related posts about electronics: