Arduino project: read a digital input
By Flavio Copes
Learn how to read a digital input on an Arduino with the digitalRead() function, wiring a button to pin 3 with INPUT_PULLUP to detect when it is pressed.
In this project you’ll learn how to read from a digital I/O pin, using the digitalRead() function.
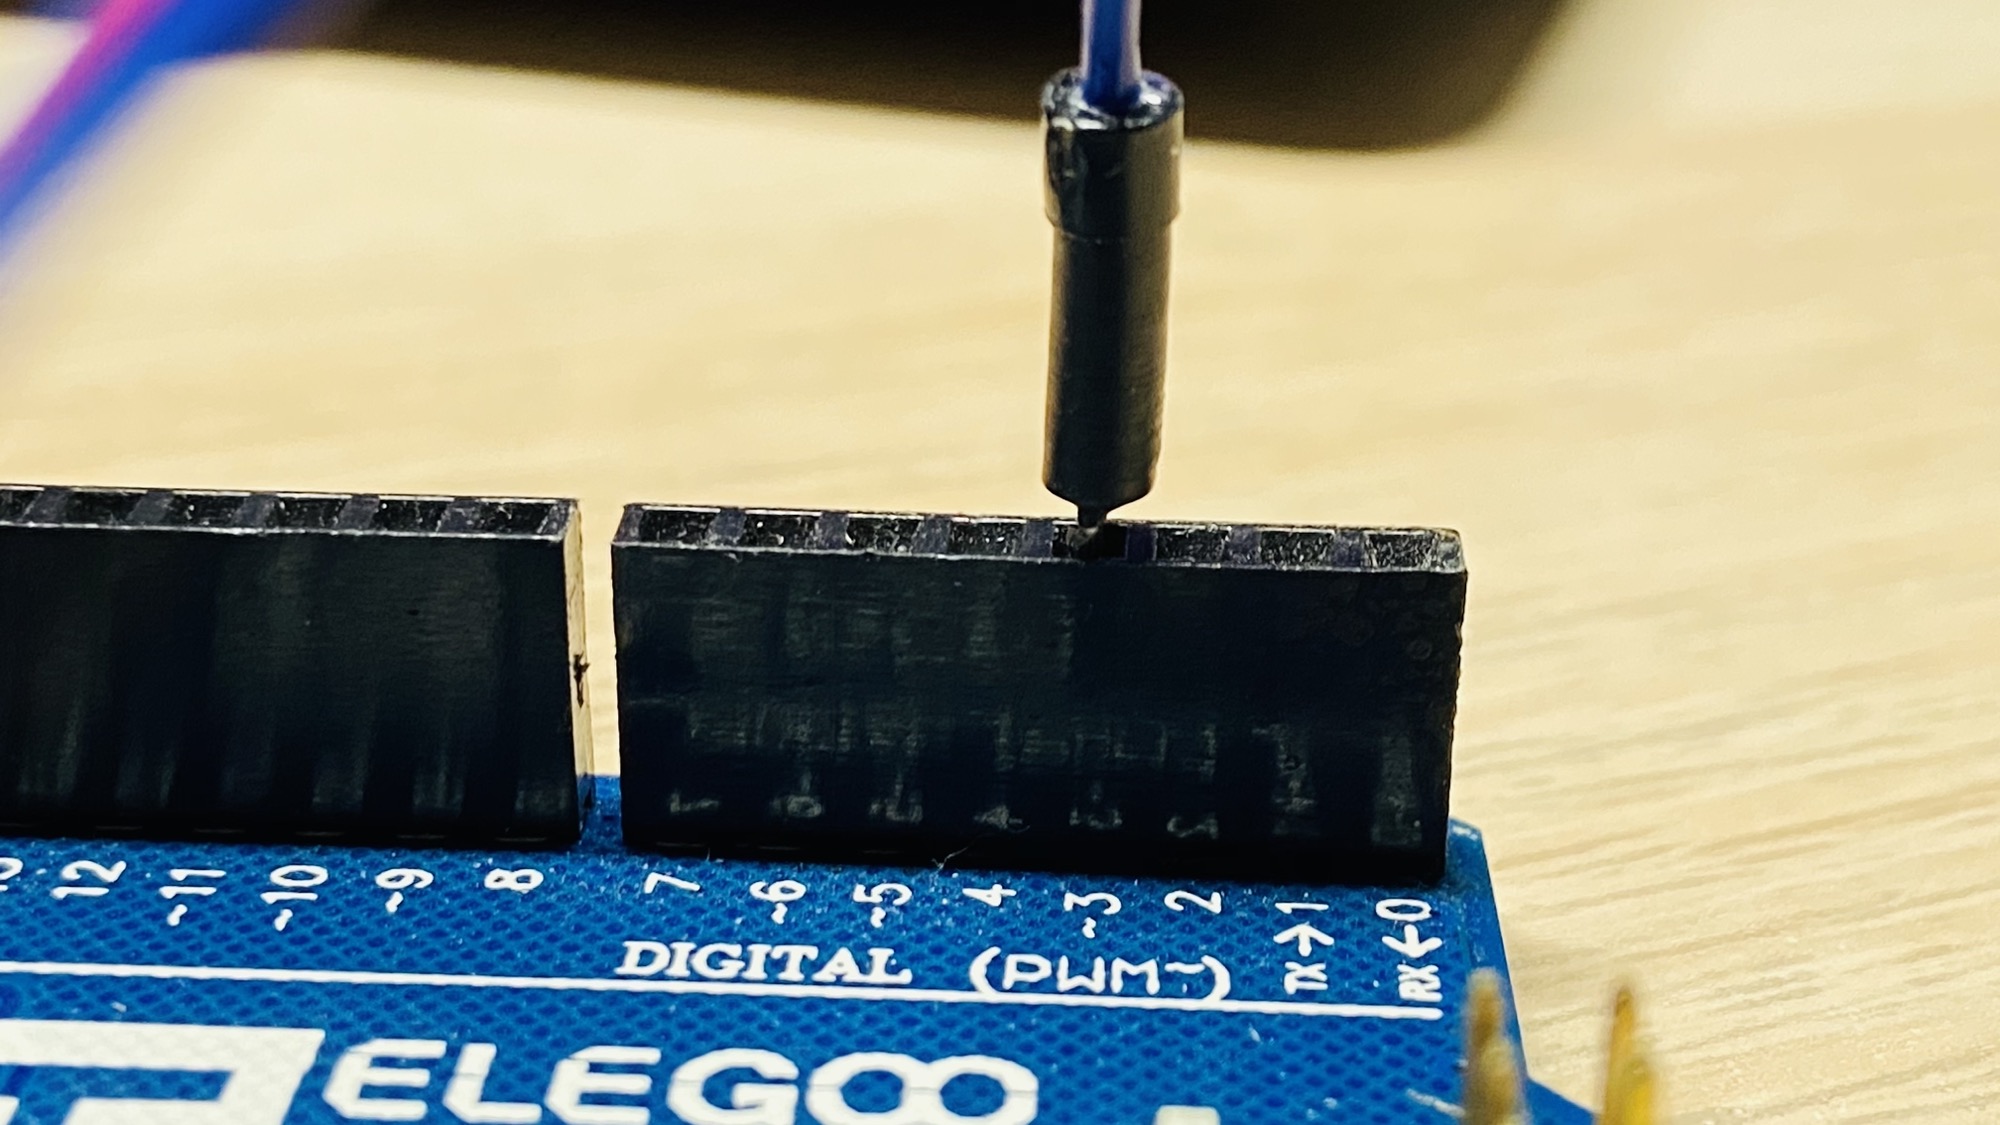
Digital I/O pins on the Arduino Uno board are the ones on the USB port side of the board, and they might also be marked as digital on the pins, like in my case:

They are numbered from 0 to 13, but you will almost always skip pins 0 and 1 unless you run out of pins, because they are used for serial communication (see the rx and tx labels printed on them).
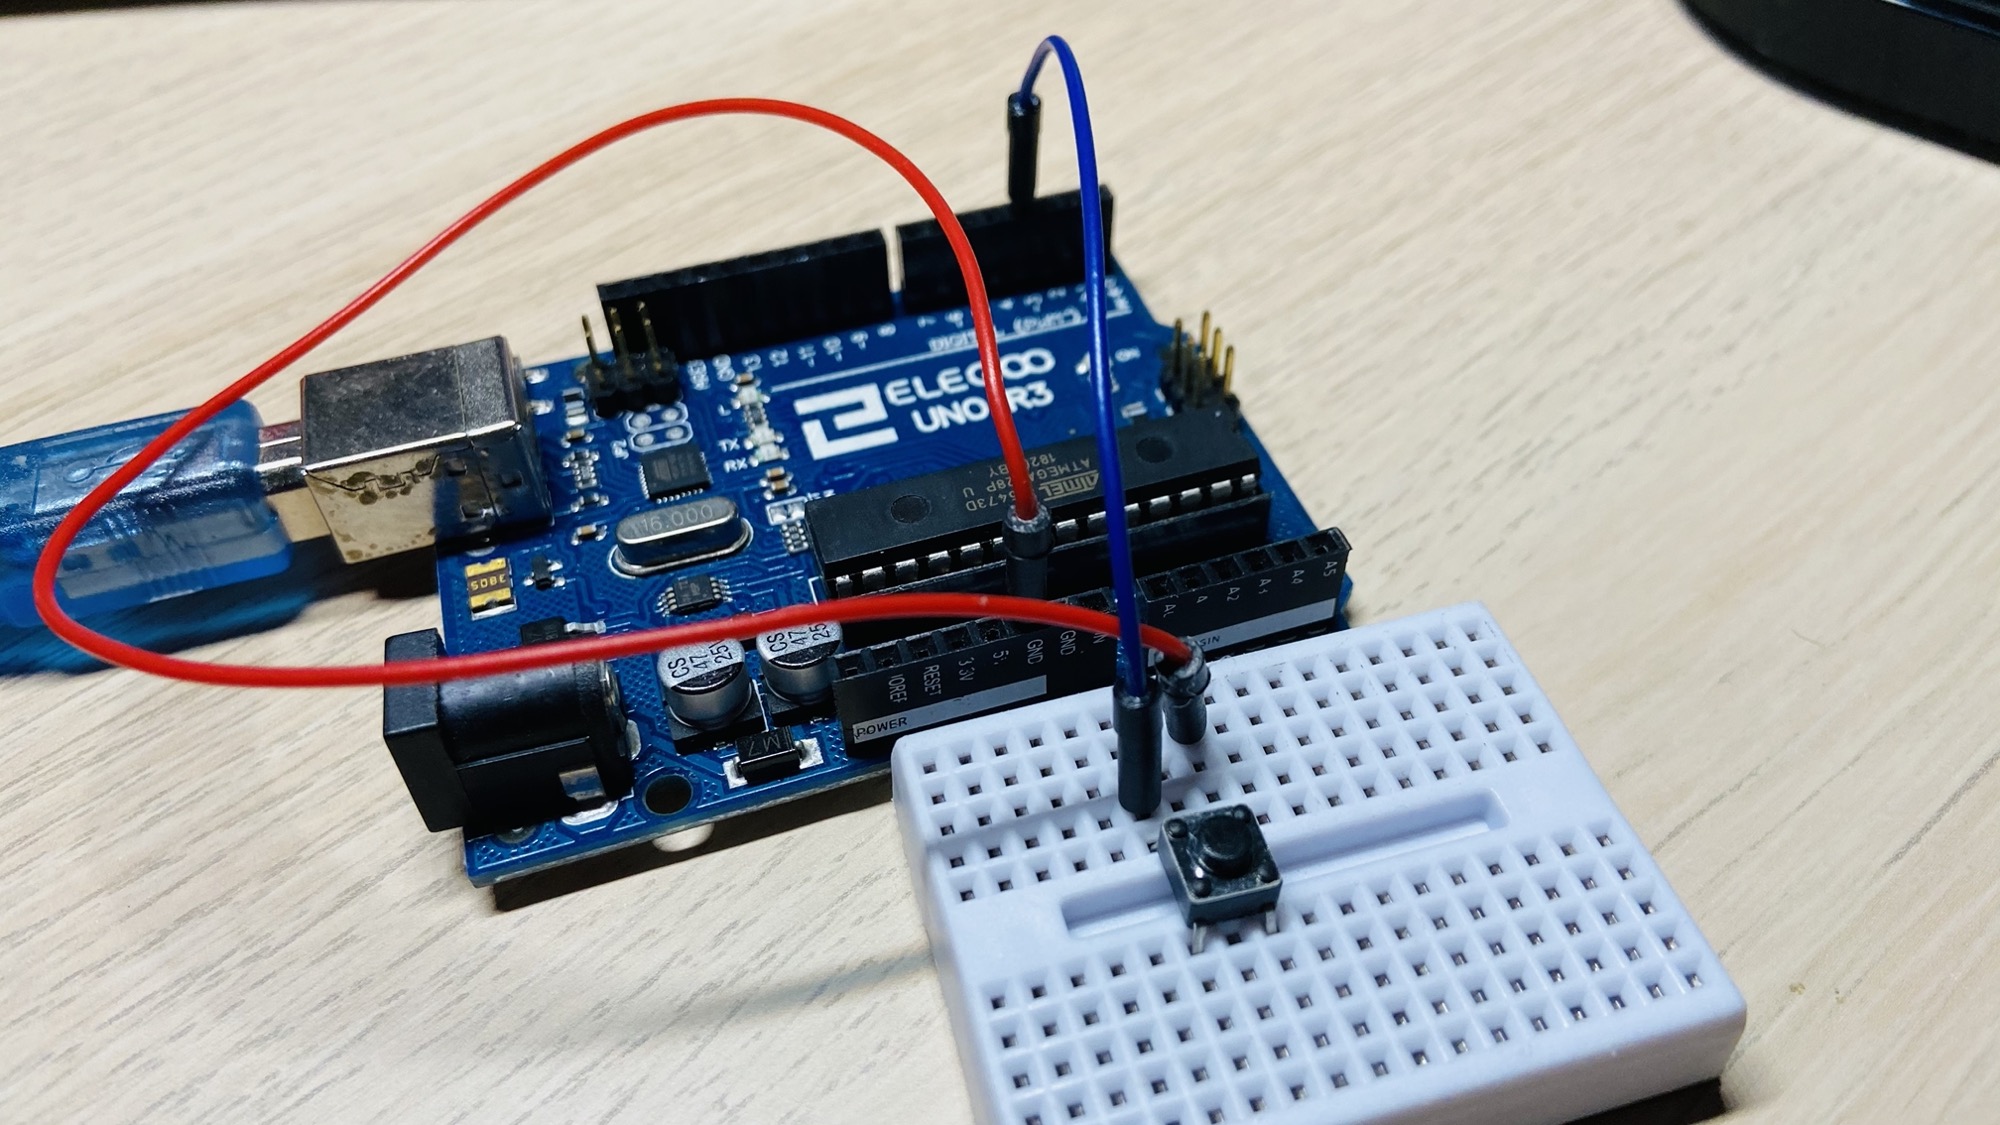
We’ll first build the circuit, then we’ll switch to the Arduino IDE on our computer.
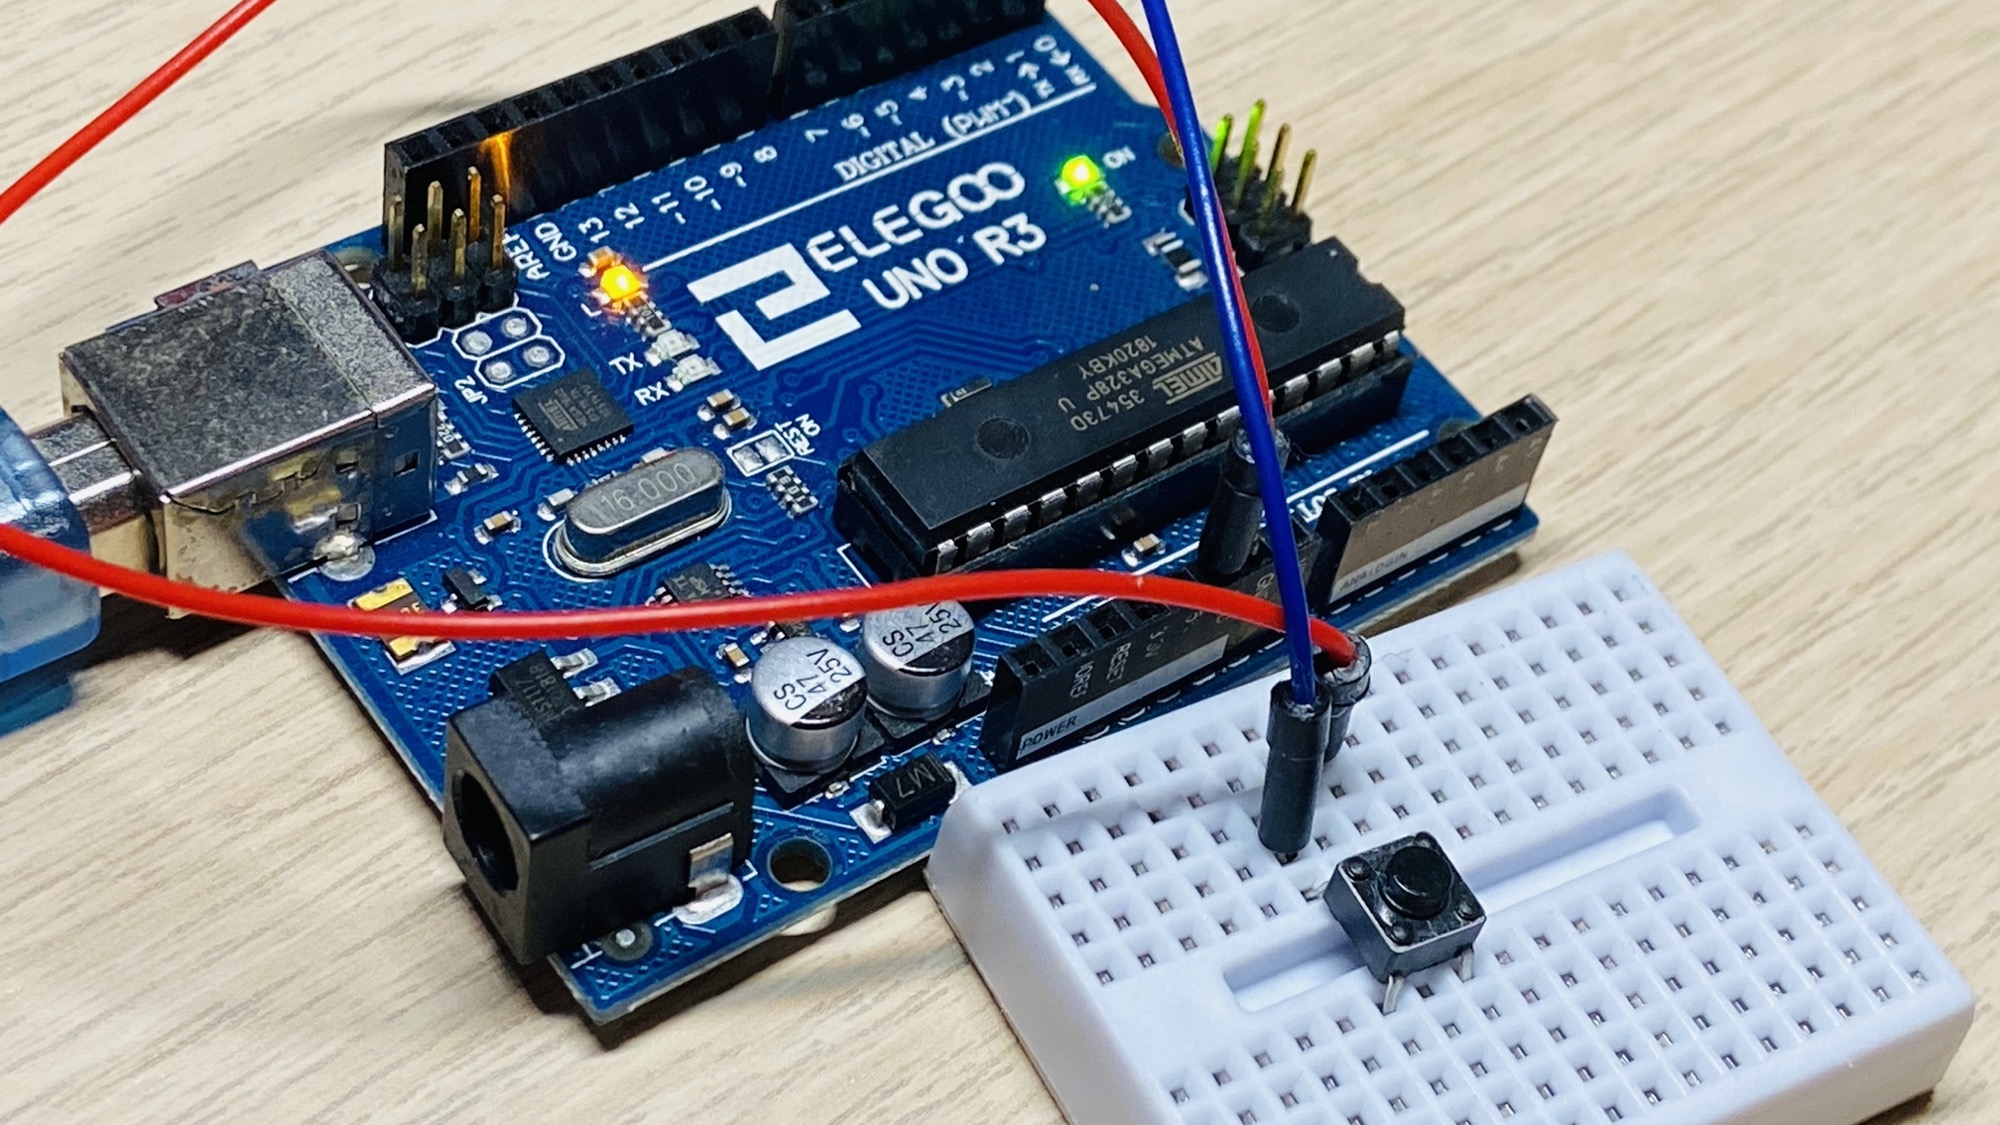
The circuit will be simple. We’ll have a button that has one lead connected to GND on the Arduino, one lead to the digital pin #3 (any other digital pin would work).
We’ll detect the voltage level on pin #3 every second. We define the pin number as a constant to avoid having a magic number in our code:
#define BUTTON_PIN 3In the setup() function we call pinMode() to set this pin as an input pin, with the INPUT_PULLUP option:
pinMode(BUTTON_PIN, INPUT_PULLUP);The INPUT_PULLUP option is needed because by default if nothing is connected to the pin (if the button is not clicked, the circuit is open and it’s like nothing is connected to the pin), the input pin is floating, which means it’s subject to interference and it can randomly pick a 0 or a 1.
In the circuit we could add a pull-up or a pull-down resistance, but it’s easier to pass the INPUT_PULLUP flag to Arduino. If nothing is connected, it defaults to 1.
Then in the loop() function we get the value of the input pin using the digitalRead() function:
int value = digitalRead(BUTTON_PIN);This value can be 0 or 1, depending on the input.
If the button is pressed, Arduino will detect 0.
If the button is not pressed, Arduino will detect 1.
You can also use the constants LOW, which maps to 0, and HIGH that maps to 1.
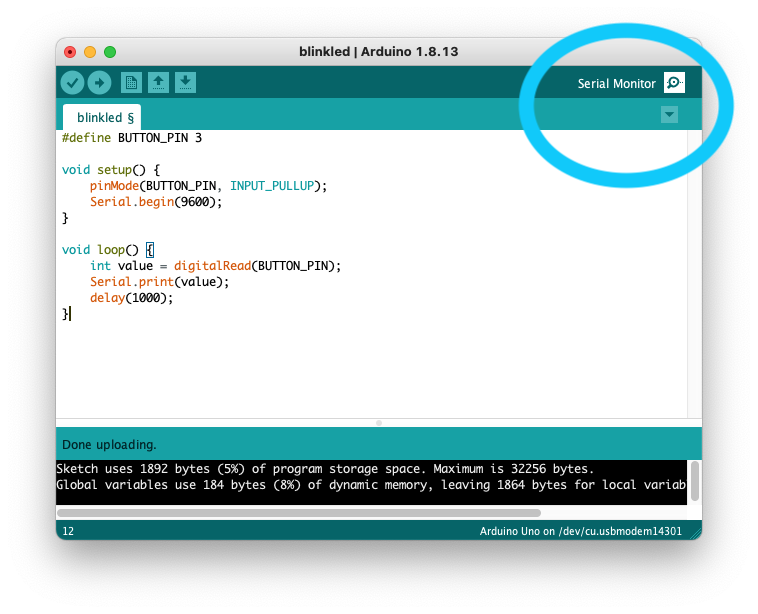
This value can be printed to the serial output, like in this program:
#define BUTTON_PIN 3

void setup() {
    pinMode(BUTTON_PIN, INPUT_PULLUP);
    Serial.begin(9600);
}

void loop() {
    int value = digitalRead(BUTTON_PIN);
    Serial.print(value);
    delay(1000);
}
Save and upload the program to the Arduino, then click the top-right button “Serial Monitor” in the Arduino IDE:
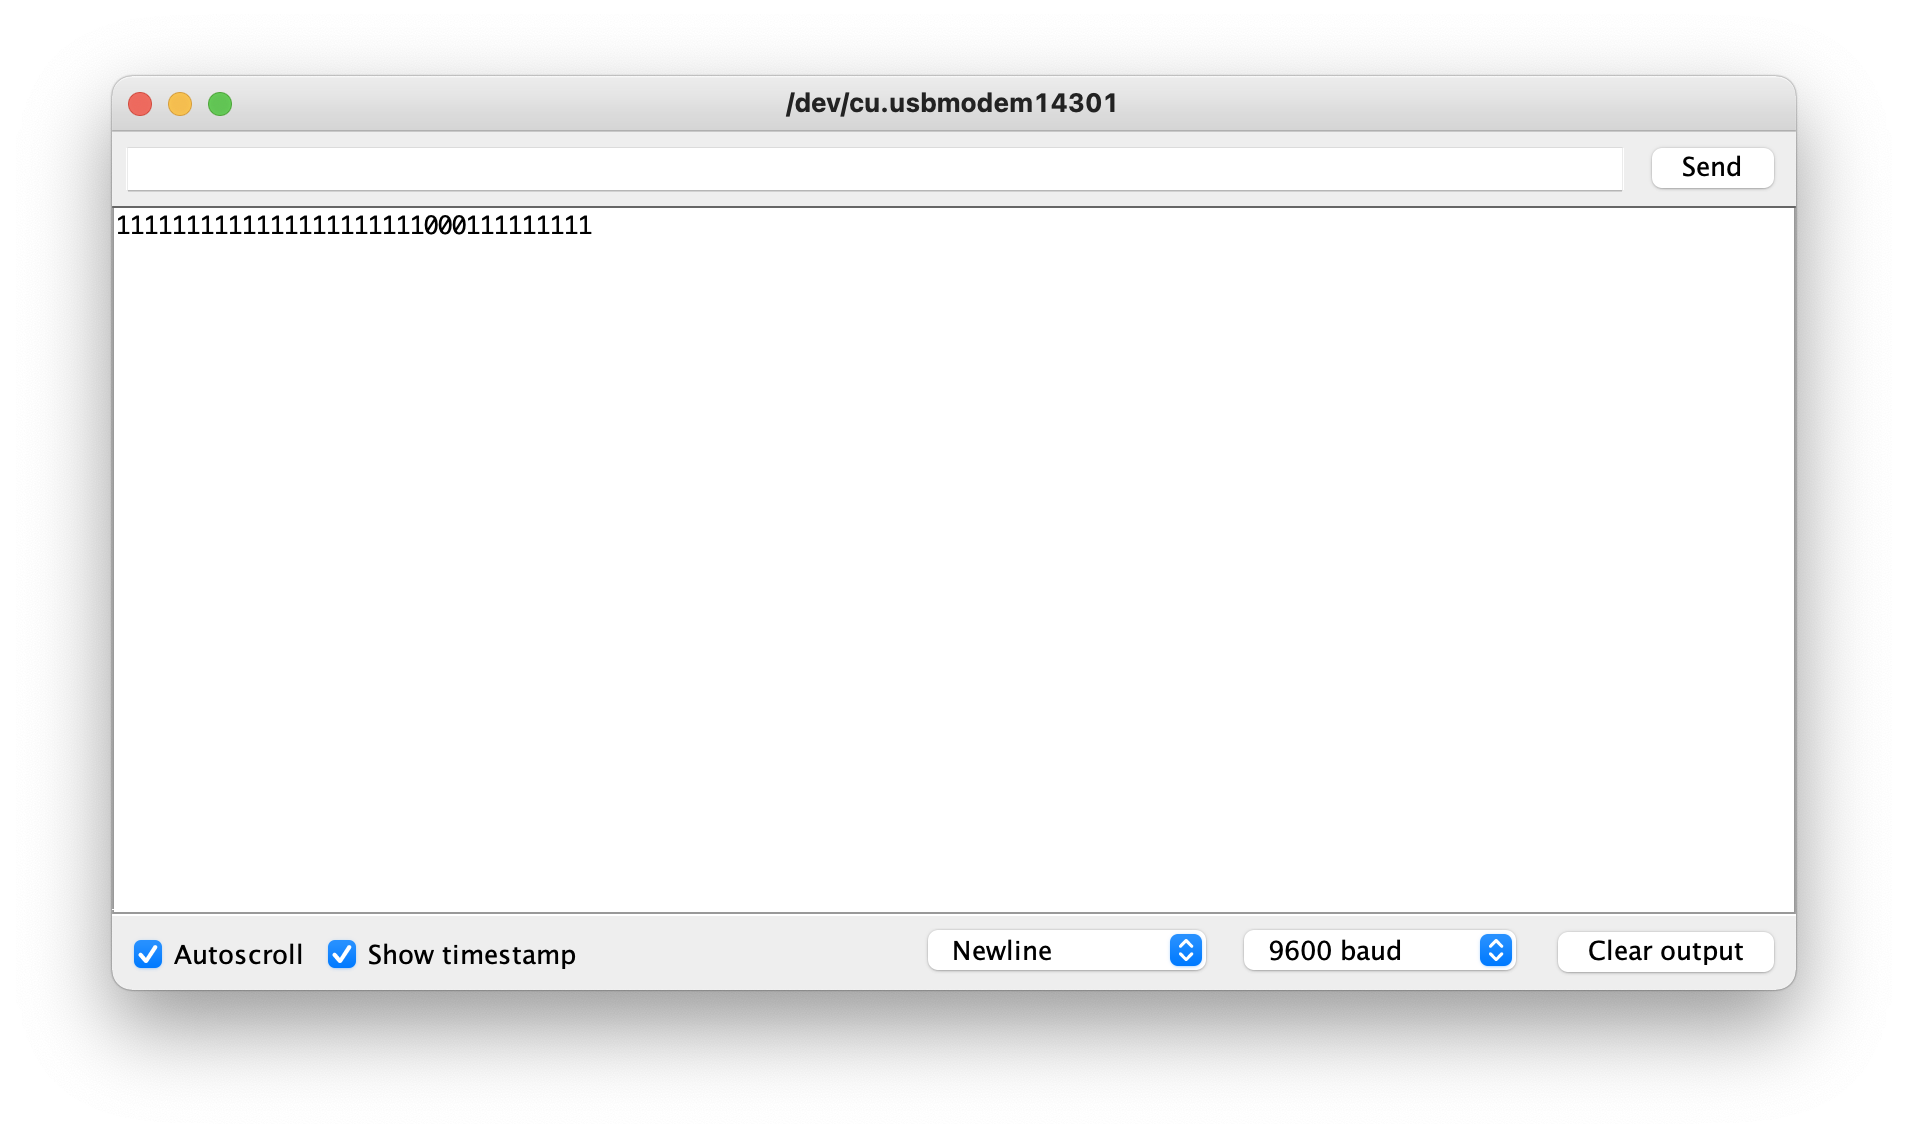
It will show the serial interface monitor. Make sure it’s tuned to 9600 baud at the bottom, and you should see a bunch of 1 until you press the button for a second, at that point you should get a 0.
We can also light a LED. We could add it to the circuit, but we can also use the Arduino Uno built-in LED, which maps to the digital I/O pin #13. We can write a program in this way:
#define BUTTON_PIN 3

void setup() {
    pinMode(BUTTON_PIN, INPUT_PULLUP);
    pinMode(13, OUTPUT);
    digitalWrite(13, LOW);
}

void loop() {
    int value = digitalRead(BUTTON_PIN);
    digitalWrite(13, value);
}
to immediately reflect the button input value, without waiting 1 second. Previously we did that to avoid writing too many values to the serial interface, making it unmanageable.
See? The built-in LED (near pin #13 / GND at the top) lights up when the program starts, and it’s turned down when we press the button

You can also do the opposite (keep it off and only turn it on when we press the button) with
digitalWrite(13, !value);And instead of referencing the magic number 13, you can use the build-in constant LED_BUILTIN:
#define BUTTON_PIN 3

void setup() {
    pinMode(BUTTON_PIN, INPUT_PULLUP);
    pinMode(LED_BUILTIN, OUTPUT);
    digitalWrite(LED_BUILTIN, LOW);
}

void loop() {
    int value = digitalRead(BUTTON_PIN);
    digitalWrite(LED_BUILTIN, !value);
}Related posts about electronics: