Arduino project: control a servo motor with a potentiometer
By Flavio Copes
Learn how to control a servo motor with an Arduino and a potentiometer, mapping the analog 0 to 1023 reading to a 0 to 180 angle with the Servo library.
In this project we’ll see how to drive a servo motor using a potentiometer.
Using an analog input pin we can read the rotation of the potentiometer, with values ranging from 0 to 1023.
We’ll use those values to rotate the servo motor from 0° to 180°.
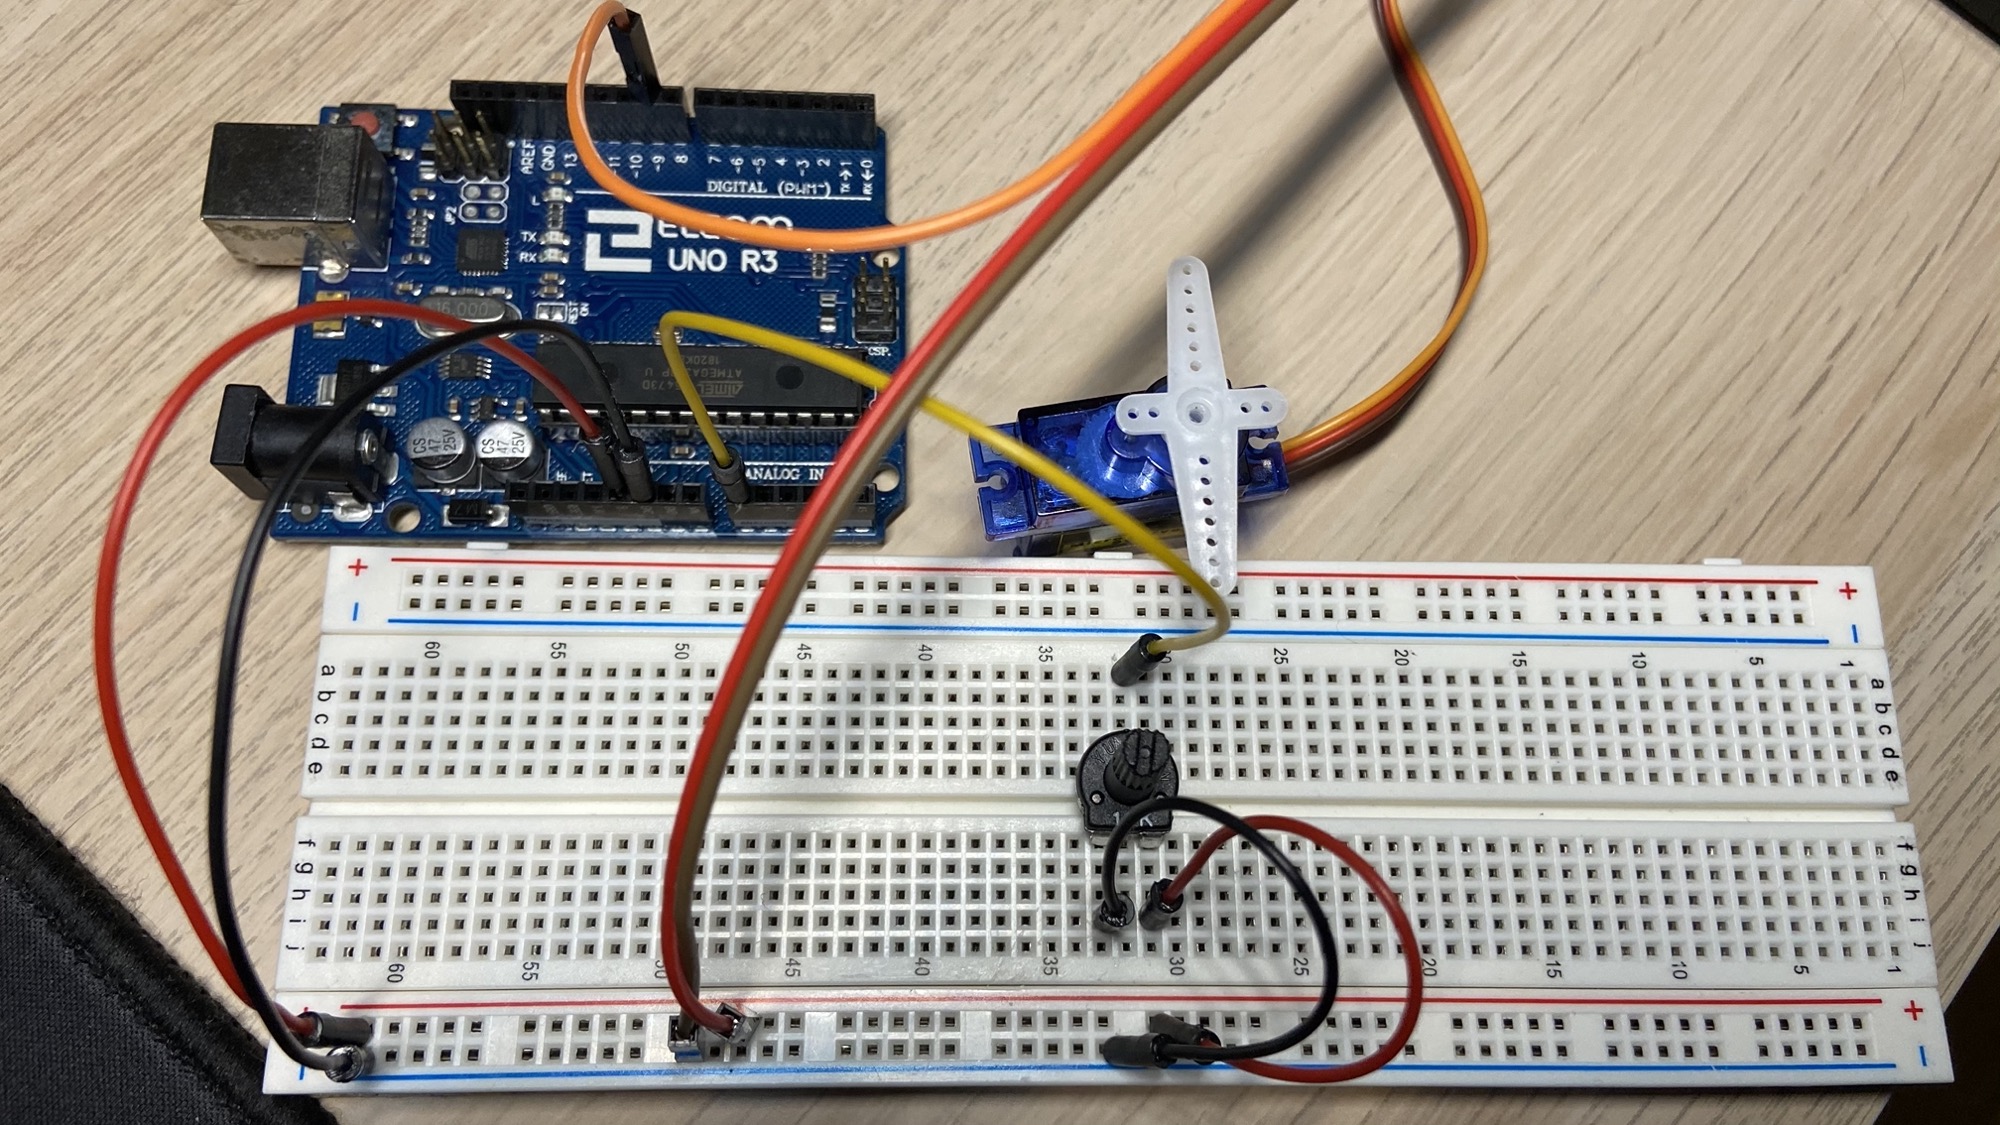
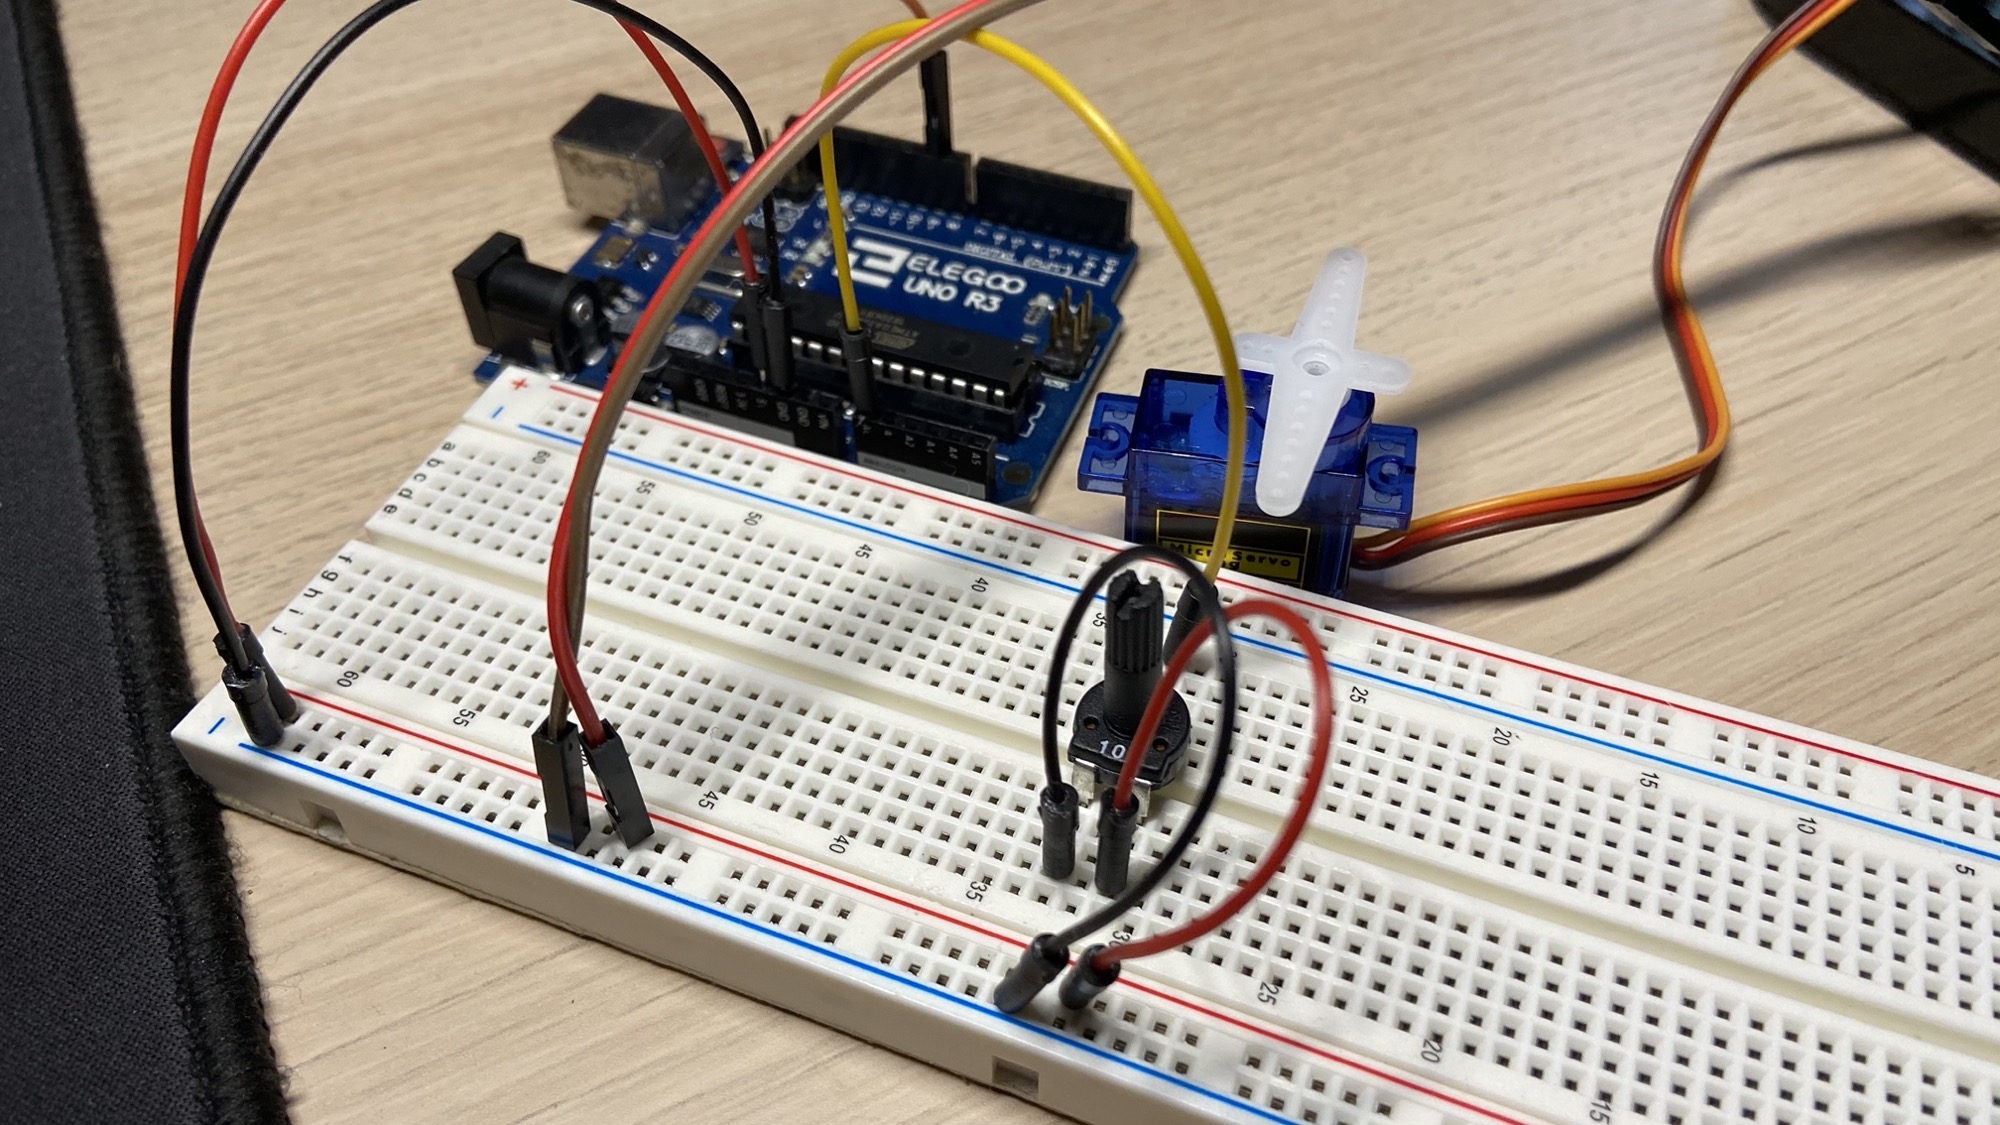
First we create the circuit, then we’ll write the program.
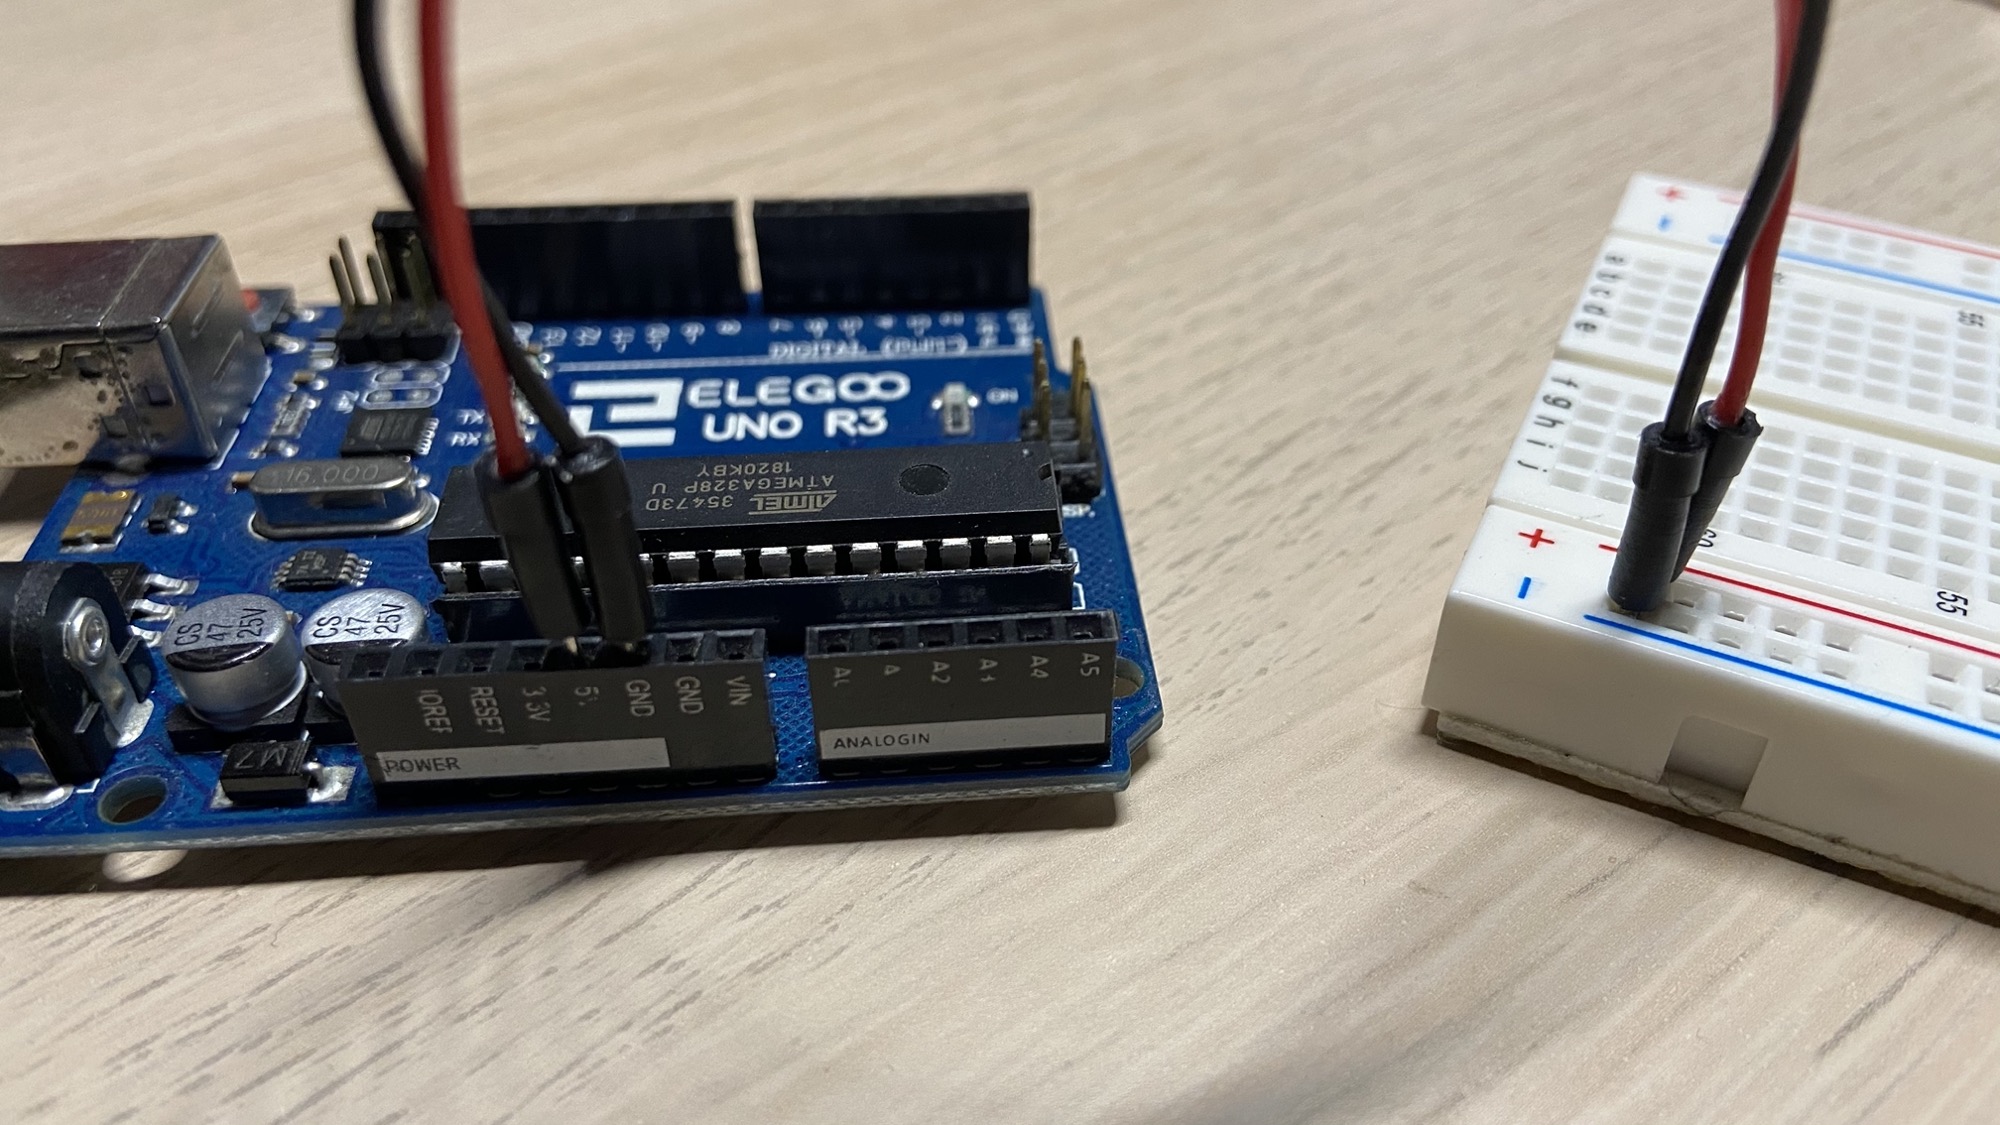
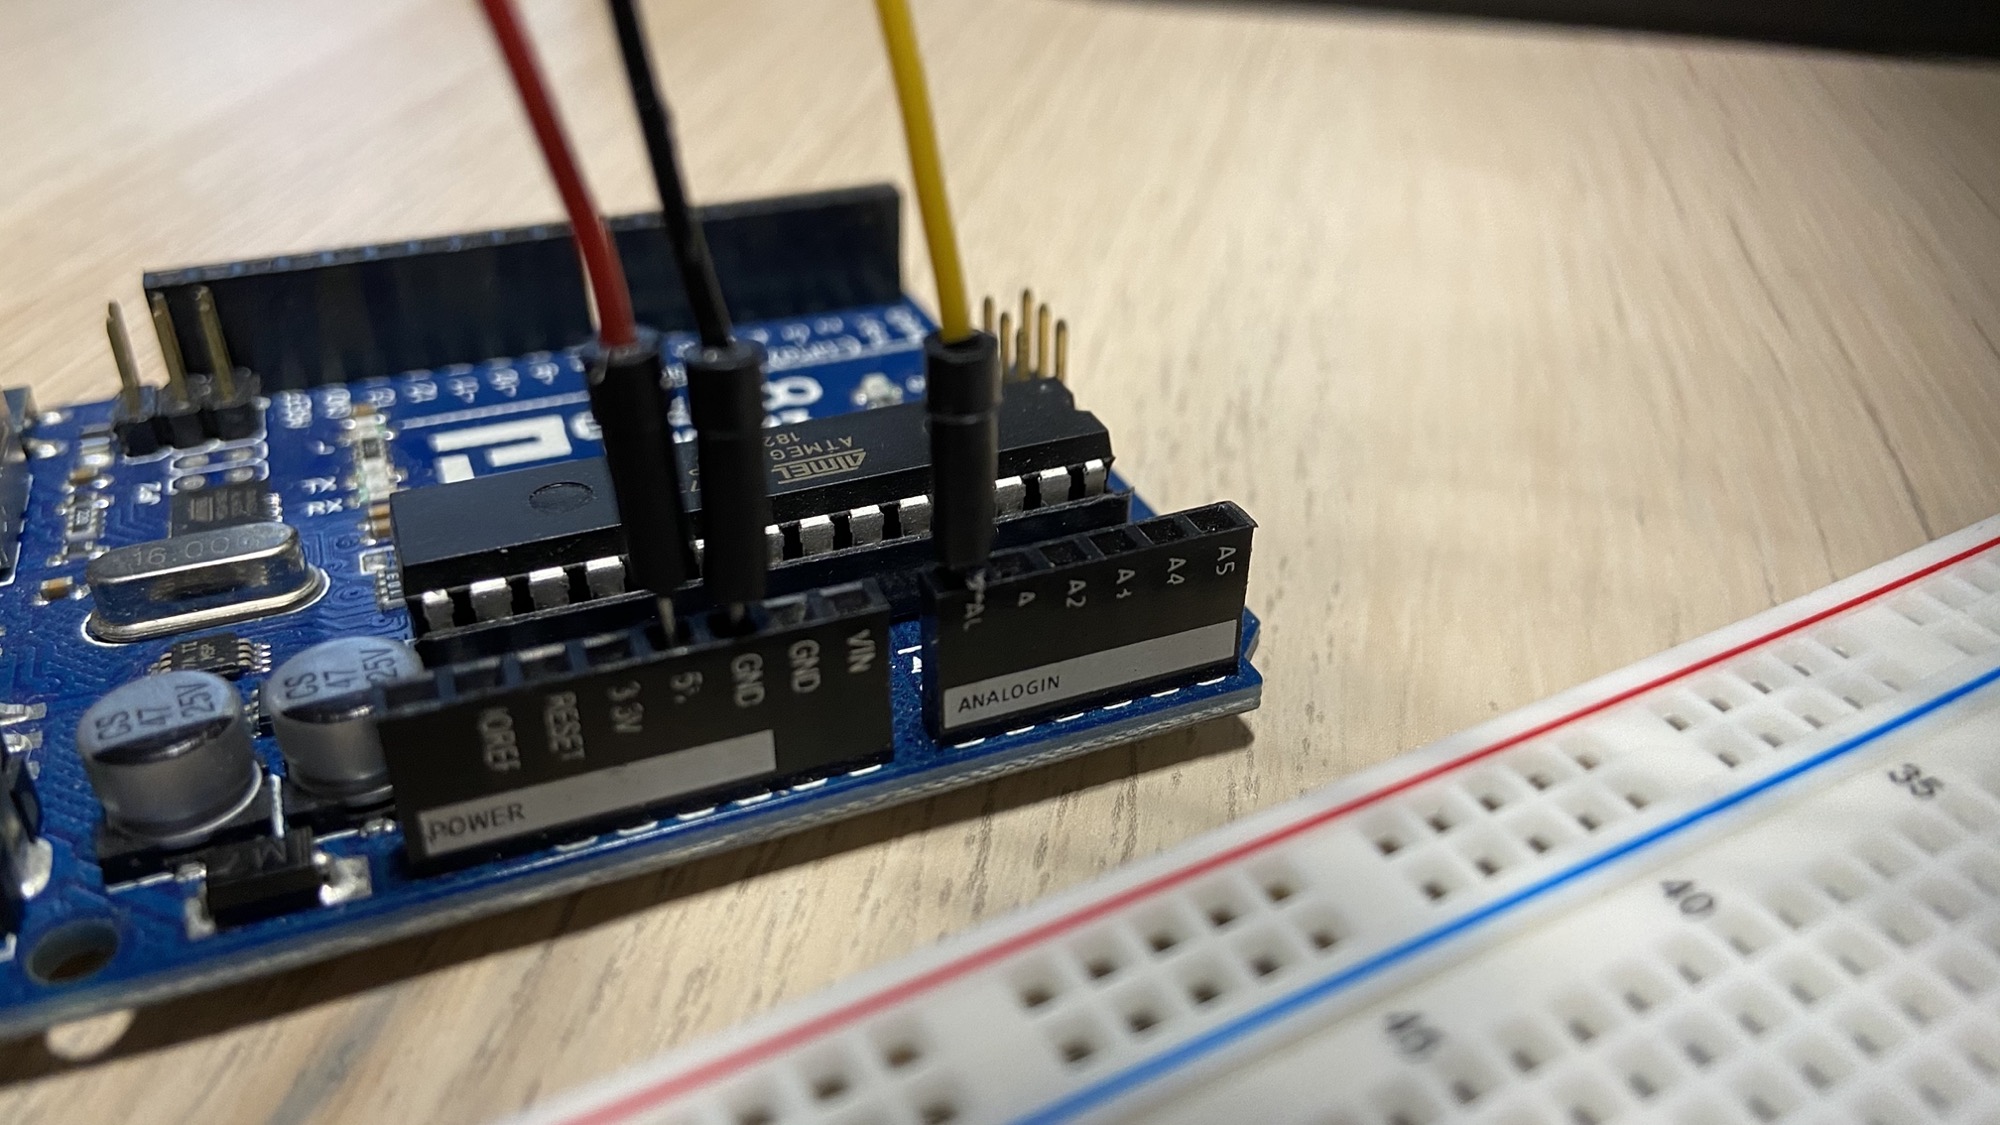
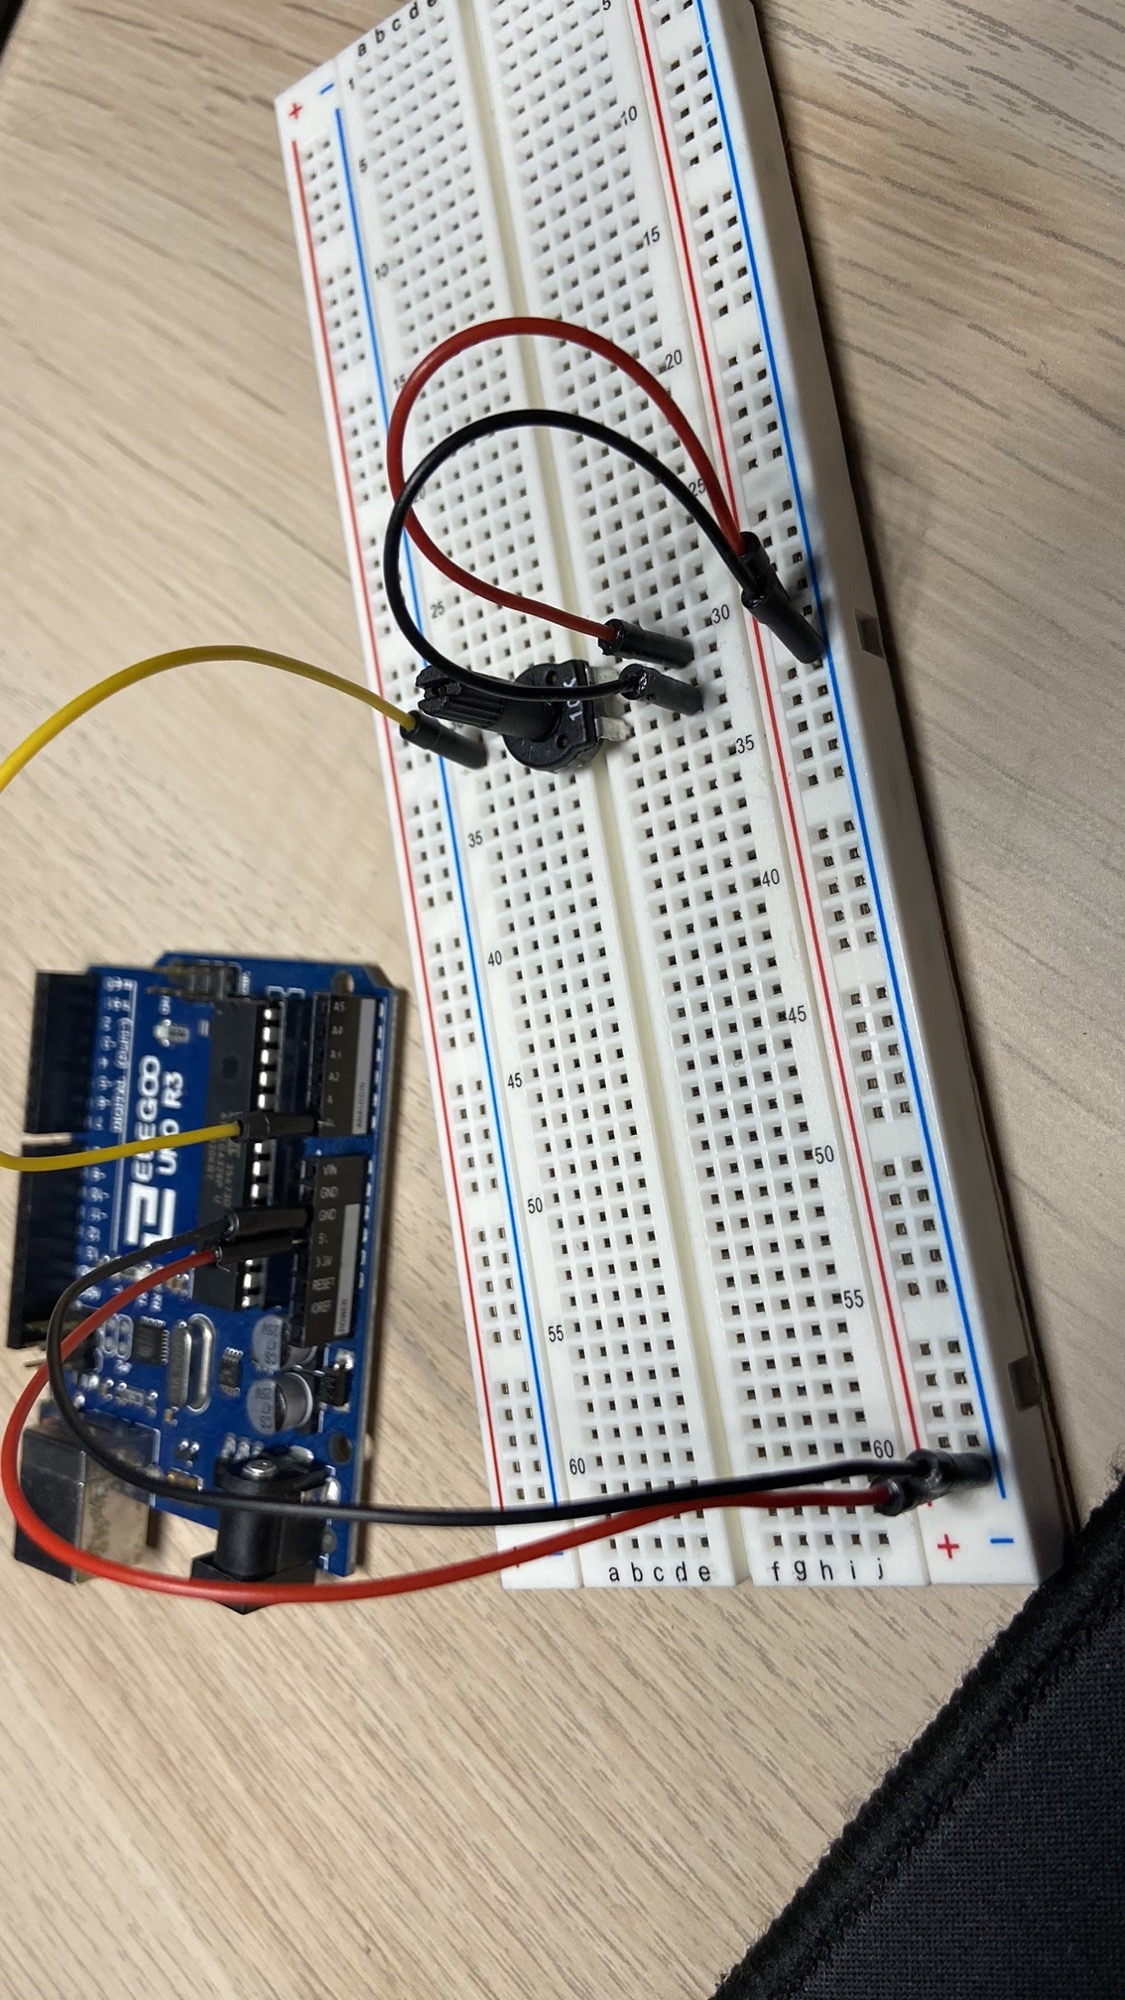
Connect the power pins 5V and GND to the + and - breadboard lines:
Then pick those signals and connect them to the input pins of the potentiometer:
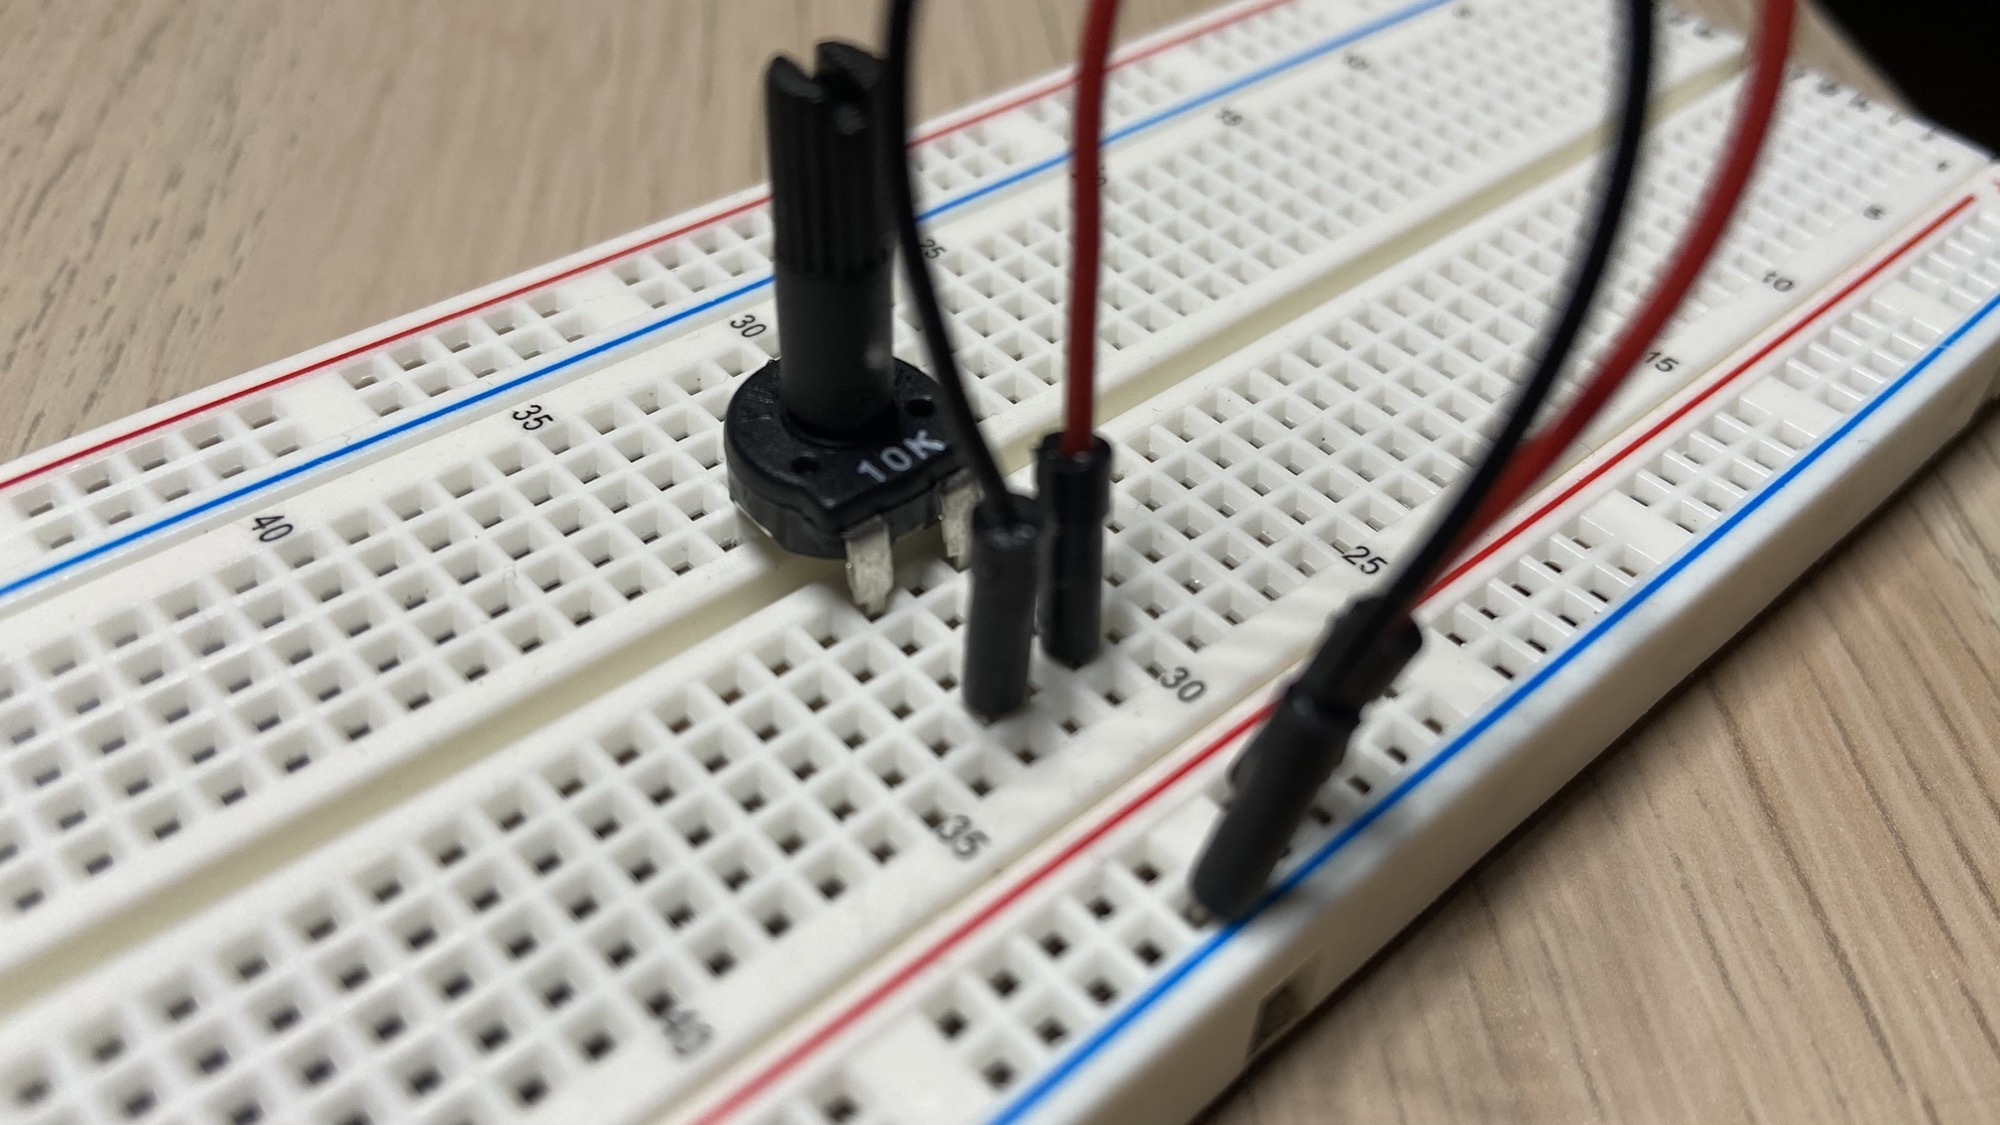
Connect the output pin to the analog I/O pin A0:
Next, connect the servo motor. Connect the brown wire to 0V, the red one to 5V, the orange one to the pin 9:
Now let’s switch to the Arduino IDE to write the program.
We need to acquire the input of the potentiometer first:
void setup() {
    Serial.begin(9600);
}

void loop() {
    int value = analogRead(A0);
    Serial.println(value);
}
Upload this program to the Arduino and you should see an output from 0 to 1023 printed in the serial monitor.
Now we need to remap this 0-1023 set of values to 0-180, the ones we’re going to feed to the servo motor.
We do so using the map() function:
value = map(value, 0, 1023, 0, 180);Now we’re going to use a library.
In the Arduino IDE Sketch menu, select Include Library and pick Servo:
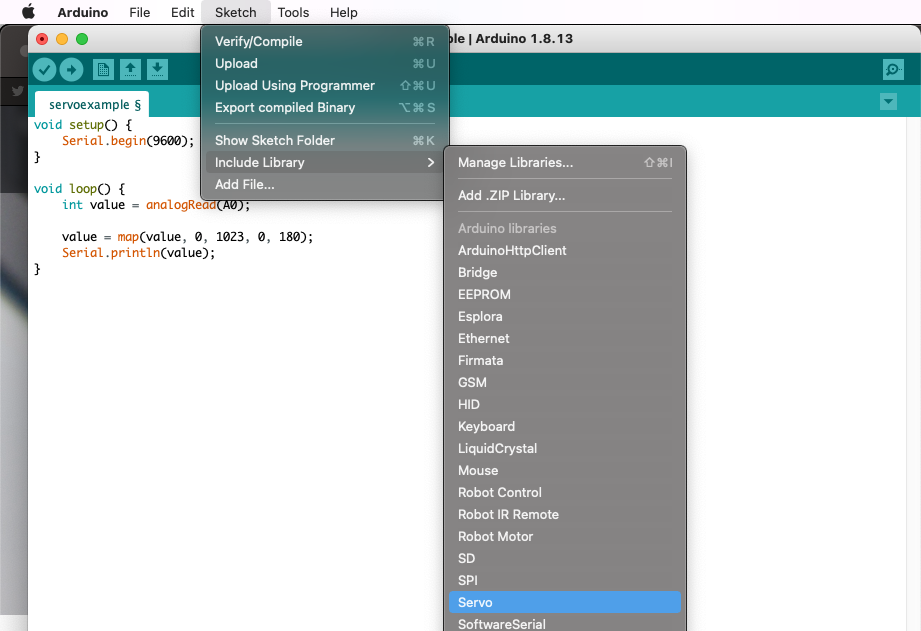
This will add a #include <Servo.h> line on top of the file.
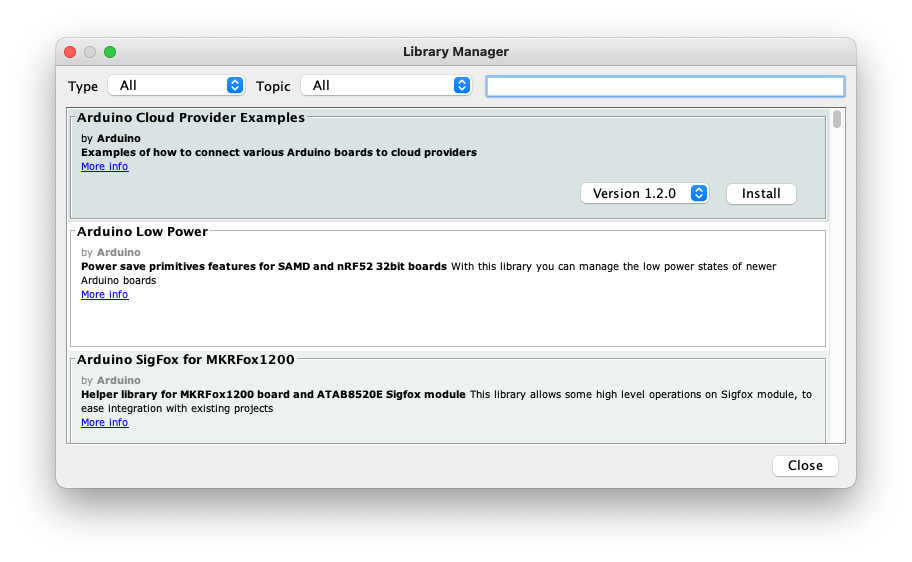
The Servo library is a built-in library, and to have more information on this library you can open the menu Tools and Manage libraries....
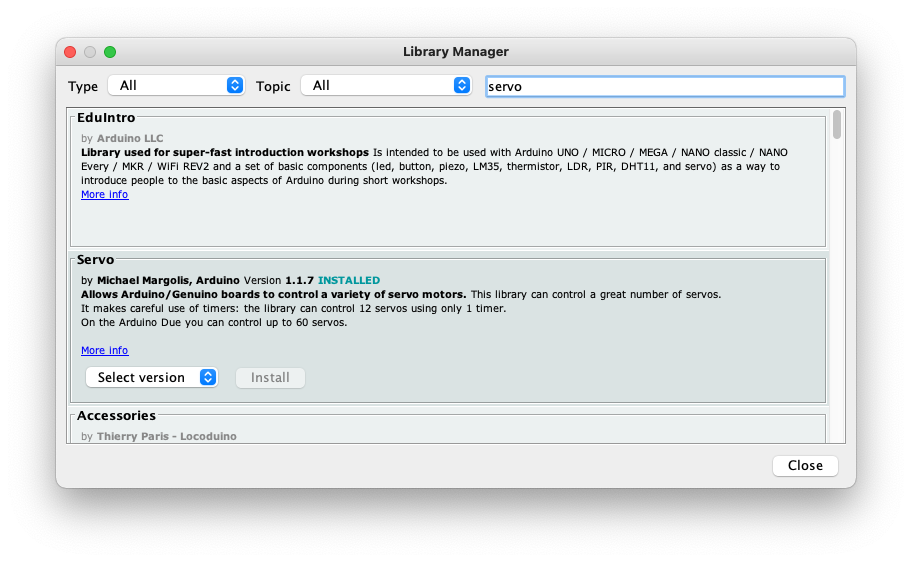
This will open the Library manager:
Search “servo” in the box, and you should see it show up:
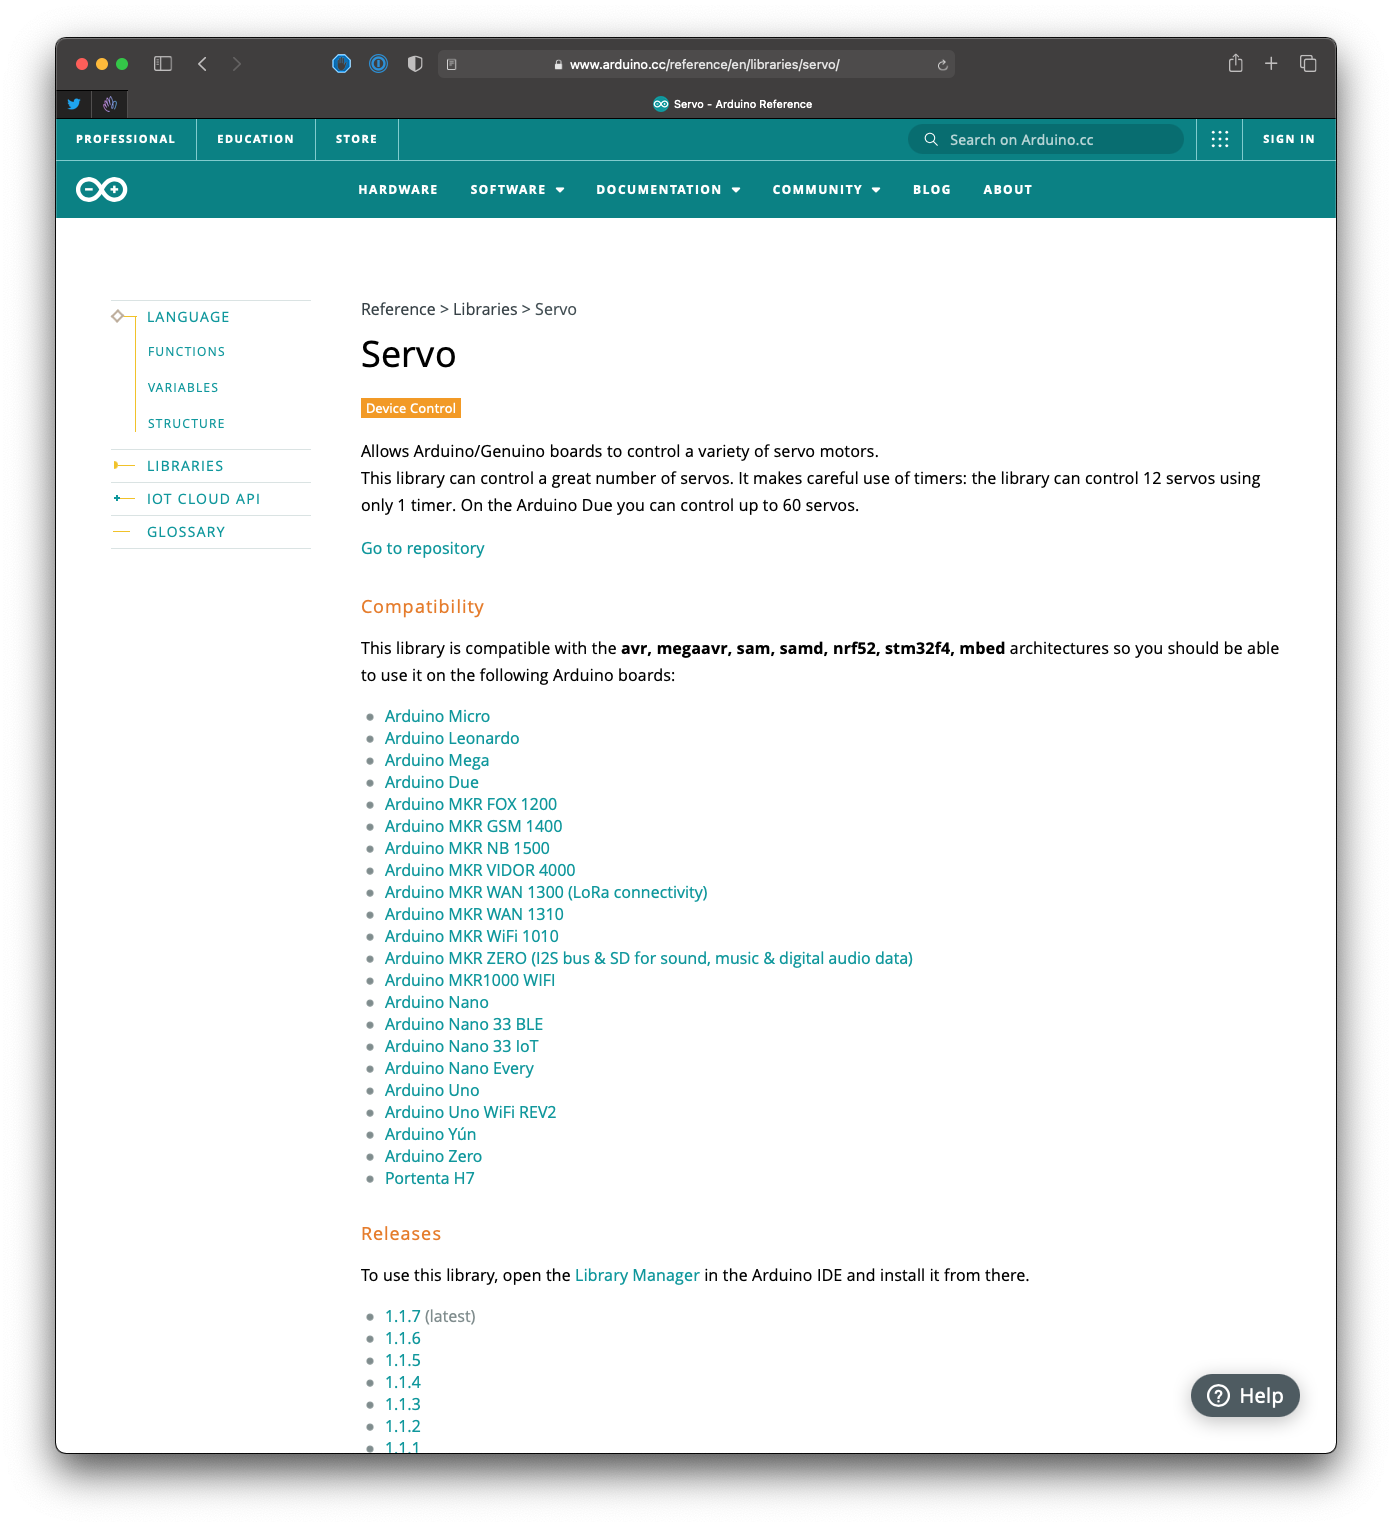
Click the “More info” link, this will open the page https://www.arduino.cc/reference/en/libraries/servo/ in your browser.
This is the way to get information about any library, not just this one, and it’s useful to know where you can get more info.
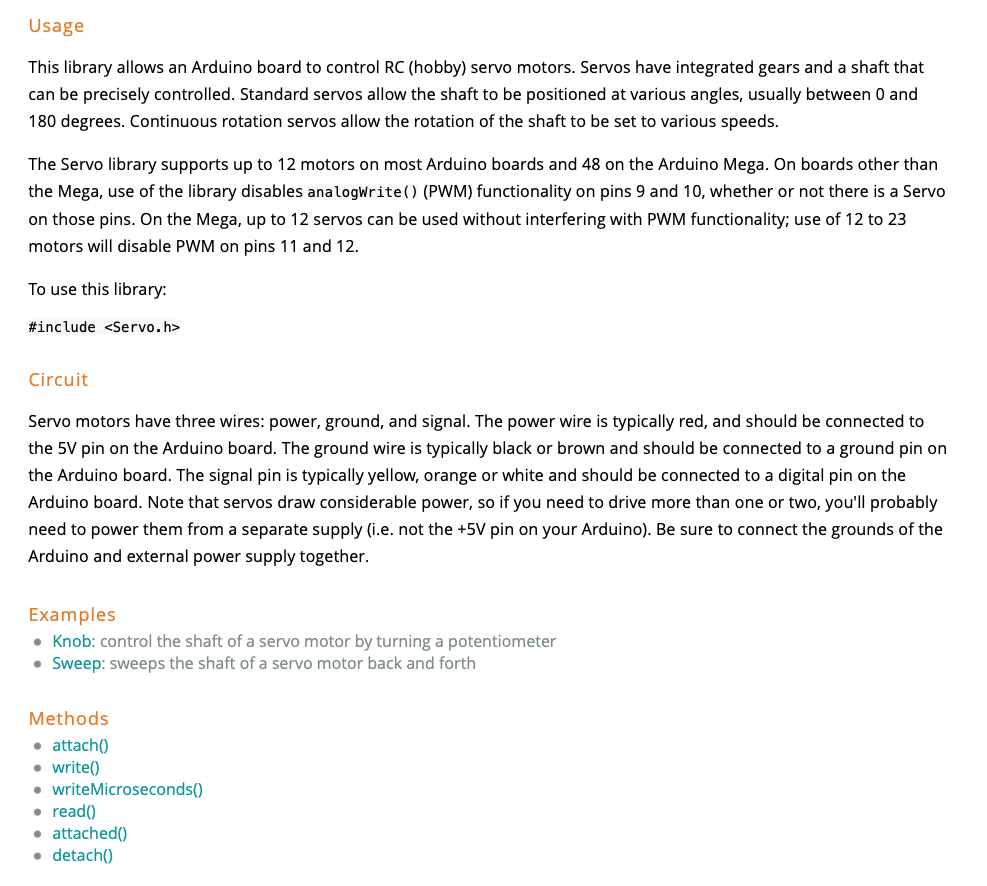
The page lists some usage information, the methods exposed by the library, and some examples too:
The nice thing about Arduino is that it’s all open source. In this case you can find the library source code at https://github.com/arduino-libraries/Servo, so you can write your own modified version or just understand how it works under the hood.
We’re going to use 2 methods: attach() and write().
With attach() we tell Servo which port to use.
With write() we move the servo motor to the desired angle, specified as parameter, from 0 to 180.
But first we need to declare a Servo object. We do so before the setup() function, with Servo myservo;:
#include <Servo.h>
Servo myservo;
Then in setup() we attach the servo to the I/O pin 9:
#include <Servo.h>
Servo myservo;

void setup() {
    myservo.attach(9);
}
Finally in loop() we call myservo.write() passing a value from 0 to 180:
#include <Servo.h>
Servo myservo;

void setup() {
    myservo.attach(9);
}

void loop() {
    int value = analogRead(A0);
    value = map(value, 0, 1023, 0, 180);
    myservo.write(value);
}Related posts about electronics: