How to self-host Plausible analytics
By Flavio Copes
Learn how to self-host Plausible Analytics on a cheap DigitalOcean Droplet, using Docker Compose, an Nginx reverse proxy, and Certbot for free HTTPS.
I decided to self-host my website analytics.
Why?
As a life rule, I tend to not self-host my own “things” unless the benefits vastly surpass the cons.
First, what are the cons of self-hosting? The most obvious is “this is something I need to worry about from now on”. It’s great to offload this burden to someone else, especially when you happen to use just the free plan.
I’m also happy paying something, don’t get me wrong.
But sometimes the costs are unjustifiable.
Like in the case of my email newsletter. Hosted solutions are just too expensive at scale.
Also, speaking of website analytics, hosted solutions can get pricey when your pageviews count is considerable.
So I decided to self-host their analytics solution.
I decided to do this after paying a year of subscription to Plausible. I tested their hosted option for a while on some smaller sites I have, and I wanted to also host my main property, this blog, but ..the hosted plan was too expensive for it. I don’t mind paying that annual sub as I think it’s good to support the project.
I can’t think about spending like $70/m just to host them. It’s not that useful information.
I like watching analytics, but it’s almost $1k/y.
This only costs me $4 per month, using a DigitalOcean Droplet (VPS) (which is actually free, because the referral link I sometimes put when I link to them gets me plenty of free resources).
Note that I said DigitalOcean Droplet, not the DigitalOcean App Platform, mostly because App Platform starts at $5/m but does not come with a database, so you’ll need to bring your own, which DO provides under its Managed Databases offering, but it’s $15/m.
After this introduction, let’s now jump to the step-by-step explanation.
Create an account on DigitalOcean if you don’t have one yet.
Use my referral link to sign up for DigitalOcean to get $200 in free credits for the next 60 days.
Now create a new project.
In the sidebar click New Project:
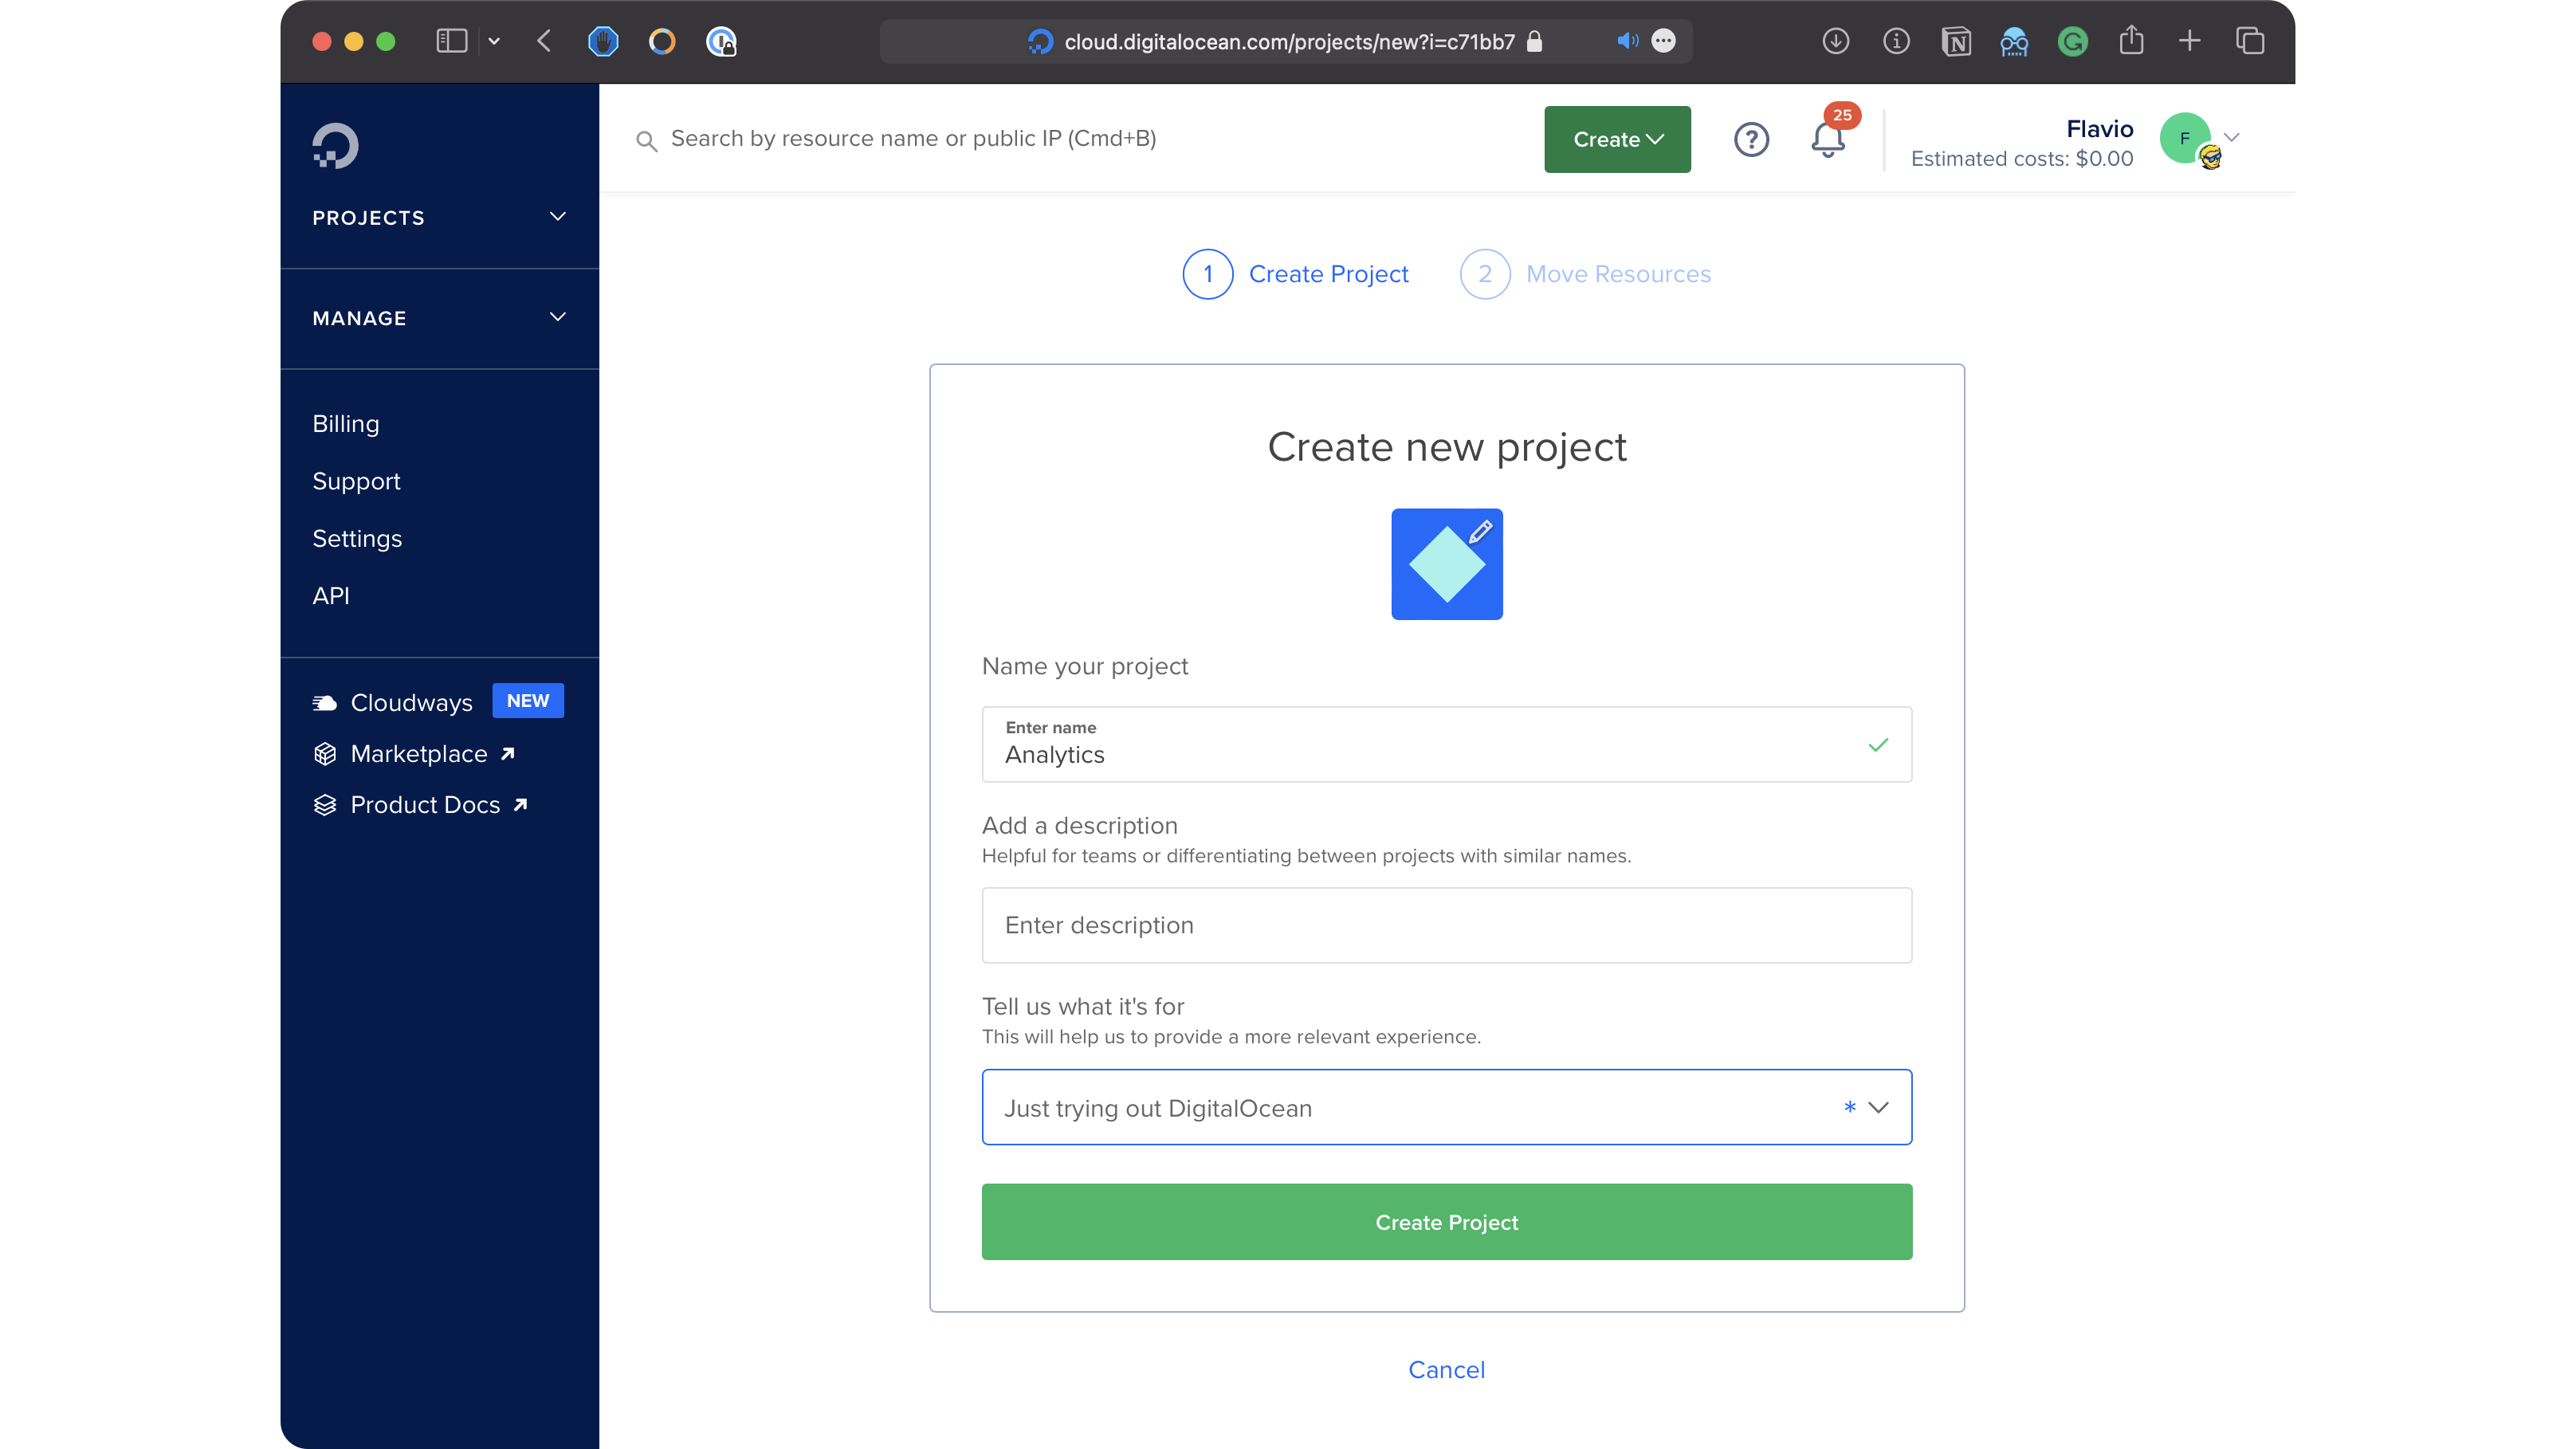
Enter a name, for example “Analytics”.
Choose something in the “Tell us what it’s for” box, or you can’t create the project. Then click Create Project.
In the next panel click Skip for now.

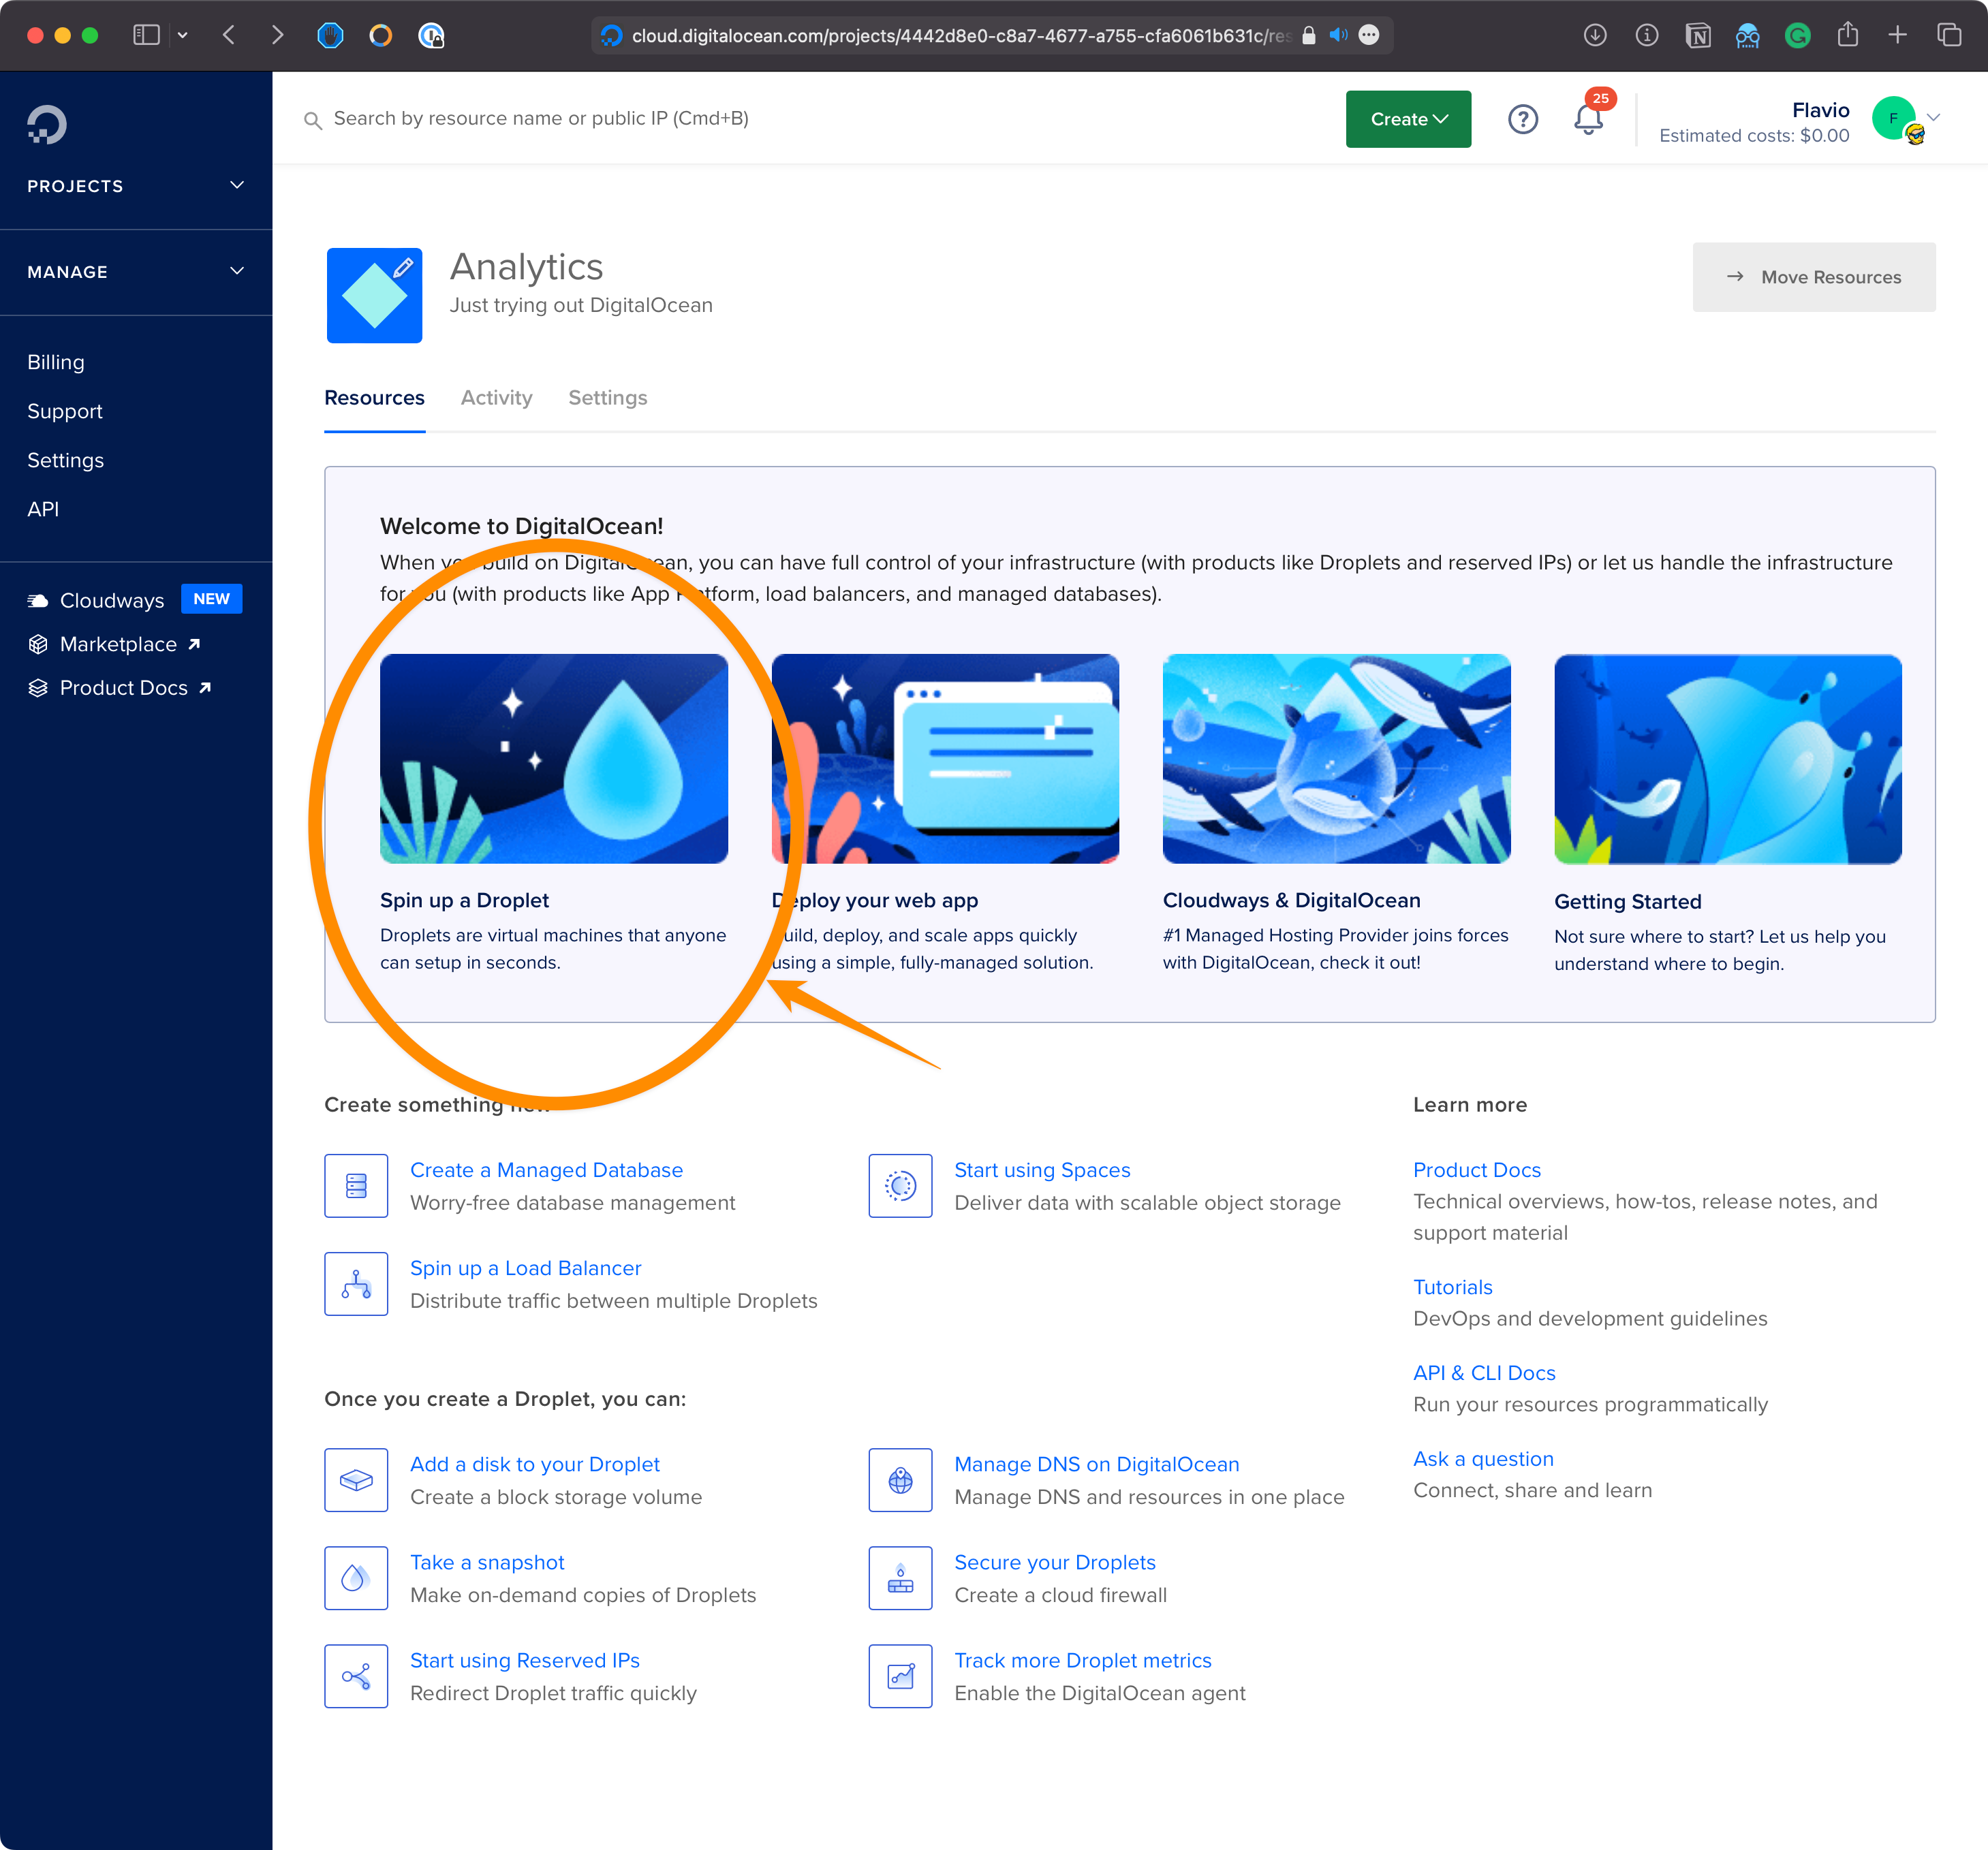
The project is now created.
Now click the first element “Spin up a Droplet”, which is DO’s terminology for VPS (Virtual Private Server):
This shows you the interface to create a new droplet.
Pick a region. It’s common to pick a region close to the majority of your users. As an EU person I want all data to stay in the EU for regulations reasons, so I picked an EU server.
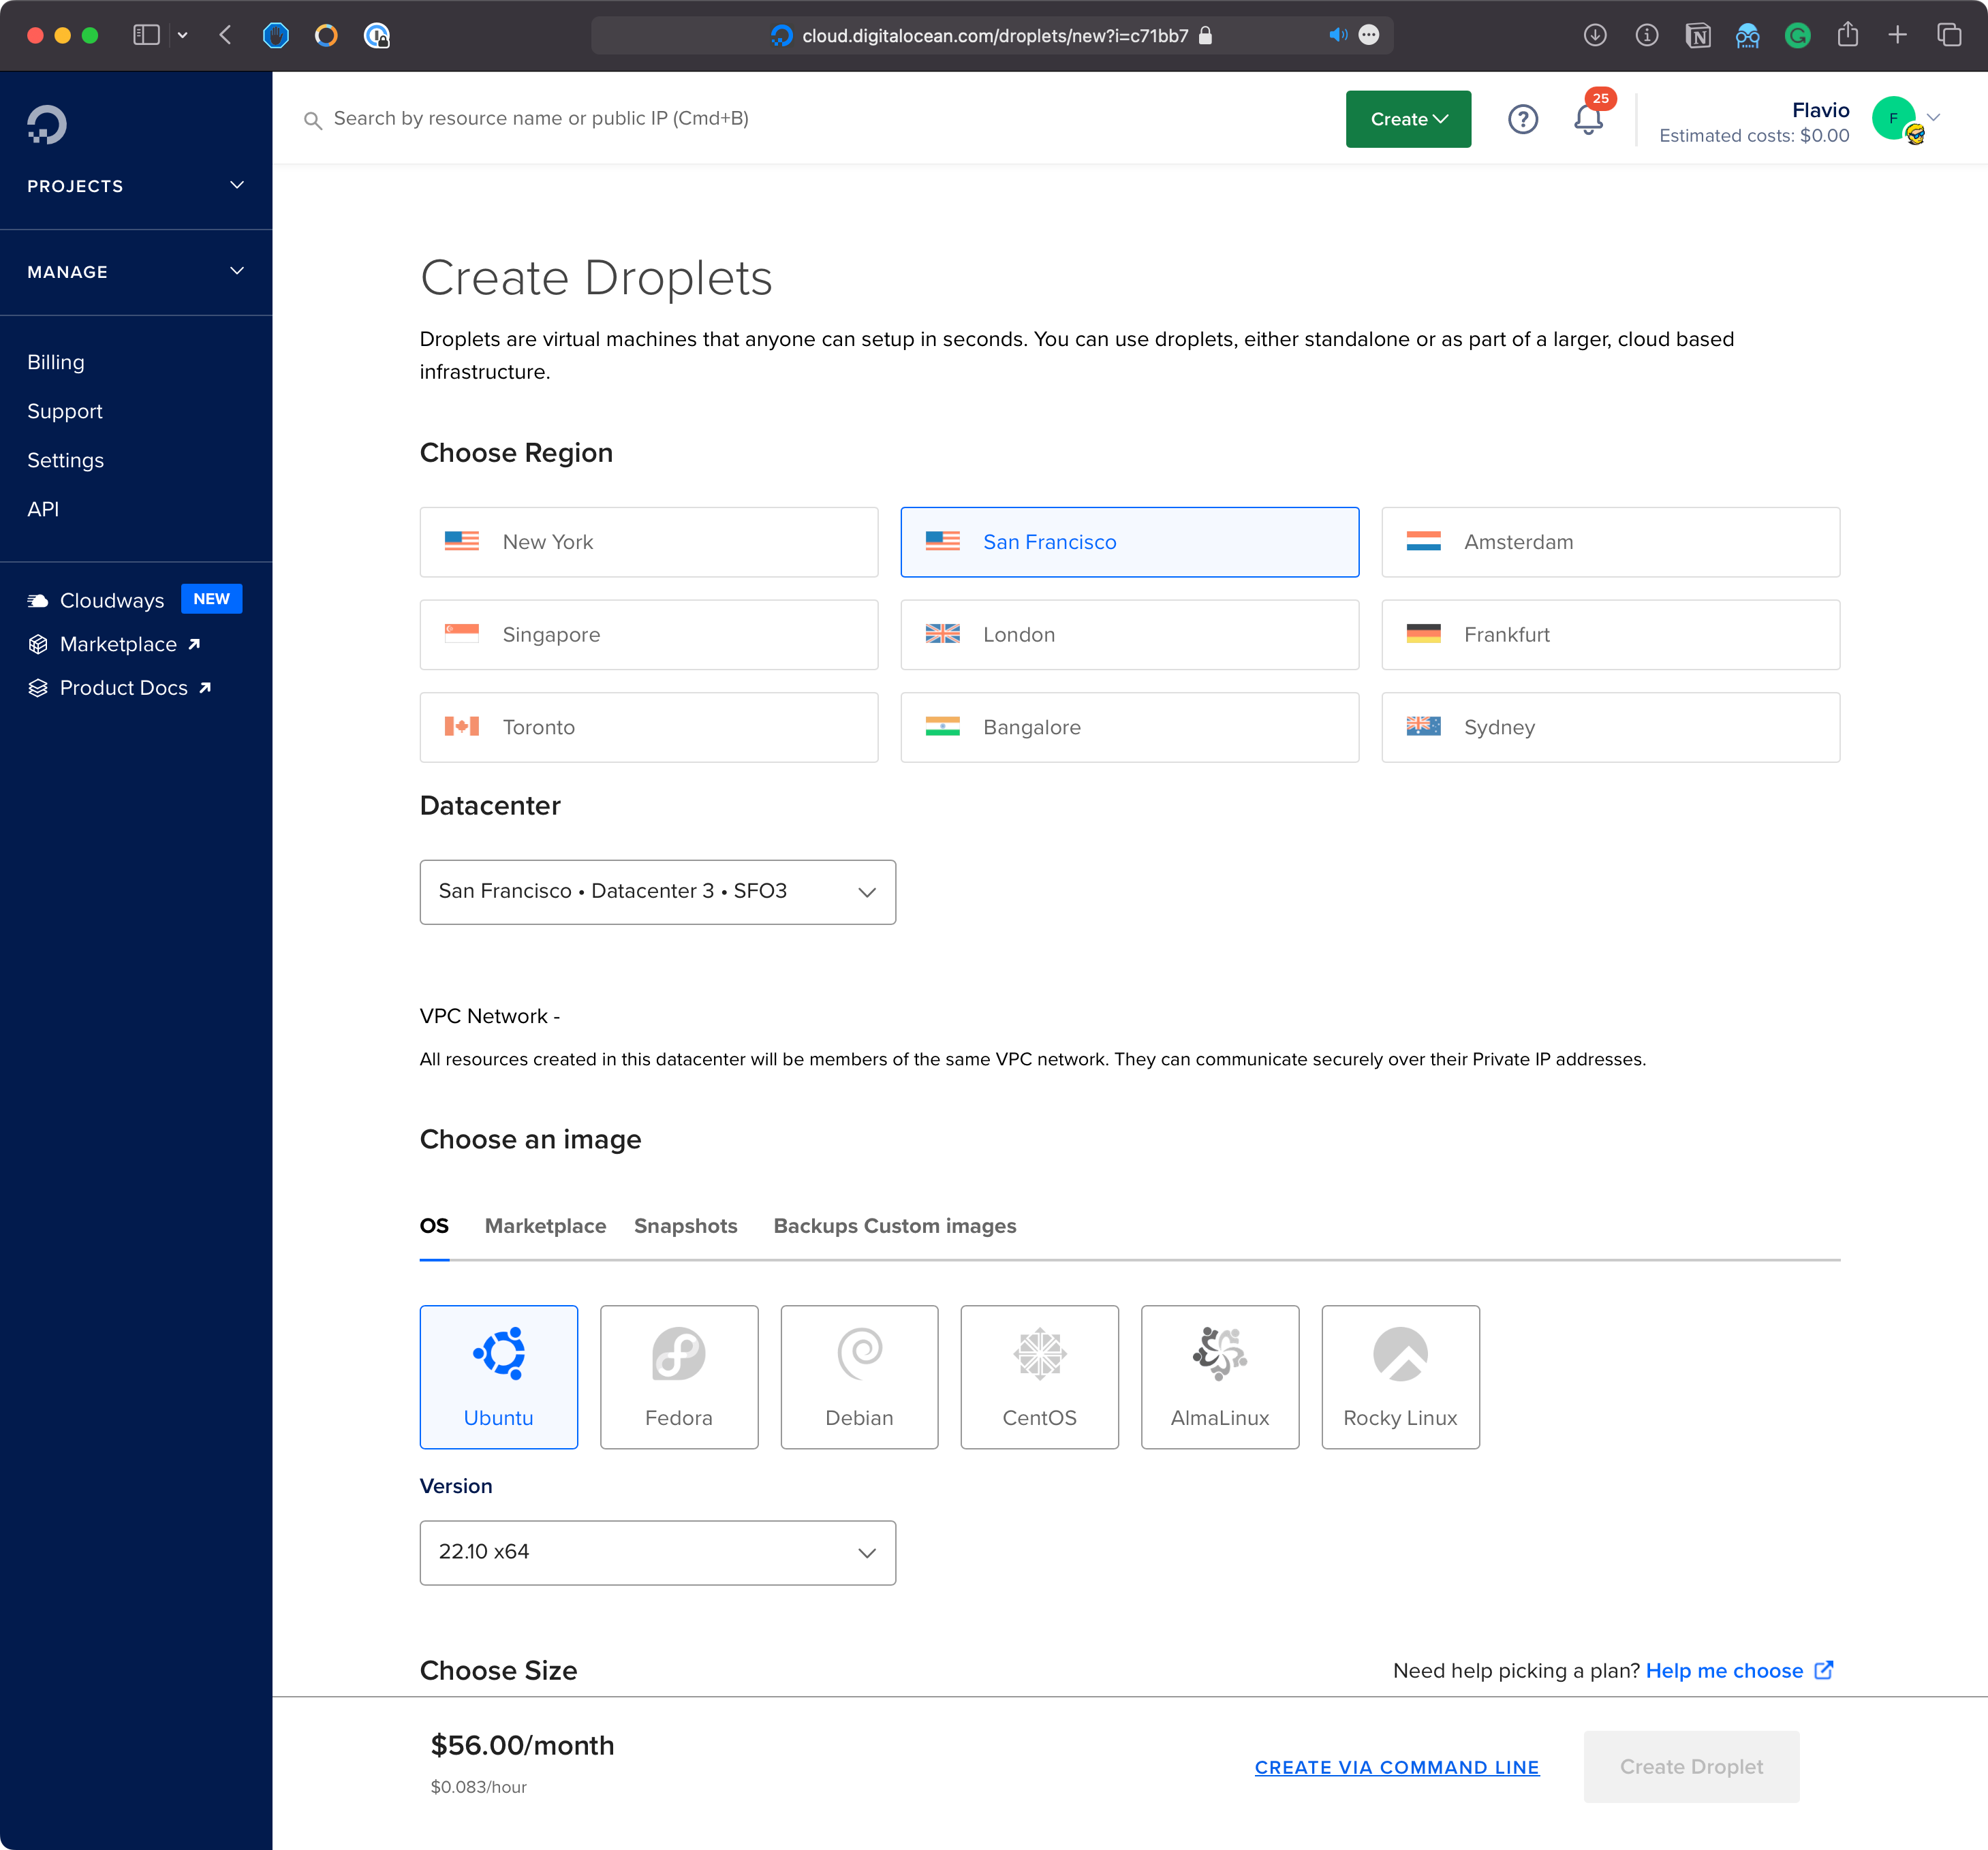
Next you can choose an image. That’s what it’s deployed to the Droplet.
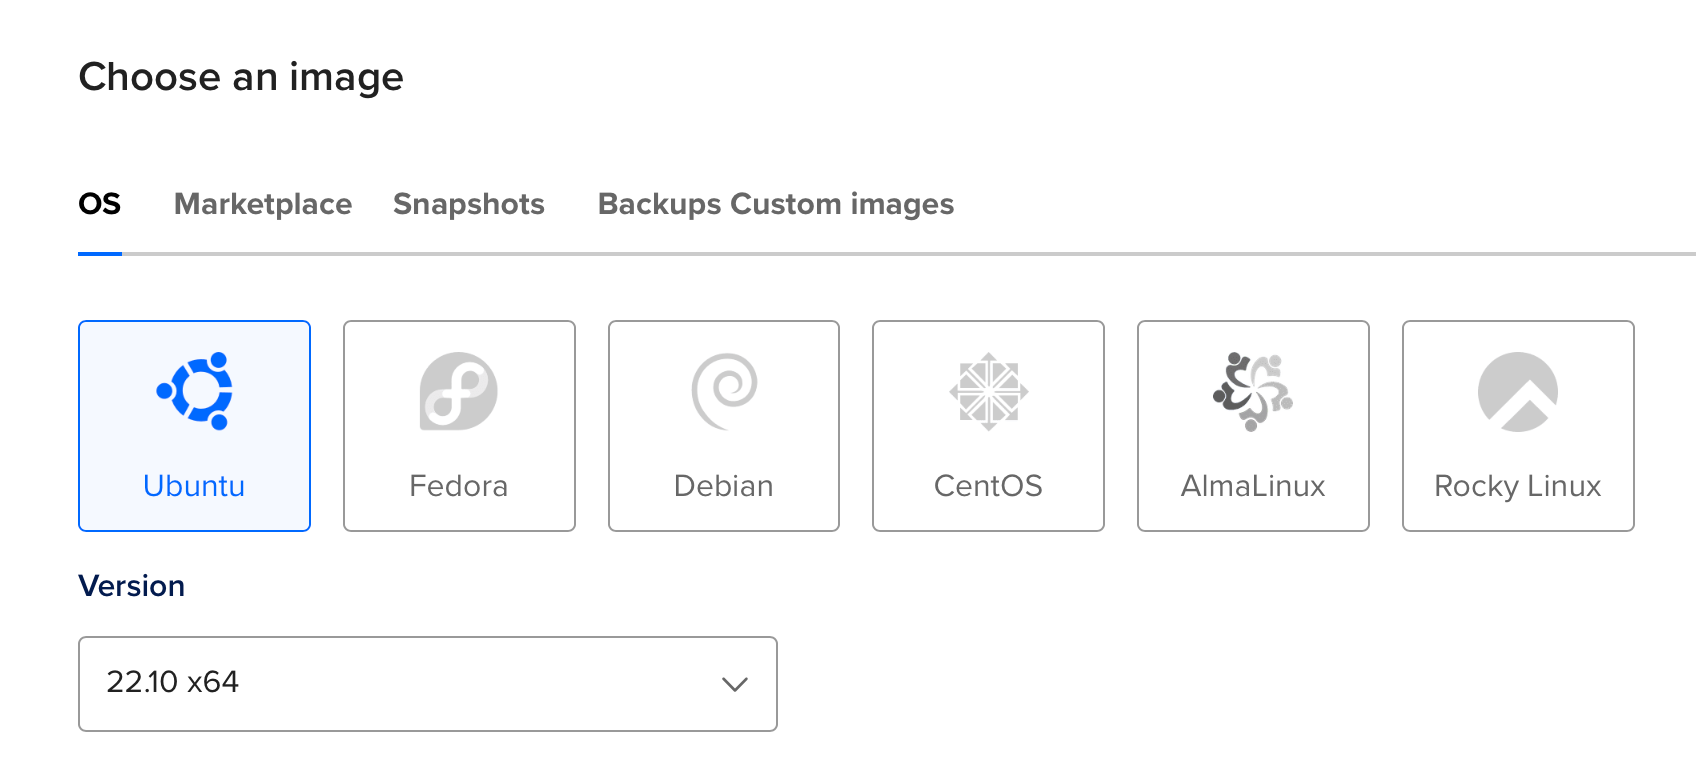
Click the Marketplace tab:
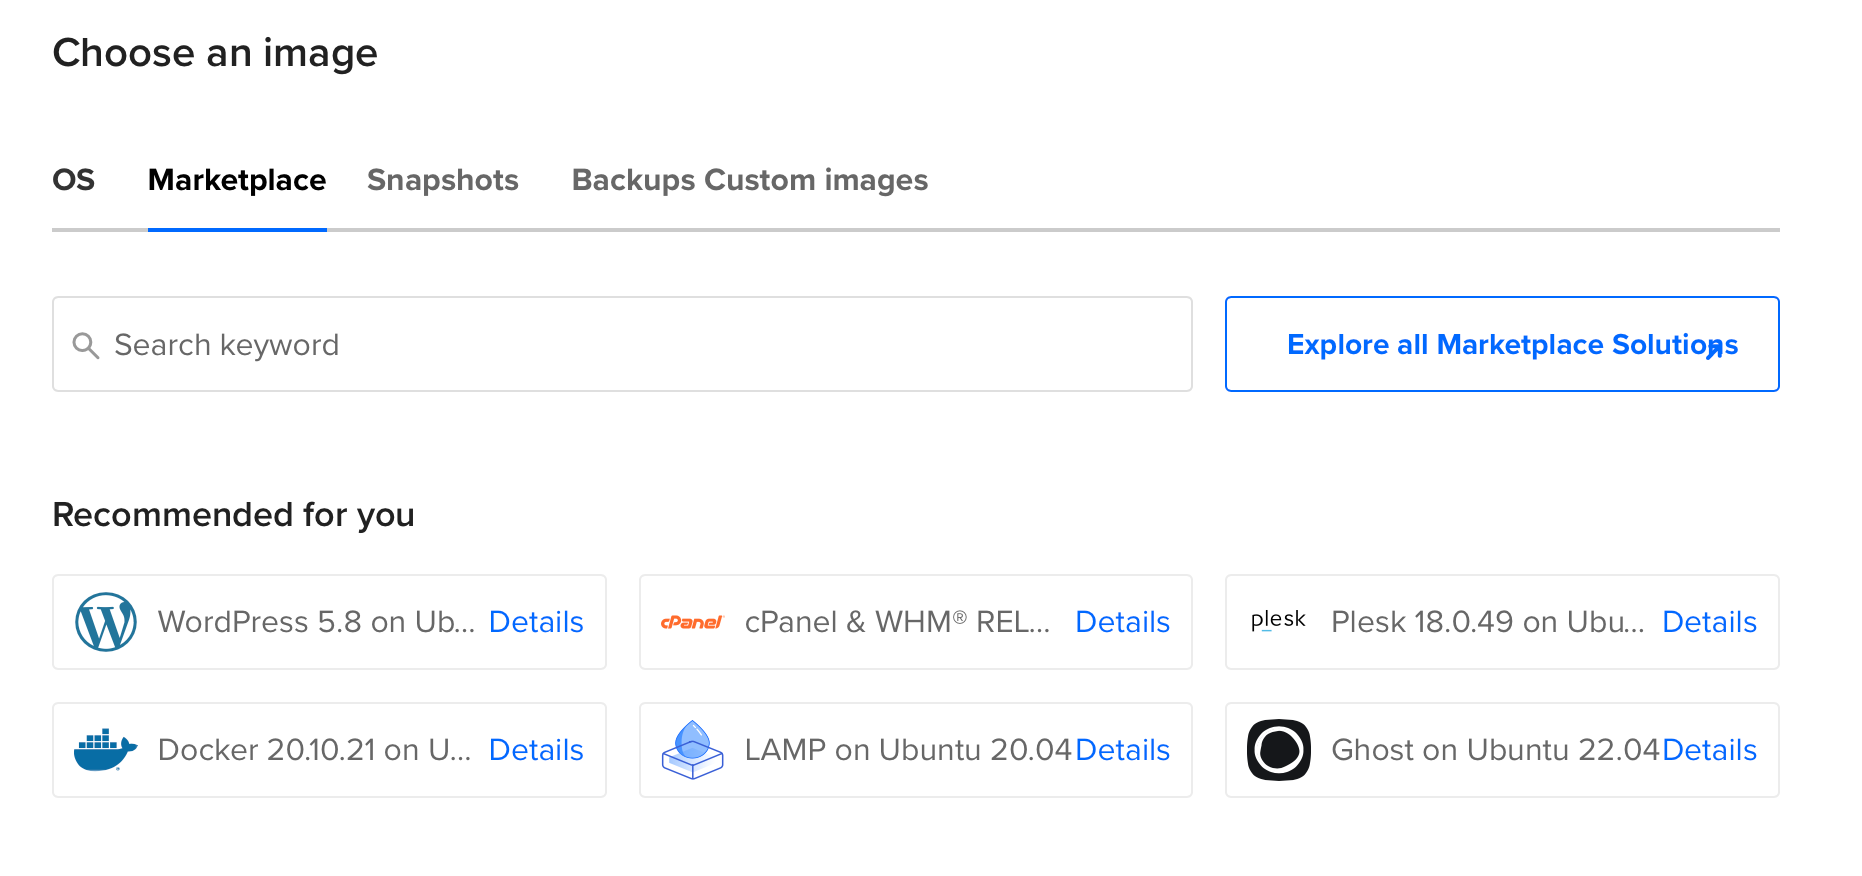
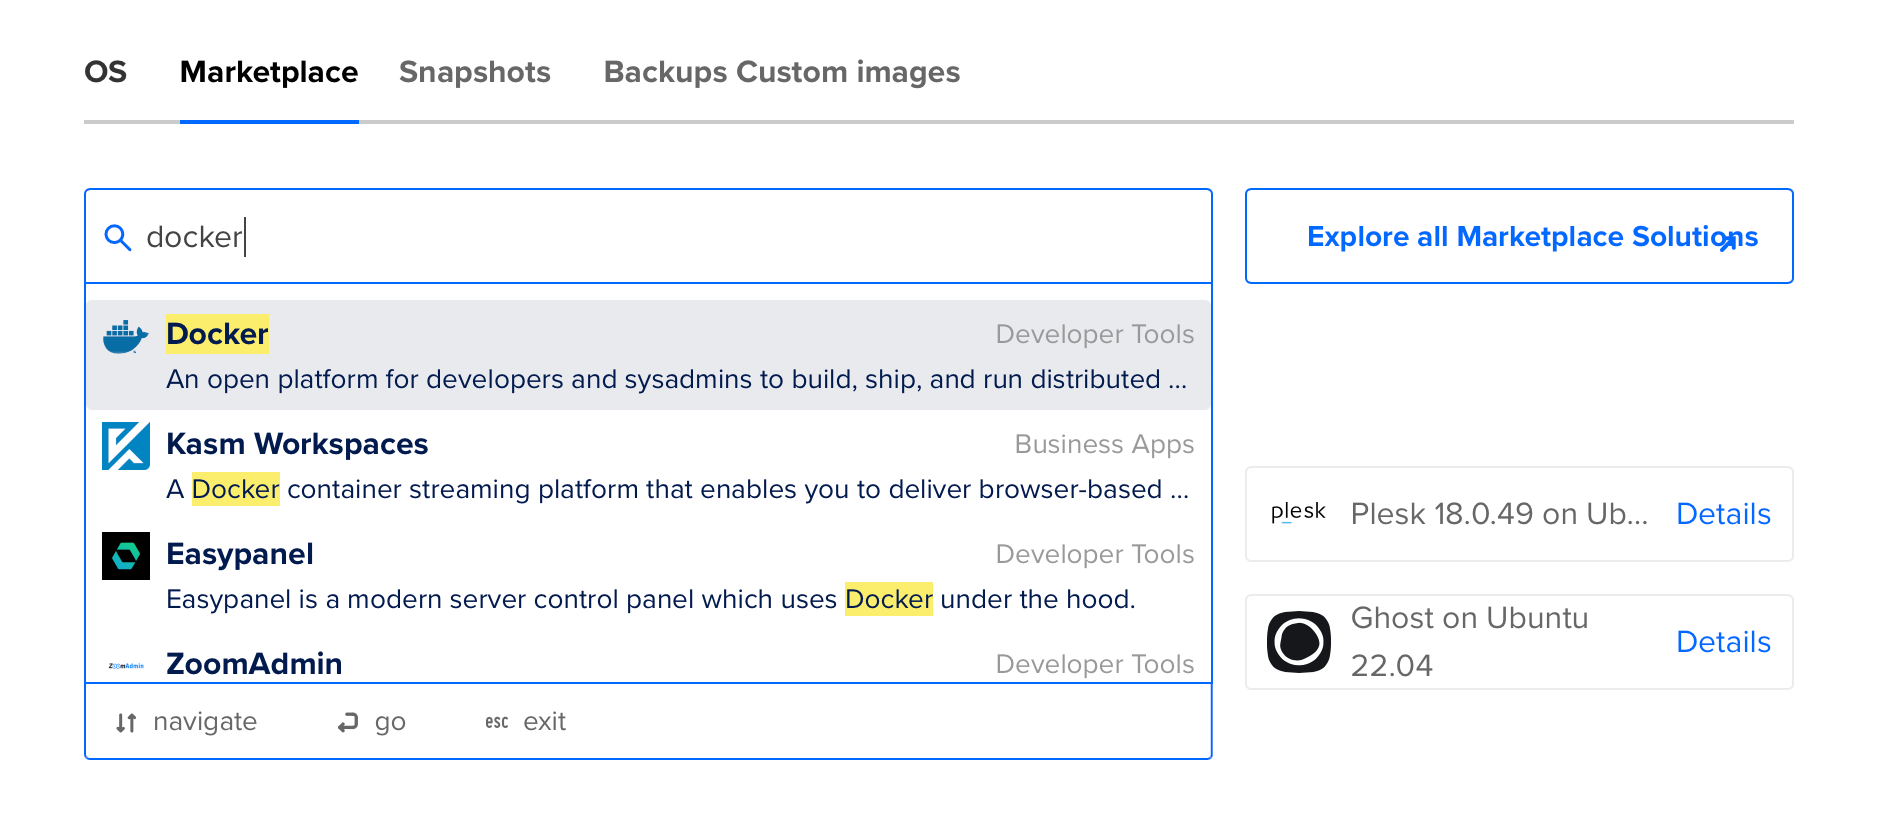
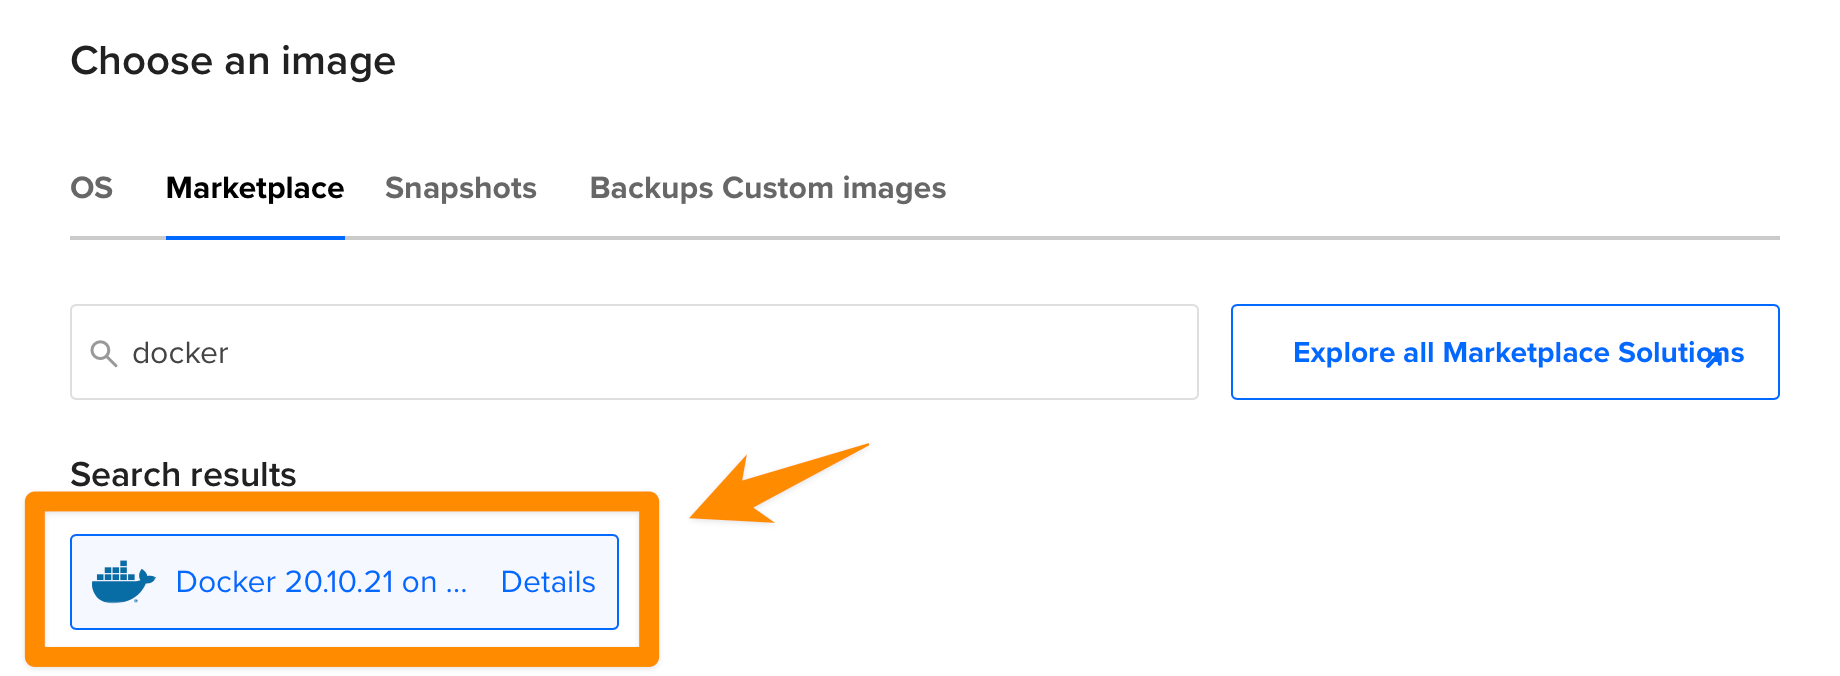
I see “Docker” listed in the recommendations. If you don’t see it, search for it, and select it.
Alternatively you can also use another Linux Droplet and install Docker on it.
We’ll use Docker because Plausible is designed to be self-hosted through Docker.
It’s common for projects like this to offer a Docker installation, because they only have to manage one environment, and fewer things can go wrong for you.
If you’re new to Docker, don’t worry.
I’ll explain each step along the way.
Also, check my Docker introduction.
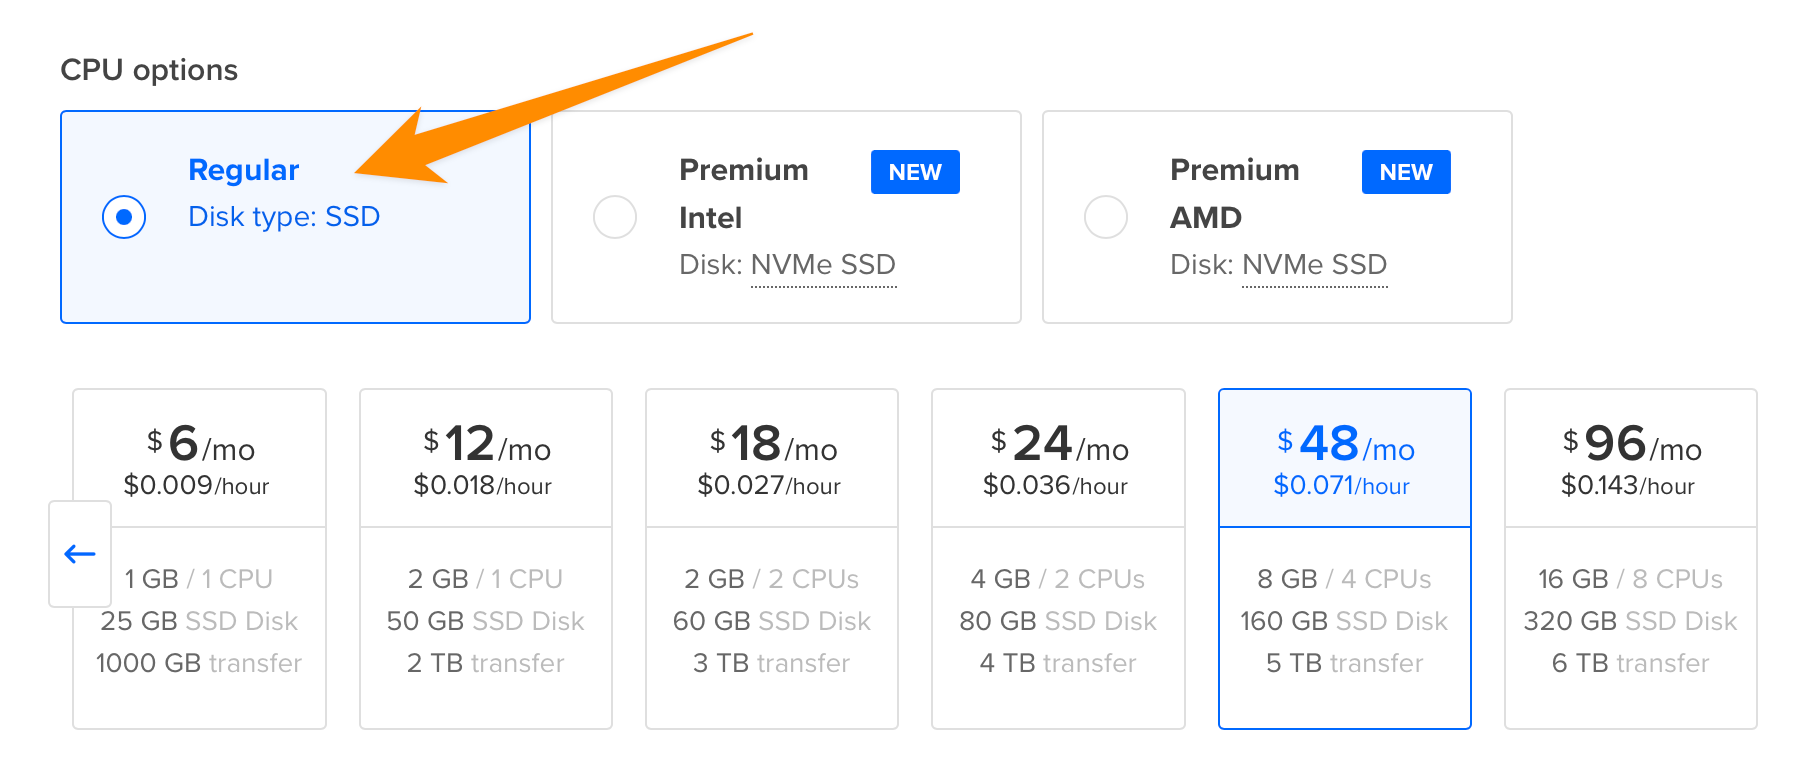
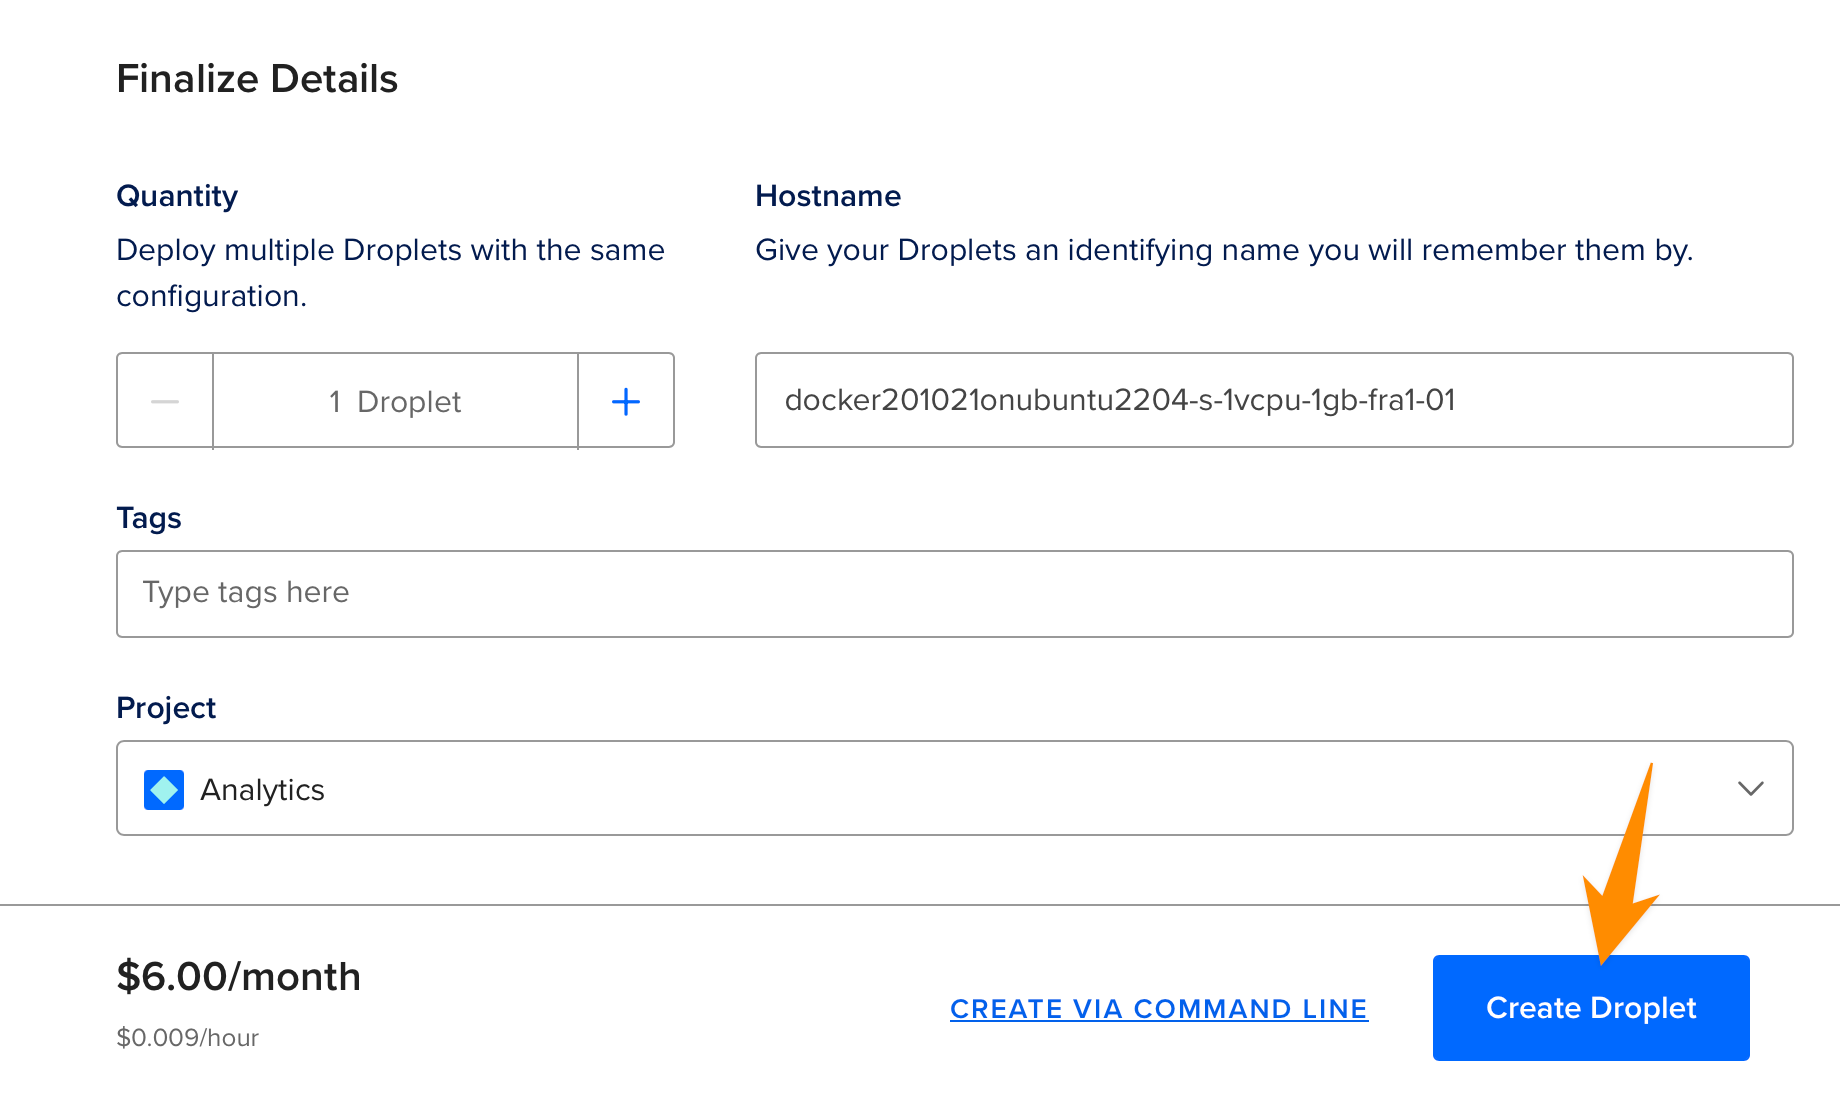
Now let’s go on. We need to pick a size for our droplet. Pay attention because DO really wants you to pick a fast one by default 😅 but pick “Regular” under CPU options instead:
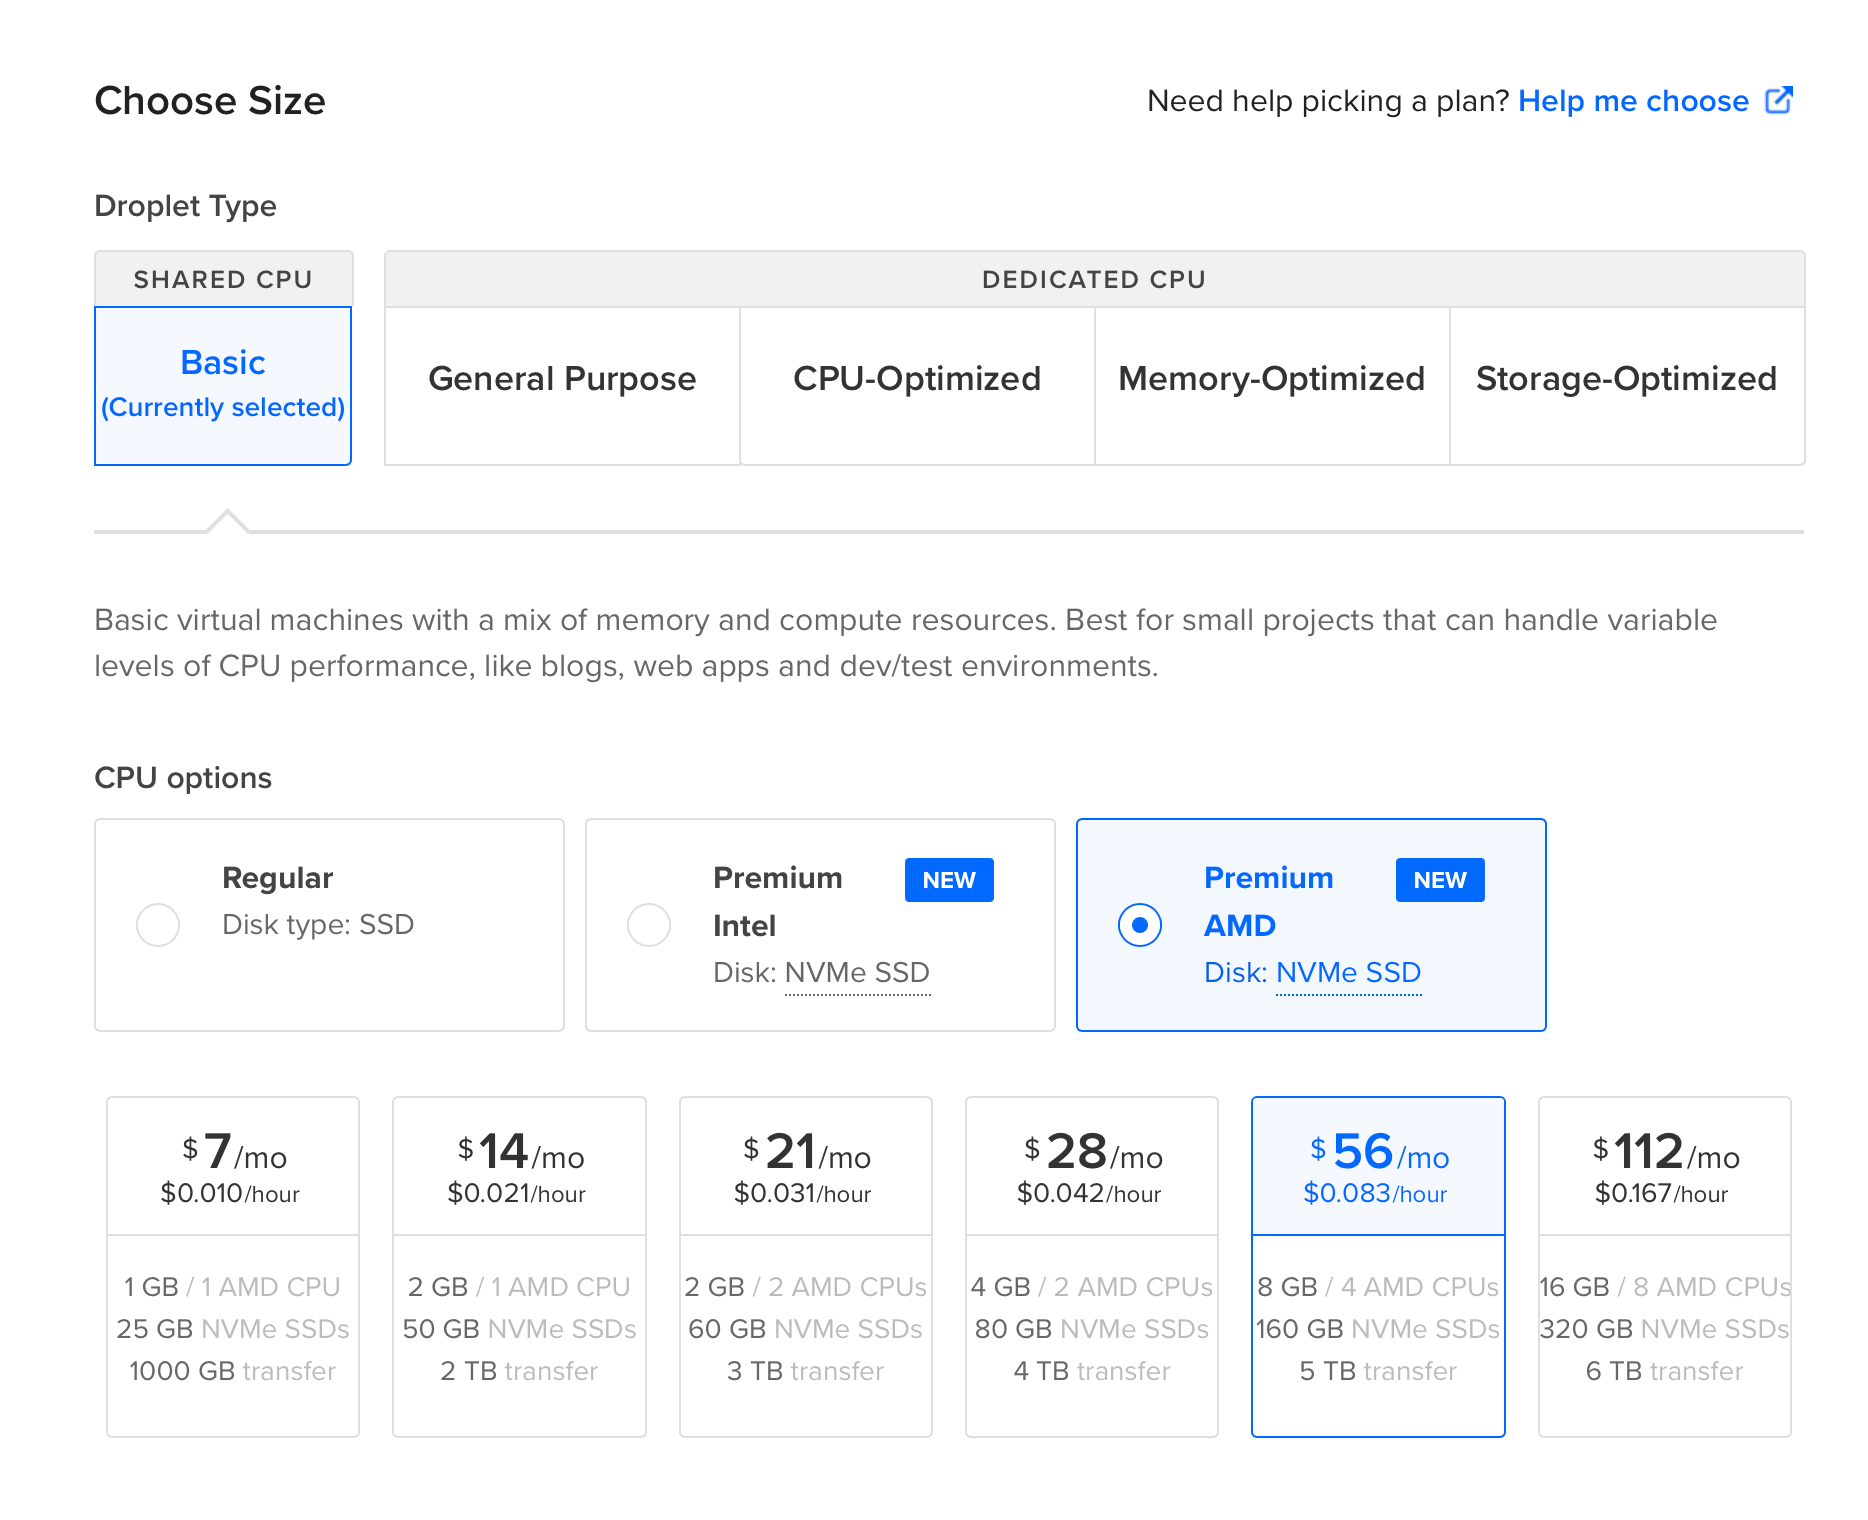
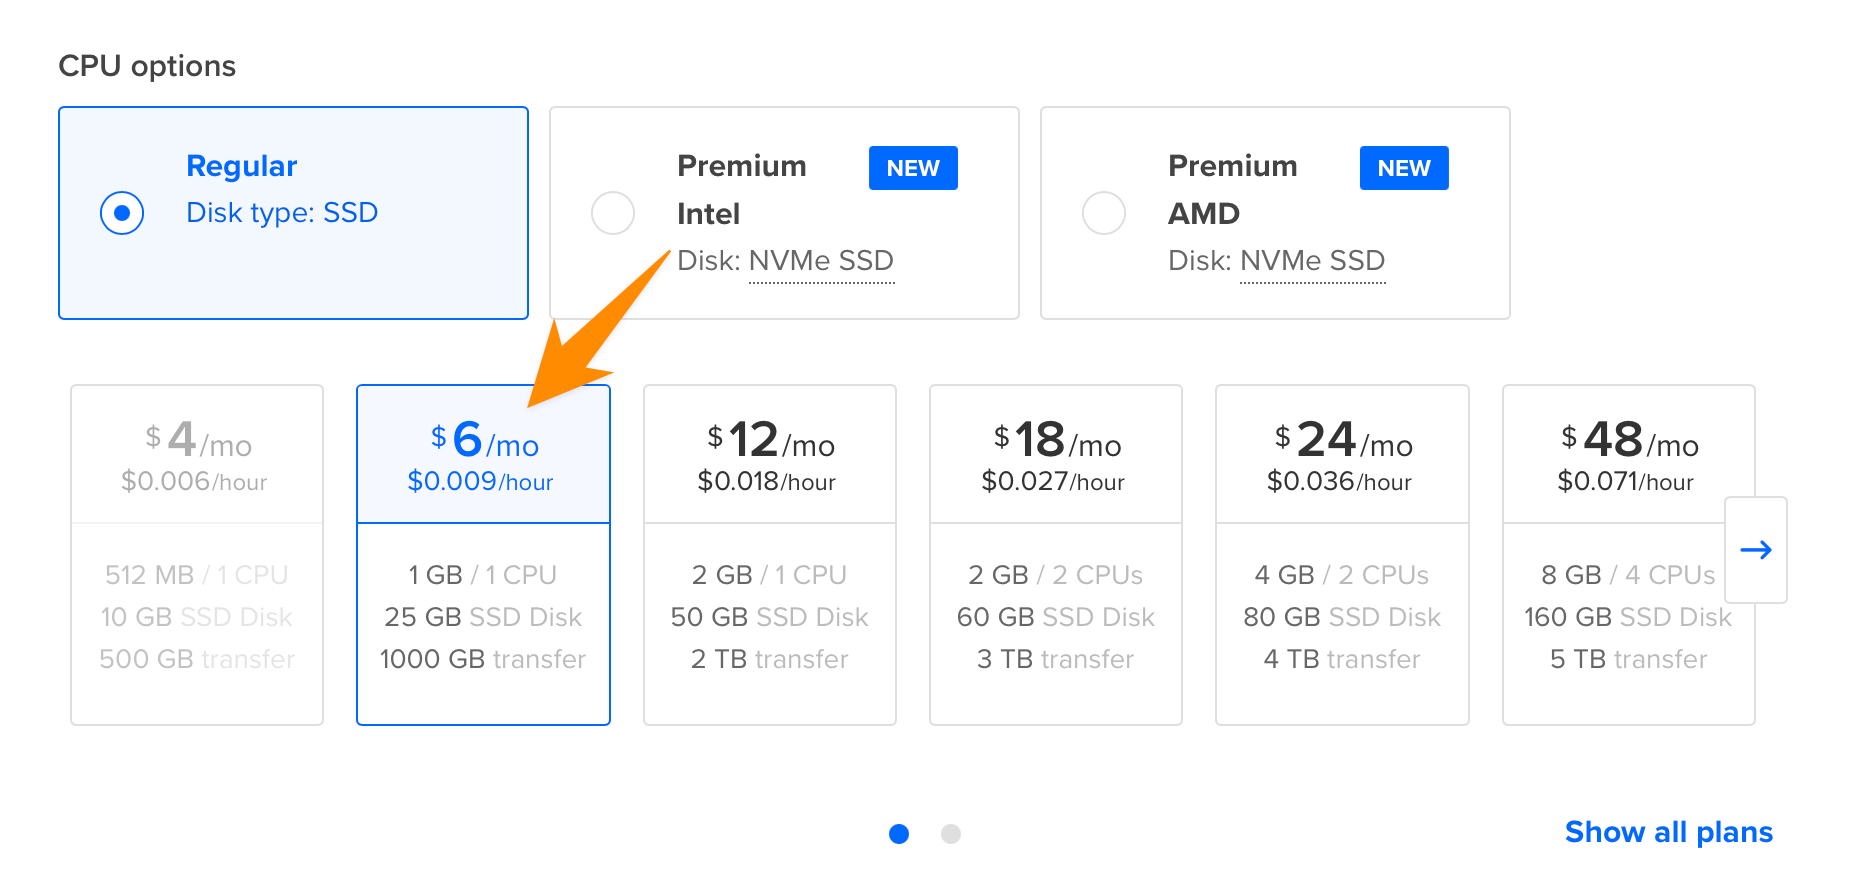
And then click the left arrow or “Show all plans” to see all plans:
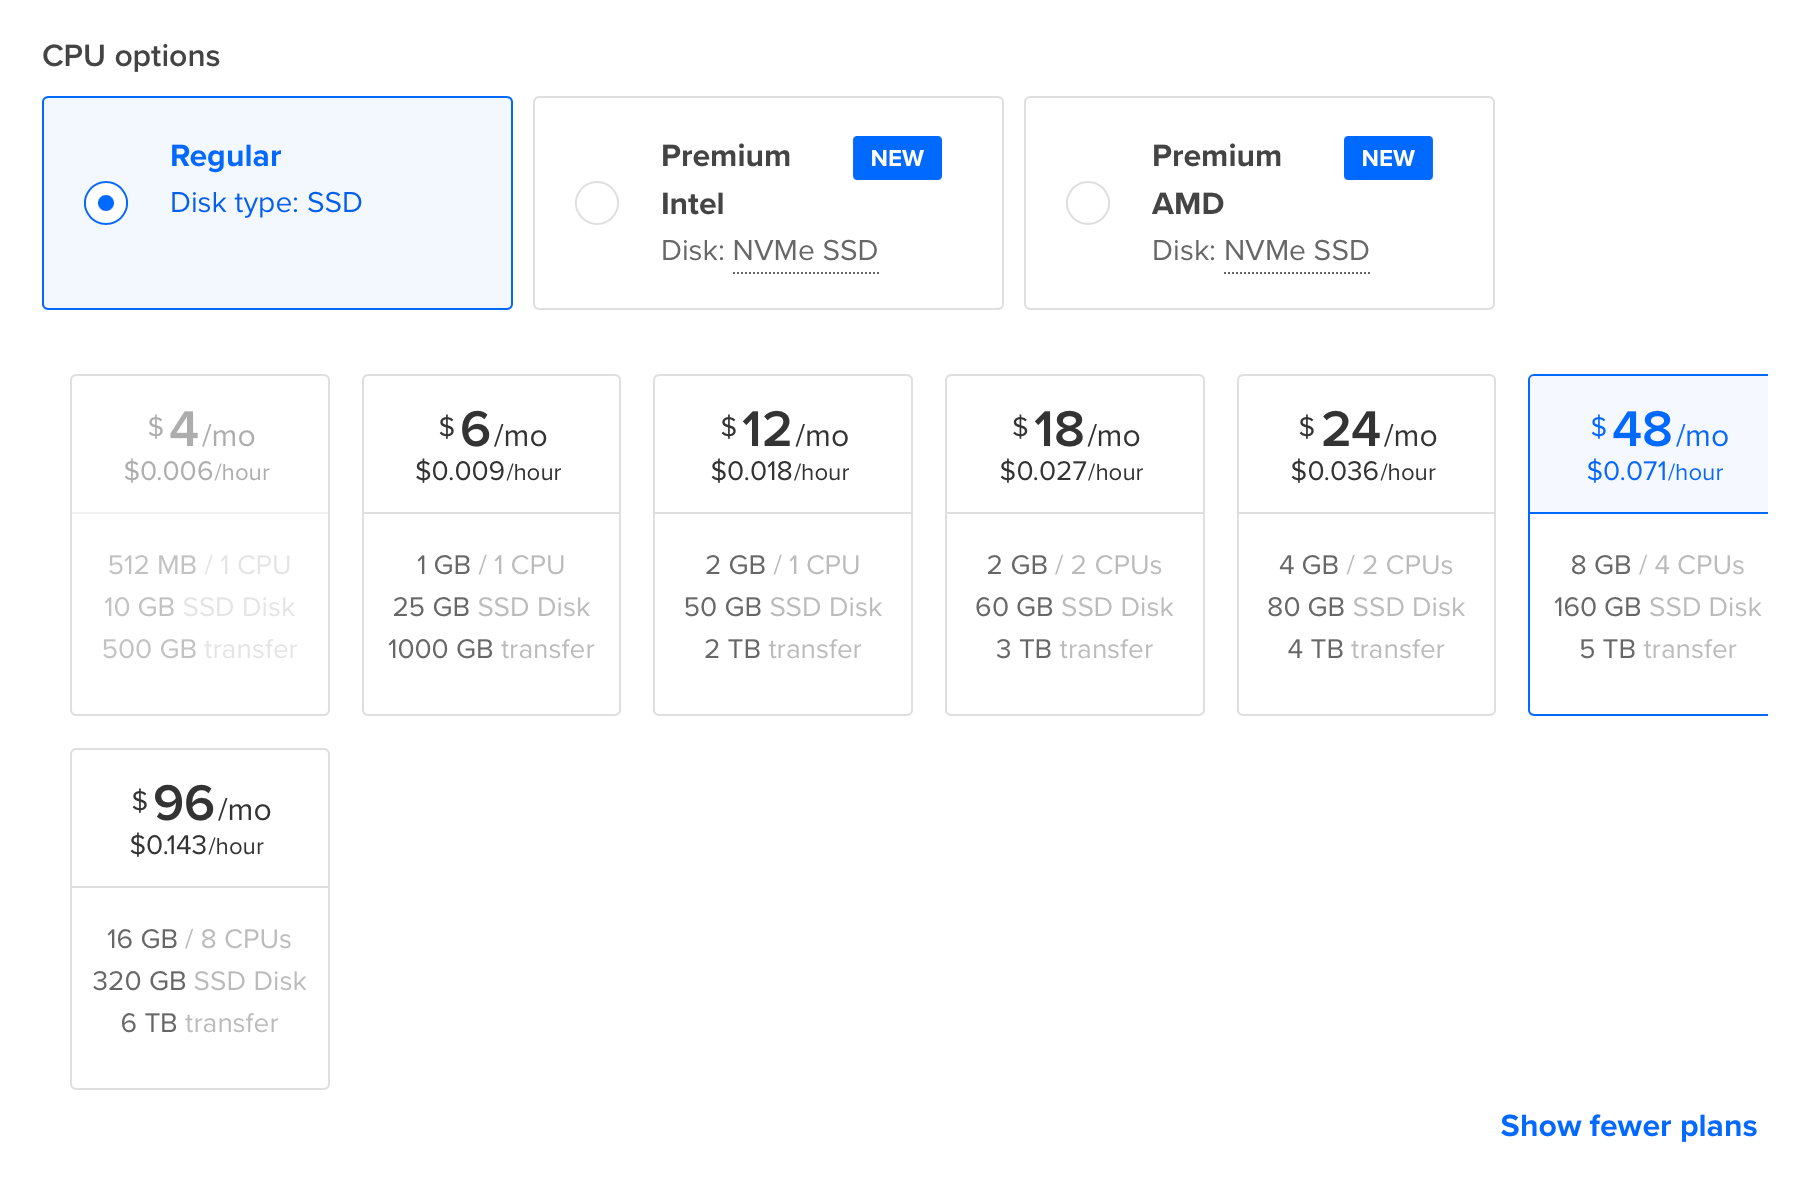
You should be able to pick the $4/m plan.
Right now as I’m making this tutorial it’s not available for some reason.
So I picked the $6/m plan:
Now go down below.
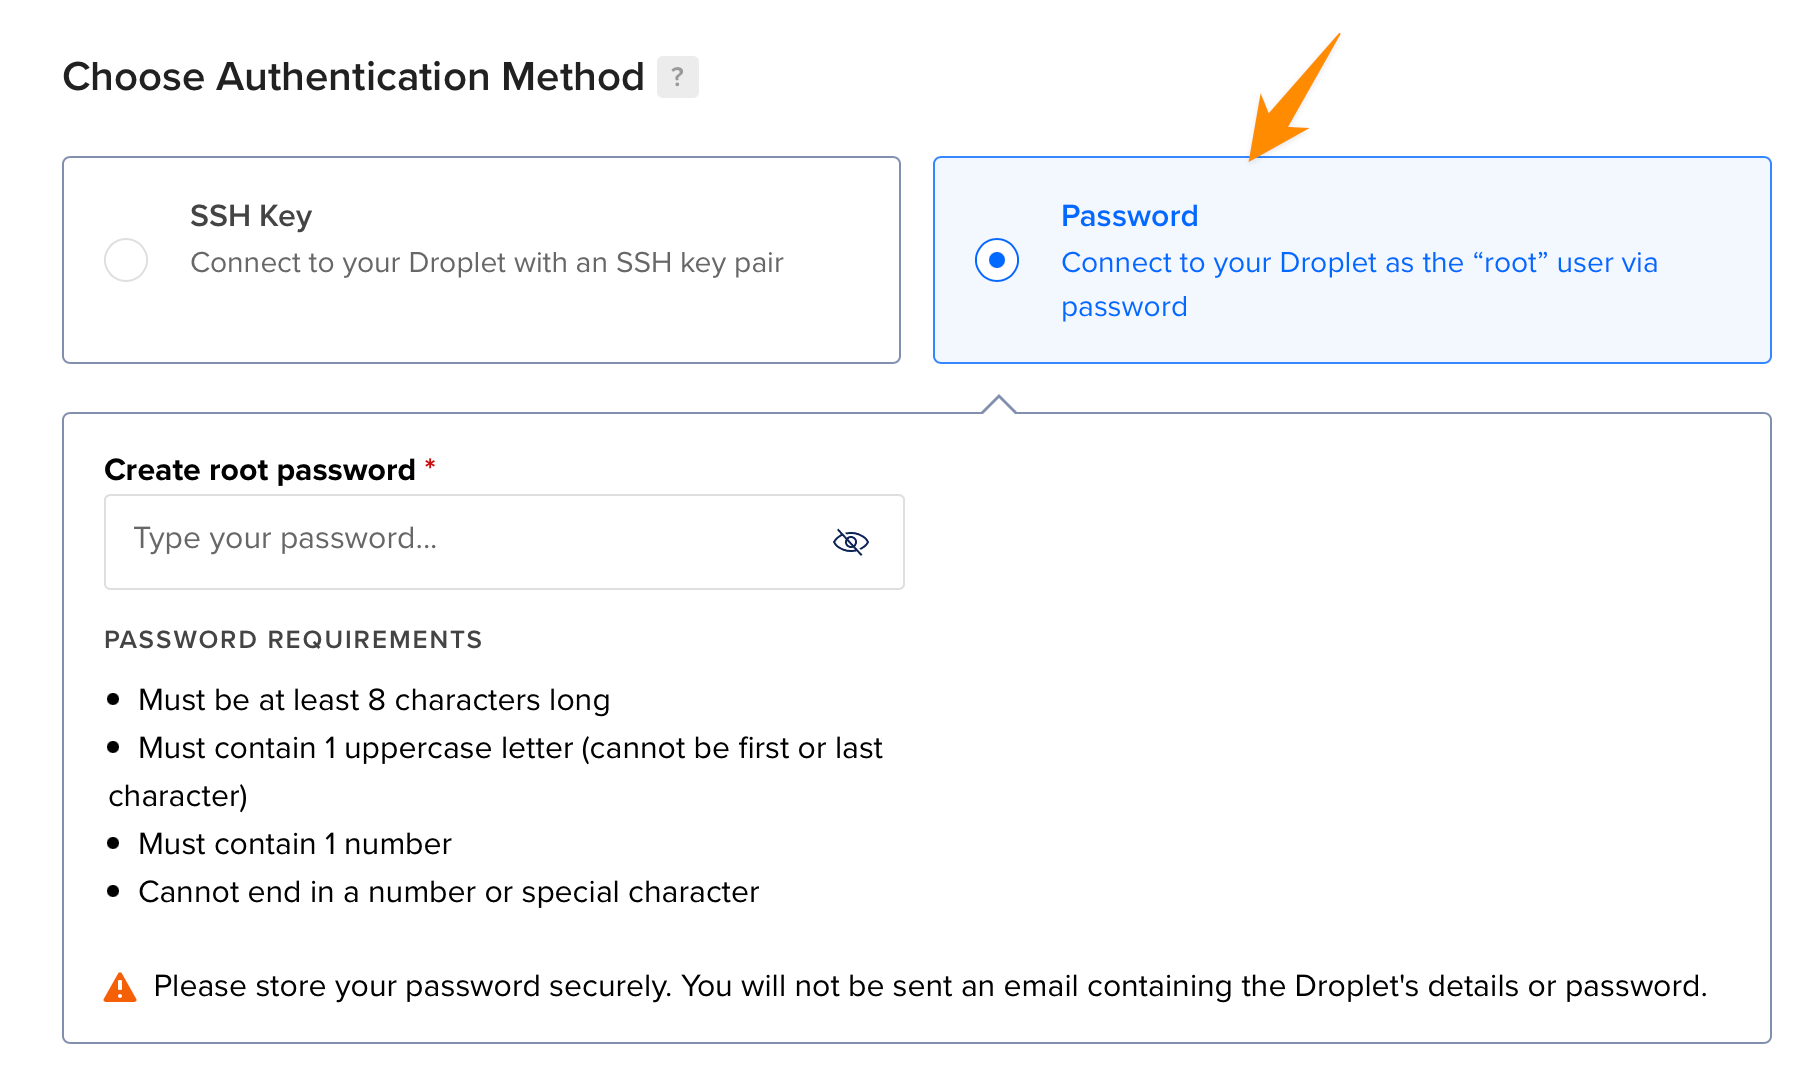
I set up my authentication method using SSH keys, and if you already have that in place, great, use that. But I don’t want to make this tutorial too long, so we’ll just be using password auth.
Pick a password for the root user, and save it somewhere safe:
Finally, click Create Droplet:
It will take a little while to create the droplet.
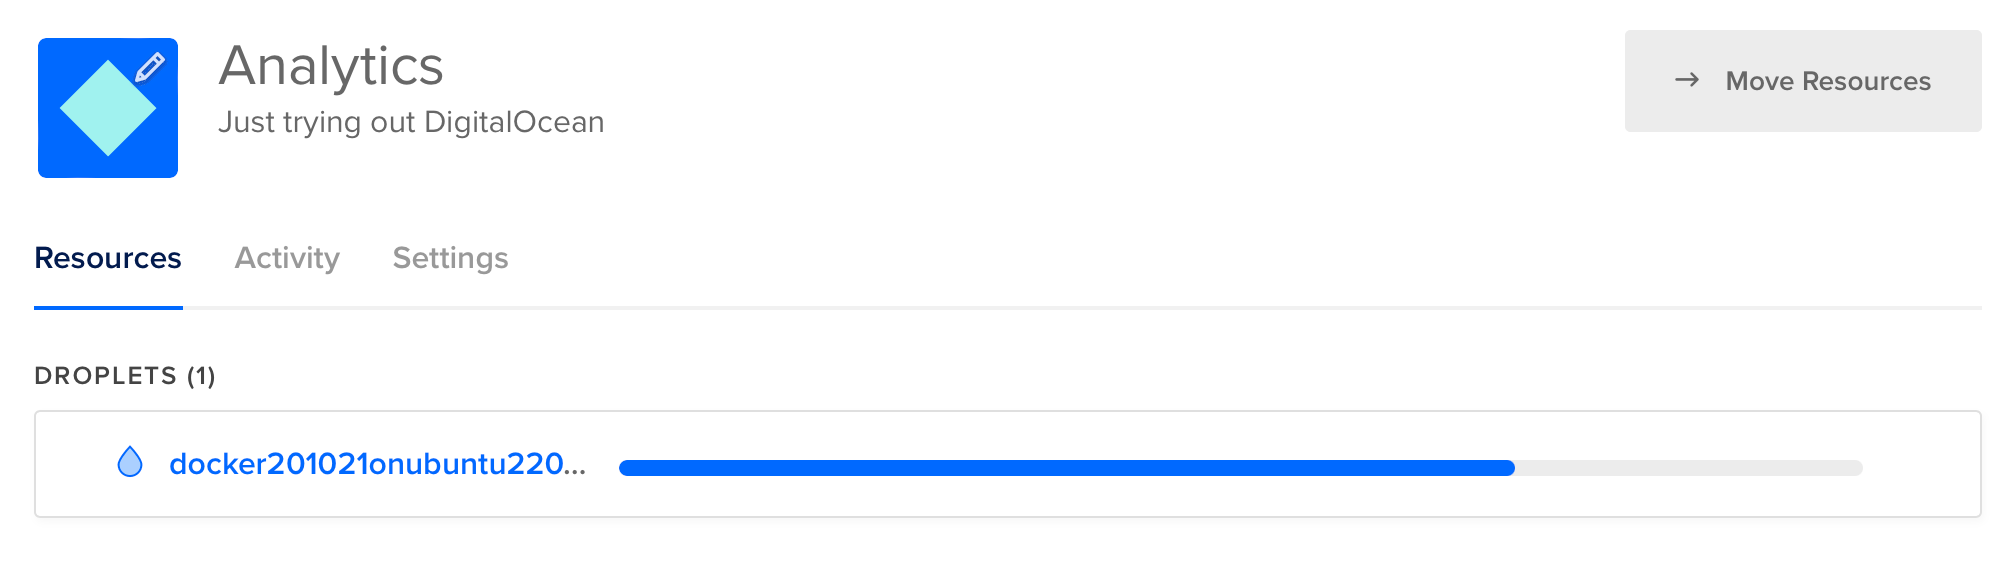
Once it’s done you’ll see the IP address:
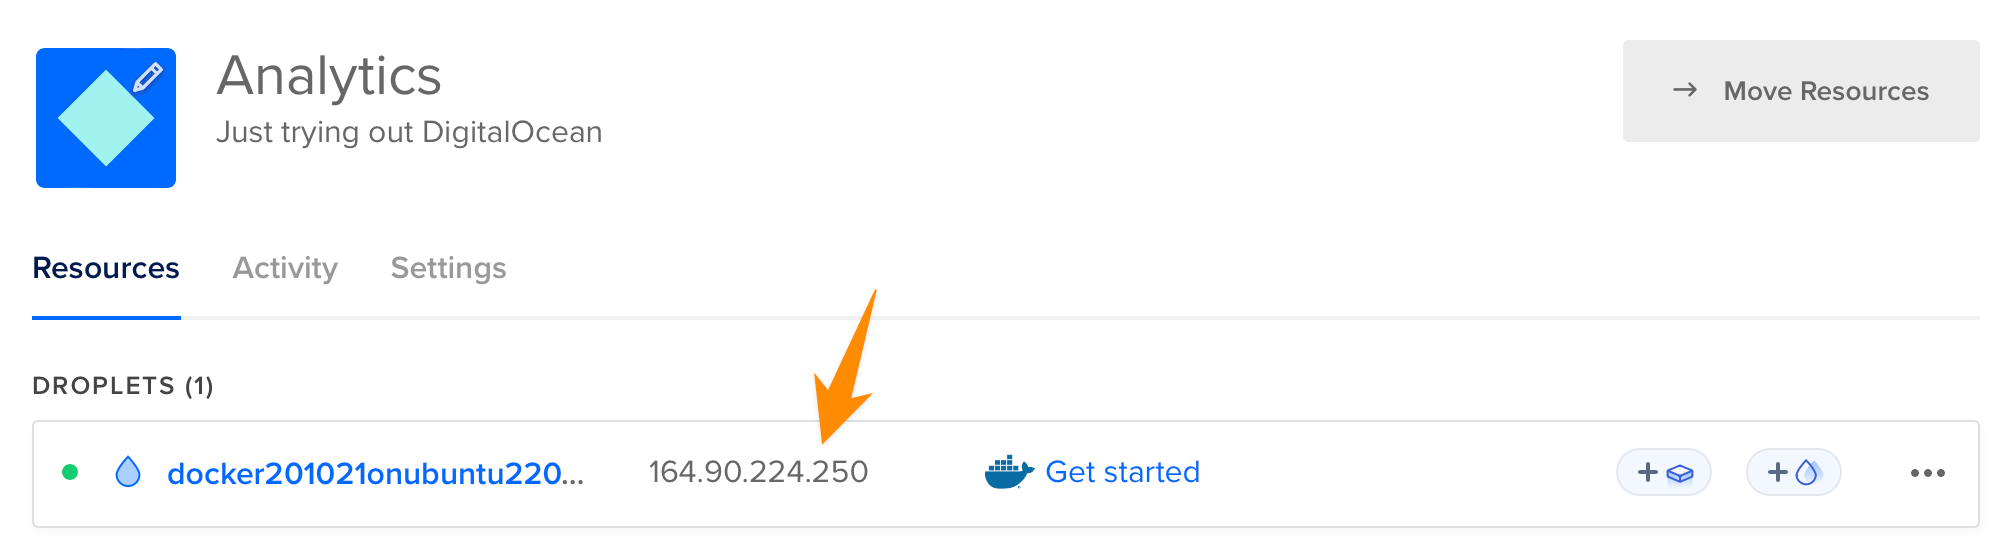
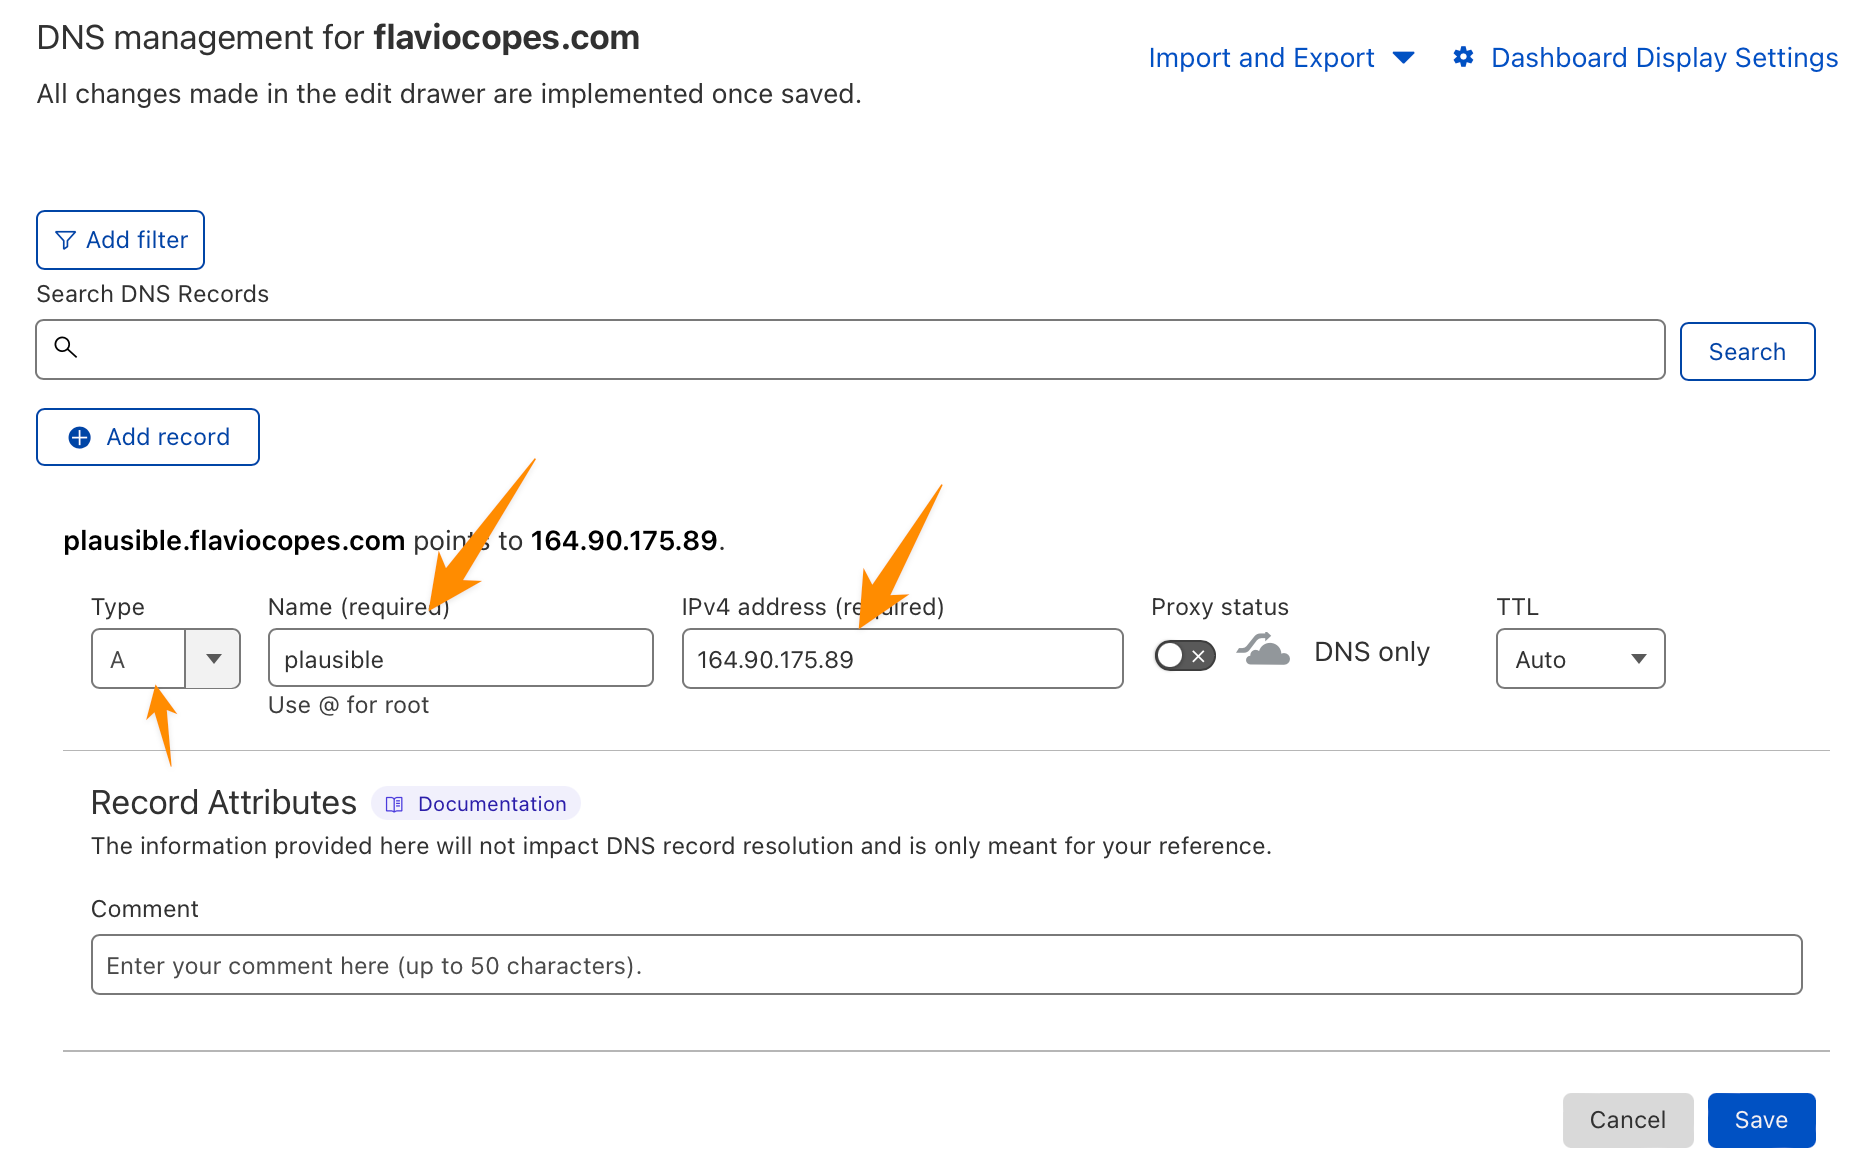
At this point you should create an A record in your DNS settings to point a subdomain of one of your domains to this IP address.
I won’t explain how, as it depends on what you use for your DNS. Check with your registrar.
For example on Cloudflare DNS it’s something like this:
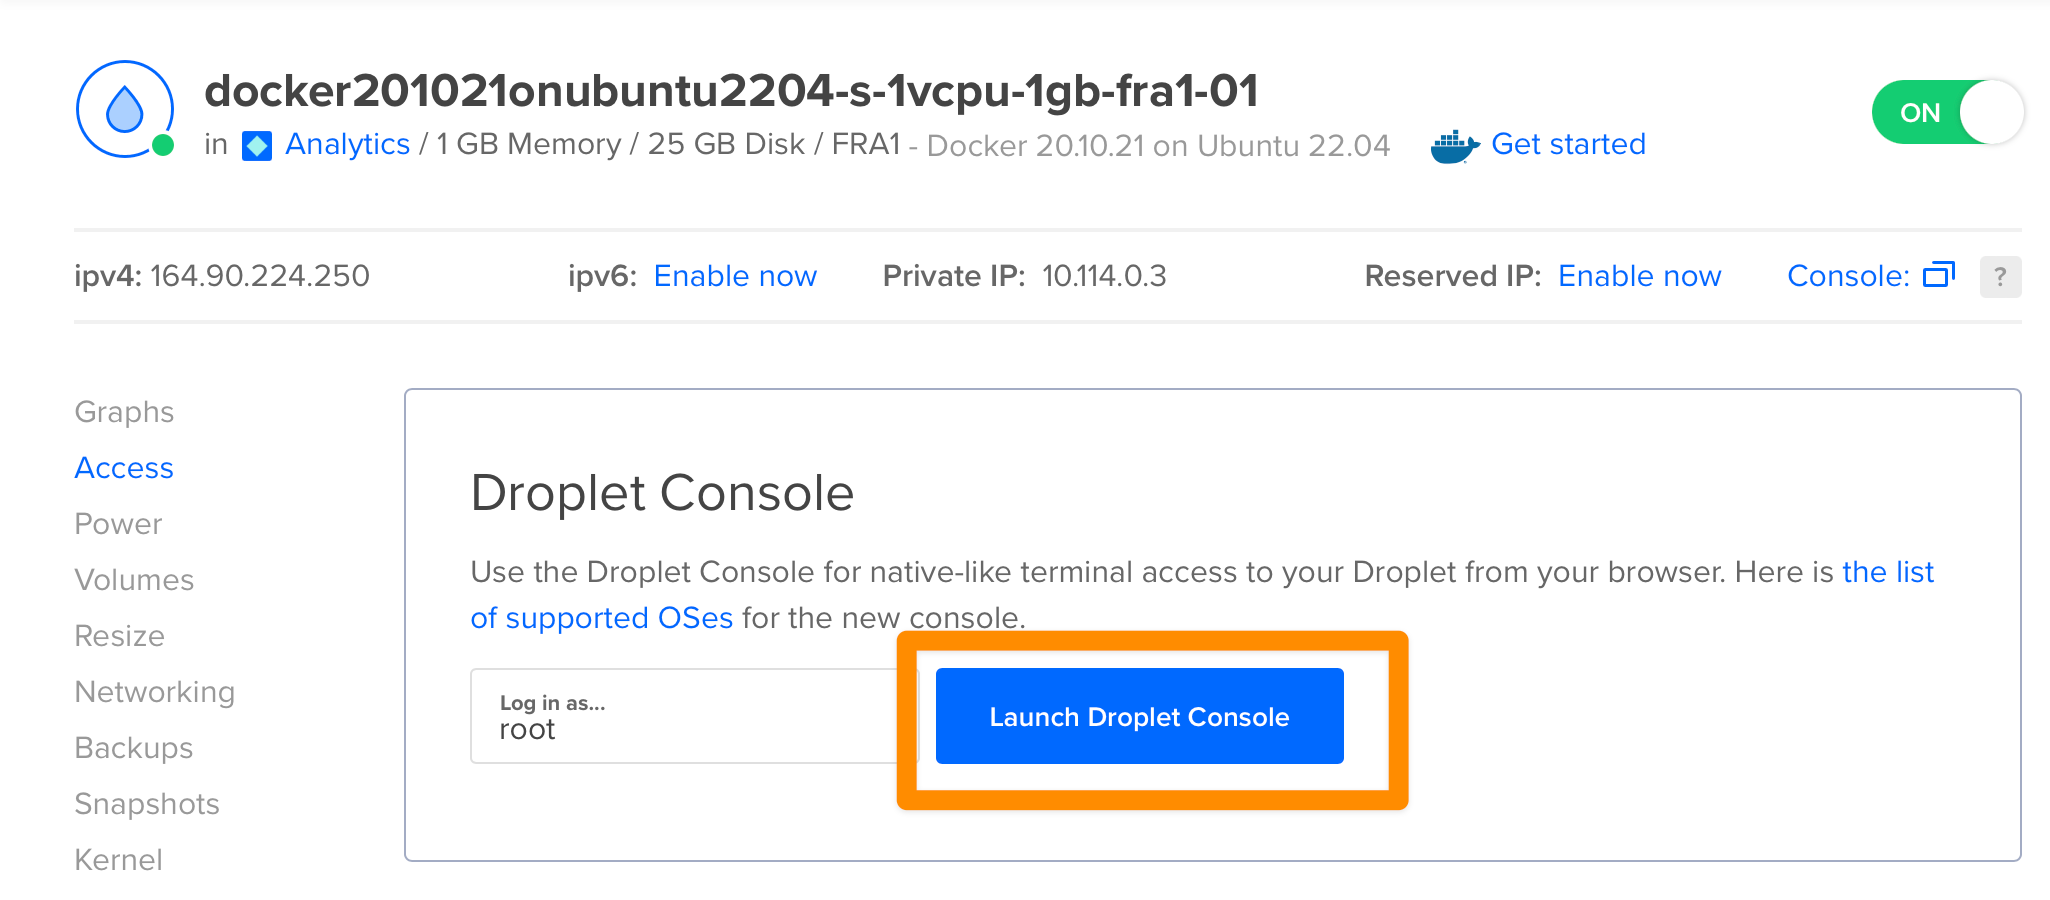
Click the ··· icon and “Access console”:

and click Launch Droplet Console:
This opens a terminal in a new window:
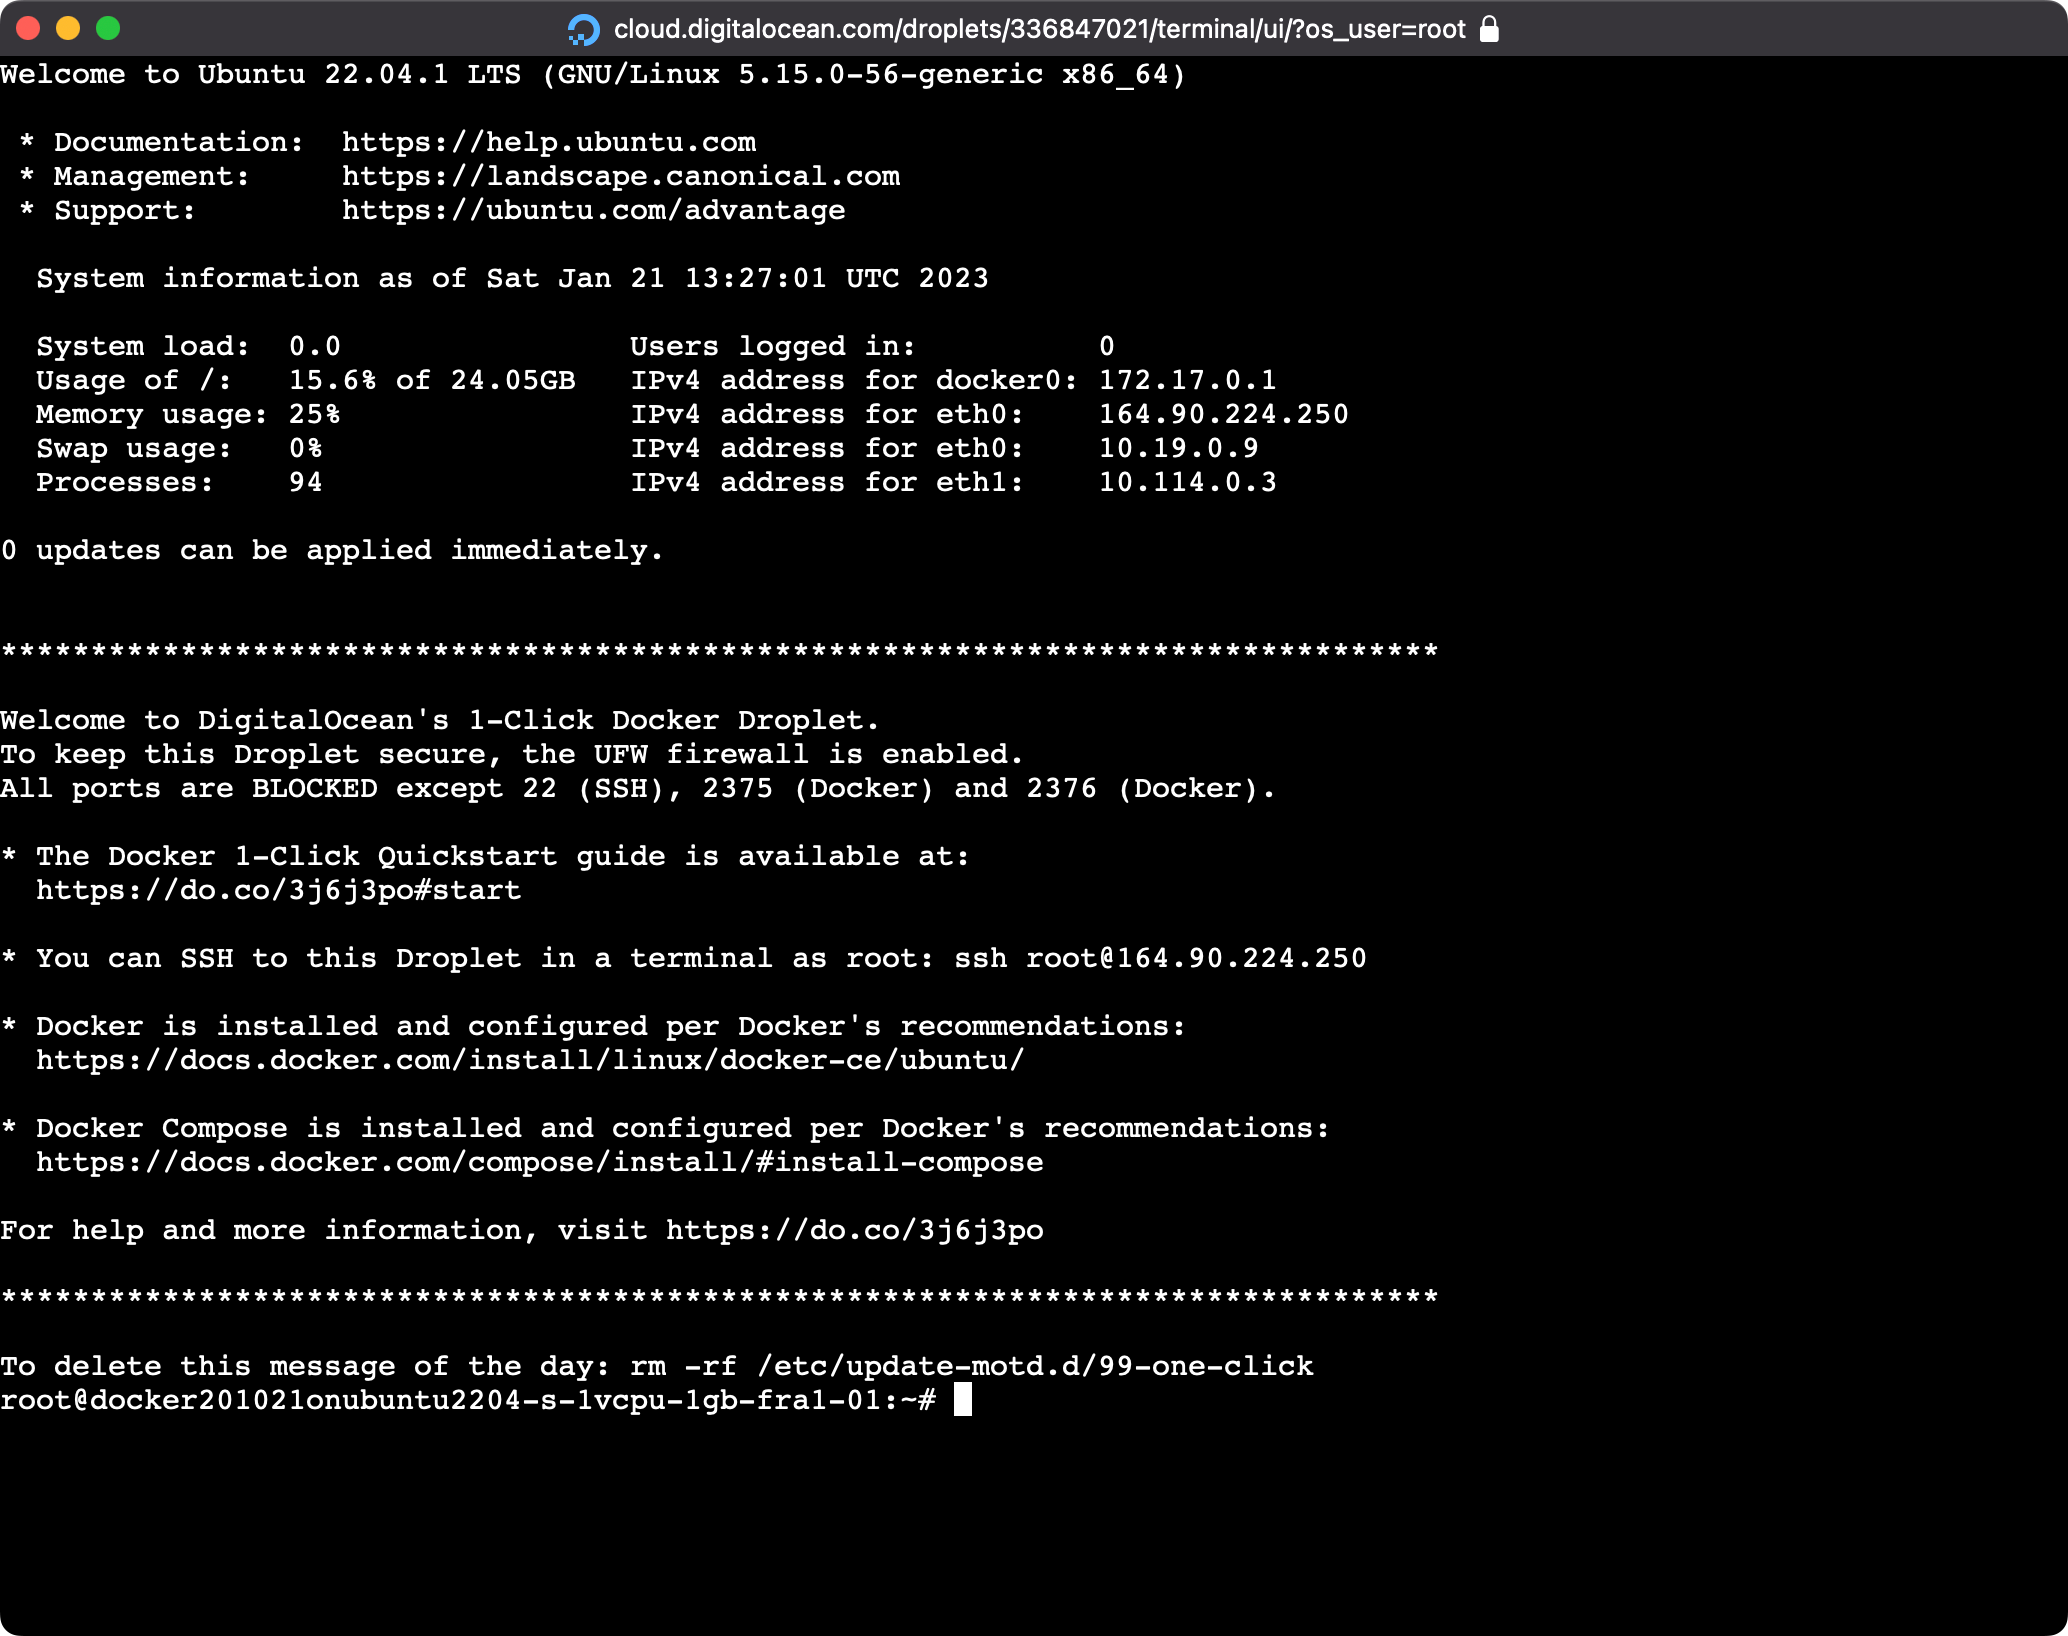
We’re ready to configure our Droplet.
First, go in the /opt folder:
cd /optand clone there the Plausible Docker Compose setup:
git clone https://github.com/plausible/hosting plausibleDocker Compose is a tool that allows you to create multiple containers for an application. Plausible Analytics requires the setup of several tools, including PostgreSQL, ClickHouse, an SMTP server and the Plausible app itself.
Instead of creating multiple Dockerfiles, we create a docker-compose.yml file. (If you need to write one of these for your own project, I built a free Docker Compose generator that sets up Postgres, MySQL or Redis with healthchecks.)
Then run cd plausible to go into the newly created plausible folder.

Now open plausible-conf.env in your favorite command line editor. I use nano:
nano plausible-conf.envThis file now contains this content:
BASE_URL=replace-me
SECRET_KEY_BASE=replace-me
You can generate a random string on https://generate-secret.vercel.app/64 and write it as the value of SECRET_KEY_BASE. In BASE_URL set your final analytics URL, for example https://plausible.your-domain.com
Note: use a subdomain and not a subfolder. Plausible won’t work as a subfolder.
Remember to fill those variables with real data. Come up with a username and password, you’ll need them later.
Save the file, then open docker-compose.yml in nano or your favorite editor:
nano docker-compose.ymlAnd under plausible: change the existing line
ports:
      - 8000:8000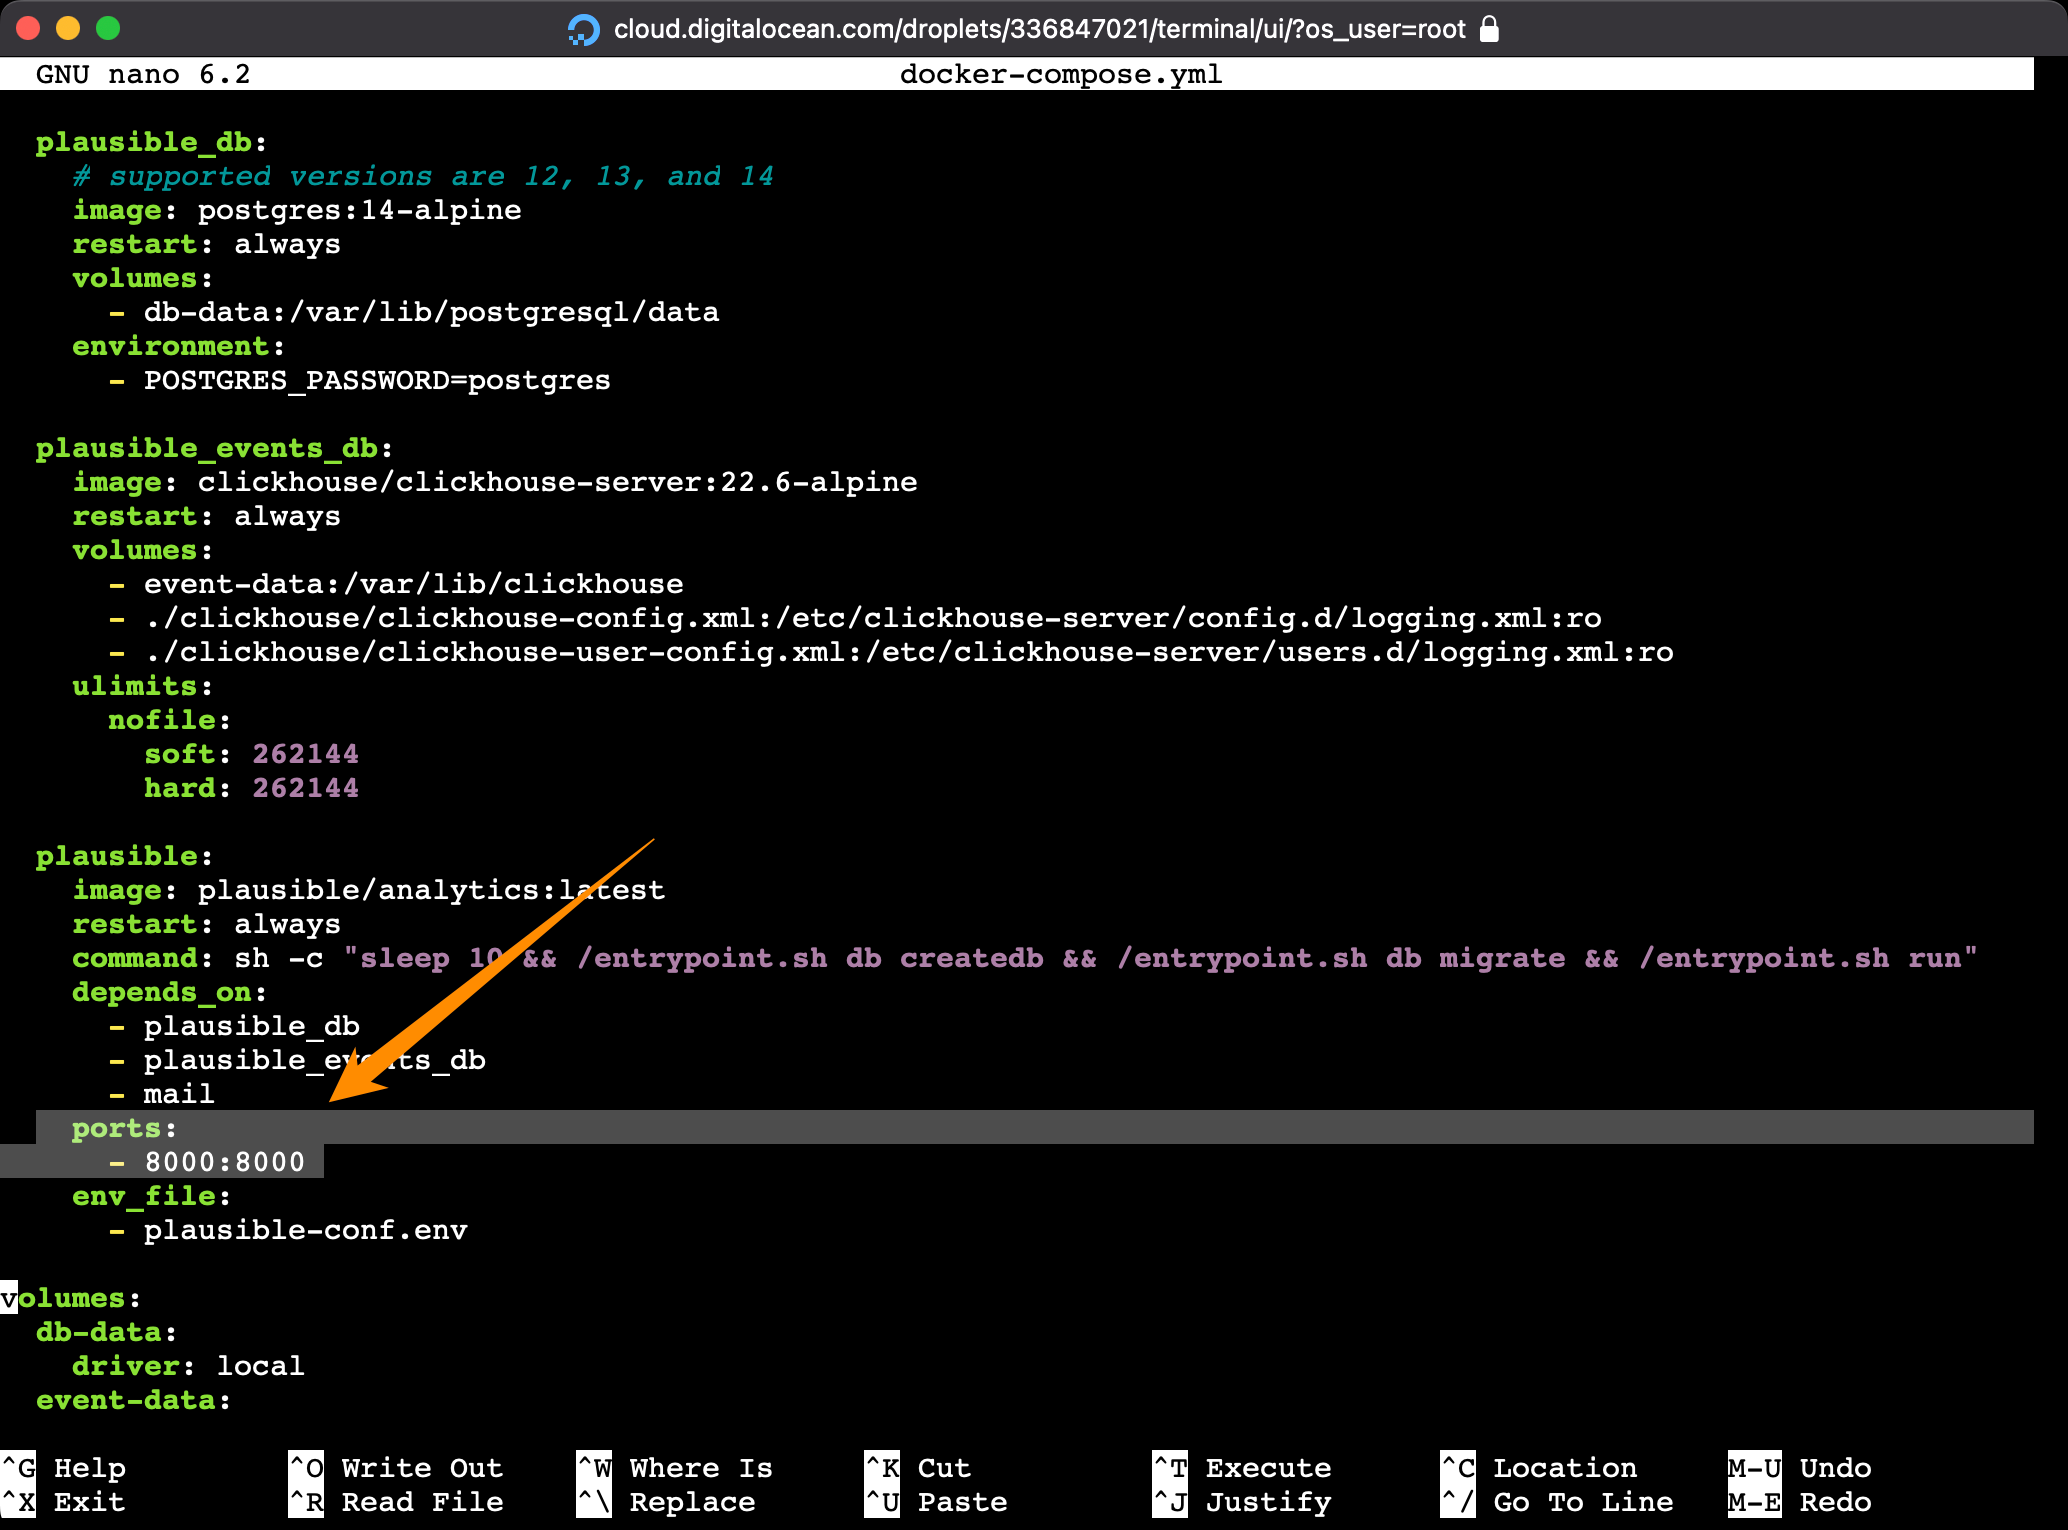
to this:
ports:
      - 127.0.0.1:8000:8000
This is because by default Plausible runs on port 8000 as HTTP.
We make sure this only works for localhost connections, not for connections coming from the outside, and we’ll later set up Nginx to act as a reverse proxy on port 80.
Now run:
docker-compose up -dNote that you might have to install docker-compose first, with apt install docker-compose.
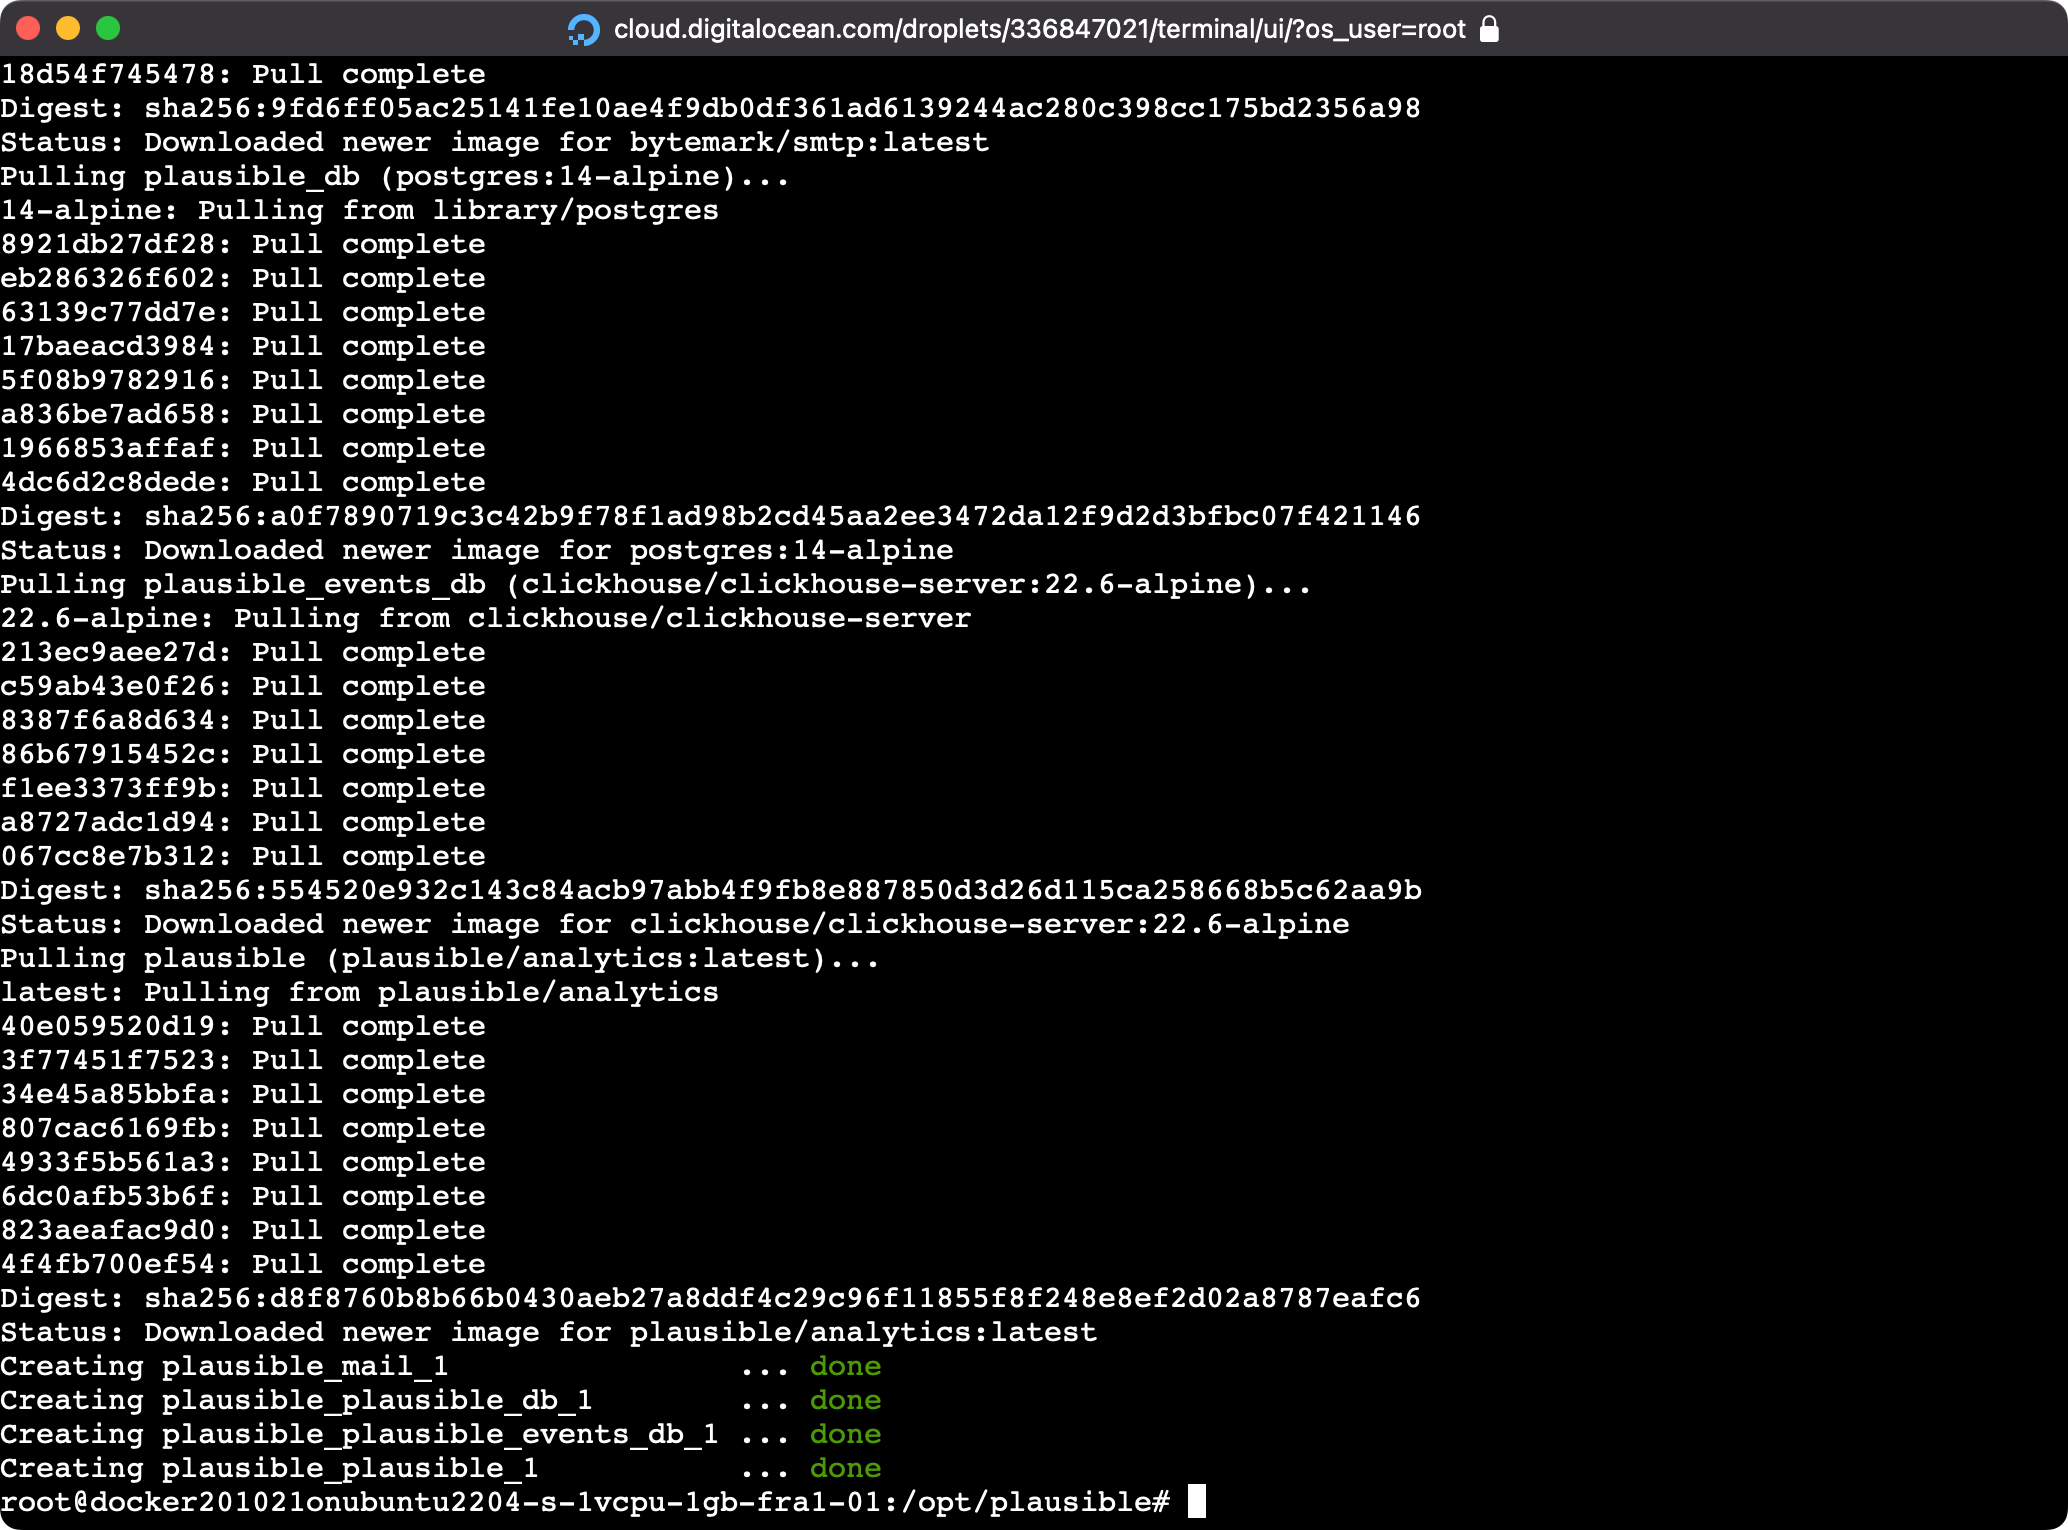
After a bit of downloading and processing, things should be up and running.
Wait a couple seconds to make sure things are up, then try accessing the server using
curl http://localhost:8000and you should get a response back like this:
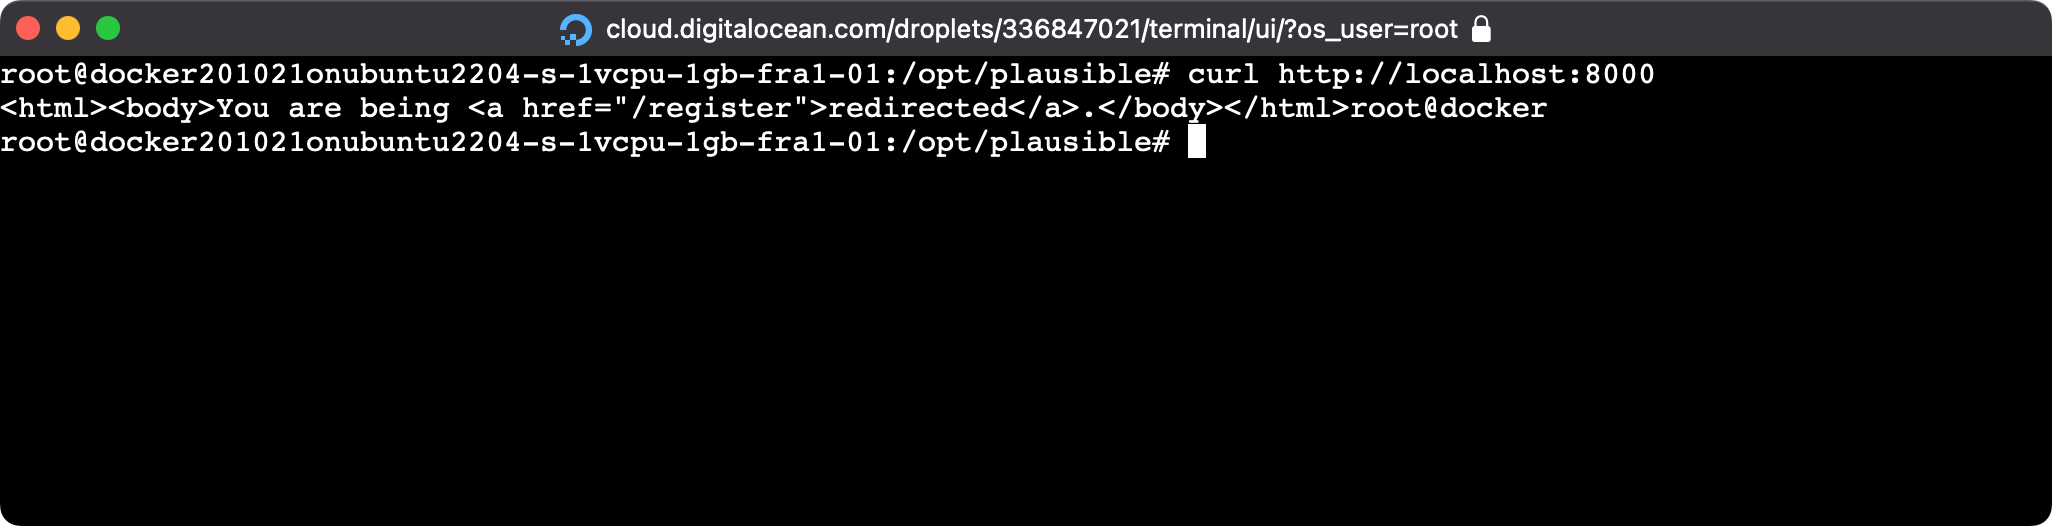
If you try too soon, you might get an error like curl: (56) Recv failure: Connection reset by peer, retry a little later.
Now it’s time to install Nginx!
Run the following commands:
apt update
apt install nginx
Then run:
ufw allow "Nginx Full"Now run this to create the plausible.conf file in /etc/nginx/sites-available/
nano /etc/nginx/sites-available/plausible.confand type this content, swapping YOUR_DOMAIN_HERE with your domain, like plausible.flaviocopes.com:
server {
    listen       80;
    listen       [::]:80;
    server_name  YOUR_DOMAIN_HERE;

    access_log  /var/log/nginx/plausible.access.log;
    error_log   /var/log/nginx/plausible.error.log;

    location / {
      proxy_pass http://localhost:8000;
      proxy_set_header X-Forwarded-For $proxy_add_x_forwarded_for;
  }
}
Using this configuration we listen on port 80 and we proxy all the requests to localhost:8000 where our Plausible instance is listening.
Now enable the site using:
ln -s /etc/nginx/sites-available/plausible.conf /etc/nginx/sites-enabled/Test the Nginx config with
nginx -t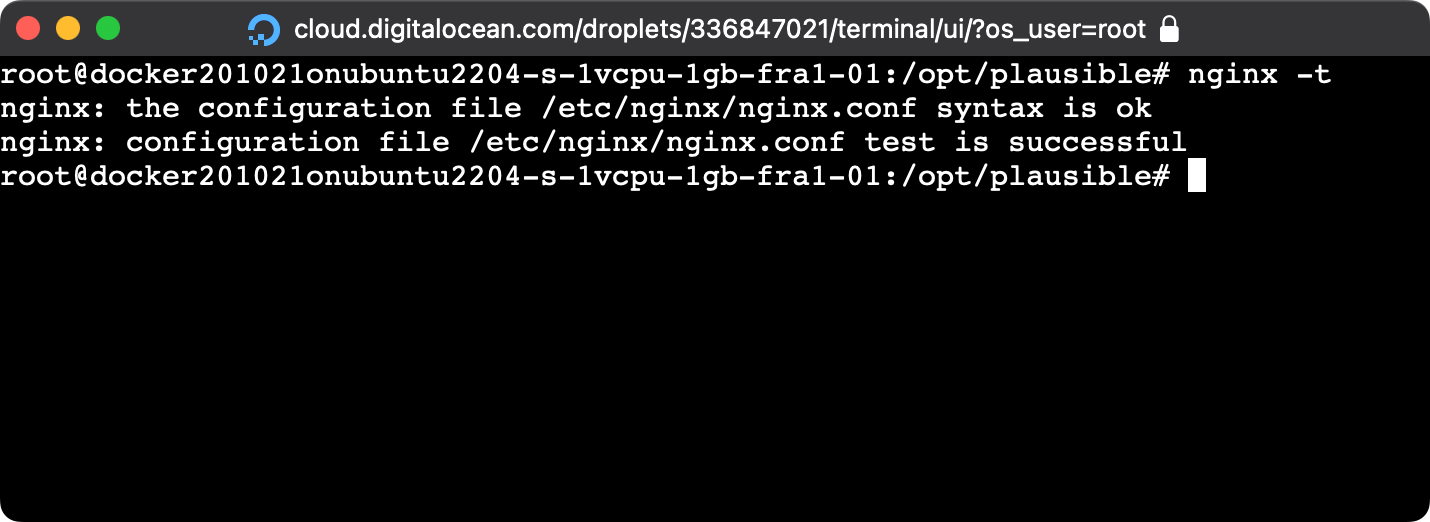
Then restart Nginx with
systemctl reload nginxAt this point if you open in your browser the URL you set, your should see Plausible working:
If it’s not working yet, you might have to wait for DNS to propagate (did you set up the domain DNS to point to the Droplet IP, right?). Also try a different browser, as DNS is often cached.
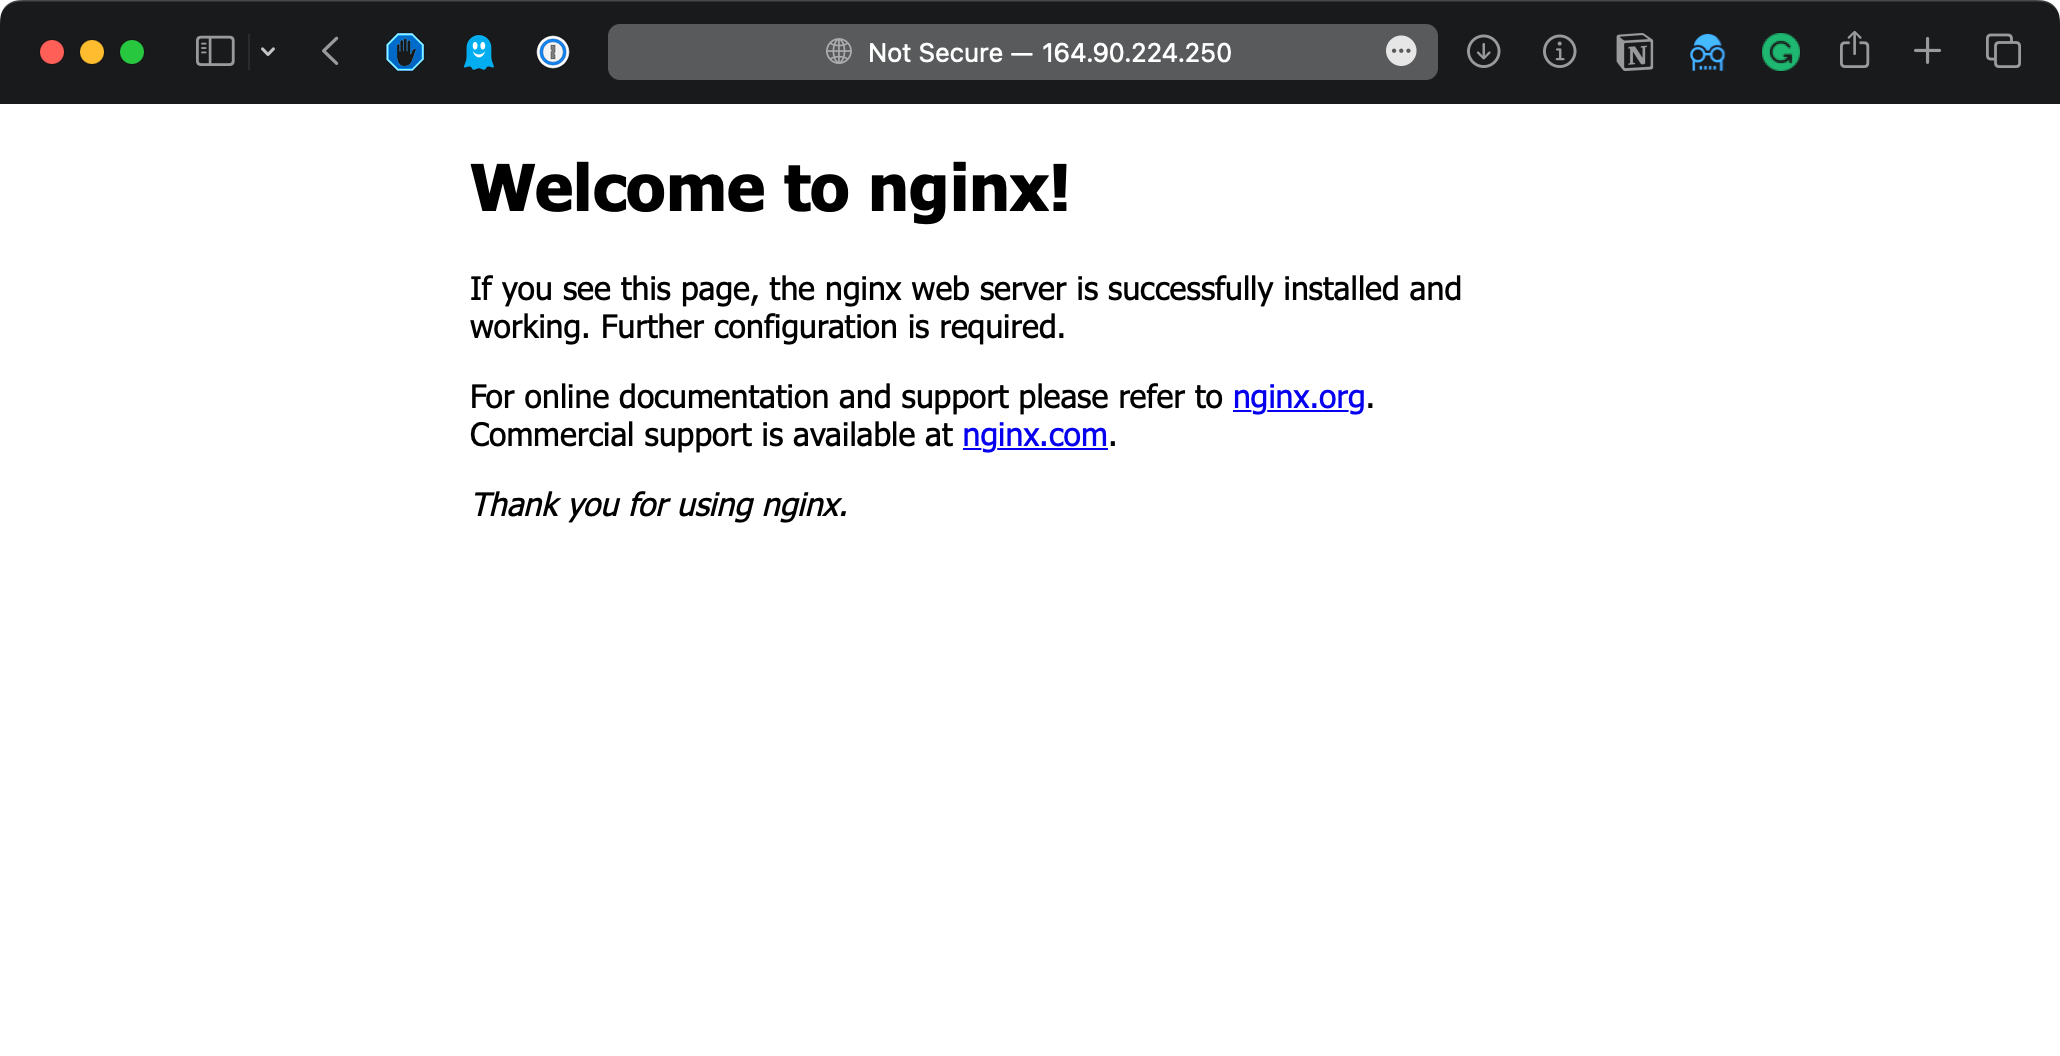
Note that we told Nginx to listen on that specific domain, so if you access the IP address you will see the default Nginx page, this is normal:
Note the “Not secure” words however.. we need to set up secure connections.
Run:
apt install certbot python3-certbot-nginxand:
certbot --nginx -d YOUR_DOMAIN_HEREand follow the instructions.
Reload the page, your should have an automatic secure connection now!
Great!
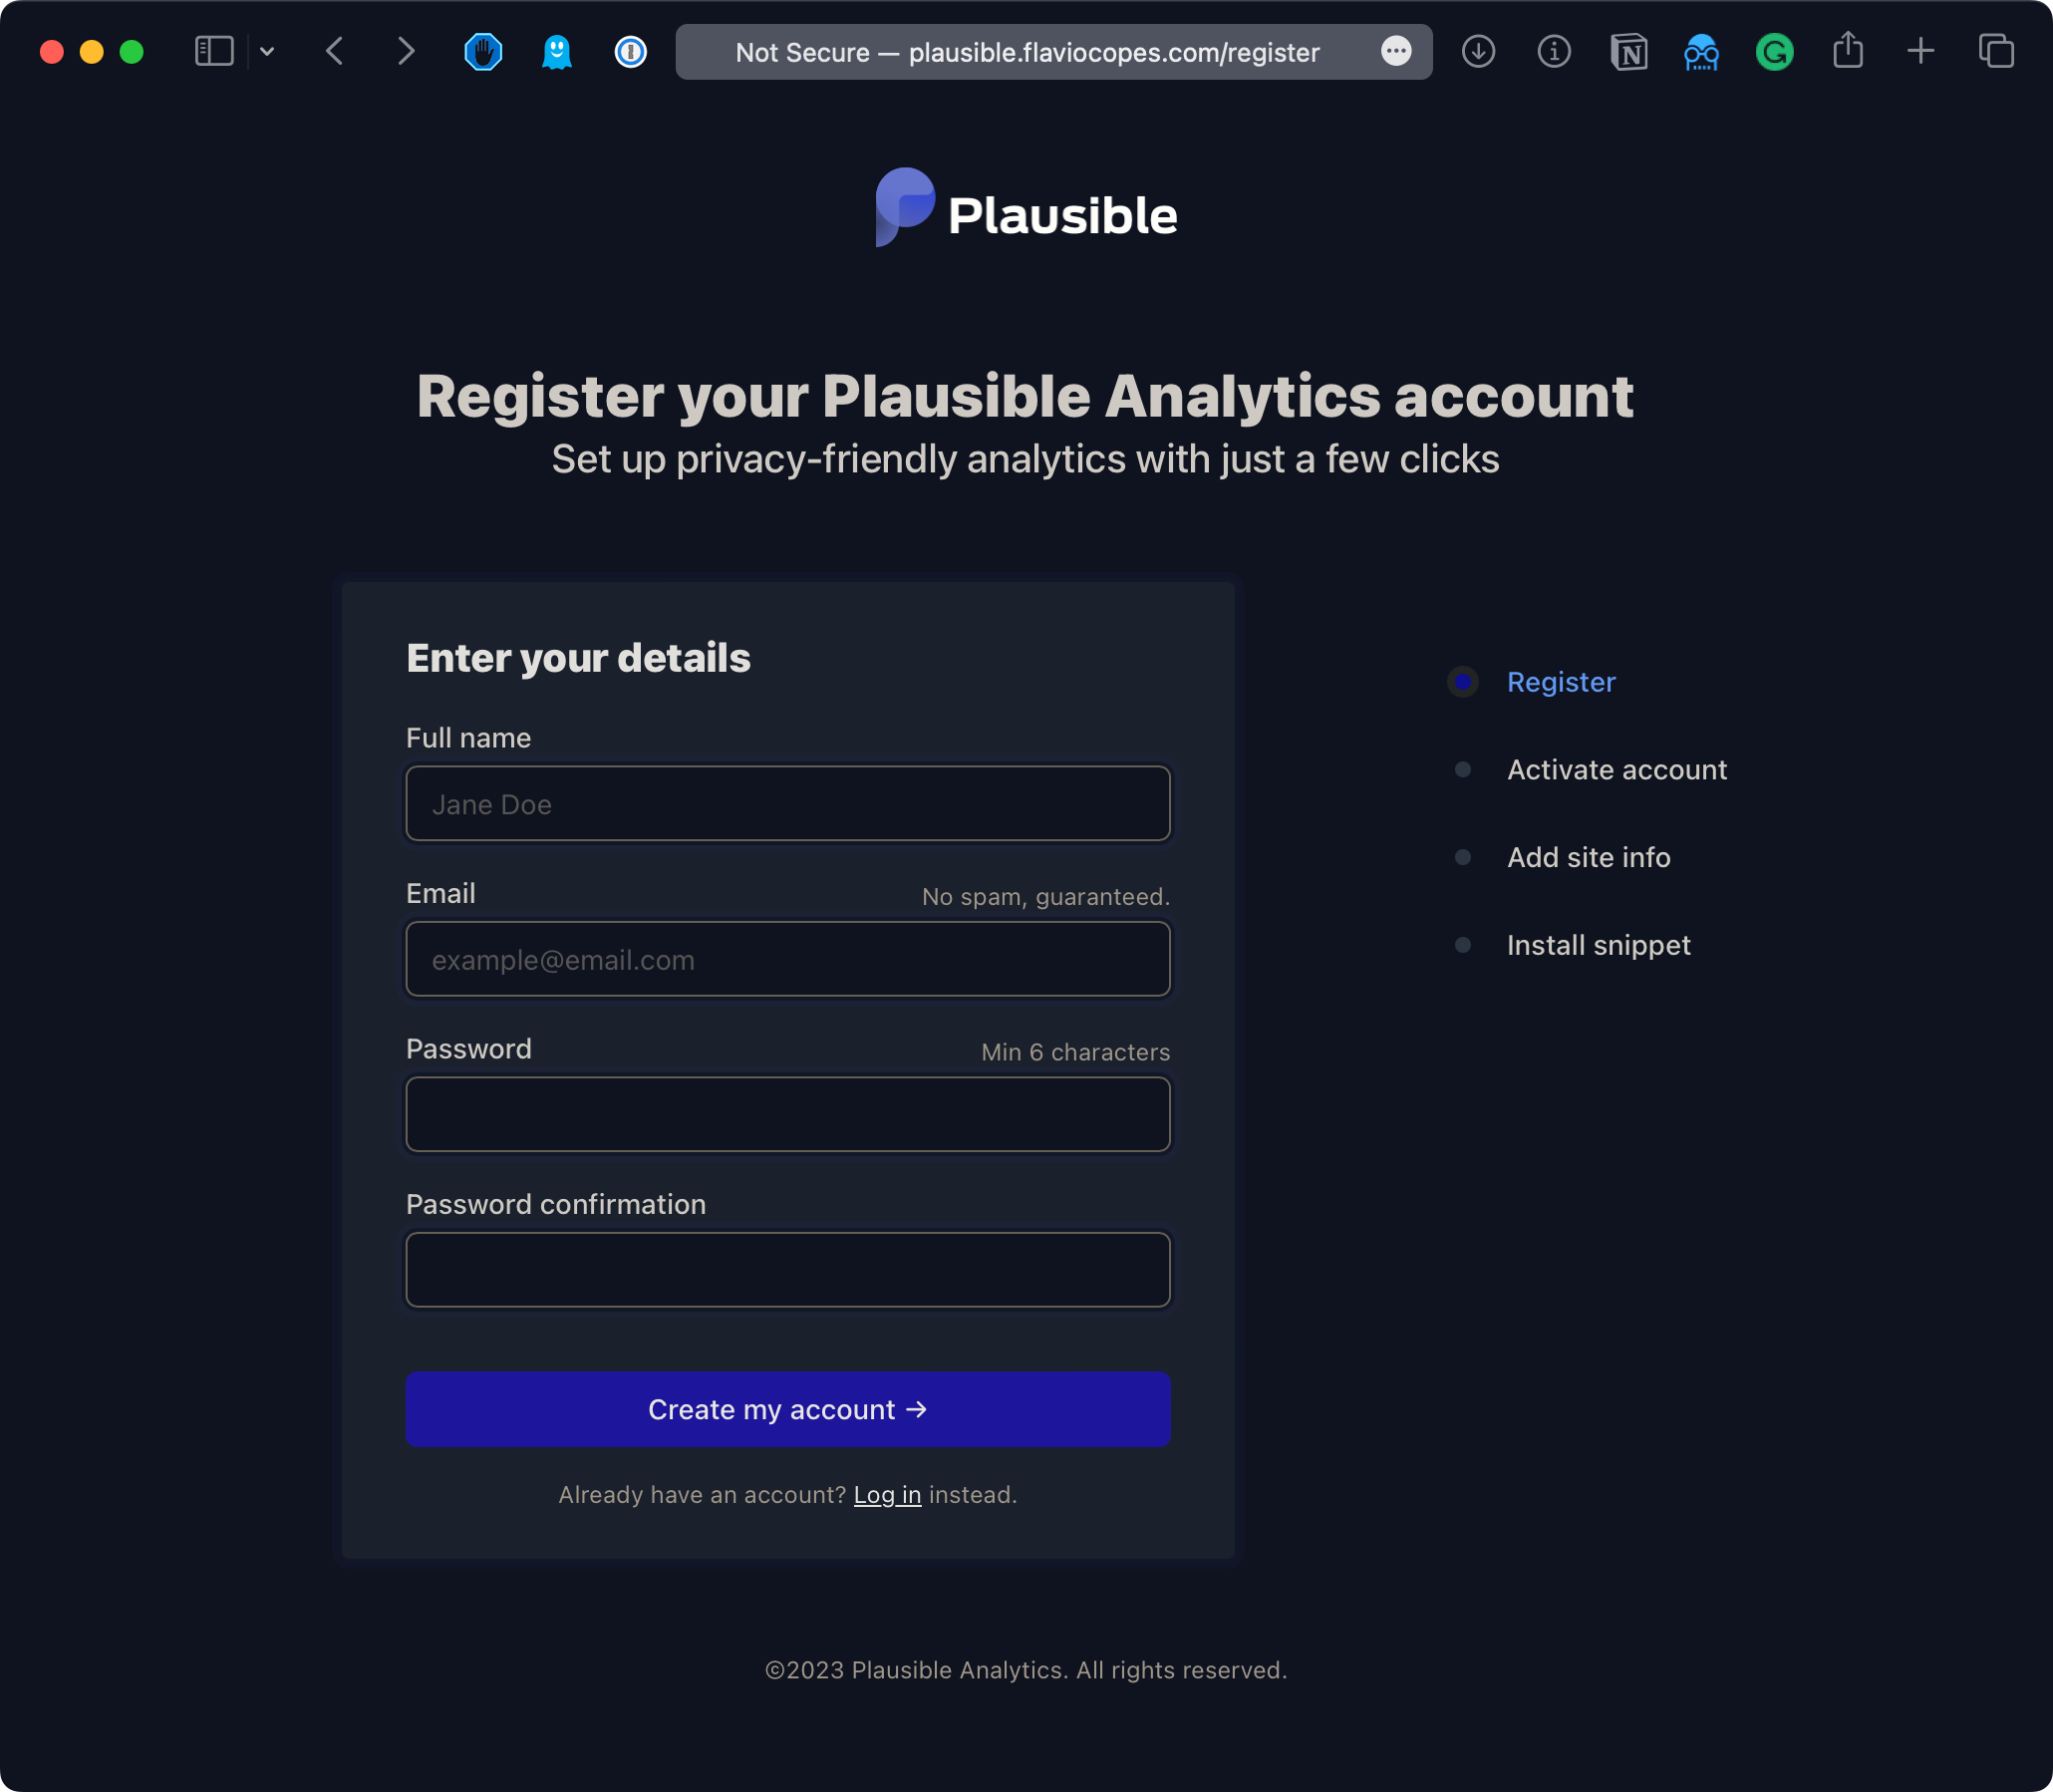
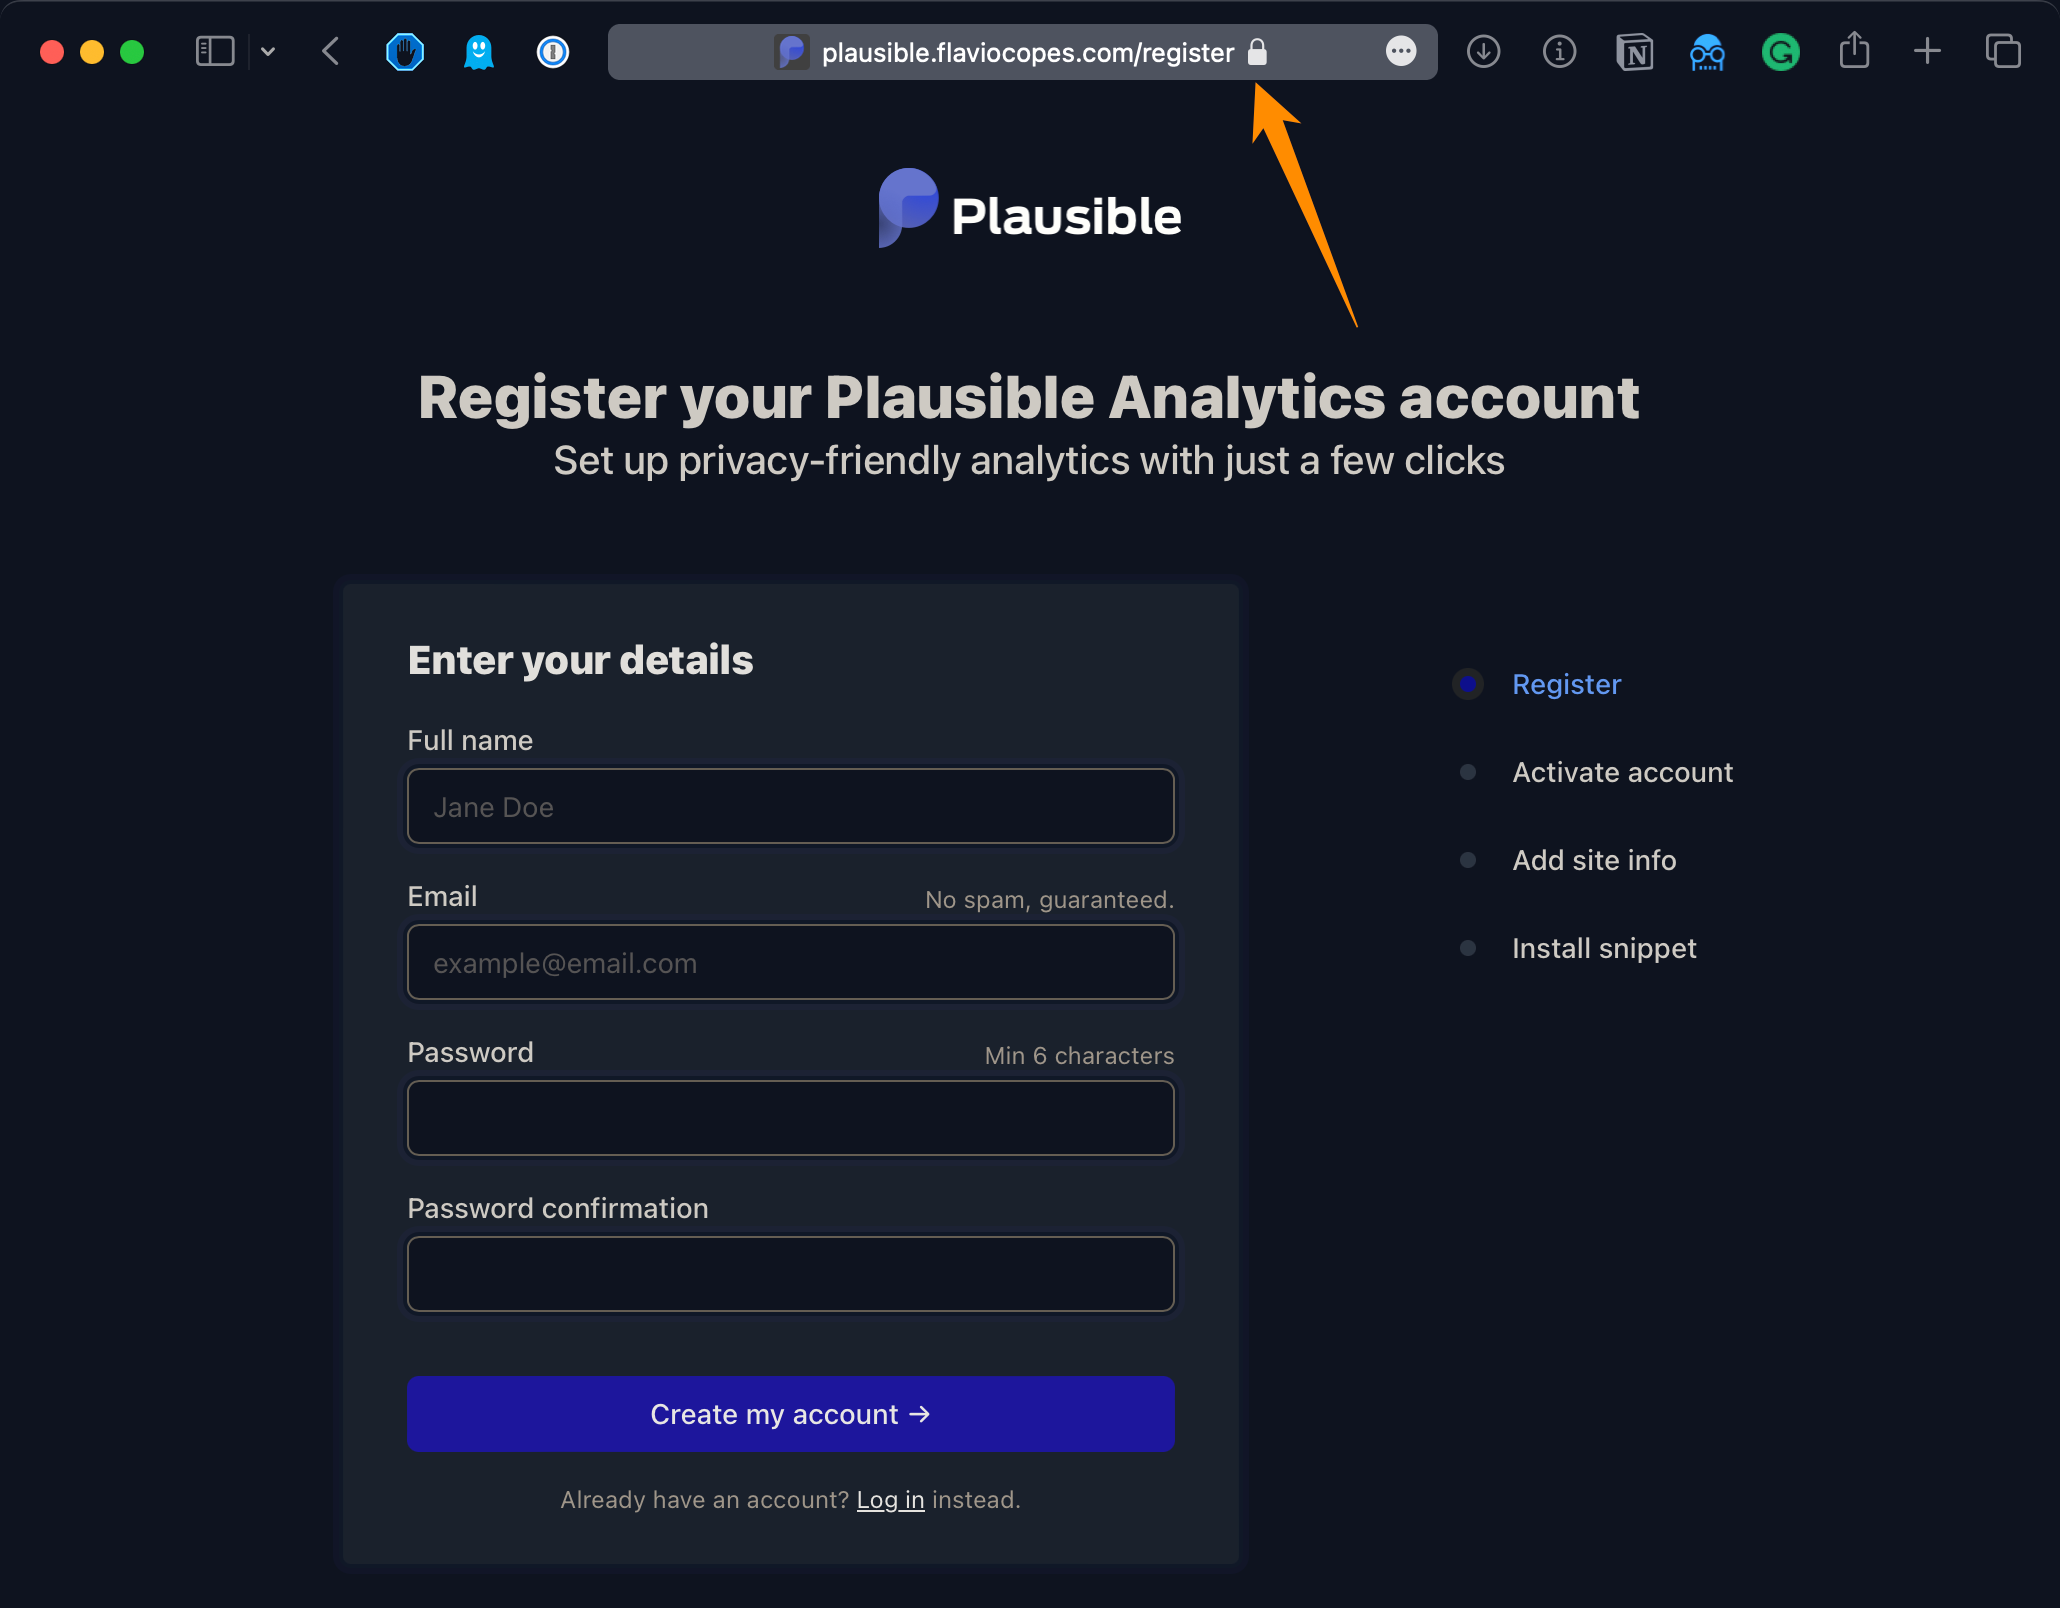
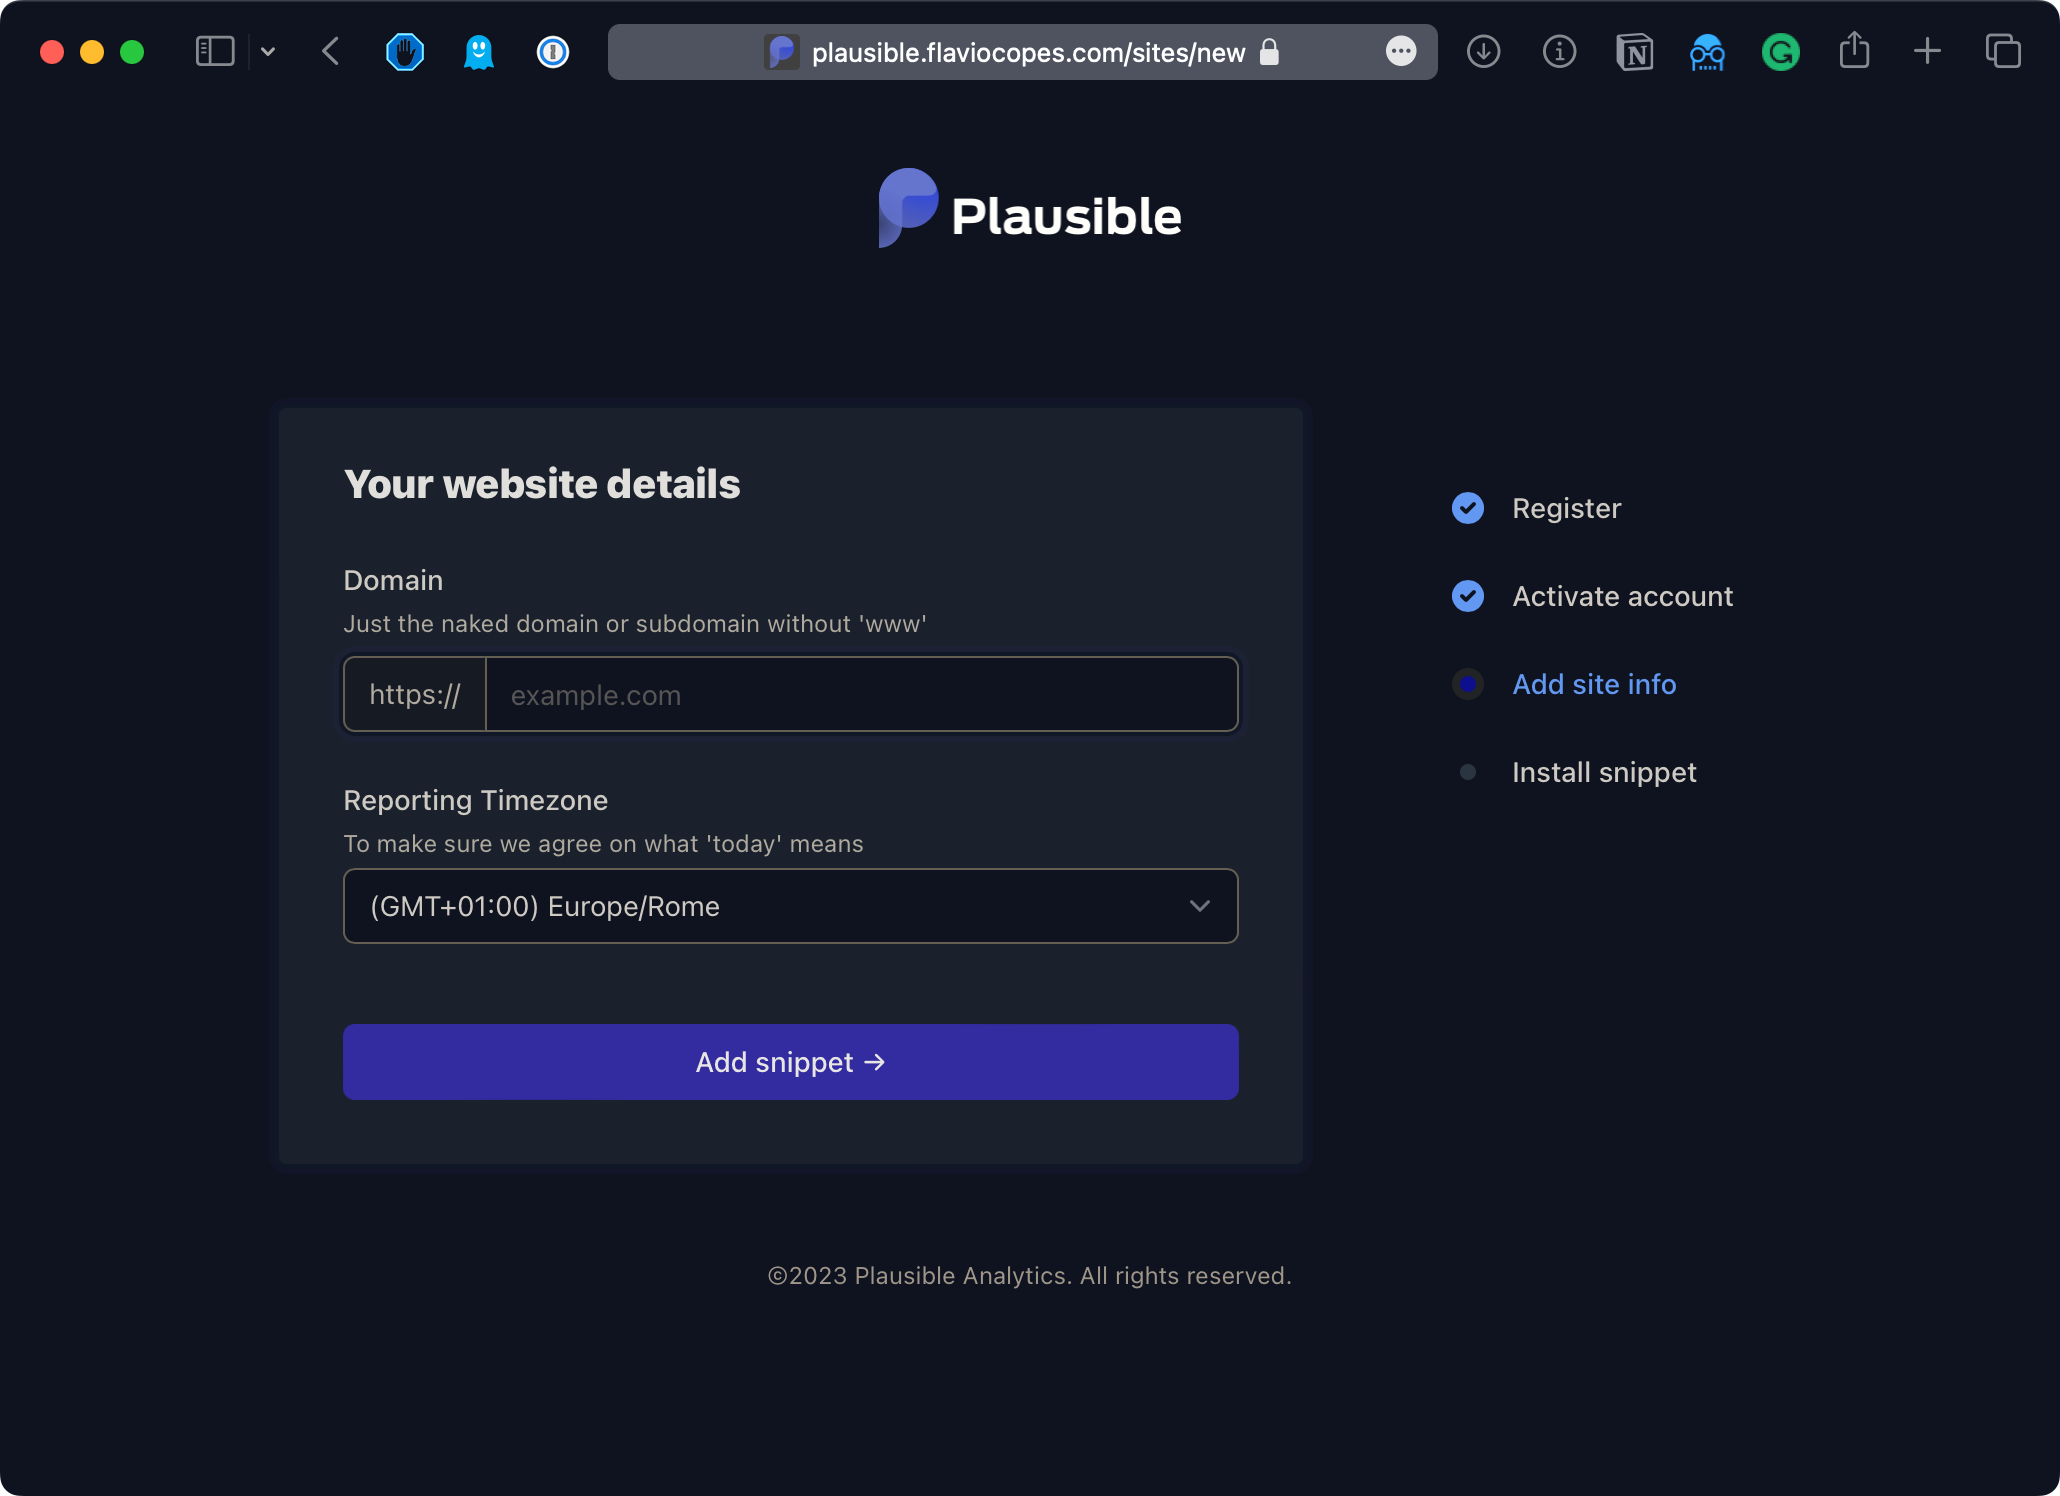
Now you can enter your details and create your user account, then add your site details:
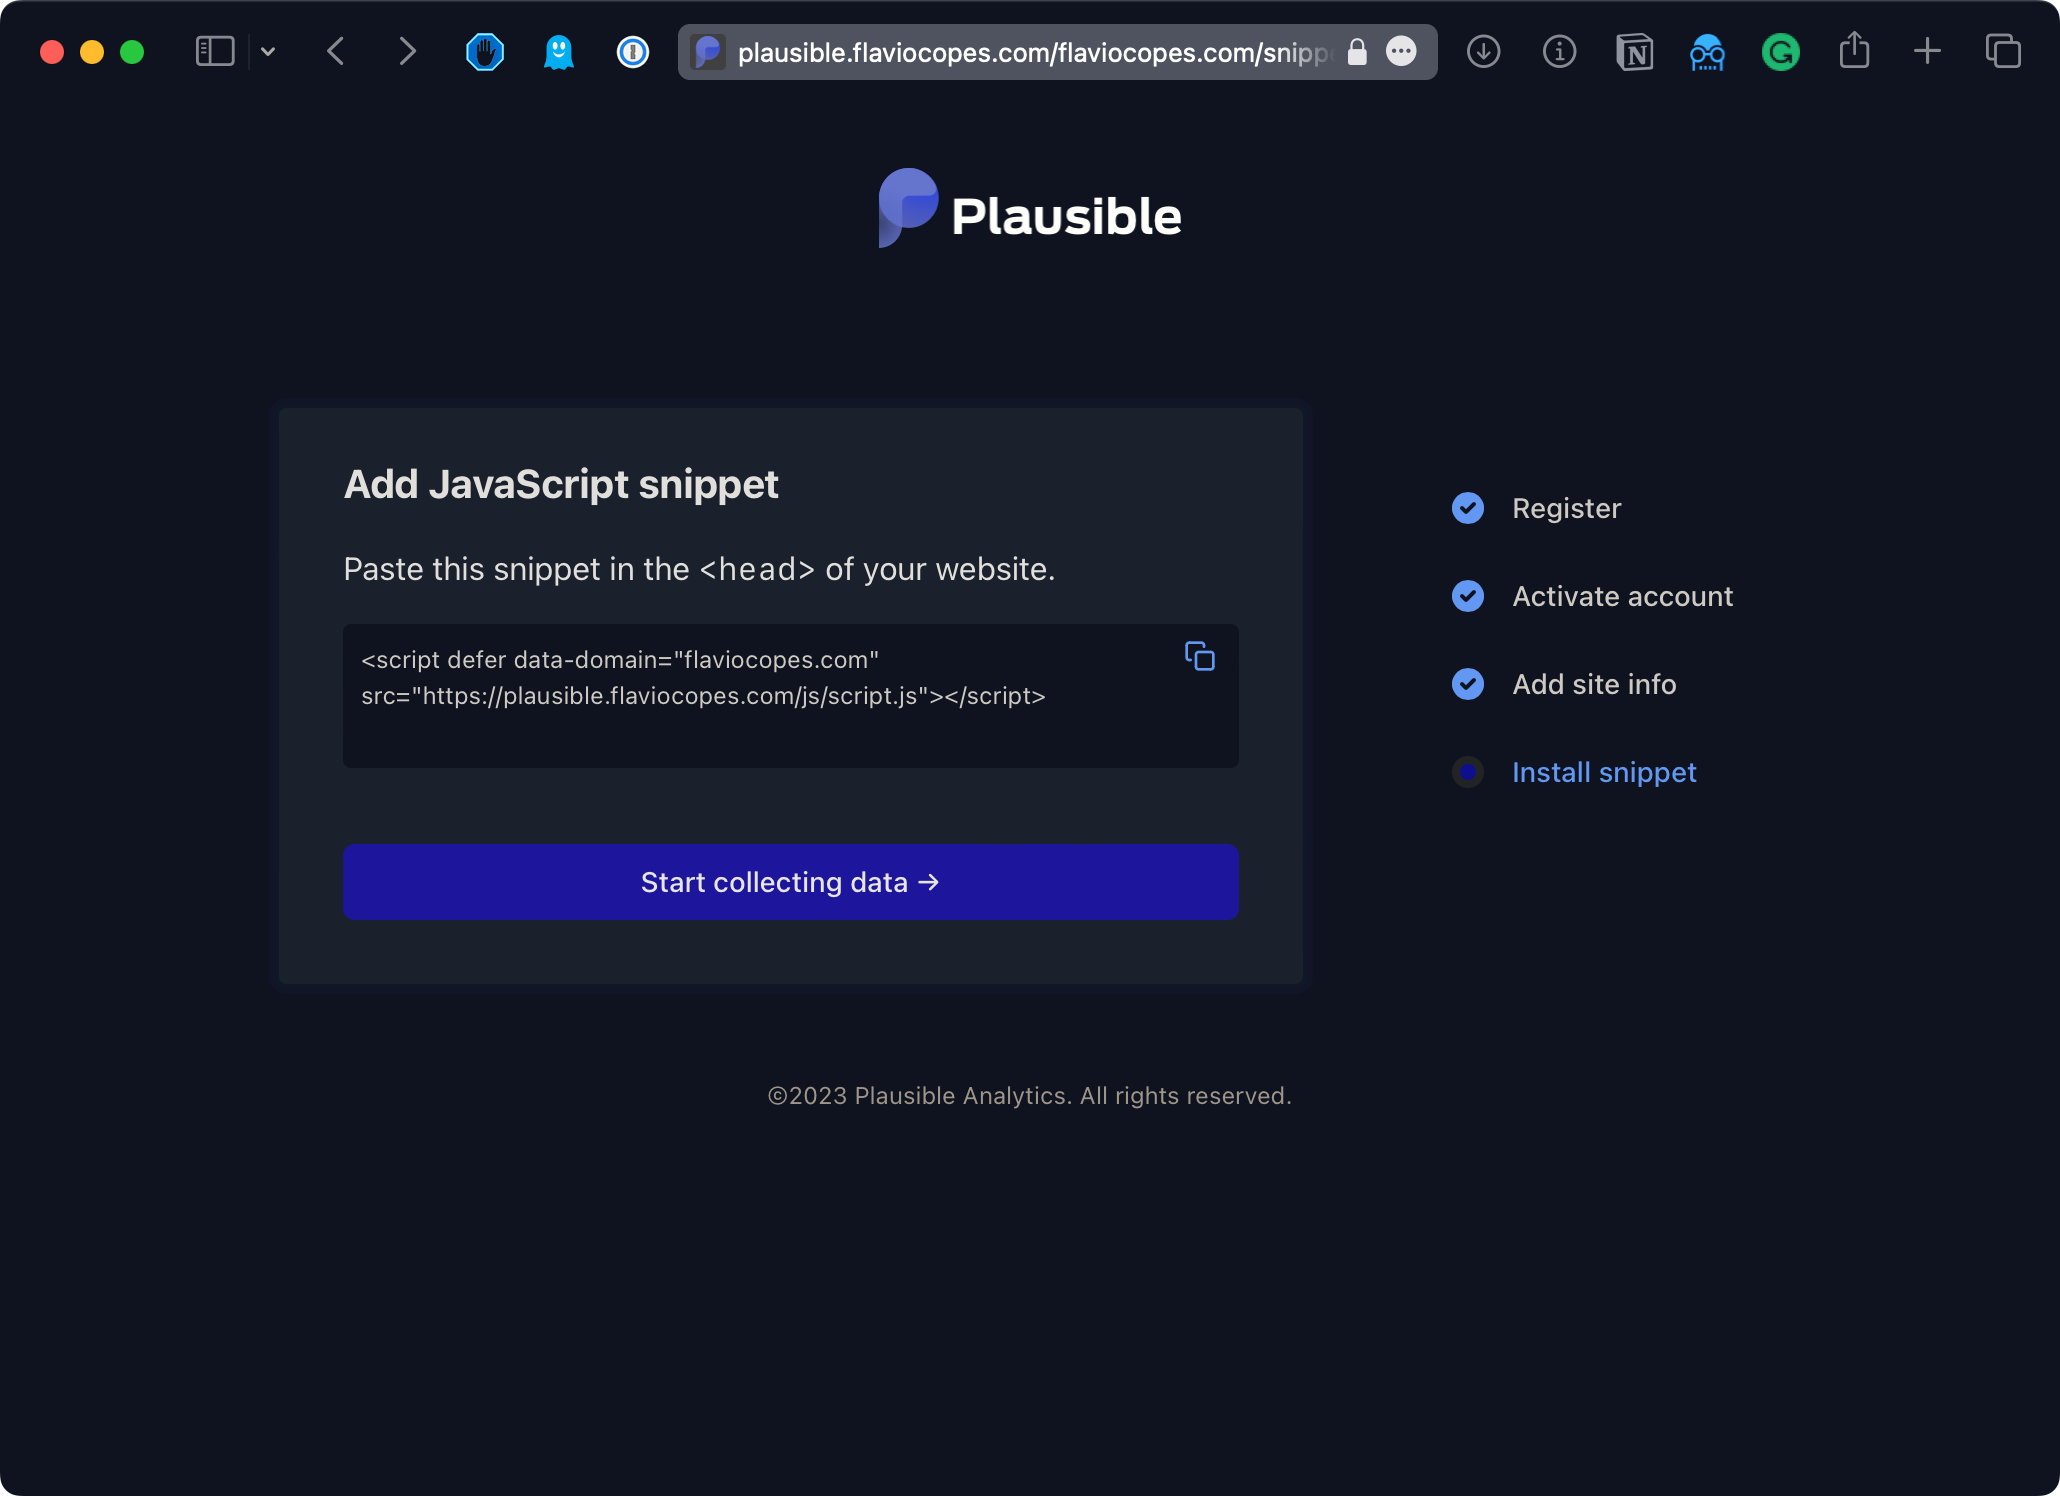
and you’re ready to go:
Now there’s a problem - anyone can create an account on your Plausible instance.
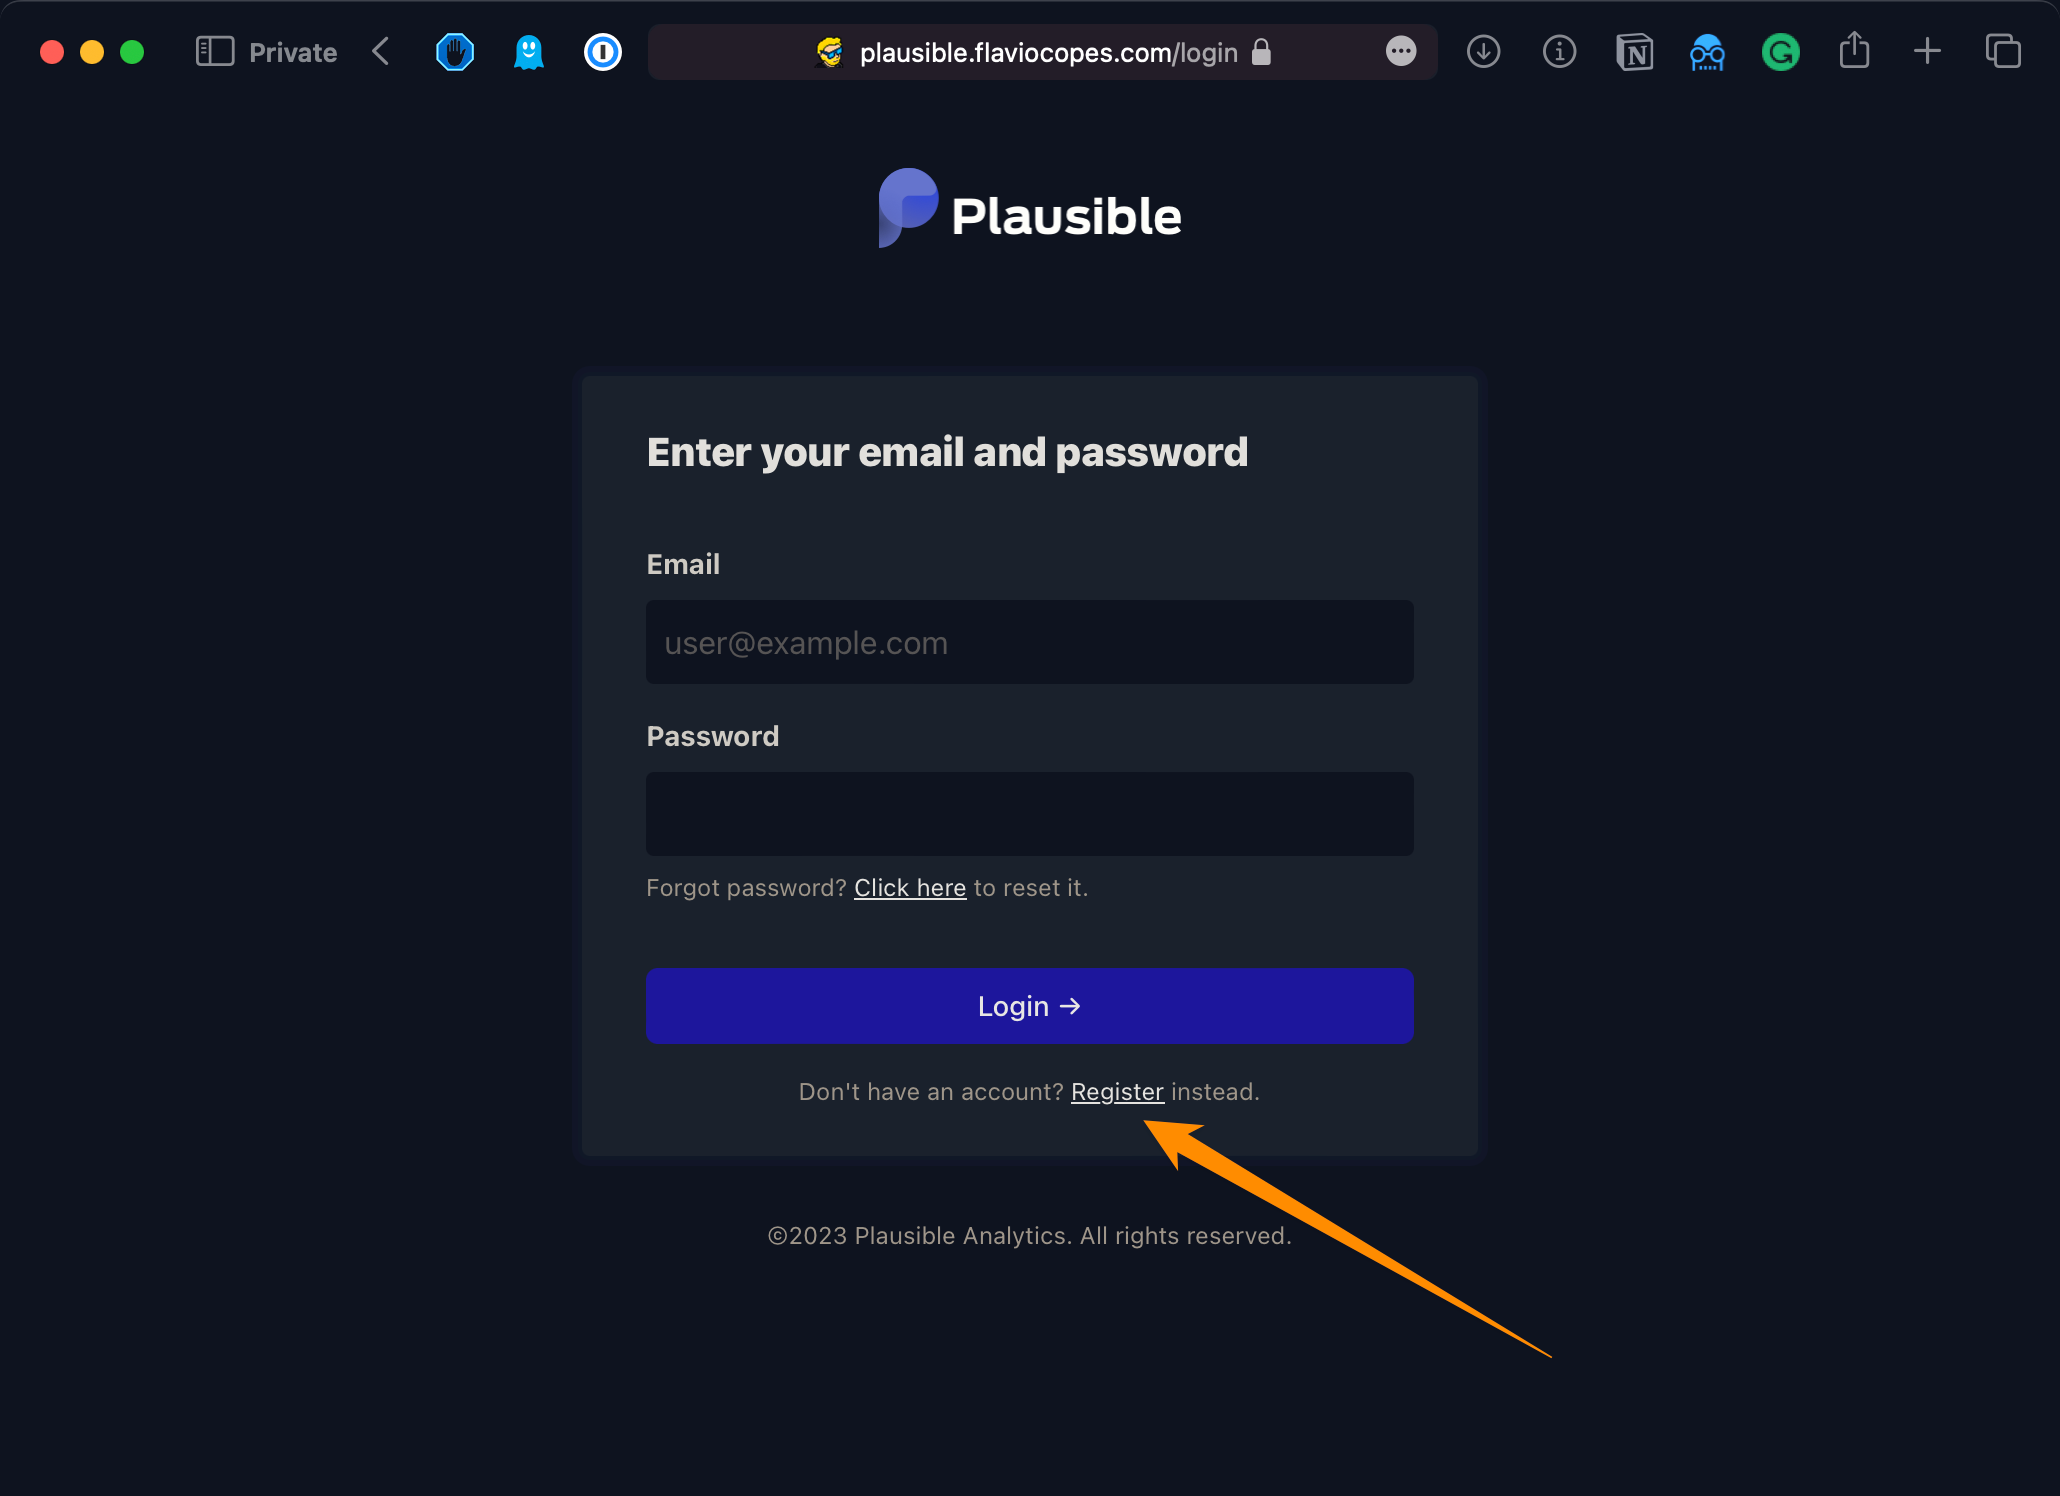
It’s ok to set up multiple accounts.
But once you are “done” with everyone supposed to track analytics on your instance, you need to close that down.
Open plausible-conf.env with nano:
nano plausible-conf.envand add this line:
DISABLE_REGISTRATION=trueSave the file.
We need to reload Plausible.
Use this command:
docker-compose down --remove-orphansand then
docker-compose up -d(docker-compose restart didn’t apply the change, in case you try)
That’s it.
I hope this tutorial can be helpful in setting up Plausible.
It’s a great tool.
And don’t forget to become a sponsor of the project.
Related posts about tutorial: