SwiftUI List: rows, sections, ForEach and list styles
By Flavio Copes
Learn how to use the List view in SwiftUI to show data in rows, group items with Section, fill rows with ForEach, and change the look with listStyle.
The List view is one of the most useful views you’ll use in SwiftUI.
List {

}
Inside it, you can put a series of views, like Text for example:
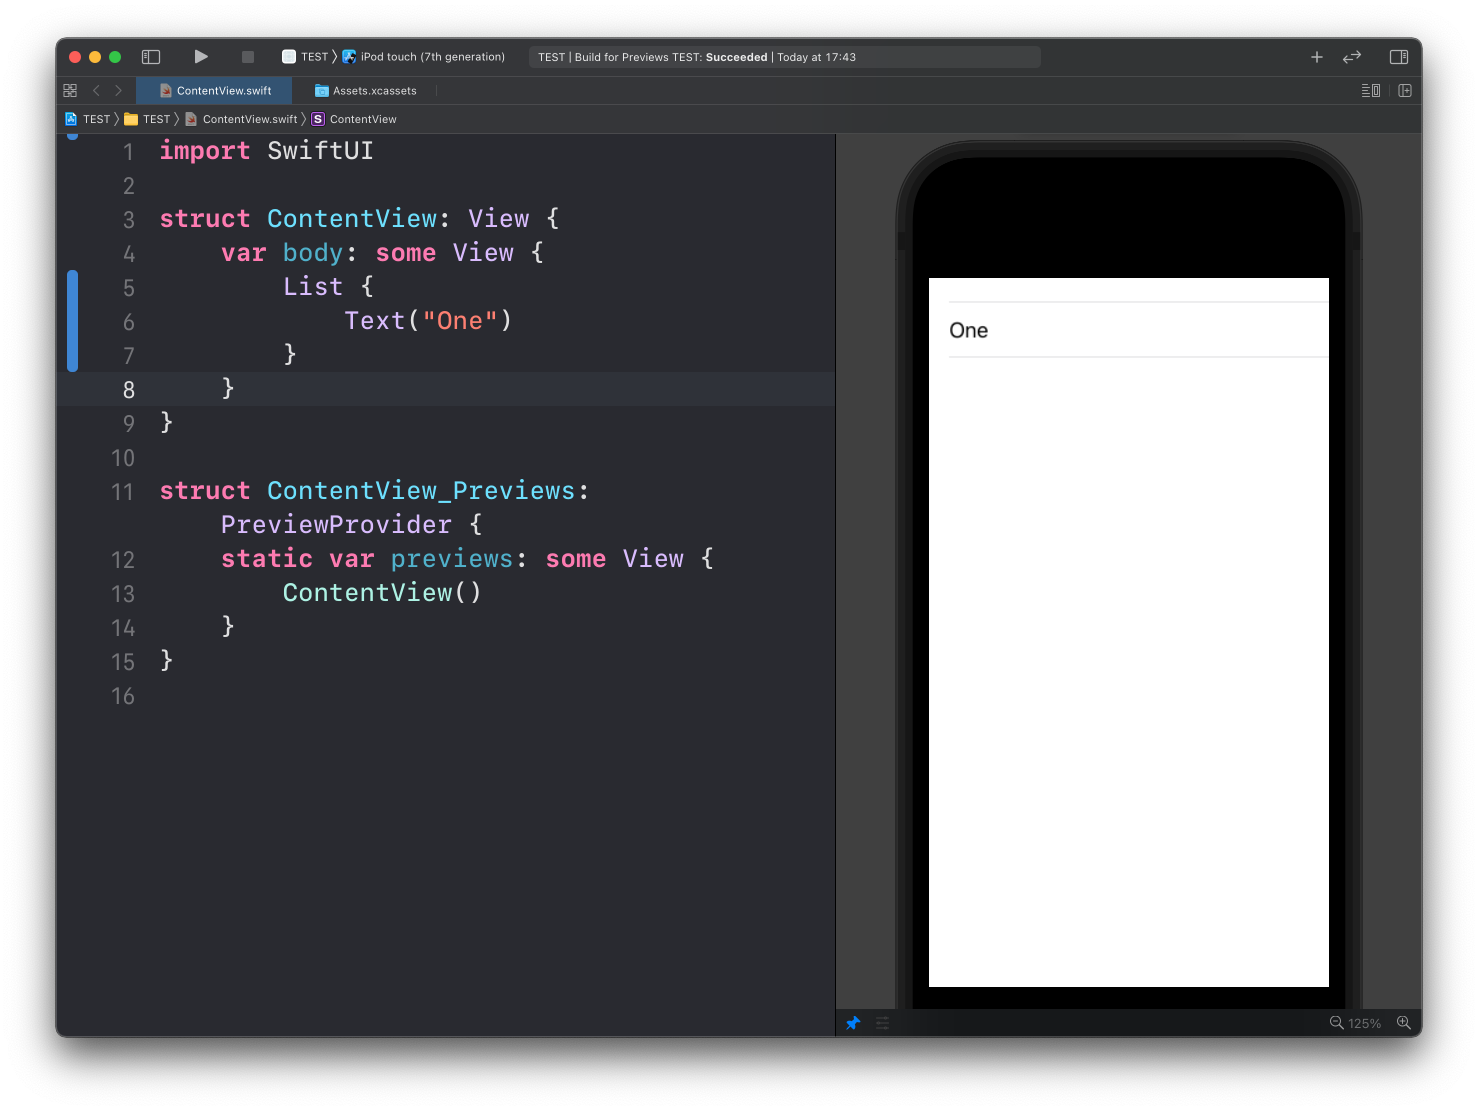
See? List recognizes the Text child view, and puts it inside a row.
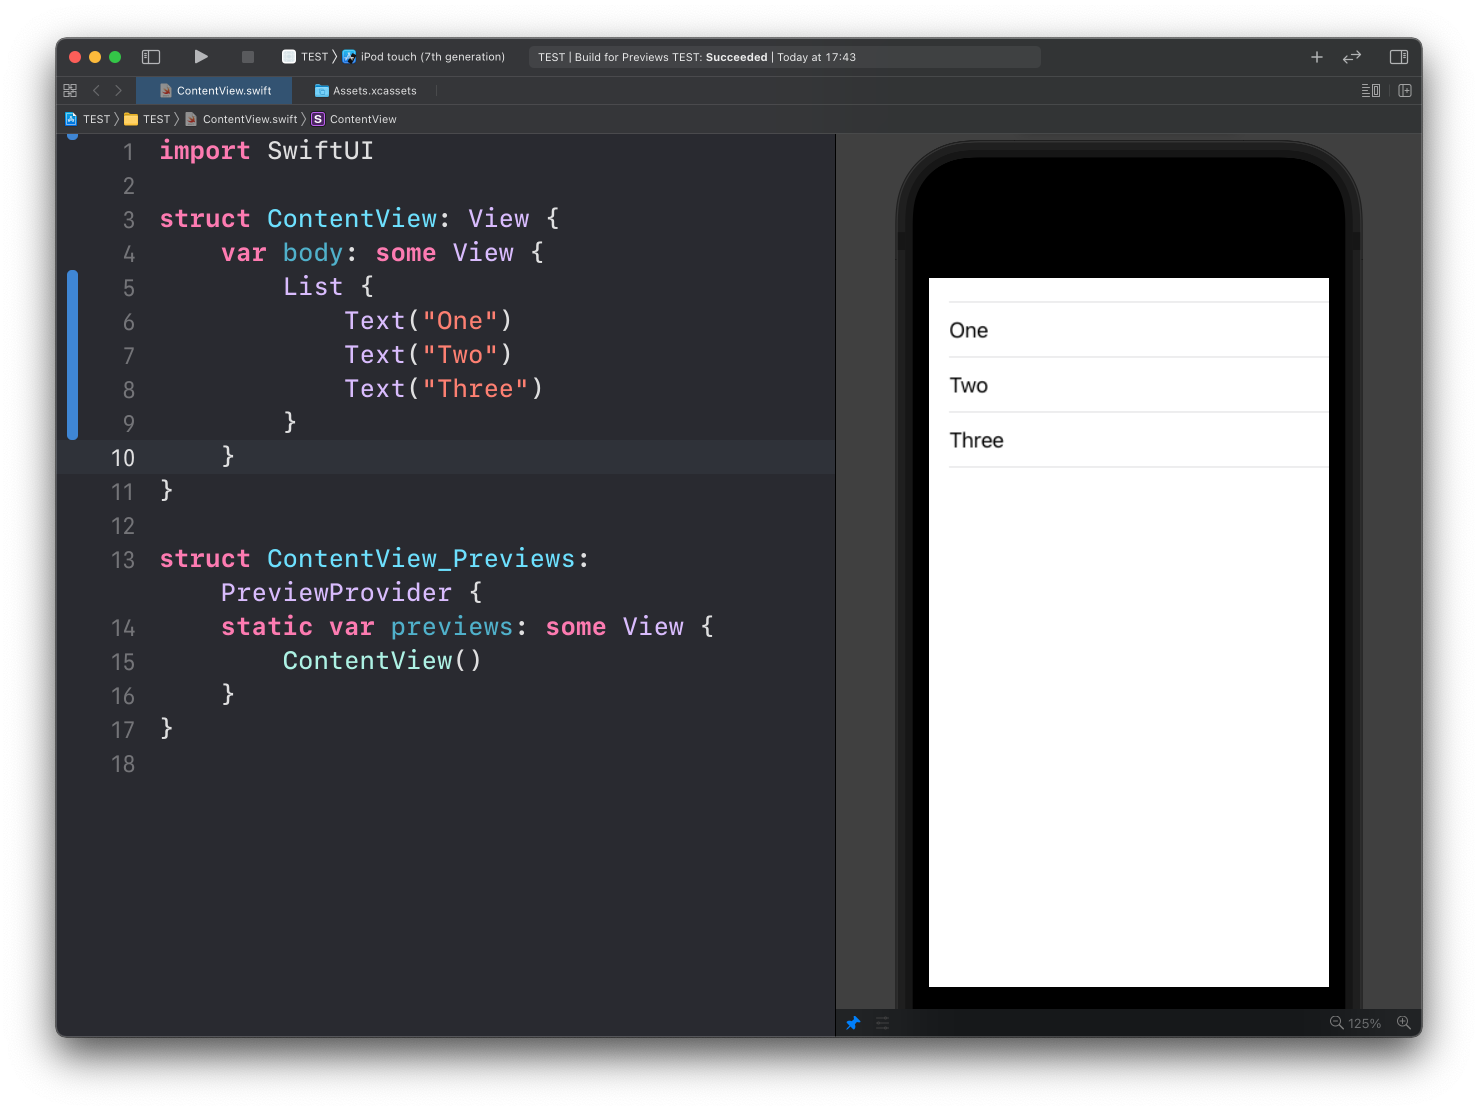
You can put more than one, and each child of List will be put on its own row:
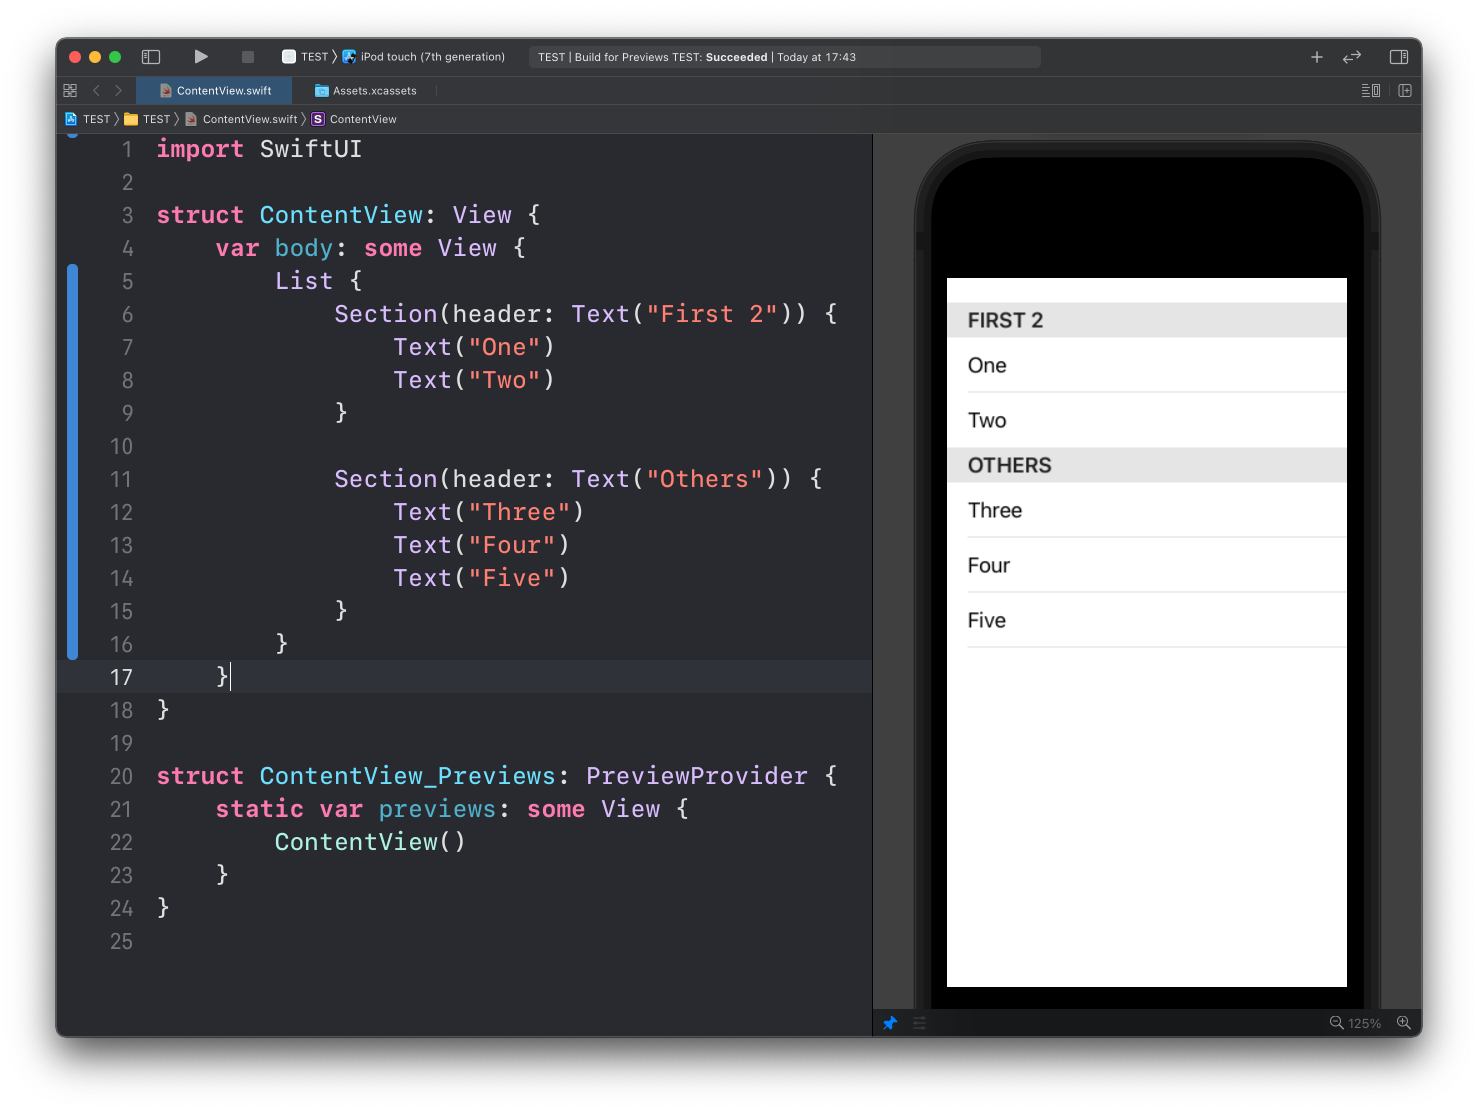
Inside a list, you can group items using the Section view:
List {
    Section("First 2") {
        Text("One")
        Text("Two")
    }
    Section("Others") {
        Text("Three")
        Text("Four")
        Text("Five")
    }
}
Section("First 2") is a shorthand for Section(header: Text("First 2")), which is the form you see in the screenshot. Both work.
Hard-coded rows are fine for small lists. For an array, put a ForEach inside the List. If your type conforms to Identifiable, you can skip the id parameter:
struct Fruit: Identifiable {
    let id = UUID()
    let name: String
}

let fruits = [
    Fruit(name: "Apple"),
    Fruit(name: "Pear"),
    Fruit(name: "Orange")
]

List {
    ForEach(fruits) { fruit in
        Text(fruit.name)
    }
}
I cover ranges, the id parameter and List iterating directly over data in the ForEach post.
You can put a NavigationLink in a row when the list sits inside a navigation stack. Tapping the row pushes the destination:
NavigationStack {
    List {
        NavigationLink("Apple") {
            Text("Apple details")
        }
    }
}
The listStyle() modifier of List can let you customize the List appearance. Pass one of the built-in styles:
.insetGrouped.inset.sidebar.grouped.plain
For example here’s .insetGrouped. The screenshots below use the longer InsetGroupedListStyle() spelling, which is the same thing:
List {
		//...
}.listStyle(.insetGrouped)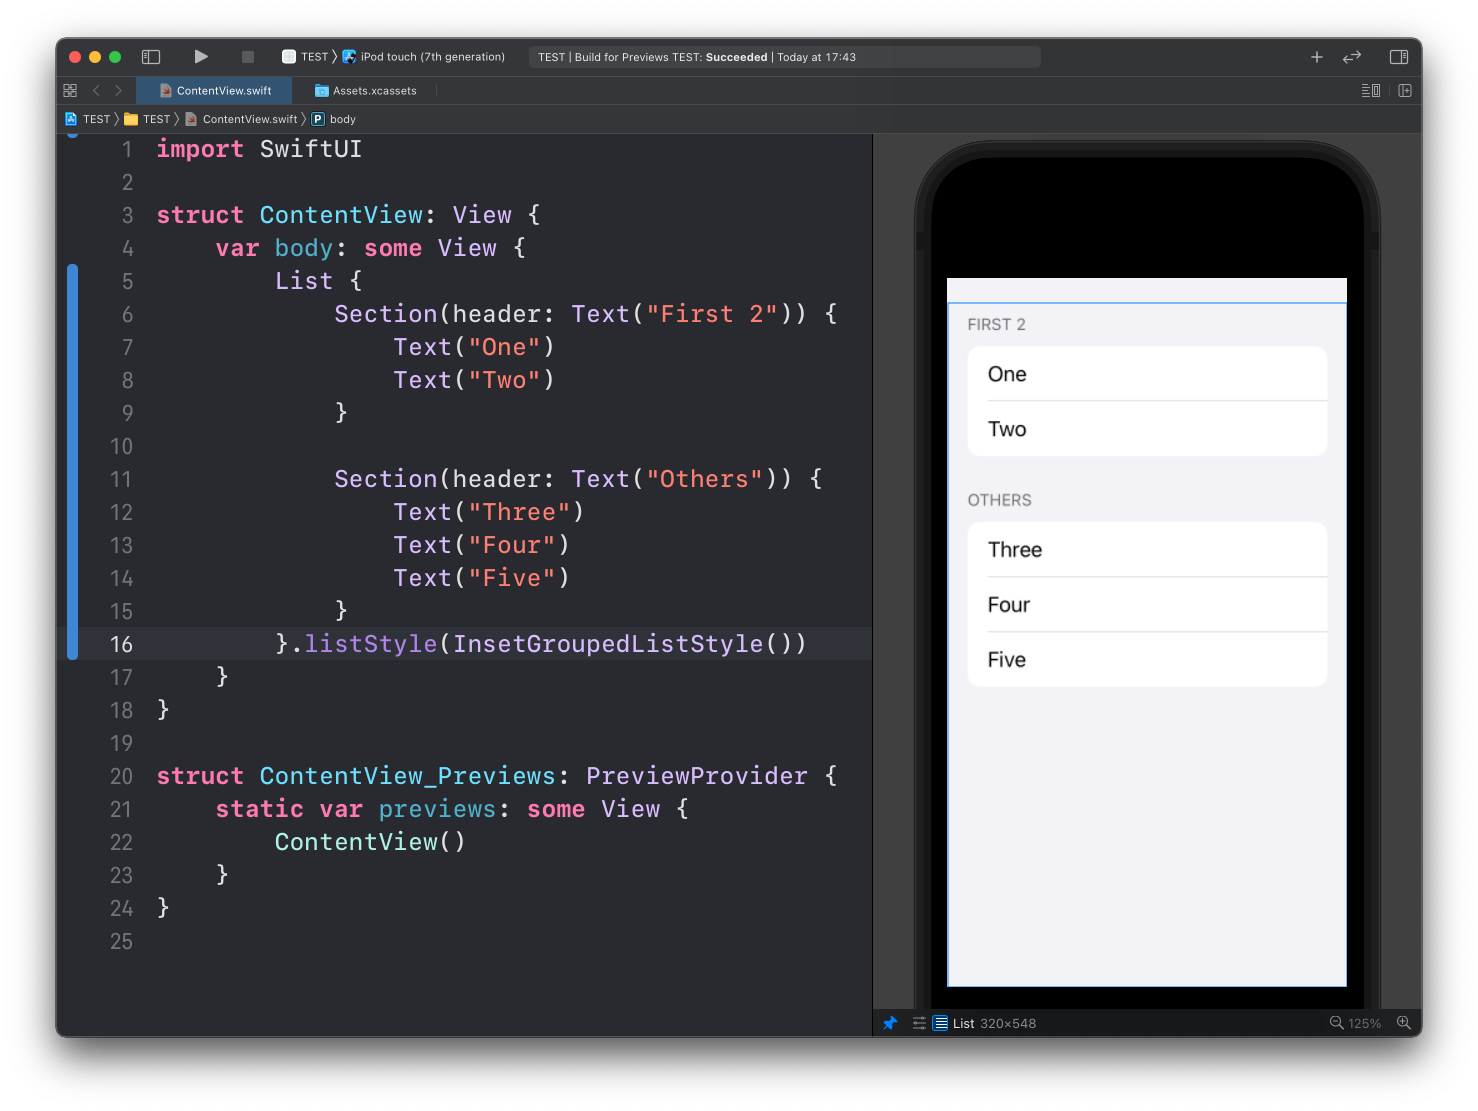
And here’s .grouped:
List {
		//...
}.listStyle(.grouped)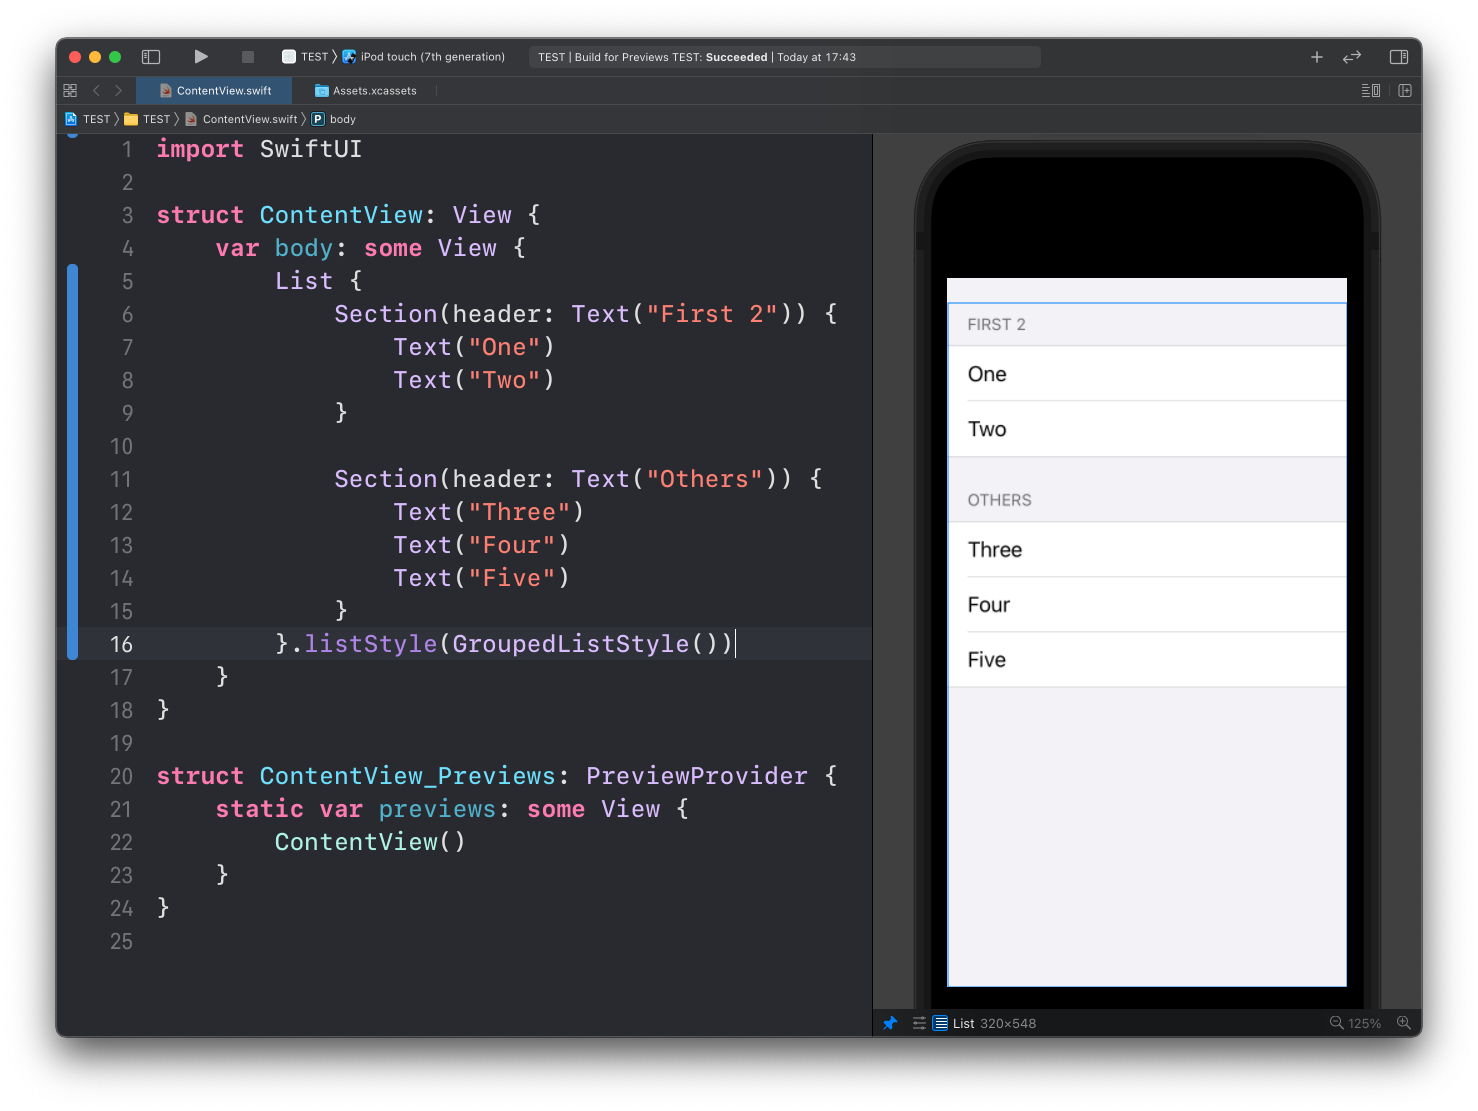
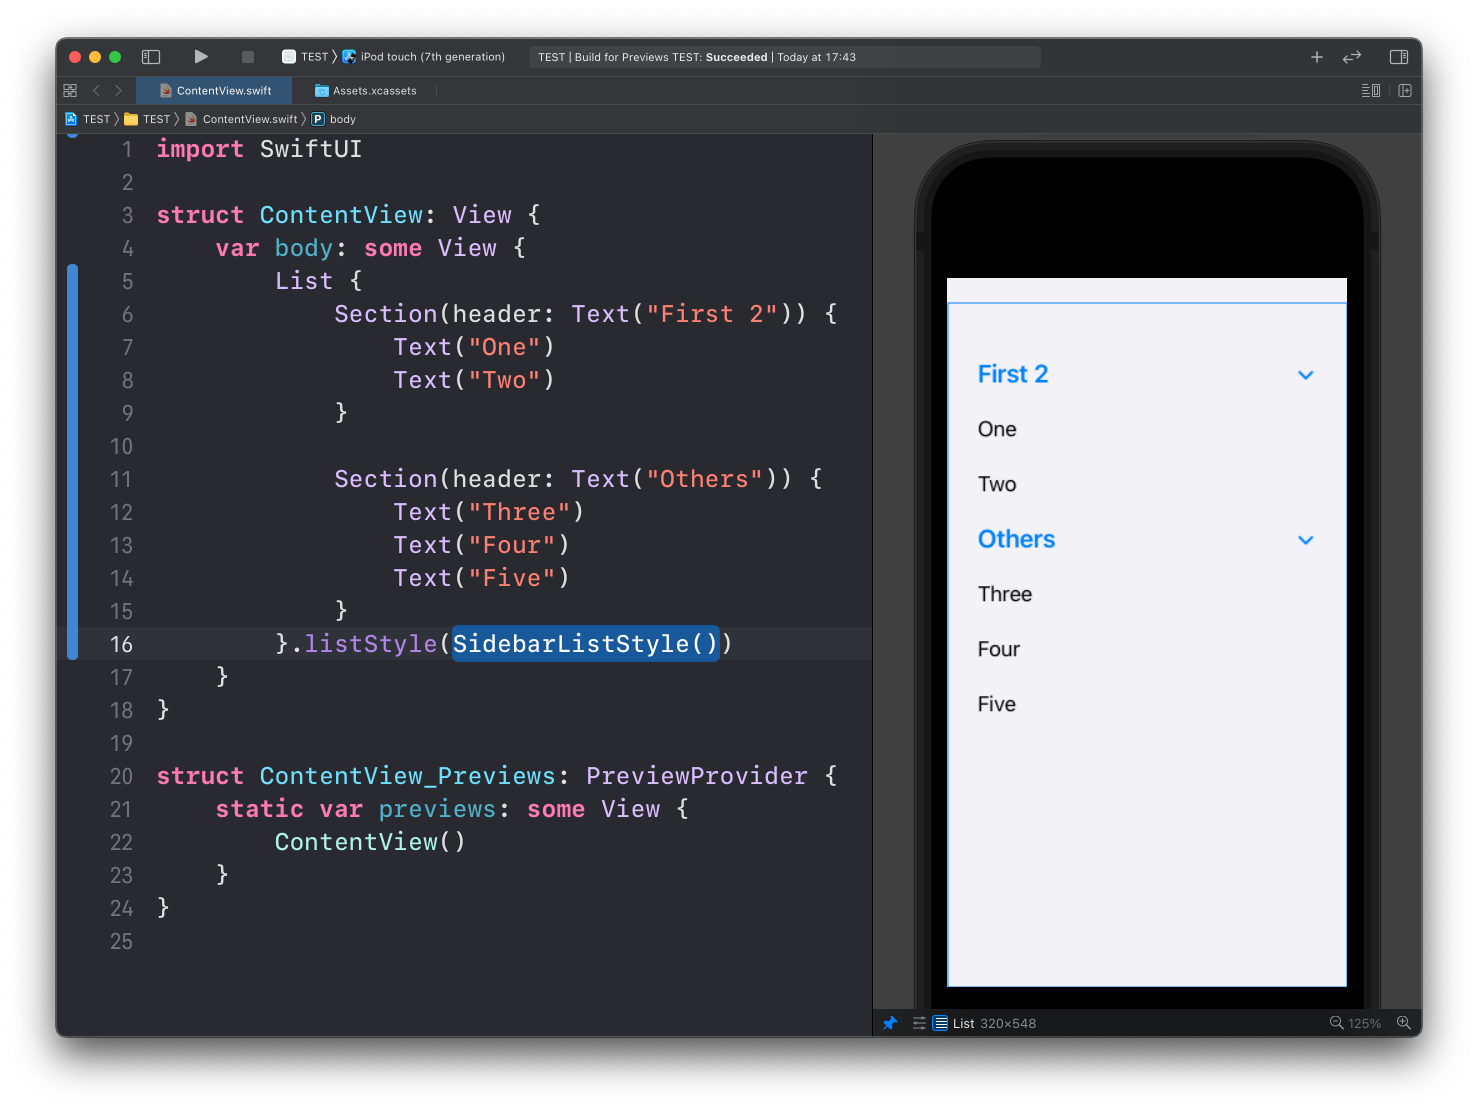
Here’s .sidebar:
Want me to talk about your product? You can sponsor this site.
Related posts about swift: