Tutorial: create a Spreadsheet using React
By Flavio Copes
A tutorial to build a simple spreadsheet in React, like a Google Sheets or Excel clone, with Table and Cell components, formulas, and local storage.
- Related content
- First steps
- Build a simple spreadsheet
- Introducing formulas
- Improve performance
- Saving the content of the table
- Wrapping up
Creating a stripped down version of a spreadsheet like Google Sheets is really a good example of showing many of the capabilities of React.
At the end of this tutorial you’ll have a working, configurable, reusable spreadsheet React Component to power all your calculations 🙂
Related content
This tutorial covers the following topics for which I wrote dedicated guides:
You might want to check them out to get an introduction to these topics if you’re new to them.
First steps
The code of this tutorial is available on GitHub at https://github.com/flaviocopes/react-spreadsheet-component
First thing, we’re going to detail what we’re going to build. We’ll create a Table component that will have a fixed number of rows. Each row has the same number of columns, and into each column we’ll load a Cell component.
We’ll be able to select any cell, and type any value into it. In addition, we’ll be able to execute formulas on those cells, effectively creating a working spreadsheet that won’t miss anything from Excel or Google Sheets 😏 </sarcasm>.
Here’s a little demo gif:
The tutorial first dives into the basic building blocks of the spreadsheet, and then goes into adding more advanced functionality such as:
- adding the ability to calculate formulas
- optimizing performance
- saving the content to local storage
Build a simple spreadsheet
If you don’t have create-react-app installed already, this is a good time to do that:
npm install -g create-react-appThen let’s start with
npx create-react-app spreadsheet
cd spreadsheet
npm start
and the React app will launch on localhost:3000:

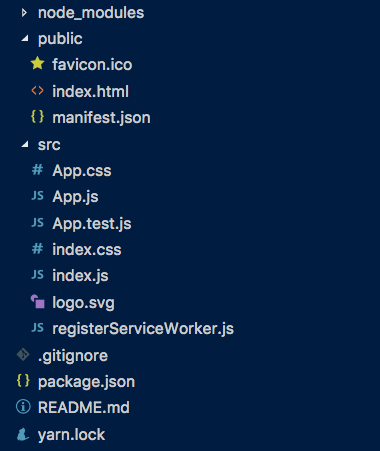
This procedure creates a number of files in the spreadsheet folder:
The one we should focus now is App.js. This file out of the box contains the following code:
import React, { Component } from 'react';
import logo from './logo.svg';
import './App.css';

class App extends Component {
  render() {
    return (
      <div className="App">
        <header className="App-header">
          <img src={logo} className="App-logo" alt="logo" />
          <h1 className="App-title">Welcome to React</h1>
        </header>
        <p className="App-intro">
          To get started, edit <code>src/App.js</code> and
          save to reload.
        </p>
      </div>
    );
  }
}

export default App;
Let’s wipe out the bulk of this code and just replace it with a simple render of the Table component. We pass it 2 properties: x the number of columns and y the number of rows.
import React from 'react'
import Table from './components/Table'

const App = () =>
  (<div style={{ width: 'max-content' }}>
    <Table x={4} y={4} />
  </div>)

export default App
Here’s the Table component, which we store in components/Table.js:
import React from 'react'
import PropTypes from 'prop-types'
import Row from './Row'

export default class Table extends React.Component {
  constructor(props) {
    super(props)

    this.state = {
      data: {},
    }
  }

  handleChangedCell = ({ x, y }, value) => {
    const modifiedData = Object.assign({}, this.state.data)
    if (!modifiedData[y]) modifiedData[y] = {}
    modifiedData[y][x] = value
    this.setState({ data: modifiedData })
  }

  updateCells = () => {
    this.forceUpdate()
  }

  render() {
    const rows = []

    for (let y = 0; y < this.props.y + 1; y += 1) {
      const rowData = this.state.data[y] || {}
      rows.push(
        <Row
          handleChangedCell={this.handleChangedCell}
          updateCells={this.updateCells}
          key={y}
          y={y}
          x={this.props.x + 1}
          rowData={rowData}
        />,
      )
    }
    return (
      <div>
        {rows}
      </div>
    )
  }
}

Table.propTypes = {
  x: PropTypes.number.isRequired,
  y: PropTypes.number.isRequired,
}
The Table component manages its own state. Its render() method creates a list of Row components, and passes to each one the part of state that bothers them: the row data. The Row component will in turn pass this data down to multiple Cell components, which we’ll introduce in a minute.
We use the y row number as the key property, which is mandatory to distinguish multiple rows.
We pass to each Row component the handleChangedCell method as a prop. When a row calls this method, it passes an (x, y) tuple indicating the row, and the new value that’s been inserted into it, and we update the state accordingly.
Let’s examine the Row component, stored in components/Row.js:
import React from 'react'
import PropTypes from 'prop-types'
import Cell from './Cell'

const Row = (props) => {
  const cells = []
  const y = props.y
  for (let x = 0; x < props.x; x += 1) {
    cells.push(
      <Cell
        key={`${x}-${y}`}
        y={y}
        x={x}
        onChangedValue={props.handleChangedCell}
        updateCells={props.updateCells}
        value={props.rowData[x] || ''}
      />,
    )
  }
  return (
    <div>
      {cells}
    </div>
  )
}

Row.propTypes = {
  handleChangedCell: PropTypes.func.isRequired,
  updateCells: PropTypes.func.isRequired,
  x: PropTypes.number.isRequired,
  y: PropTypes.number.isRequired,
  rowData: PropTypes.shape({
    string: PropTypes.string,
  }).isRequired,
}

export default Row
Same as the Table component, here we’re building an array of Cell components and we put it in the cells variable, which the component renders.
We pass the x, y coordinates combination as the key, and we pass down as a prop the current state of that cell value using value={props.rowData[x] || ''}, defaulting the state to an empty string if not set.
Let’s now dive into the Cell, the core (and last) component of our spreadsheet!
import React from 'react'
import PropTypes from 'prop-types'

/**
 * Cell represents the atomic element of a table
 */
export default class Cell extends React.Component {
  constructor(props) {
    super(props)
    this.state = {
      editing: false,
      value: props.value,
    }
    this.display = this.determineDisplay(
      { x: props.x, y: props.y },
      props.value
    )
    this.timer = 0
    this.delay = 200
    this.prevent = false
  }

  /**
   * Add listener to the `unselectAll` event used to broadcast the
   * unselect all event
   */
  componentDidMount() {
    window.document.addEventListener('unselectAll',
      this.handleUnselectAll)
  }

  /**
   * Before updating, execute the formula on the Cell value to
   * calculate the `display` value. Especially useful when a
   * redraw is pushed upon this cell when editing another cell
   * that this might depend upon
   */
  componentWillUpdate() {
    this.display = this.determineDisplay(
      { x: this.props.x, y: this.props.y }, this.state.value)
  }

  /**
   * Remove the `unselectAll` event listener added in
   * `componentDidMount()`
   */
  componentWillUnmount() {
    window.document.removeEventListener('unselectAll',
      this.handleUnselectAll)
  }

  /**
   * When a Cell value changes, re-determine the display value
   * by calling the formula calculation
   */
  onChange = (e) => {
    this.setState({ value: e.target.value })
    this.display = this.determineDisplay(
      { x: this.props.x, y: this.props.y }, e.target.value)
  }

  /**
   * Handle pressing a key when the Cell is an input element
   */
  onKeyPressOnInput = (e) => {
    if (e.key === 'Enter') {
      this.hasNewValue(e.target.value)
    }
  }

  /**
   * Handle pressing a key when the Cell is a span element,
   * not yet in editing mode
   */
  onKeyPressOnSpan = () => {
    if (!this.state.editing) {
      this.setState({ editing: true })
    }
  }

  /**
   * Handle moving away from a cell, stores the new value
   */
  onBlur = (e) => {
    this.hasNewValue(e.target.value)
  }

  /**
   * Used by `componentDid(Un)Mount`, handles the `unselectAll`
   * event response
   */
  handleUnselectAll = () => {
    if (this.state.selected || this.state.editing) {
      this.setState({ selected: false, editing: false })
    }
  }

  /**
   * Called by the `onBlur` or `onKeyPressOnInput` event handlers,
   * it escalates the value changed event, and restore the editing
   * state to `false`.
   */
  hasNewValue = (value) => {
    this.props.onChangedValue(
      {
        x: this.props.x,
        y: this.props.y,
      },
      value,
    )
    this.setState({ editing: false })
  }

  /**
   * Emits the `unselectAll` event, used to tell all the other
   * cells to unselect
   */
  emitUnselectAllEvent = () => {
    const unselectAllEvent = new Event('unselectAll')
    window.document.dispatchEvent(unselectAllEvent)
  }

  /**
   * Handle clicking a Cell.
   */
  clicked = () => {
    // Prevent click and double click to conflict
    this.timer = setTimeout(() => {
      if (!this.prevent) {
        // Unselect all the other cells and set the current
        // Cell state to `selected`
        this.emitUnselectAllEvent()
        this.setState({ selected: true })
      }
      this.prevent = false
    }, this.delay)
  }

  /**
   * Handle doubleclicking a Cell.
   */
  doubleClicked = () => {
    // Prevent click and double click to conflict
    clearTimeout(this.timer)
    this.prevent = true

    // Unselect all the other cells and set the current
    // Cell state to `selected` & `editing`
    this.emitUnselectAllEvent()
    this.setState({ editing: true, selected: true })
  }

  determineDisplay = ({ x, y }, value) => {
    return value
  }

  /**
   * Calculates a cell's CSS values
   */
  calculateCss = () => {
    const css = {
      width: '80px',
      padding: '4px',
      margin: '0',
      height: '25px',
      boxSizing: 'border-box',
      position: 'relative',
      display: 'inline-block',
      color: 'black',
      border: '1px solid #cacaca',
      textAlign: 'left',
      verticalAlign: 'top',
      fontSize: '14px',
      lineHeight: '15px',
      overflow: 'hidden',
      fontFamily: 'Calibri, \'Segoe UI\', Thonburi,
        Arial, Verdana, sans-serif',
    }

    if (this.props.x === 0 || this.props.y === 0) {
      css.textAlign = 'center'
      css.backgroundColor = '#f0f0f0'
      css.fontWeight = 'bold'
    }

    return css
  }

  render() {
    const css = this.calculateCss()

    // column 0
    if (this.props.x === 0) {
      return (
        <span style={css}>
          {this.props.y}
        </span>
      )
    }

    // row 0
    if (this.props.y === 0) {
      const alpha = ' abcdefghijklmnopqrstuvwxyz'.split('')
      return (
        <span
          onKeyPress={this.onKeyPressOnSpan}
          style={css}
          role="presentation">
          {alpha[this.props.x]}
        </span>
      )
    }

    if (this.state.selected) {
      css.outlineColor = 'lightblue'
      css.outlineStyle = 'dotted'
    }

    if (this.state.editing) {
      return (
        <input
          style={css}
          type="text"
          onBlur={this.onBlur}
          onKeyPress={this.onKeyPressOnInput}
          value={this.state.value}
          onChange={this.onChange}
          autoFocus
        />
      )
    }
    return (
      <span
        onClick={e => this.clicked(e)}
        onDoubleClick={e => this.doubleClicked(e)}
        style={css}
        role="presentation"
      >
        {this.display}
      </span>
    )
  }
}

Cell.propTypes = {
  onChangedValue: PropTypes.func.isRequired,
  x: PropTypes.number.isRequired,
  y: PropTypes.number.isRequired,
  value: PropTypes.string.isRequired,
}
Quite a bit to discuss here! But first, you should be able to finally see something in your browser, and this something seems already working quite good:
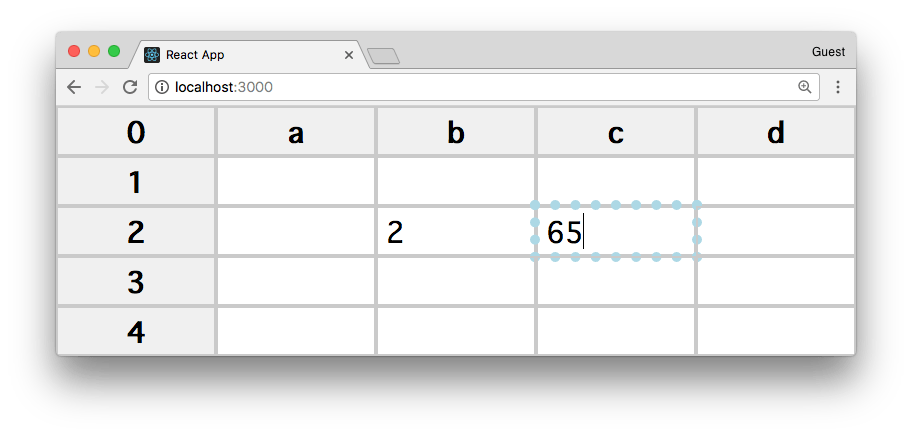
It’s not much, but we can already edit the cells content.
Let’s examine the code.
In the constructor we set some internal state properties that we’ll need later, and we also initialize the this.display property based upon props.value, which is used in the render() method. Why we do this? Because later when we’ll add the option to store th table data in local storage, we’ll be able to initialize a cell with a value instead of an empty value.
At the moment, props.value will always have an empty value, so all the cells are initialized empty.
When a Cell value changes, I escalate the updateCells event to Table which forces an update of the whole component.
When a Cell is selected, I trigger the selected state which I use to add some CSS attributes (outline). This could have been left to a CSS job, but I decided to factor it in as a state property so I could optionally later control multiple cells selection.
When a Cell is selected, it emits a unselectAll plain JS event, which allows sibling cells to communicate. It is also instrumental to clear selection across multiple table instances on the page, which I considered a good behaviour and a natural UX feat.
A Cell can be clicked or double-clicked, and I introduced a timer to prevent conflicts between these 2 events. Clicking a cell select it, while double-clicking allows editing by switching the span normally used to render the table into an input field, and you can enter any value.
So wrapping up a Table renders a list of y Row components, which in turn render x Cell components each.
In the current implementation Row is not much more than a proxy; it is responsible for the creation of the Cells that compose a row, but aside from this it just passes events up the hierarchy to the Table via props.
Introducing formulas
The spreadsheet at this point is nice and all, but the real power comes from being able to execute formulas: sum values, reference other cells, and so on.
I decided to use this pretty nice library that handles Excel formulas: https://github.com/handsontable/formula-parser so we can get full compatibility with the most popular formulas for free, without having to code them ourselves.
The library seems quite actively developed, and has a good test suite so we can run the test ourselves to check if something goes wrong.
We can run npm install hot-formula-parser and then restart our app with npm start.
We did the first app dissection from top to bottom, let’s now start from the bottom.
In the Cell component, when determining the value of an item we run the determineDisplay() method:
determineDisplay = ({ x, y }, value) => {
  return value
}
It’s very simple, because it is missing the bulk of the functionality. Determining the value is simple if it’s just a value, but it’s more complicated if we need to calculate the value based on a formula. A formula (in our little spreadsheet) always starts with the equal sign =, so whenever we find it as the first char of a value, we run the formula computation on it, by calling the executeFormula() method passed as one of the props of Cell:
export default class Cell extends React.Component {
  //...

  determineDisplay = ({ x, y }, value) => {
    if (value.slice(0, 1) === '=') {
      const res = this.props.executeFormula({ x, y },
        value.slice(1))
      if (res.error !== null) {
        return 'INVALID'
      }
      return res.result
    }
    return value
  }

  //...
}

Cell.propTypes = {
  //...
  executeFormula: PropTypes.func.isRequired,
  //...
}
We get executeFormula() from our parent component, so let’s see it in Row:
const Row = (props) => {
  //...
    cells.push(
      <Cell
        key={`${x}-${y}`}
        y={y}
        x={x}
        onChangedValue={props.handleChangedCell}
        updateCells={props.updateCells}
        value={props.rowData[x] || ''}
        executeFormula={props.executeFormula}
      />,
    )
  //...
}

Row.propTypes = {
  //...
  executeFormula: PropTypes.func.isRequired,
  //...
}
We’re passing it down from the component props to its children. Nothing complicated here. The meat of the functionality is all moved up to Table then! This is because to do anything, we must know all the state of the table, we can’t just run a formula on a cell or on a row: any formula might reference any other cell. So here is how we’ll edit Table to fit formulas:
//...
import { Parser as FormulaParser } from 'hot-formula-parser'
//...

export default class Table extends React.Component {
  constructor(props) {
    //...
    this.parser = new FormulaParser()

    // When a formula contains a cell value, this event lets us
    // hook and return an error value if necessary
    this.parser.on('callCellValue', (cellCoord, done) => {
      const x = cellCoord.column.index + 1
      const y = cellCoord.row.index + 1

      // Check if I have that coordinates tuple in the table range
      if (x > this.props.x || y > this.props.y) {
        throw this.parser.Error(this.parser.ERROR_NOT_AVAILABLE)
      }

      // Check that the cell is not self referencing
      if (this.parser.cell.x === x && this.parser.cell.y === y) {
        throw this.parser.Error(this.parser.ERROR_REF)
      }

      if (!this.state.data[y] || !this.state.data[y][x]) {
        return done('')
      }

      // All fine
      return done(this.state.data[y][x])
    })

    // When a formula contains a range value, this event lets us
    // hook and return an error value if necessary
    this.parser.on('callRangeValue',
      (startCellCoord, endCellCoord, done) => {
      const sx = startCellCoord.column.index + 1
      const sy = startCellCoord.row.index + 1
      const ex = endCellCoord.column.index + 1
      const ey = endCellCoord.row.index + 1
      const fragment = []

      for (let y = sy; y <= ey; y += 1) {
        const row = this.state.data[y]
        if (!row) {
          continue
        }

        const colFragment = []

        for (let x = sx; x <= ex; x += 1) {
          let value = row[x]
          if (!value) {
            value = ''
          }

          if (value.slice(0, 1) === '=') {
            const res = this.executeFormula({ x, y },
              value.slice(1))
            if (res.error) {
              throw this.parser.Error(res.error)
            }
            value = res.result
          }

          colFragment.push(value)
        }
        fragment.push(colFragment)
      }

      if (fragment) {
        done(fragment)
      }
    })
  }

  //...

  /**
   * Executes the formula on the `value` usign the
   * FormulaParser object
   */
  executeFormula = (cell, value) => {
    this.parser.cell = cell
    let res = this.parser.parse(value)
    if (res.error != null) {
      return res // tip: returning `res.error` shows more details
    }
    if (res.result.toString() === '') {
      return res
    }
    if (res.result.toString().slice(0, 1) === '=') {
      // formula points to formula
      res = this.executeFormula(cell, res.result.slice(1))
    }

    return res
  }

  render() {
    //...
        <Row
          handleChangedCell={this.handleChangedCell}
          executeFormula={this.executeFormula}
          updateCells={this.updateCells}
          key={y}
          y={y}
          x={this.props.x + 1}
          rowData={rowData}
        />,
    //...
  }
}
In the constructor we initialize the formula parser. We pass the executeFormula() method down to each Row, and when called we call our parser. The parser emits 2 events that we use to hook our table state to determine the value of specific cells (callCellValue) and the values of a range of cells (callRangeValue), e.g. =SUM(A1:A5).
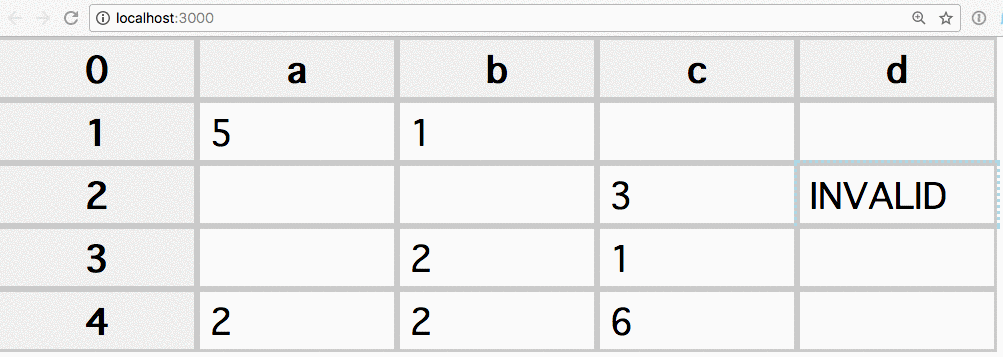
The Table.executeFormula() method is building a recursive call around the parser, because if a cell has an identity function pointing to another identity function, it will resolve the functions until it gets a plain value. In this way every cell of the table can be linked to each other, but will generate an INVALID value when a circular reference is determined, because the library has a callCellValue event that allows me to hook into the Table state and raise an error if
- the formula reference a value out of the table
- the cell is self-referencing
The inner working of each event responder is a bit tricky to get, but don’t worry about the details, focus on how it works overall.
Improve performance
The updateCells prop passed down from Table to Cell is responsible for rerendering all the cells in the table, and it’s triggered when a Cell changes its content.
This is because another Cell might reference ours in a formula, and multiple Cells could need to be updated because of a change in another Cell.
At the moment we’re blindly updating all cells, which is a lot of rerendering. Imagine a big table, and the amount of computation needed to rerender could be bad enough to cause some problems.
We need to do something: implement the shouldComponentUpdate() in Cell.
The Cell.shouldComponentUpdate() is key to avoiding performance penalties in re-rendering the whole table:
//...

  /**
   * Performance lifesaver as the cell not touched by a change can
   * decide to avoid a rerender
   */
  shouldComponentUpdate(nextProps, nextState) {
    // Has a formula value? could be affected by any change. Update
    if (this.state.value !== '' &&
        this.state.value.slice(0, 1) === '=') {
      return true
    }

    // Its own state values changed? Update
    // Its own value prop changed? Update
    if (nextState.value !== this.state.value ||
        nextState.editing !== this.state.editing ||
        nextState.selected !== this.state.selected ||
        nextProps.value !== this.props.value) {
      return true
    }

    return false
  }

//...
What this method does is: if there is a value, and this value is a formula, yes we need to update as our formula might depend on some other cell value.
Then, we check if we’re editing this cell, in which case - yes, we need to update the component.
In all other cases, no we can leave this component as-is and not rerender it.
In short, we only update formula cells, and the cell being modified.
We could improve this by keeping a graph of formula dependencies that can trigger ad-hoc re-rendering of dependent cells of the one modified, which is an optimization that with large amounts of data can be a lifesaver, but it might even be causing delays itself, so I ended up with this basic implementation.
Saving the content of the table
The last thing I want to introduce in this tutorial is how to save the data we have in the table to localStorage, so that when we reload the page, the data is still there. We can close the browser, reopen it next week, and the data will still be there.
How do we do that?
We need to hook into the handleChangedCell() method of Table, and change it from:
handleChangedCell = ({ x, y }, value) => {
  const modifiedData = Object.assign({}, this.state.data)
  if (!modifiedData[y]) modifiedData[y] = {}
  modifiedData[y][x] = value
  this.setState({ data: modifiedData })
}
to:
handleChangedCell = ({ x, y }, value) => {
  const modifiedData = Object.assign({}, this.state.data)
  if (!modifiedData[y]) modifiedData[y] = {}
  modifiedData[y][x] = value
  this.setState({ data: modifiedData })

  if (window && window.localStorage) {
    window.localStorage.setItem(this.tableIdentifier,
      JSON.stringify(modifiedData))
  }
}
so that whenever a cell is changed, we store the state into localStorage.
We set tableIdentifier in the constructor, using
this.tableIdentifier = `tableData-${props.id}`We use an id prop so that we can use multiple Table components in the same app, and they will all save on their own storage, by rendering them this way:
<Table x={4} y={4} id={'1'} />
<Table x={4} y={4} id={'2'} />
We now just need to load this state when the Table component is initialized, by adding a componentWillMount() method to Table:
componentWillMount() {
  if (this.props.saveToLocalStorage &&
      window &&
      window.localStorage) {
    const data = window.localStorage.getItem(this.tableIdentifier)
    if (data) {
      this.setState({ data: JSON.parse(data) })
    }
  }
}
Wrapping up
That’s it for this tutorial!
Don’t miss the in-depth coverage of the topics we talked about:
Related posts about react: