How to run a Web Server on an Arduino
By Flavio Copes
Learn how to run a web server on a WiFi Arduino, building an HTTP response on top of a TCP WiFiServer on port 80 so you can reach the board from your browser.
In this tutorial I’ll show you how to start a Web Server on an Arduino device with WiFi, like my Arduino MKR WiFi 1010.
We’ll connect to an existing WiFi network, and we’ll be able to interact with the Arduino from our browser via HTTP.
This is very interesting for a variety of applications. From simple check of the sensors data, to performing actions based on the HTTP request performed.
We’ll start from this program defined in the Connect to a WiFi network using an Arduino tutorial:
#include <SPI.h>
#include <WiFiNINA.h>

void setup() {
  char ssid[] = SECRET_SSID;
  char pass[] = SECRET_PASS;

  Serial.begin(9600);
  while (!Serial);

  int status = WL_IDLE_STATUS;
  while (status != WL_CONNECTED) {
    Serial.print("Connecting to ");
    Serial.println(ssid);
    status = WiFi.begin(ssid, pass);
    delay(5000);
  }

  Serial.print("IP address: ");
  Serial.println(WiFi.localIP());
}

void loop() {

}
Before setup(), add this line:
WiFiServer server(80);to initialize a TCP server on port 80 and at the end of setup() call
server.begin();to start the server.
Now this is a TCP server, not an HTTP server. But since HTTP (a TCP/IP application protocol) is built on top of TCP (the transport layer), we can build the HTTP server on our own, pretty easily.
First we need to listen for client connections. We do so in loop():
void loop() {
  WiFiClient client = server.available();
  if (client) {

  }
}
The available() method of server listens for incoming clients.
Inside the if (client) {} check, we have an HTTP client connected. What we need to do is:
- call
client.connected()to check if the data is connected, and there is data to read - call
client.available()to get the number of bytes available for reading (this makes sure there is data to read) - call
client.read()to read one byte from the incoming data (the HTTP request sent by the client) - call
client.println()orclient.print()to send data to the client, building a proper HTTP response - call
client.stop()to end the connection
We start printing to the serial interface each character sent by the client, and in the end we close the connection:
void loop() {
WiFiClient client = server.available();
if (client) {
while (client.connected()) {
if (client.available()) {
char c = client.read();
Serial.write(c);
}
}
client.stop();
}
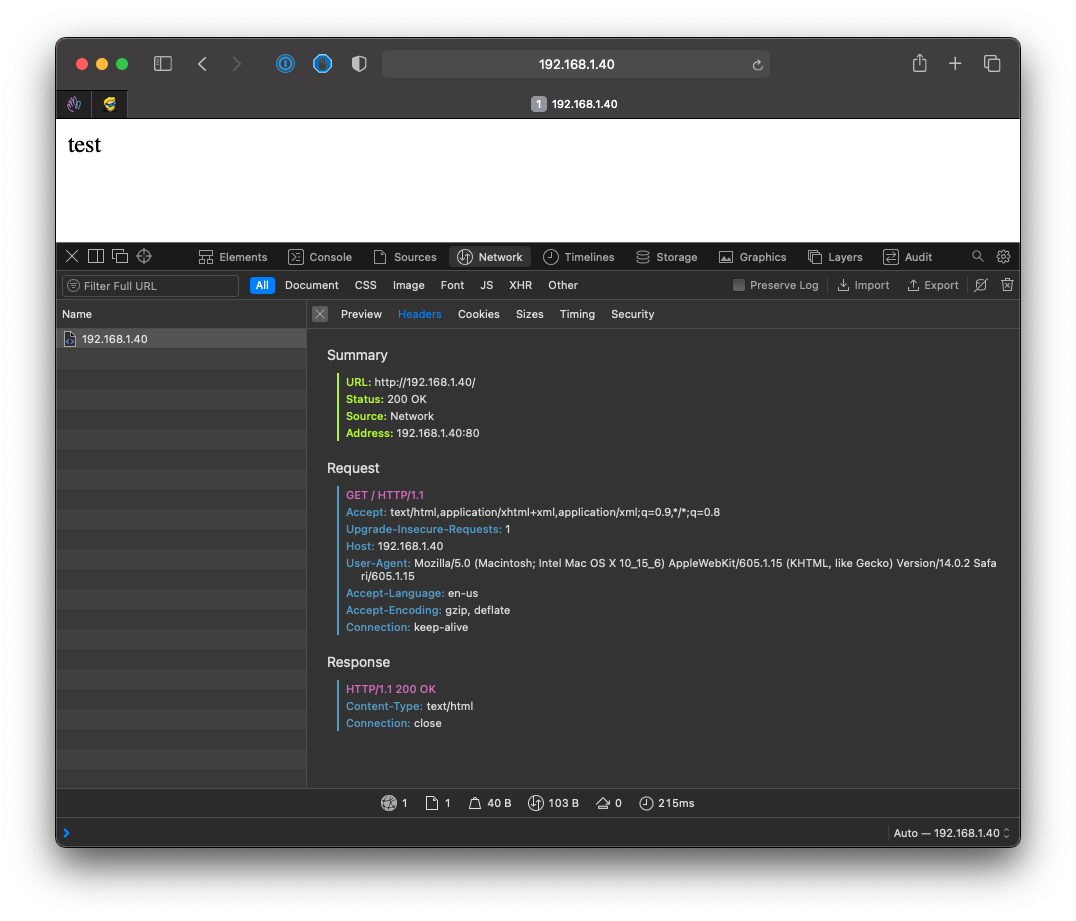
}Try uploading this program on the Arduino. Point your browser to the IP address. You will see something like this printed to the serial interface. This is what is sent by the browser:
GET / HTTP/1.1
Host: 192.168.1.40
Upgrade-Insecure-Requests: 1
Accept: text/html,application/xhtml+xml,application/xml;q=0.9,*/*;q=0.8
User-Agent: Mozilla/5.0 (Macintosh; Intel Mac OS X 10_15_6) AppleWebKit/605.1.15 (KHTML, like Gecko) Version/14.0.2 Safari/605.1.15
Accept-Language: en-us
Accept-Encoding: gzip, deflate
Connection: keep-alive
Note the ending empty line. This is the end of the HTTP request.
We need to intercept this empty line.
Each line in the HTTP request is terminated by a CR carriage return character (\r), and a LF line feed character (\n).
So the end of the request can be determined by 2 sets of those sequences: \r\n\r\n.
This simple algorithm will work, we just memorize 2 characters prior to the current one, and we check if we identify the sequence \n\r\n (the last 3 characters in that sequence are enough to determine the last line):
void loop() {
  WiFiClient client = server.available();
  if (client) {

    char prevprev;
    char prev;

    while (client.connected()) {
      if (client.available()) {
        char c = client.read();
        Serial.write(c);

        if (prevprev == '\n' && prev == '\r' && c == '\n') {
          //we can send the response!
        }

        prevprev = prev;
        prev = c;
      }
    }

    client.stop();
  }
}
So now we can send the response inside the if, we can use client.println() for this, and we add a simple response like this:
HTTP/1.1 200 OK
Content-Type: text/html
Connection: close

<!DOCTYPE HTML>
<html>
test
</html>
In this way:
client.println("HTTP/1.1 200 OK");
client.println("Content-Type: text/html");
client.println("Connection: close");
client.println();
client.println("<!DOCTYPE HTML>");
client.println("<html>");
client.println("test");
client.println("</html>");
break;
The break; statement ends the while (client.connected()) {} block.
Here is the full program:
#include <SPI.h>
#include <WiFiNINA.h>

WiFiServer server(80);

void setup() {
  char ssid[] = SECRET_SSID;
  char pass[] = SECRET_PASS;

  Serial.begin(9600);
  while (!Serial);

  int status = WL_IDLE_STATUS;
  while (status != WL_CONNECTED) {
    Serial.print("Connecting to ");
    Serial.println(ssid);
    status = WiFi.begin(ssid, pass);
    delay(5000);
  }

  Serial.print("IP address: ");
  Serial.println(WiFi.localIP());

  server.begin();
}

void loop() {
  WiFiClient client = server.available();
  if (client) {

    char prevprev;
    char prev;
    while (client.connected()) {
      if (client.available()) {
        char c = client.read();
        Serial.write(c);

        if (prevprev == '\n' && prev == '\r' && c == '\n') {
          client.println("HTTP/1.1 200 OK");
          client.println("Content-Type: text/html");
          client.println("Connection: close");
          client.println();
          client.println("<!DOCTYPE HTML>");
          client.println("<html>");
          client.println("test");
          client.println("</html>");
          break;
        }

        prevprev = prev;
        prev = c;
      }
    }

    client.stop();
  }
}
Try it, you should see test showing up in the browser:
The approach works until you need to figure out how what the client asked us.
In that case you want to read each line, so this alternative approach works better:
void loop() {
  WiFiClient client = server.available();
  if (client) {
    String line = "";
    while (client.connected()) {
      if (client.available()) {
        char c = client.read();
        Serial.write(c);

        if (c != '\n' && c != '\r') {
          line += c;
        }

        if (c == '\n') {
          if (line.length() == 0) {
            client.println("HTTP/1.1 200 OK");
            client.println("Content-Type: text/html");
            client.println("Connection: close");
            client.println();
            client.println("<!DOCTYPE HTML>");
            client.println("<html>");
            client.println("test");
            client.println("</html>");
            break;
          } else {
            line = "";
          }
        }
      }
    }

    client.stop();
  }
}
In the last else we can inspect the line because the line is terminated, and act accordingly to our needs.
Related posts about electronics: