How to export all your voice memos from a Mac
By Flavio
Voice Memos on the Mac saves recordings one at a time, by dragging each one to the Finder or with the Share button. To save all of them at once, with their dates, folders and transcripts, you need an app that reads the Voice Memos library.
You have a few hundred voice memos: song ideas, lectures, notes to self. You want them all in a folder on your Mac or on a drive, where you can back them up and open them without Voice Memos.
Voice Memos has no button that exports everything. Apple’s own guide gives two ways to get a recording out on the Mac, both one recording at a time: drag it to a Finder window, or use the Share button. To save all of them in one go, you need an app that reads the Voice Memos library, like the one at the end of this page.
First, get the iPhone’s recordings onto the Mac
If you record on your iPhone, the recordings reach the Mac through iCloud. Apple’s Voice Memos User Guide for Mac, on the page “See your recordings on all your Apple devices”, has the steps:
- On the iPhone: Settings › [your name] › iCloud, tap See All, and turn on Voice Memos.
- On the Mac: open Voice Memos once, then Apple menu › System Settings, click your name, click iCloud, click See All next to Saved to iCloud, and make sure Voice Memos is on.
Both devices have to be signed in to the same Apple Account. When the recordings show up in Voice Memos on the Mac, you can save them.
Save them one at a time with Voice Memos
The test Mac for this tutorial had no recordings of its own (it has no microphone, and Voice Memos has no import), so these steps are Apple’s, from the page “Share a recording on Mac” in the same guide:
- Open Voice Memos.
- Select the recording.
- Click the Share button, then choose an app or service, like Mail or Notes.
The same page says you can drag a recording to a Finder window to save it to the folder of your choice. That’s the closest thing to an export: one drag per recording, and you pick the folder each time.
For 13 recordings, that’s 13 drags. Apple’s page doesn’t say what the dragged file is called, which date the Finder gives it, or whether the folder you kept it in inside Voice Memos comes along. The transcript stays in Voice Memos: Apple’s transcript page says to select the text, Control-click it and choose Copy, one recording at a time.
Save them all at once with Exporter for Voice Memos
Exporter for Voice Memos is a Mac app I made that saves the recordings Voice Memos has on the Mac to a folder you pick, all at once. It’s my own app, not made by, affiliated with or endorsed by Apple. It costs $20, paid once.
Here it is on a made-up library of 13 short spoken recordings, in folders, some with transcripts. The titles and recordings in these screenshots are made up for the test.
Open the app and click Show My Recordings. If macOS won’t let it read the library, the app shows two ways in, and picking the Recordings folder in a window is one of them. Your recordings show up in a list, every one ticked:
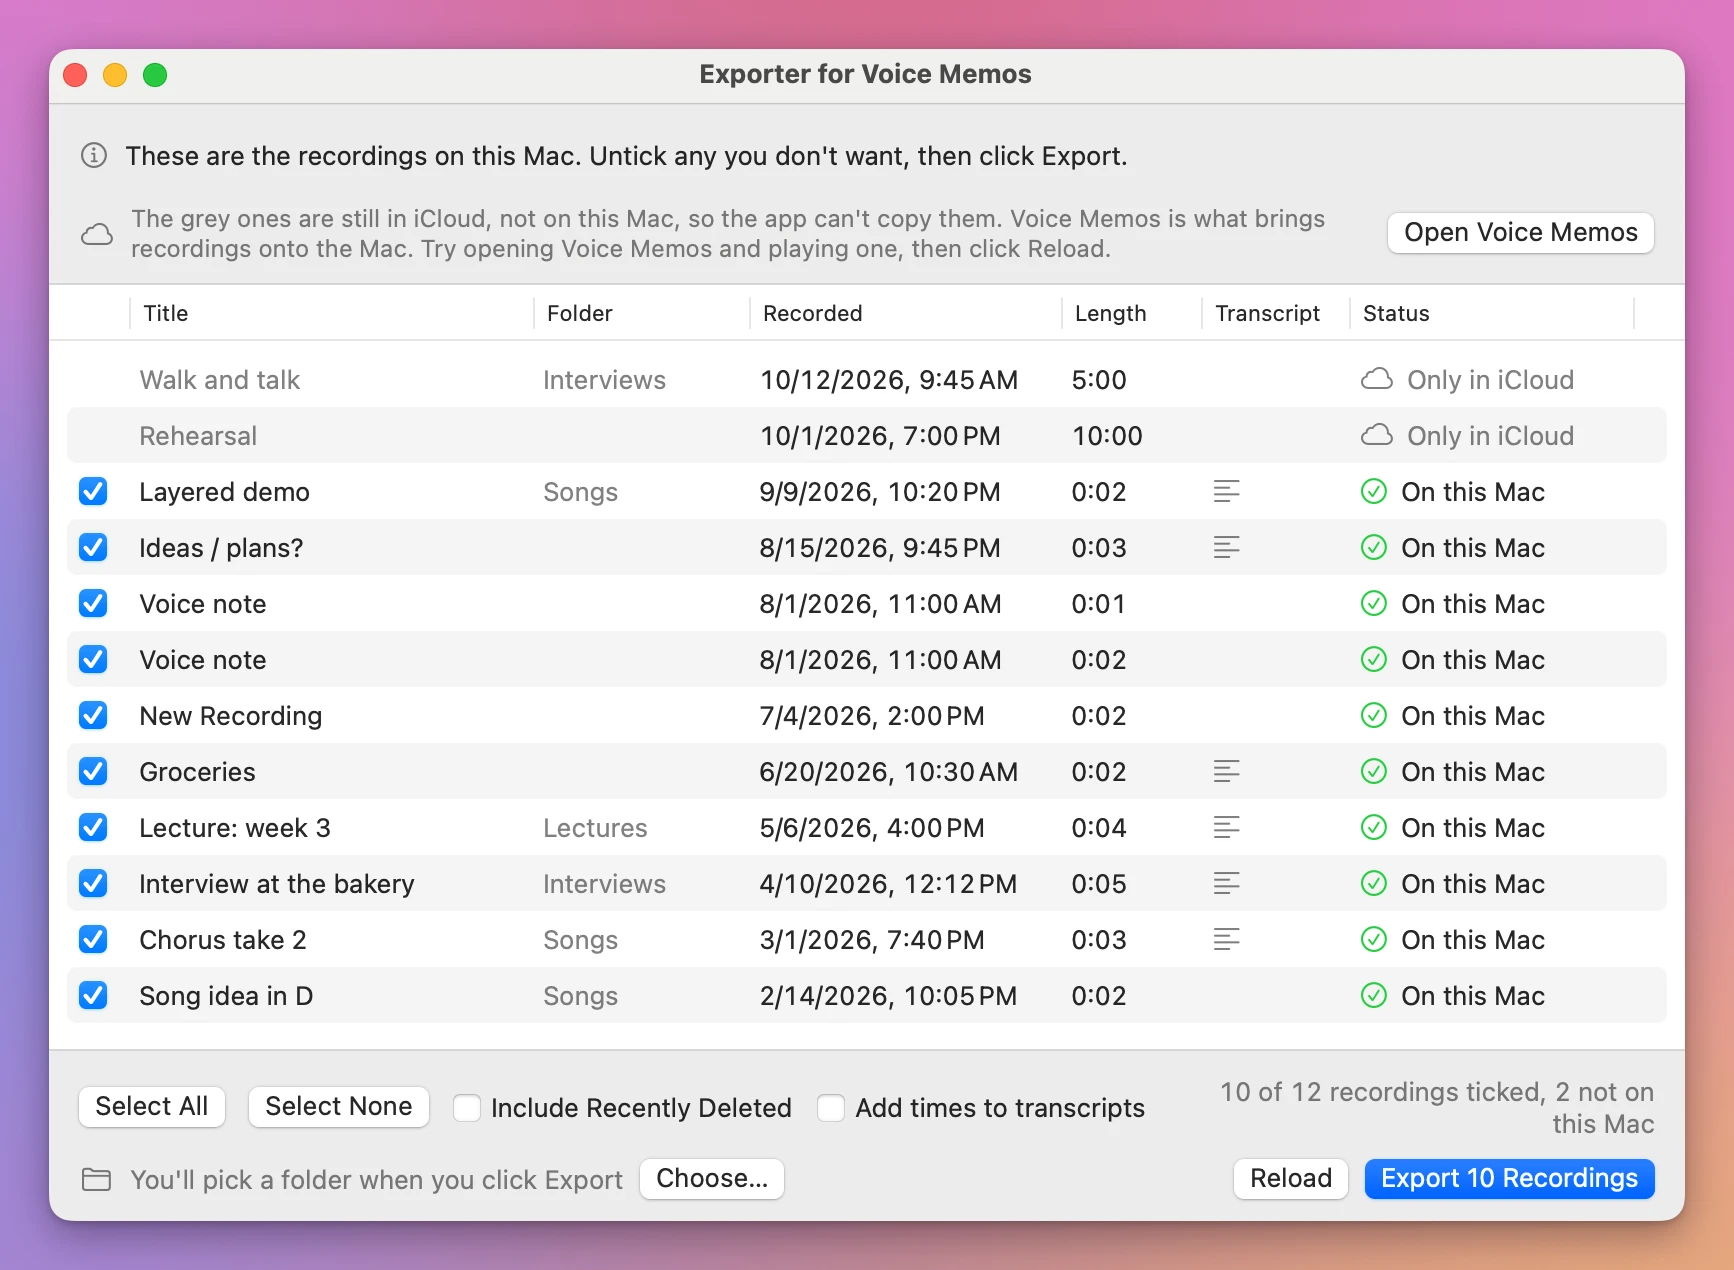
The two grey rows are recordings that are still in iCloud, not on this Mac, so the app can’t copy them. The line above the list says so, and suggests trying to open Voice Memos and play one, then clicking Reload. Untick anything you don’t want. With New Recording and Groceries unticked, the button changed to Export 8 Recordings.
Click it. The first time, a window asks where the recordings go:
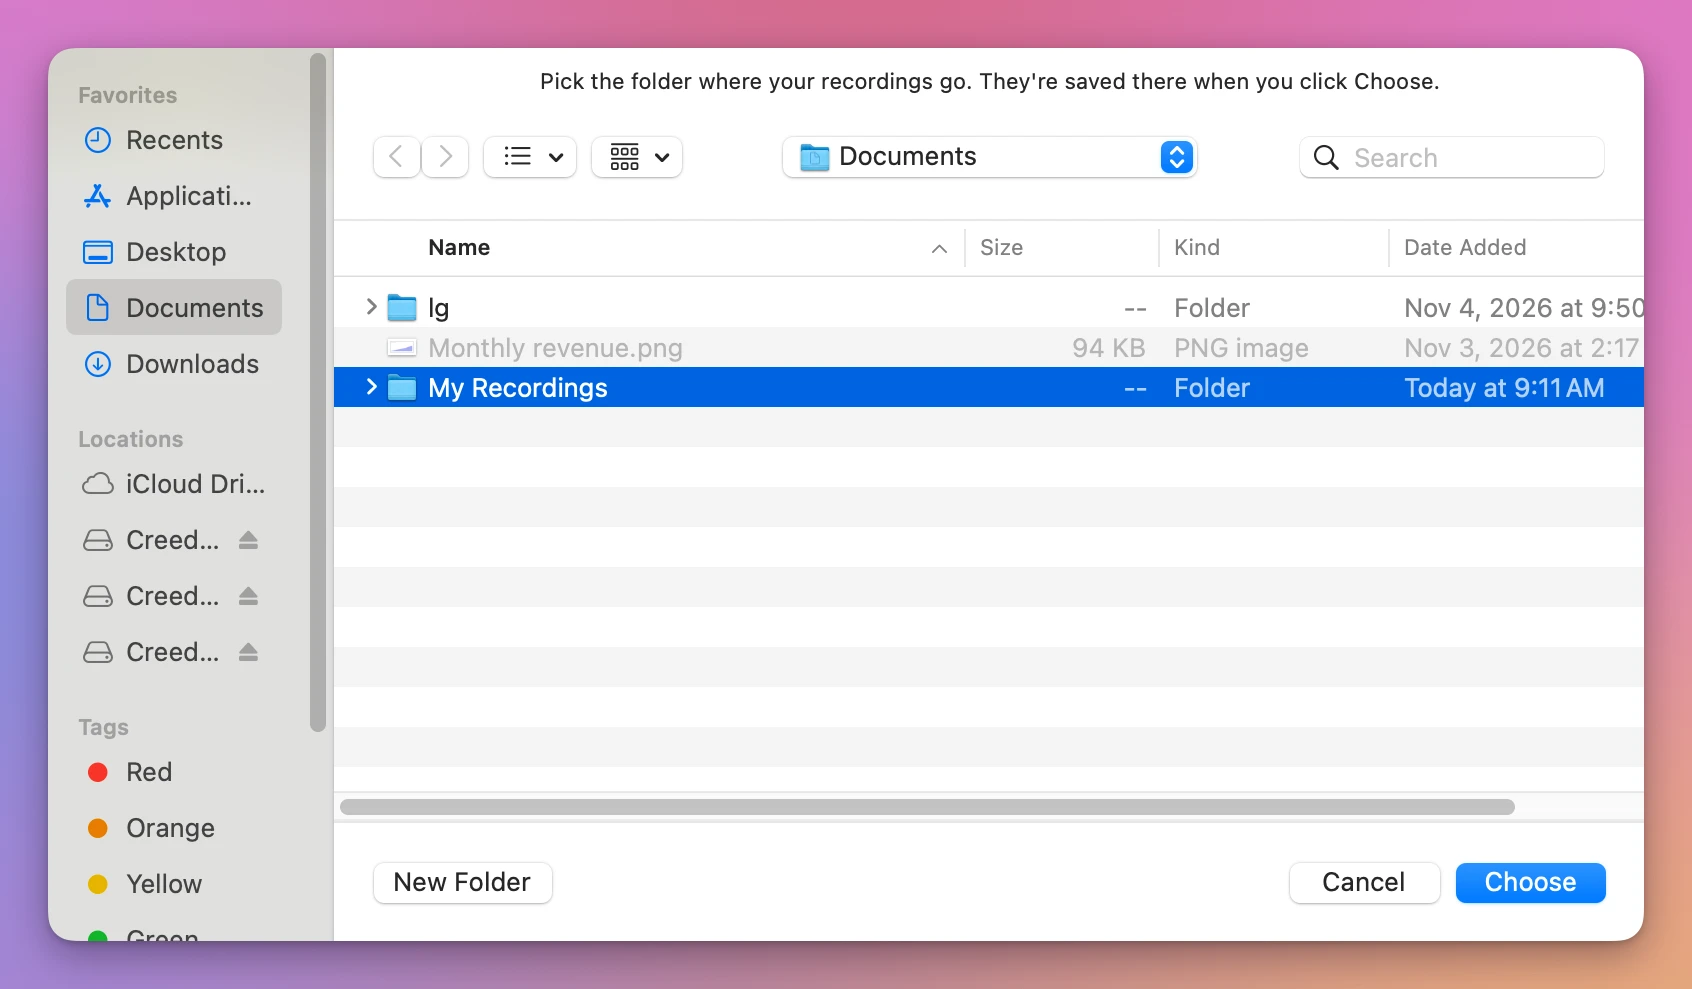
Click Choose, and the export starts. On the test Mac it took about a second. The report says what was saved and what wasn’t:
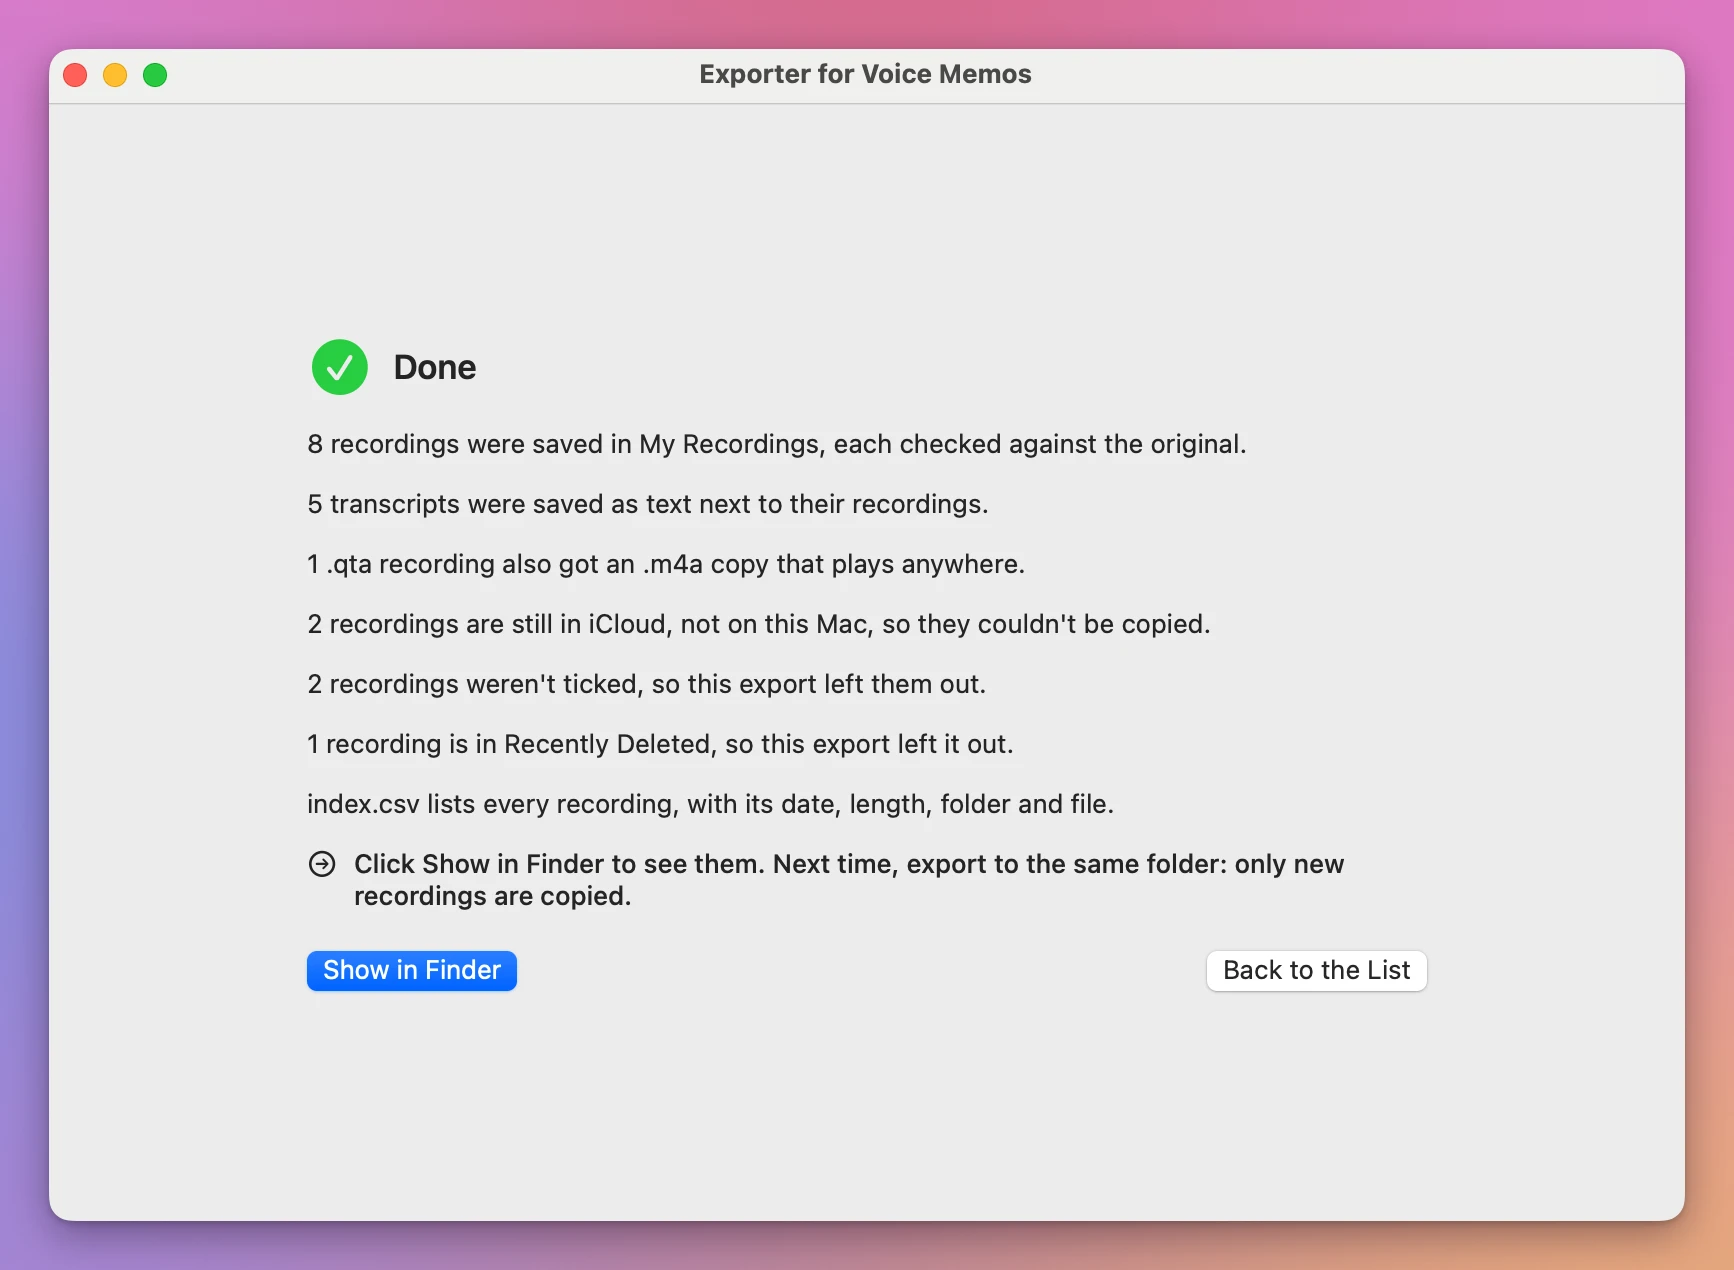
Show in Finder opens the Finder with your folder selected. Open it. Each file starts with the day and time it was recorded, then its title, and the Finder shows the recording date, not today. The folders from Voice Memos are folders, each transcript is a text file next to its recording, and index.csv lists everything:
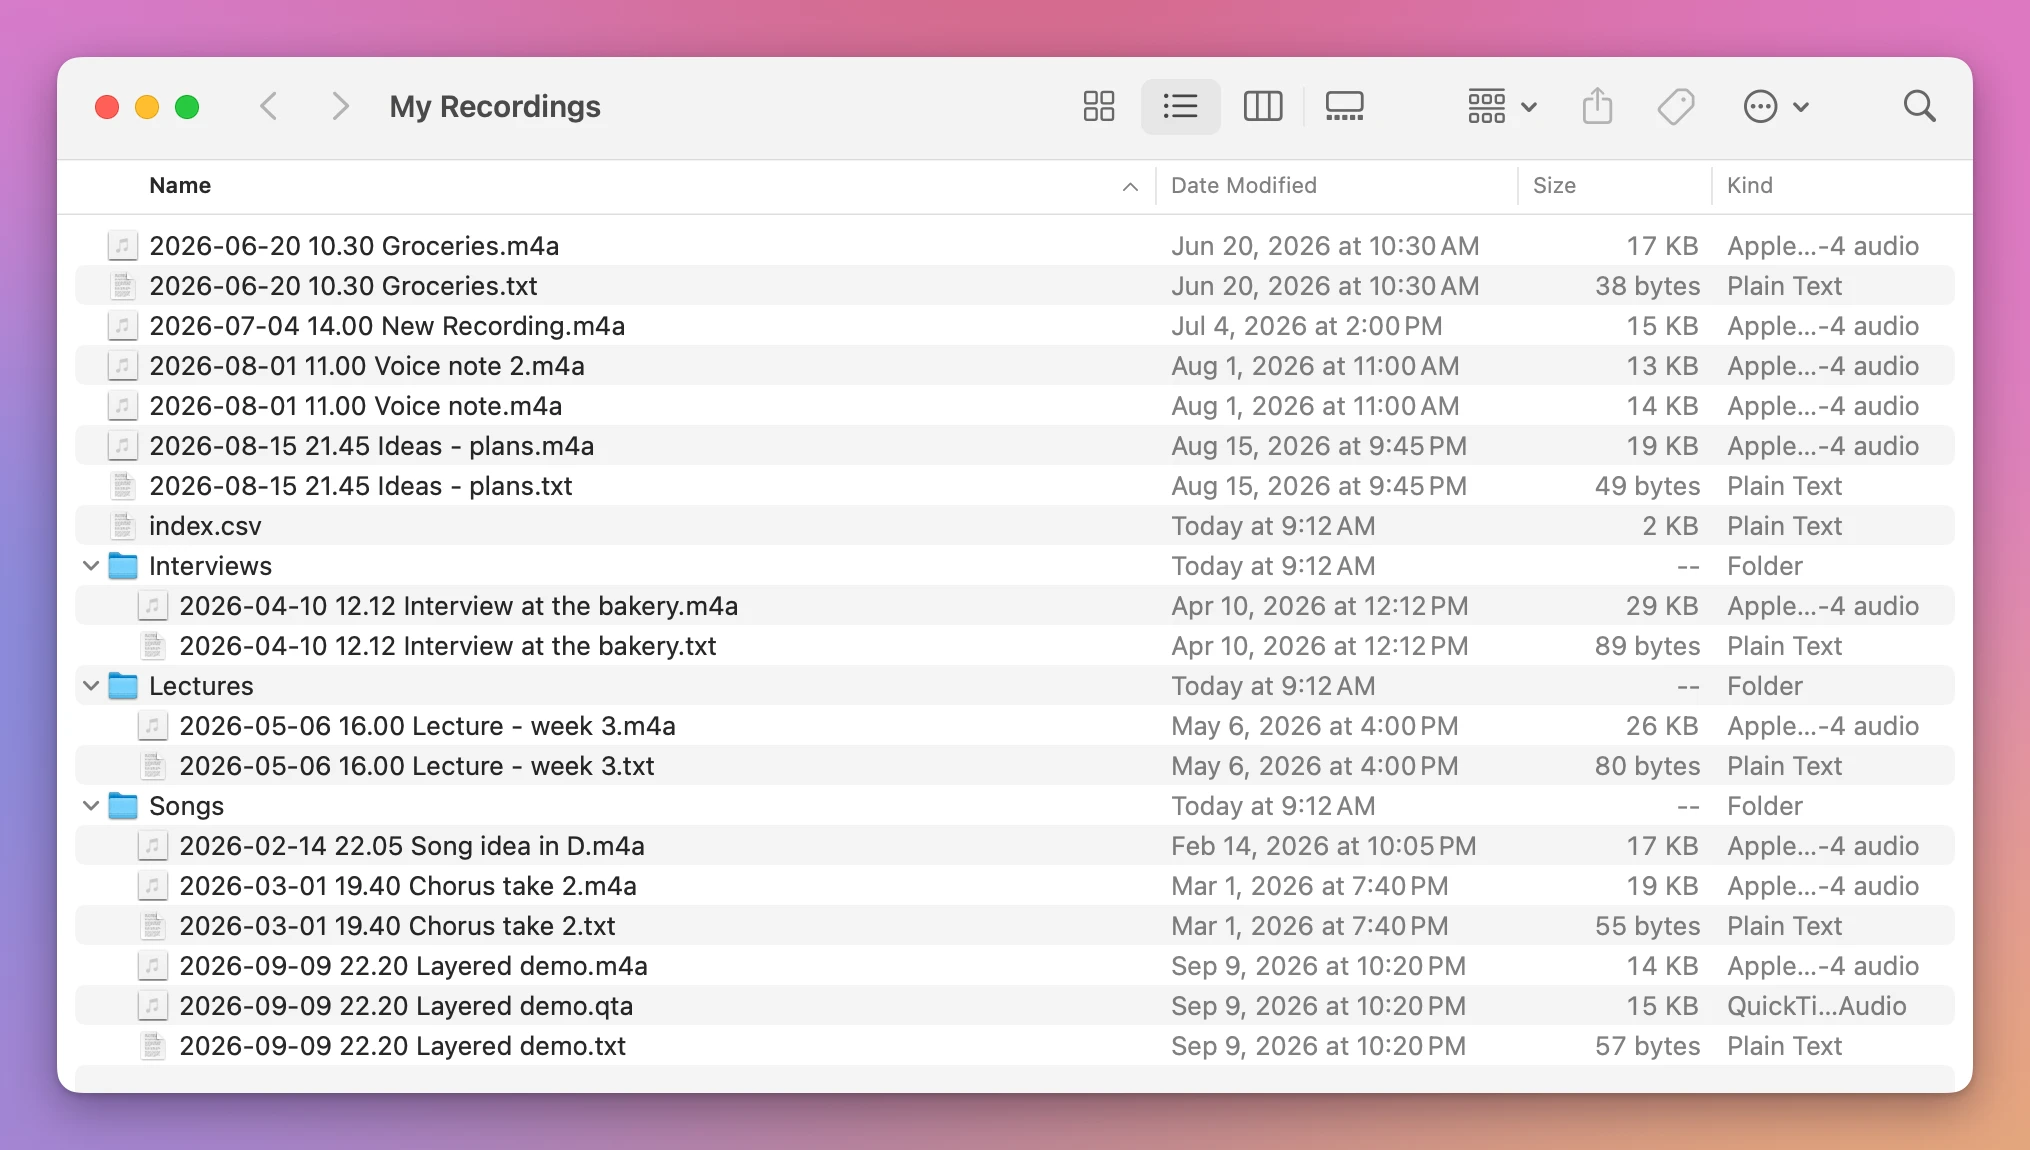
The two recordings titled “Voice note”, made in the same minute, became Voice note.m4a and Voice note 2.m4a. Titles with characters a drive might refuse were cleaned up: “Ideas / plans?” became Ideas - plans.m4a.
Next time, only the new ones
Open the app again later. The recordings already in your folder say Already saved. Ticking the two that were left out changed the button to Export 2 New Recordings:
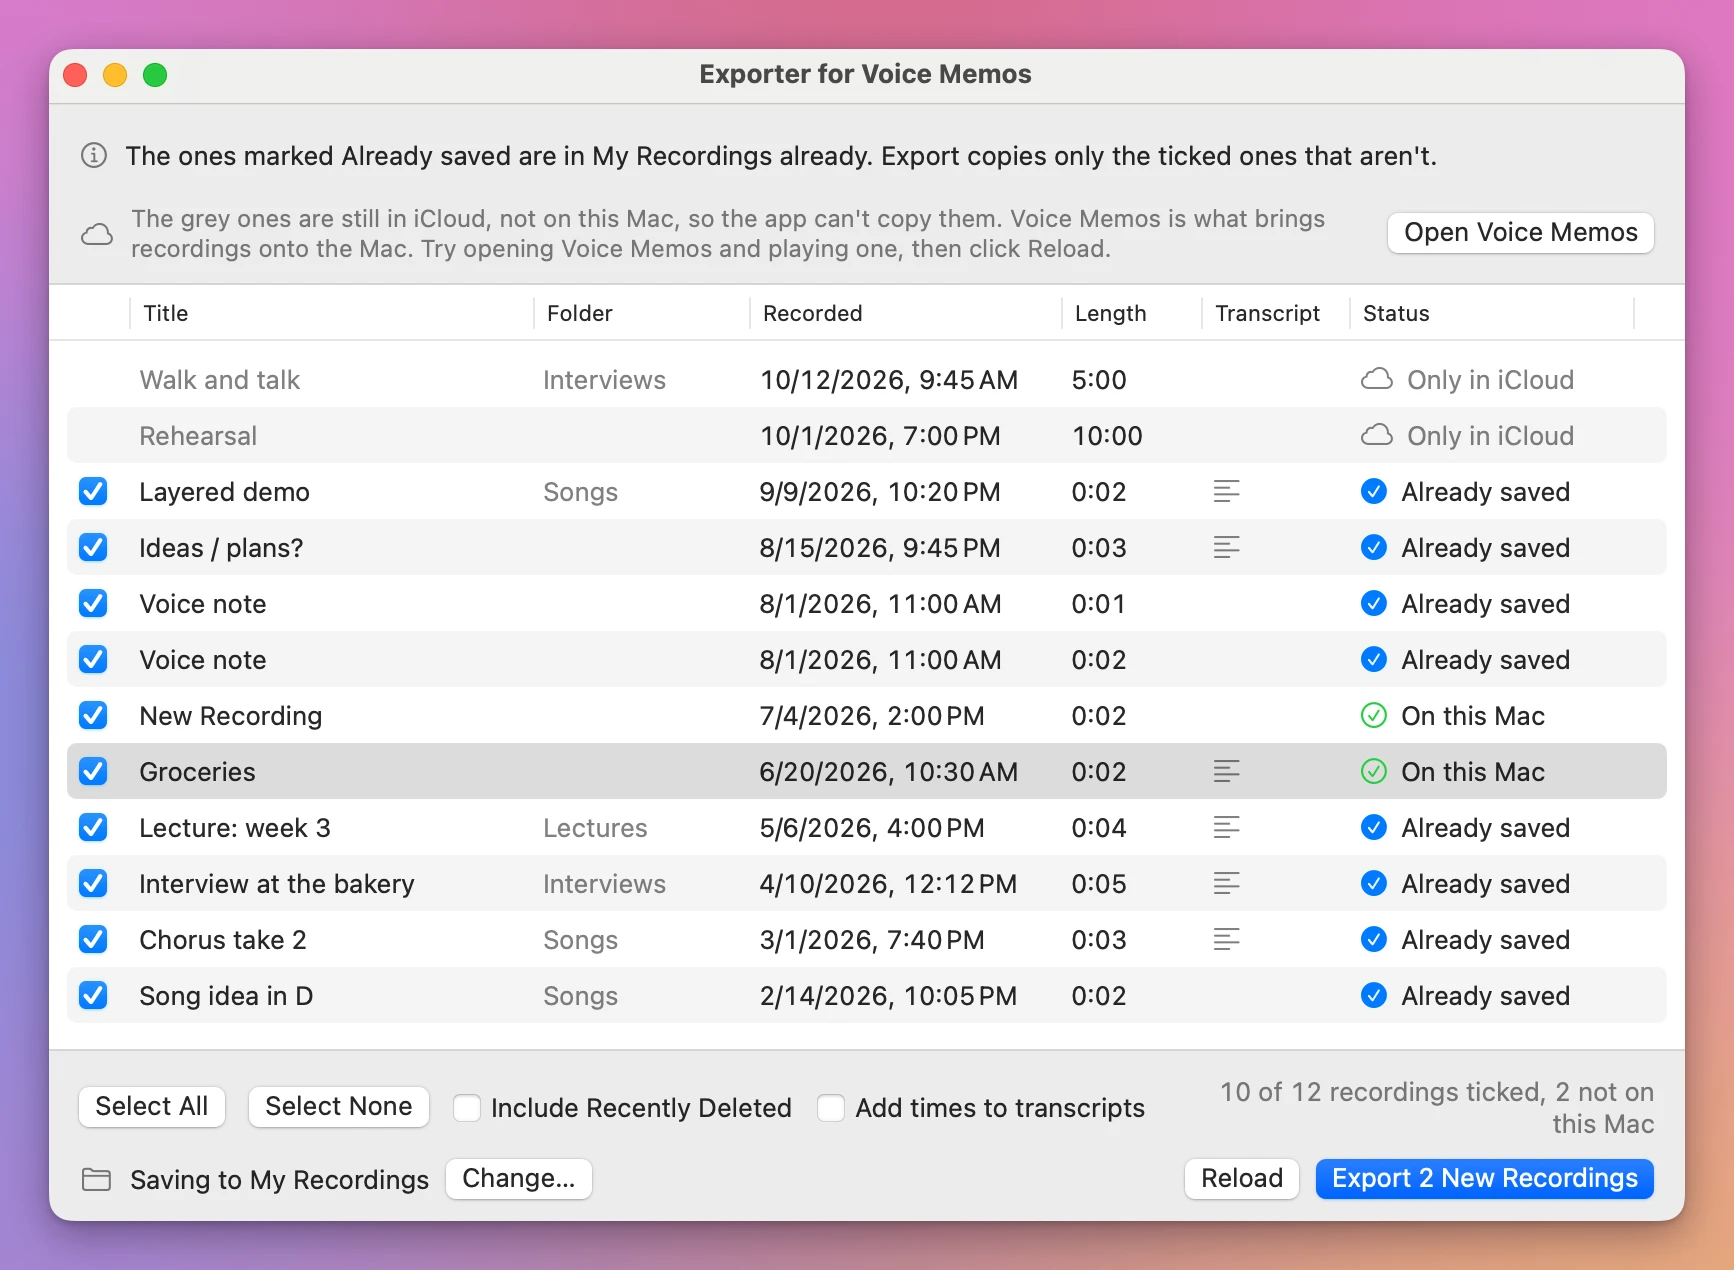
That export saved the two and left the other eight alone. When everything ticked is already there, Export is off and says “Everything ticked is already in this folder”.
Dragging or the app
| Drag or Share in Voice Memos | Exporter for Voice Memos | |
|---|---|---|
| How many at a time | One recording | All of them, or the ones you tick |
| File name | Not stated | Date, time and title, like 2026-06-20 10.30 Groceries.m4a |
| File date in the Finder | Not stated | The day it was recorded |
| Voice Memos folders | Not stated | Kept as folders |
| Transcripts | Copied by hand, one at a time | A .txt next to each recording that has one |
| The second time | Find the new ones yourself | Only the new ones are copied |
| Recordings only in iCloud | Not stated | Listed in grey, not copied |
Apple’s way costs nothing and is fine for a handful of recordings. The app is for when you have dozens or hundreds and want them all dated, in their folders, with their transcripts.
Get Exporter for Voice Memos
Save every recording in Voice Memos to a folder you pick, named with the date and title, with the right file dates, in its folders, with its transcript as text and an index of everything. Run it again and it saves only what is new.
See Exporter for Voice Memos → · Read the docs · $20. See the app page for tax details.
Want me to talk about your product? You can sponsor this site.