Connect a plain HTML form to your waiting list endpoint
By Flavio
Updated
Point a form you already have at a Waiting Lists endpoint, send only email and consent, and fix the origin and extra-field errors.
The waiting list already exists. The form lives on a site you already shipped, and that site is not the Worker. You need the form to post an email address and a consent field, and to leave every other field out.
Waiting Lists gives you that endpoint on your own Cloudflare account. Deploying it, the D1 database and the first curl are Add a double opt-in waiting list on Cloudflare. This page starts after that list exists. HTML forms is the plain method and action the browser already knows. Scanner-safe double opt-in is why the confirmation step is a button that sends POST, not a link that confirms on GET.
A native submit shows the JSON answer as a new page. A script can stay on your page. htmx gets plain text when it sends HX-Request: true. The address is pending until the person presses the button in the email.
What you need
You need the list’s endpoint and the origins of the pages that will post to it. In the dashboard that is the list’s detail page. The Form setup tab prints HTML and JavaScript you can copy. The CLI prints the same HTML with integration once the project is linked. This page does not run init, migrations or deploy.
The endpoint is at the top of the list’s page, above the Subscribers, Form setup and List settings tabs:
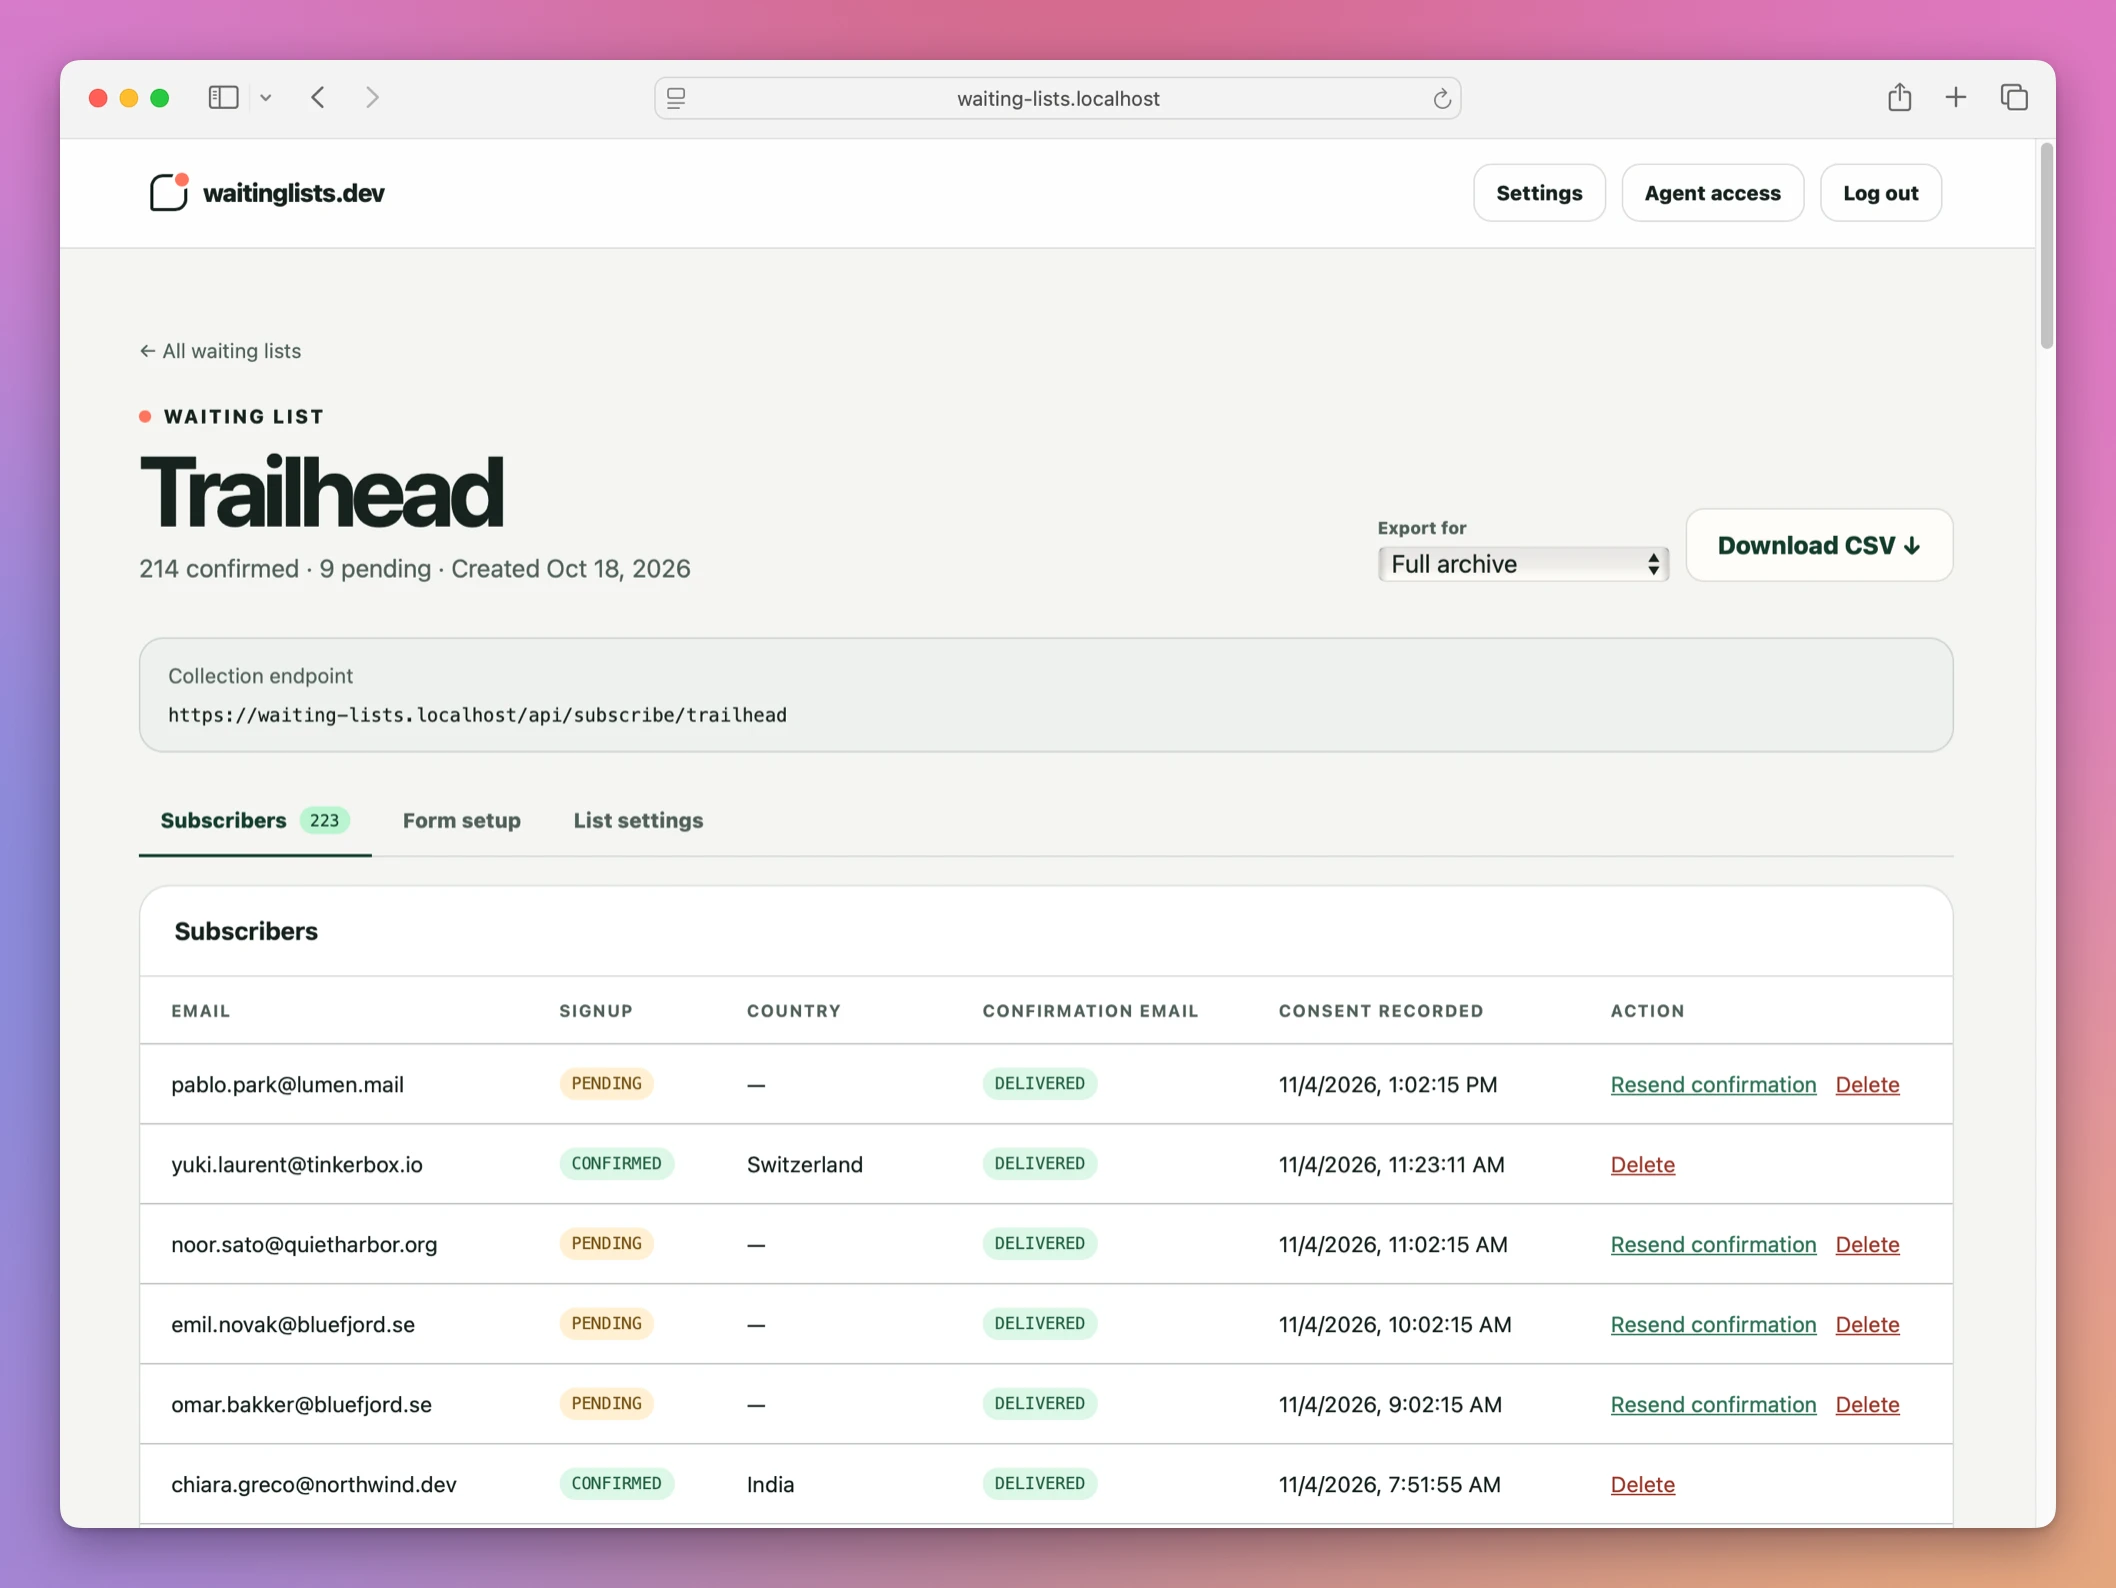
The public endpoint accepts exactly two subscriber fields, email and consent. Consent may be yes, on, 1 or true. The Form setup screenshot on the app page says the same thing in its agent brief: a boolean true, 1, "yes" or "on". An unchecked box, or false, is not consent.
This is that tab, with the allowed origins on the right and the brief for an agent below:
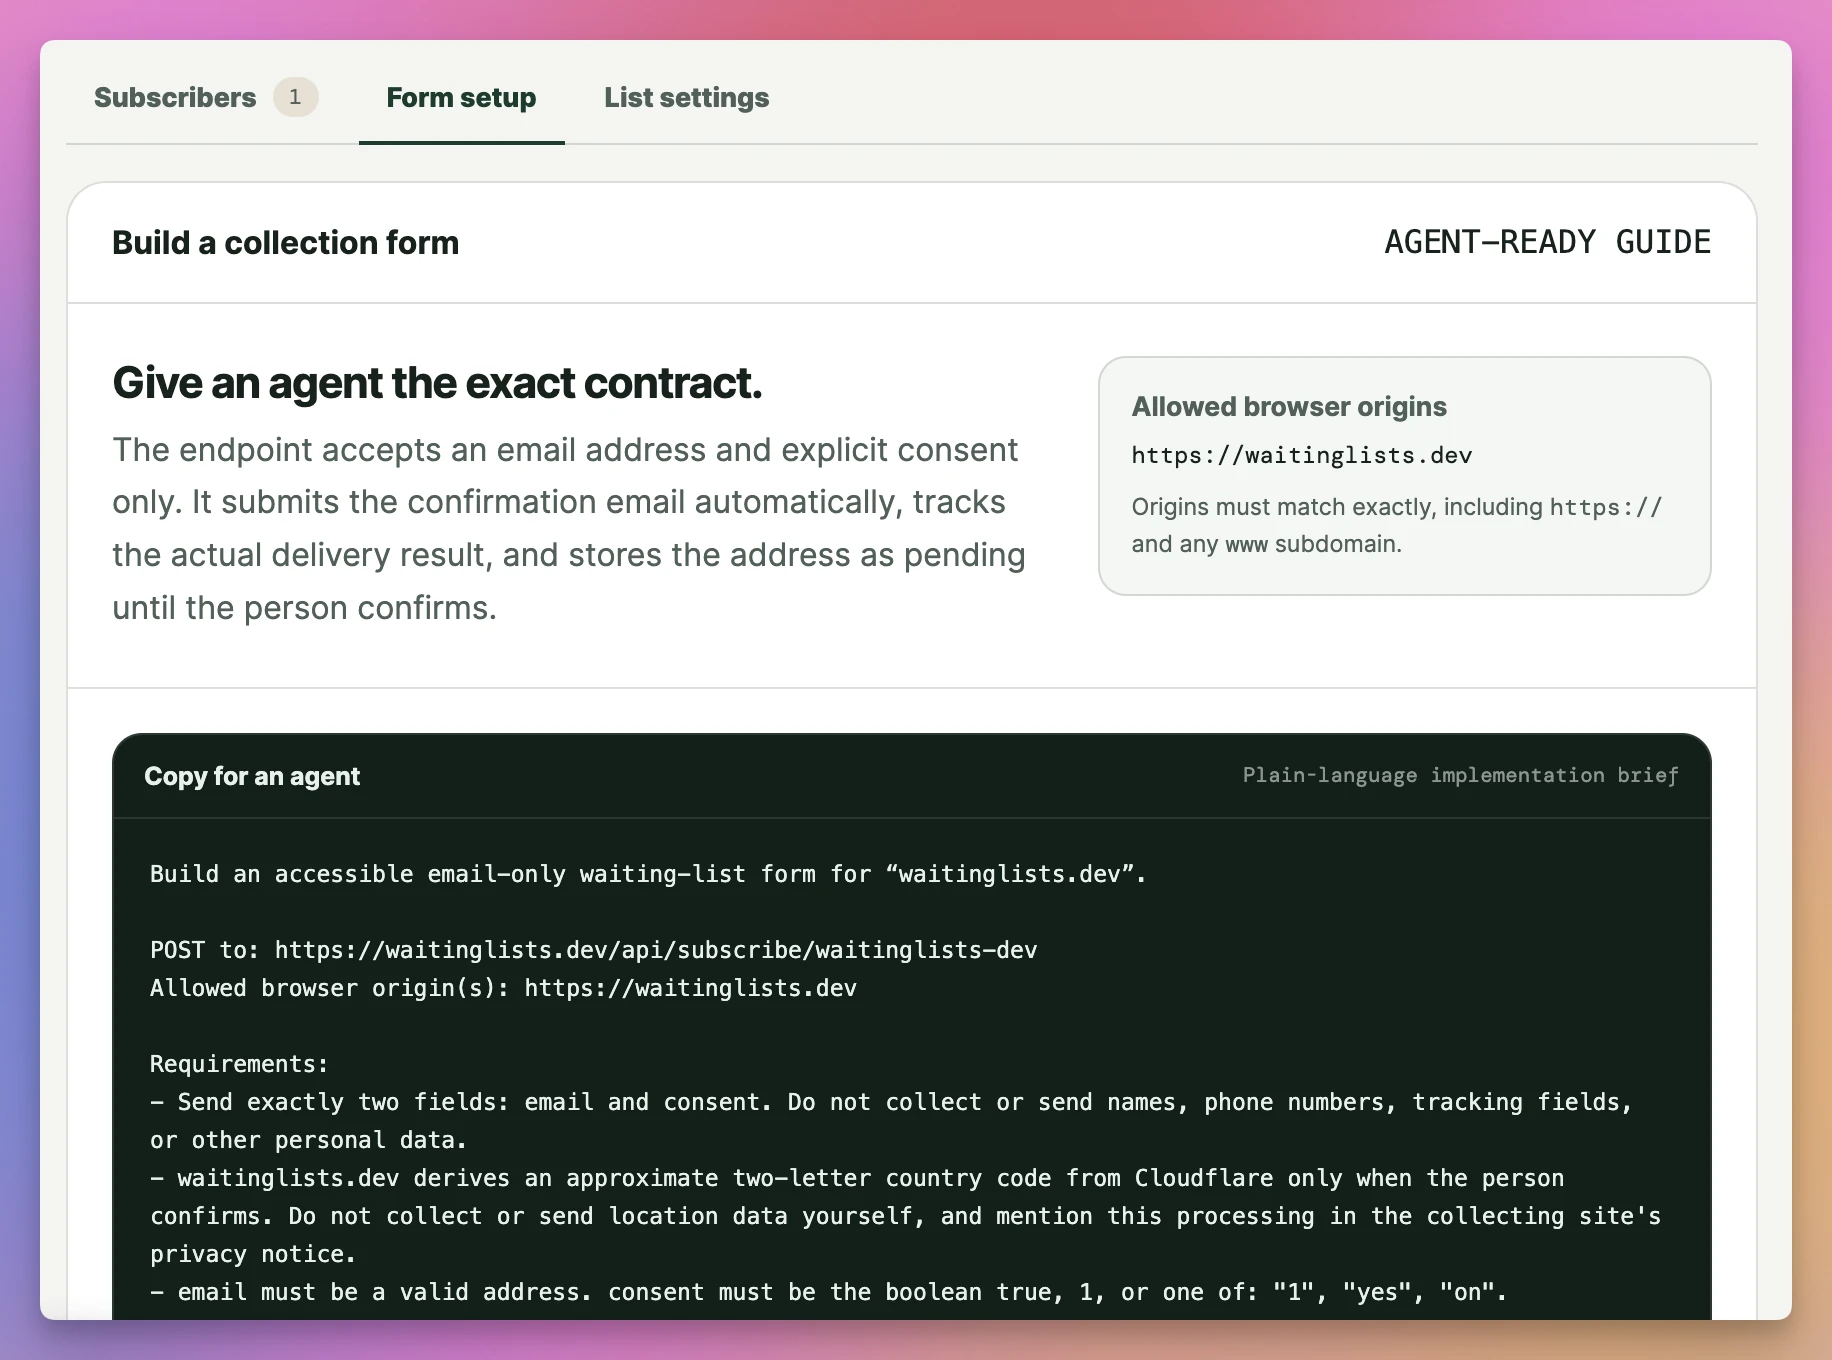
Turnstile protects /login. It is not part of the public form. A Turnstile token is an extra named field, and the endpoint rejects those. Don’t put an administrator API key in the page either. The public signup endpoint and the private API are different.
An origin is the scheme, the hostname and the port when there is one. https://garden.northstar.example and https://www.garden.northstar.example are two origins. Add each page you actually serve. The docs use Garden Planner and https://garden.northstar.example as the example. Replace both with yours.
The form does not need Node on the website. Node.js 22.12 or later is for the Waiting Lists source, which you already used when you deployed.
Allow the page, not the Worker
The browser sends an Origin header of the page that contains the form. That is the site the person is looking at. It is not the Worker’s hostname in the form’s action. If you only allow the Worker, a post from your marketing site is a different origin, and the browser shows a failed request.
The origin list is what stops another website from posting into your list from its own page. It does not stop a script. A request with no Origin header is accepted. Anyone can set a fake Origin from curl. Rate limits and the confirmation button are what stand in front of scripts. The rate limit in the sibling tutorial is 5 requests per 60 seconds per IP and list. Wrong-origin and wrong-slug requests are refused before that counter.
Skip the origin and the form works in curl with no Origin, then fails for every real visitor. The message for a page you forgot to add is fixed. The sibling tutorial got this for an origin that was not on the list:
403
This website is not allowed to submit to this list.
* on a list accepts any site. The first migration creates a list that uses *. On your install, don’t leave that open unless you mean it. The sibling tutorial says to delete that seed list or change its origins.
Paste the form the list already printed
The list page and the CLI both print a form that posts those two fields and nothing else. The sibling tutorial quotes it for a local list called Hosting Picker. Yours will show your endpoint. The shape is the same:
<form method="post" action="http://localhost:4321/api/subscribe/hosting-picker">
  <input type="email" name="email" required />
  <label>
    <input type="checkbox" name="consent" value="yes" required />
    I want updates about this waitlist and agree to the privacy notice.
  </label>
  <button>Join the waitlist</button>
</form>
Example 1: that form, then your production URL
Put a <label> on the email field too, and link your privacy notice in the consent sentence. value="yes" is one of the four consent values. required on the checkbox stops an empty submit in the browser. It does not change what the server accepts. The server still checks the value.
A plain form navigates. The person lands on a new page whose body is JSON. The sibling tutorial called that same local endpoint with the origin a browser would send:
curl -i -X POST http://localhost:4321/api/subscribe/hosting-picker \
  -H 'Origin: https://hostingpicker.dev' \
  -H 'Content-Type: application/json' \
  -d '{"email":"[email protected]","consent":true}'
The response was:
HTTP/1.1 202 Accepted
access-control-allow-origin: https://hostingpicker.dev
cache-control: no-store
content-type: application/json

{"ok":true,"message":"Thanks — you’re on the waitlist. Check your inbox if a confirmation step is needed."}
202 means the request was accepted. It does not mean the address is confirmed, and it does not mean the mail has been delivered. The access-control-allow-origin value is the origin the browser sent, when that origin is allowed. That is what lets the browser read the JSON from your page’s script later.
Swap http://localhost:4321 for the HTTPS origin of your Worker when the form ships. The sales page uses the reference service as the illustration:
<form method="post" action="https://waitinglists.dev/api/subscribe/my-product">
  <input type="email" name="email" required />
  <label>
    <input type="checkbox" name="consent" value="yes" required />
    I want updates about this product.
  </label>
  <button>Join the waitlist</button>
</form>
waitinglists.dev and my-product are that reference install. Your action is your Worker plus your list slug. The page that contains the form still has to be an allowed origin. Changing only the action does not add the origin.
Submit the same address again and the endpoint returns the same 202 and the same message. No second email is sent. The body never says whether the address was new, pending or already confirmed. That second submit is safe to retry. It is not a way to ask the server what state the row is in.
The person is not on the list in the confirmed sense until they press the button. The confirmation link opens a page titled Confirm your email. with a Confirm my place button. Opening the link does not confirm. The button’s POST does. The token works once, and a second press shows This link is invalid or expired. Links expire after 24 hours, and a pending row is deleted when its link expires. A confirmed row is deleted 24 months later. If the form’s 202 is the last thing you test, you have not watched the step that actually writes the confirmed subscriber.
There is a second limit, per email, on top of the 5 requests per 60 seconds per IP and list. The sibling tutorial names it and does not print a separate status line for it, so this page won’t invent that status. A 503 is the other failure that is not your form: the database or the email submission failed. Retry after the service is healthy. The 202 you already saw is the shape of a healthy accept.
Stay on the page
The JSON page is correct and clumsy. People lose the site they were on. Form setup includes a JavaScript version for that, and integration LIST_ID prints it from the CLI. Copy that file when you want the one the app generated. The contract it has to keep is the same two fields the curl sends.
This fetch is that contract, written out so you can see it. It is not a transcript of the generated file:
<form id="waitlist">
  <input type="email" name="email" required />
  <label>
    <input type="checkbox" name="consent" value="yes" required />
    I want updates about this waitlist and agree to the privacy notice.
  </label>
  <button>Join the waitlist</button>
  <p id="waitlist-result"></p>
</form>
<script>
  const form = document.querySelector('#waitlist')
  form.addEventListener('submit', async (event) => {
    event.preventDefault()
    const data = new FormData(form)
    const response = await fetch('https://lists.northstar.example/api/subscribe/garden-planner', {
      method: 'POST',
      headers: { 'Content-Type': 'application/json' },
      body: JSON.stringify({
        email: data.get('email'),
        consent: data.get('consent') === 'yes'
      })
    })
    const body = await response.json()
    document.querySelector('#waitlist-result').textContent = body.message
  })
</script>
lists.northstar.example and garden-planner are examples. Replace them. consent: true matches a checked value="yes". Don’t append name, a referral code or a Turnstile response to that object. The endpoint’s answer for an extra field is a 400, covered below. body.message is the sentence from the 202, so the page can show it without navigating.
Ask for plain text when the form is htmx
A native form always navigates. fetch stays on the page because your script reads message and writes it into an element. htmx stays on the page too, and it inserts the response body itself. If that body is the JSON object, the element fills with {"ok":true,...}, which is the raw API answer rather than a sentence a person can read.
The endpoint already has a switch for that. When the request carries HX-Request: true, the response is plain text instead of JSON. htmx sends that header on its own requests. You don’t add a Waiting Lists flag to the form. You do have to keep the body to email and consent, same as every other client. Skip the header and htmx will insert the JSON. Send an extra field and you still get the 400, header or not.
The sibling tutorial states the header and does not quote the plain-text body, so this page won’t invent the sentence. You can see the status with curl the same way that tutorial called the JSON endpoint:
curl -i -X POST http://localhost:4321/api/subscribe/hosting-picker \
  -H 'Origin: https://hostingpicker.dev' \
  -H 'Content-Type: application/json' \
  -H 'HX-Request: true' \
  -d '{"email":"[email protected]","consent":true}'
[email protected] is an example address. Use one you can open. Read the status and the content-type. JSON is the path without that header. Plain text is the path with it. I am not pasting a body I don’t have a source for.
Point a second site at the same list
One list can allow more than one origin. A second site, or the www host of the first, is a different origin even when the form markup is a copy.
Example 2: www, which is not the same origin
You allowed https://garden.northstar.example. The form also exists on https://www.garden.northstar.example. Add the www origin on the list settings page, comma-separated from the first, the way the sibling tutorial adds both hostingpicker.dev hosts. Until you do, a browser on www is refused.
The field is Allowed website origins:
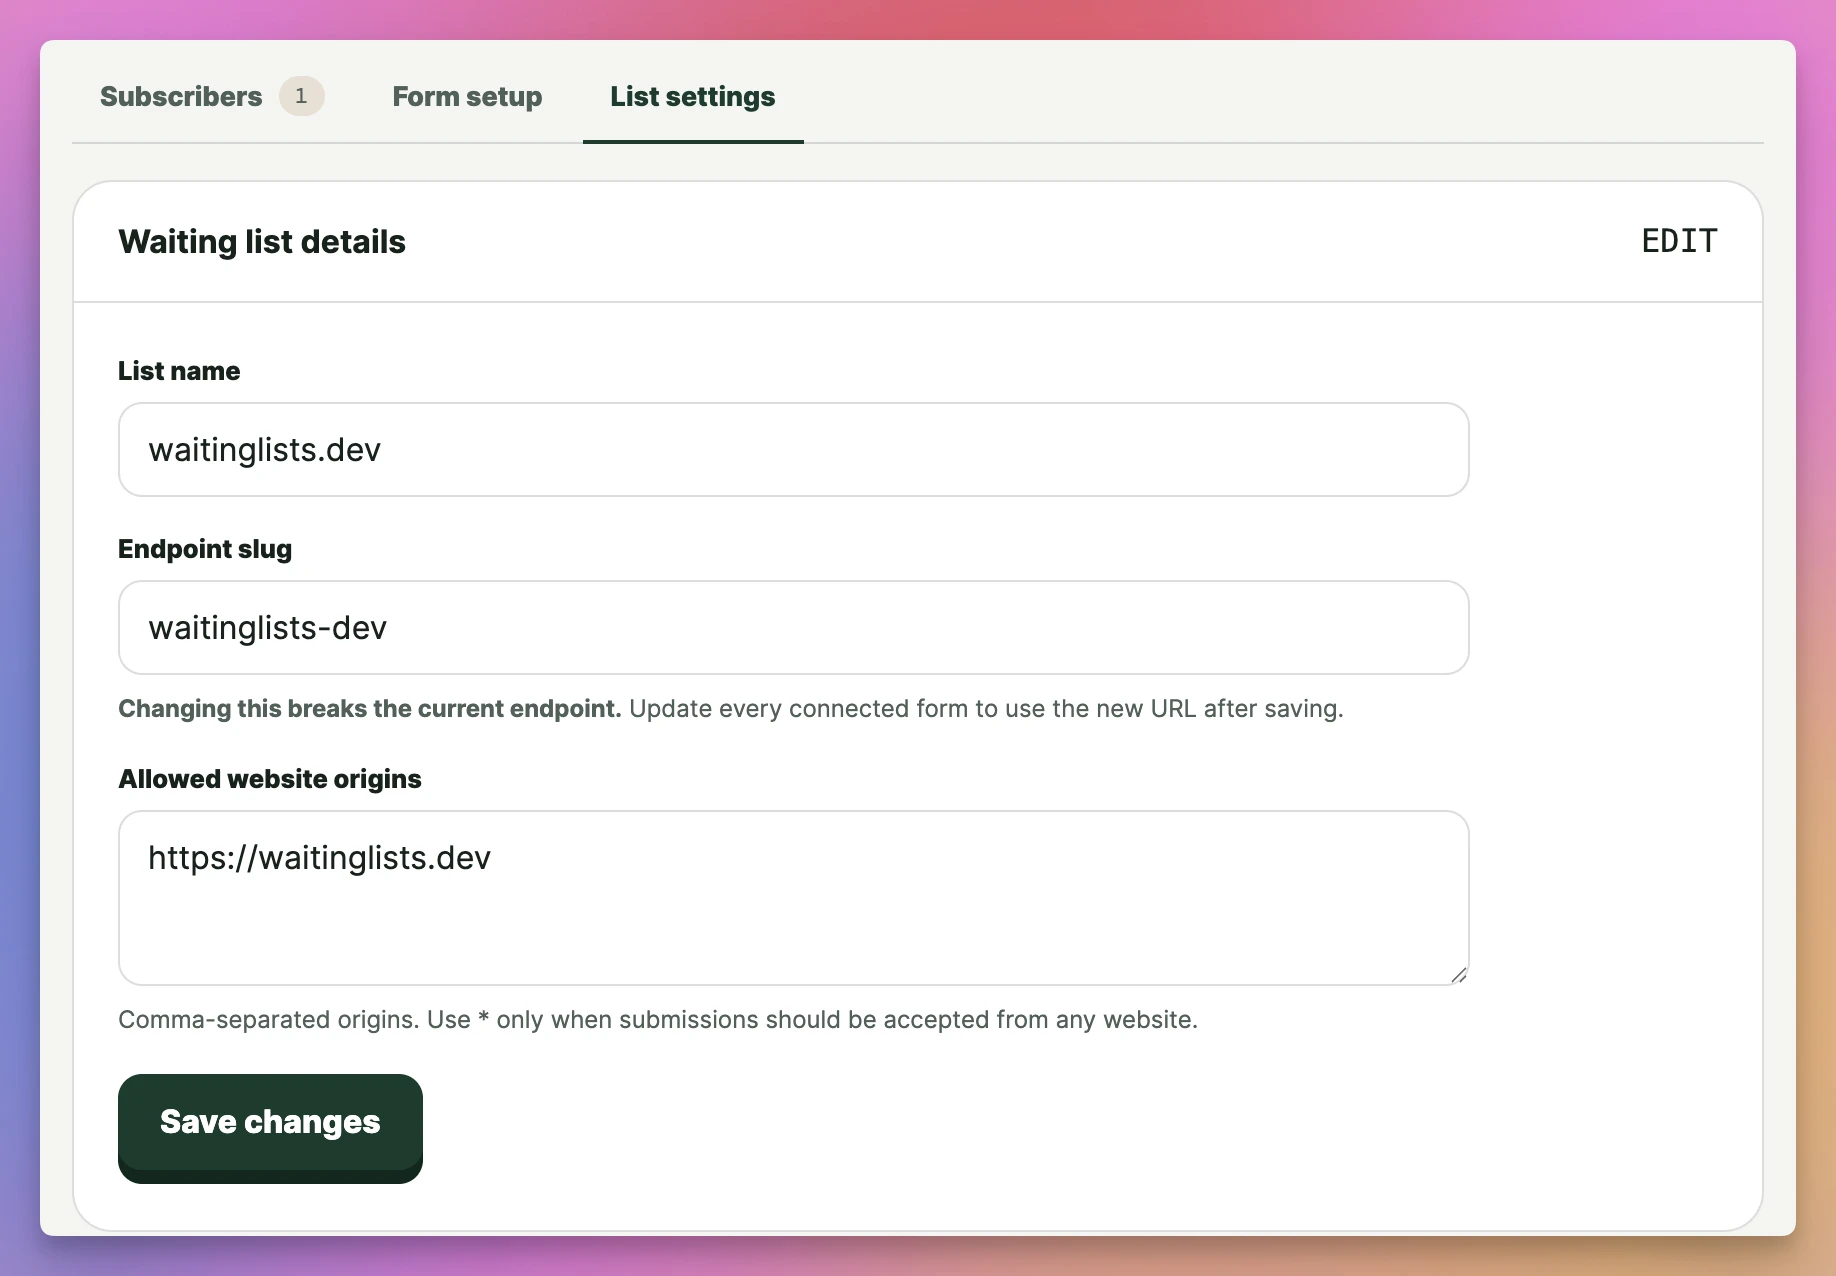
The sibling tutorial sent Origin: https://flaviocopes.com, which was not on its list, and got 403 with This website is not allowed to submit to this list. The same status and message are what an unlisted www origin gets. The call is the accepted one, with that origin swapped in:
curl -i -X POST http://localhost:4321/api/subscribe/hosting-picker \
  -H 'Origin: https://flaviocopes.com' \
  -H 'Content-Type: application/json' \
  -d '{"email":"[email protected]","consent":true}'
For the Garden Planner www host, once you have added it, you send Origin: https://www.garden.northstar.example instead. Until that origin is saved, expect the 403 above. A different list slug is a different endpoint, not a different origin. hostingpicker instead of hosting-picker returned 404 and Waiting list not found. in that same run. Your Garden Planner slug is whatever the list page shows. The form’s action has to use that slug, and the page’s origin has to be on that list.
After you add www, the same curl with that Origin is the 202 from example 1. The second time you run it, still 202, still one message, still no second mail.
If something looks wrong
Example 3: a name field, which the endpoint will not store
The sibling tutorial posted {"email":…,"consent":true,"name":"Flavio"} and got:
400
Enter a valid email and agree to join the waitlist.
A hidden input, a company field or a Turnstile token on the public form is the same class of body. Remove the extra name. The agent brief on Form setup says not to collect names, phone numbers or tracking fields. The service derives an approximate country code when the person confirms. You don’t send location yourself.
If "consent": false, the status is also 400 and the message is the same sentence. The checkbox has to send yes, on, 1 or true. Broken JSON is 400 with Send a valid email and explicit consent.
If the slug is wrong, the status is 404 and the message is Waiting list not found. Copy the slug from the list page into action.
If the sixth request in a minute returns 429 and Too many attempts. Please try again in a minute., that is the 5-per-60-seconds limit. Bad bodies count toward it. The 403 and 404 above do not.
If the status is 503, the sibling tutorial says the database or the email submission failed. That is not an origin problem and not an extra field. Check the list’s delivery status in the dashboard once the service is healthy.
If the browser stays on a JSON page, the form is the native POST. Use the script from Form setup, or the fetch above, when you want the person to remain on your site.
If you need to undo a signup, use the removal link in the confirmation email. The sibling tutorial’s dev message includes a /remove link with subscriber and signature query parameters. Open the link from your own mail. Testing that link is part of the docs. The confirmation link is a page with a Confirm my place button. Opening it does not confirm. The button’s POST does. Pressing it again shows This link is invalid or expired. because the token works once.
Get Waiting Lists
Collect confirmed subscribers with your own forms, dashboard and agent CLI. Includes full MIT source for deployment in your Cloudflare account.
See Waiting Lists → · Read the docs · $20. See the app page for tax details, with full source code.
Want me to talk about your product? You can sponsor this site.