Make a mind map on your Mac using only the keyboard
By Flavio
Updated
Build a mind map in Mind Map with Tab, Return, Space and the arrow keys, paste an indented list as a whole branch, then focus, outline and present it without the mouse.
In Mind Map you can build a whole map without touching the mouse. Tab adds a child, Return adds a sibling, Space edits, and the arrow keys move around. The app arranges the branches while you type.
Here we’ll build a small map called Weekend project, paste a branch from a list, add a note, and present it.
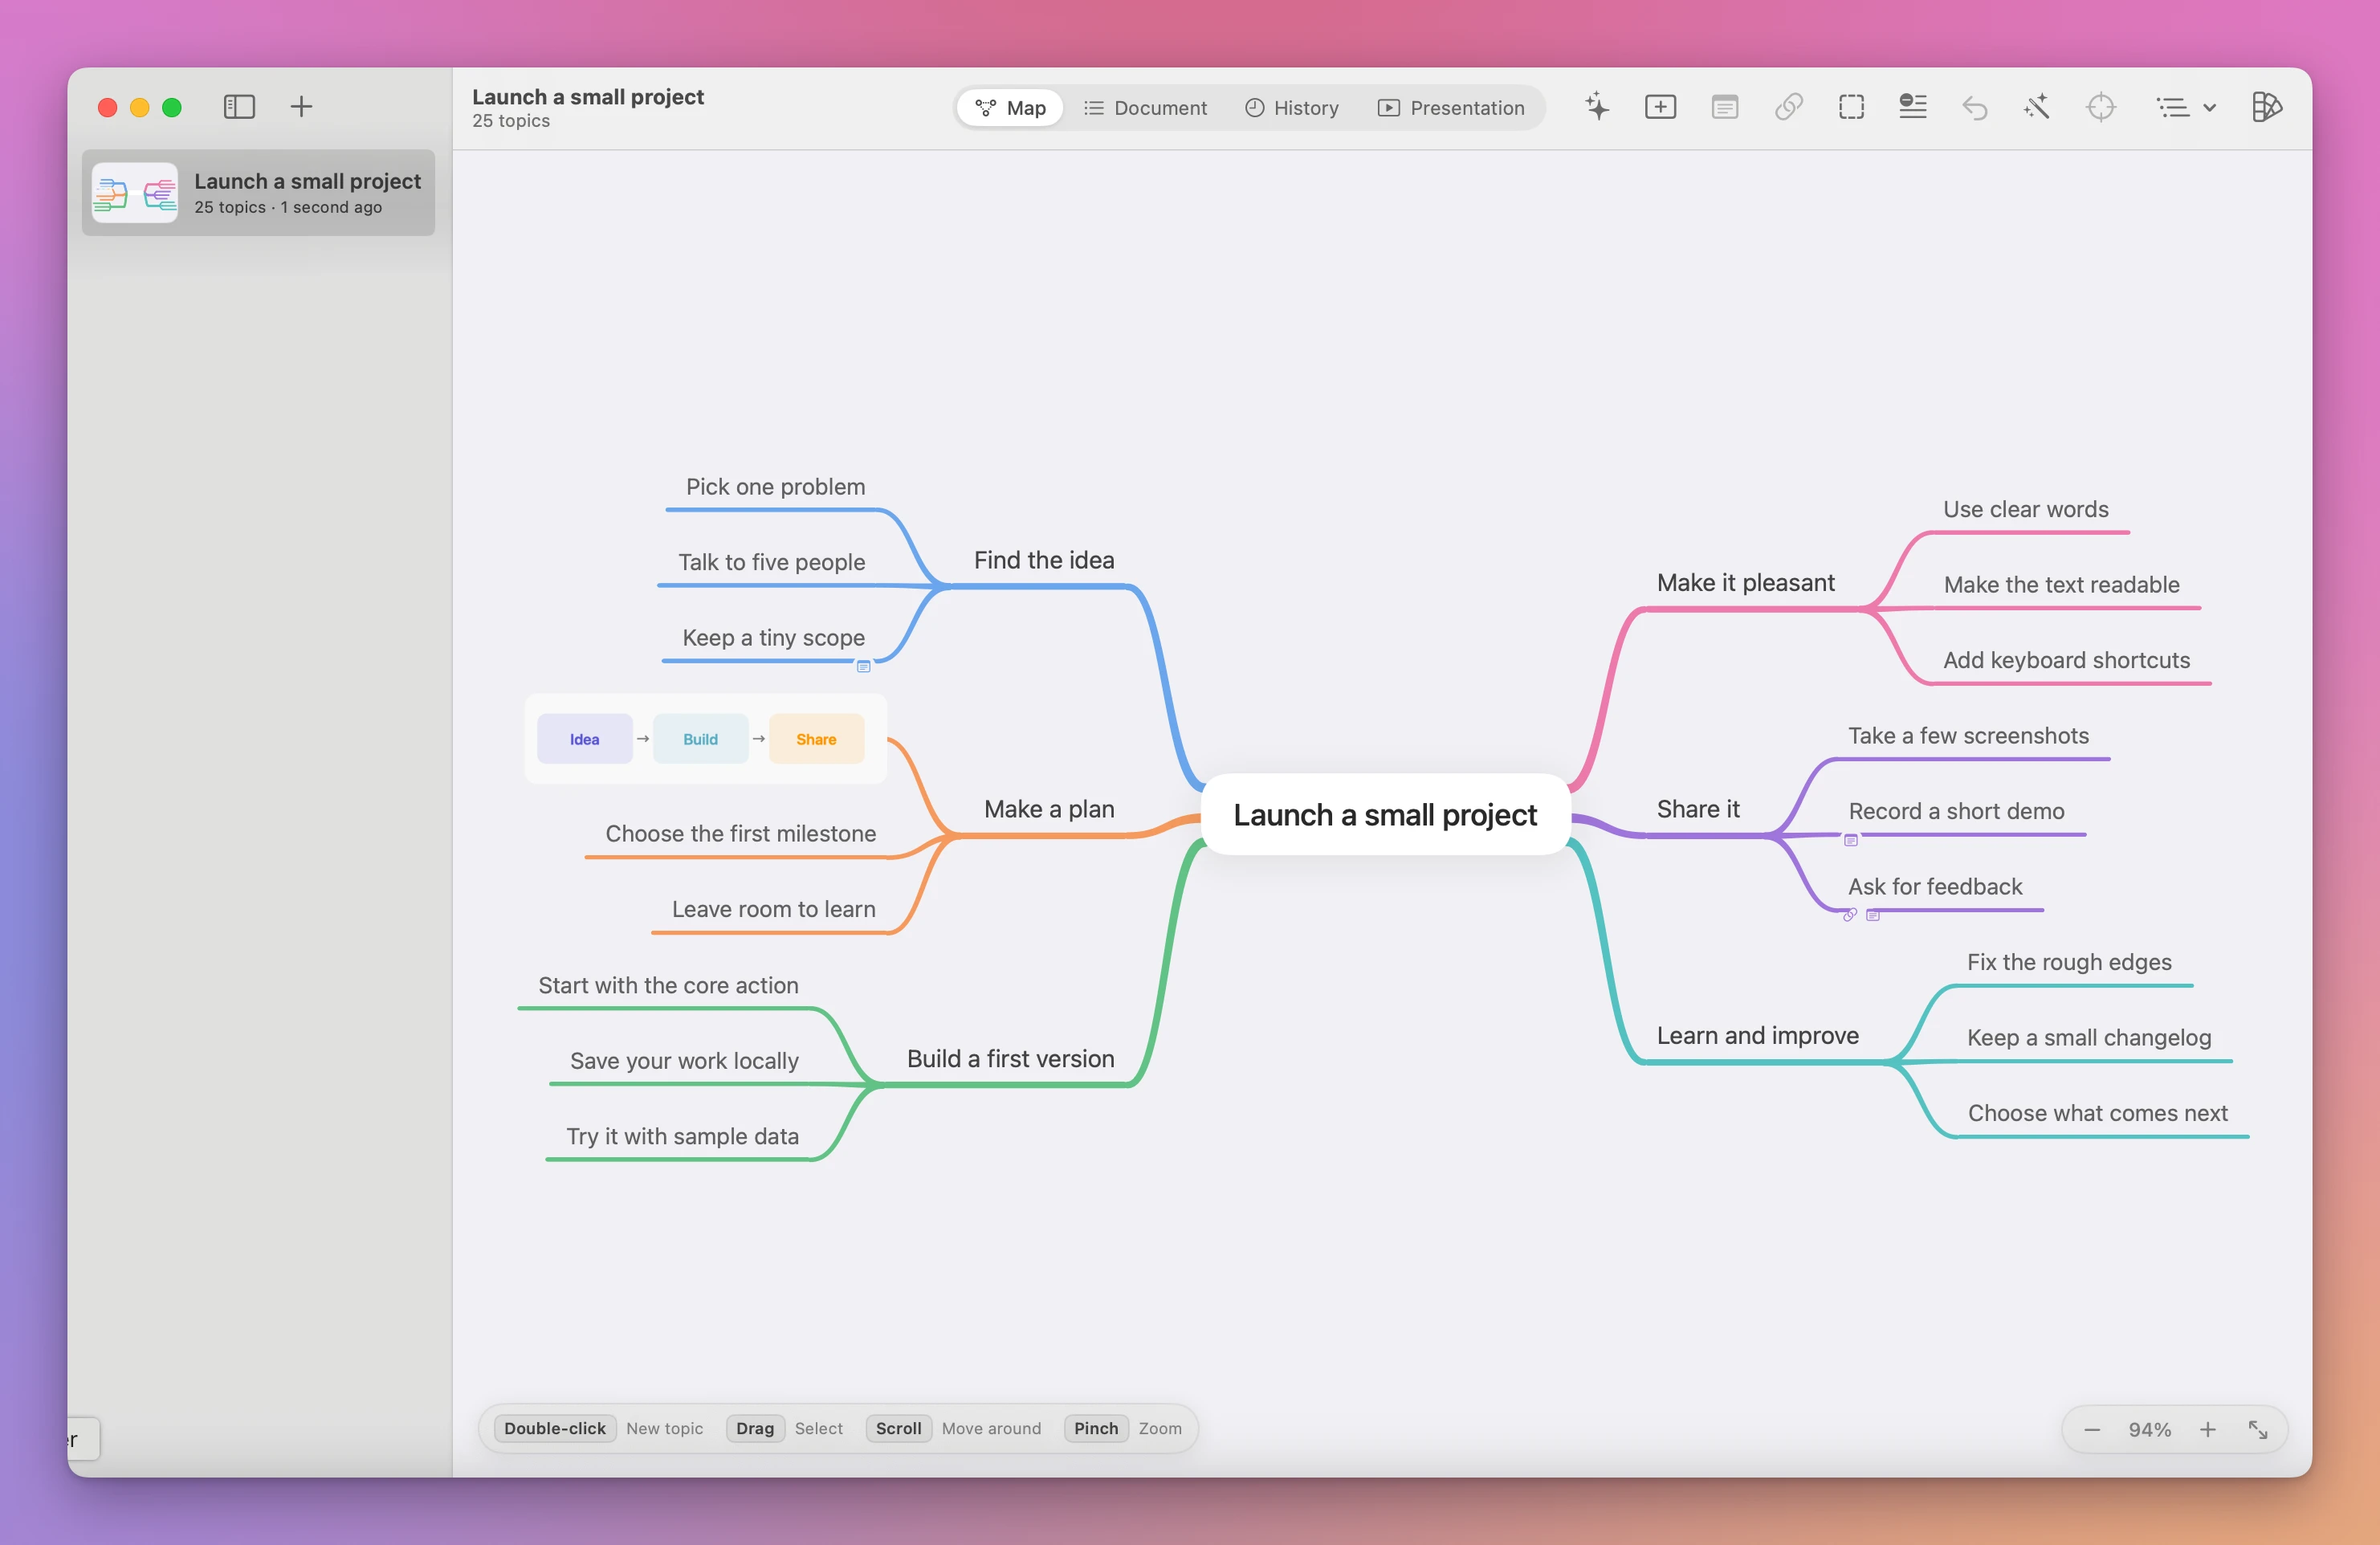
That’s the sample map a fresh install opens with. File → New Sample Map makes another copy of it, so you can experiment there without worrying.
Two modes: selected and editing
Every key in Mind Map depends on one thing: is a topic selected, or are you typing inside it?
When a topic is selected, Tab, Return and Space act on the map. When you’re typing, the text field gets the keys first, so Return finishes the text and ⌘C copies text instead of a branch.
Most “why did that happen” moments come from pressing a key in the other mode.
Add the first topics
Press ⌘N. The new map opens with the central topic already in editing mode, showing the gray Central Idea placeholder. Type Weekend project.
Now press Tab. This finishes the center and opens a child under it, ready for typing. Tab works like this while you’re typing too: it finishes the current topic and adds a child under it.
Type Build and press Tab again to go one level deeper. Type Make a prototype and press Return to finish it.
The topic is still selected, so a second Return adds a sibling. Type Test with a friend and press Return.
To get to Build again, use the arrow keys. They move the selection to the nearest topic in that direction, so on this map ← goes from Test with a friend back toward Build. With Build selected, press Return, type Share, then Tab, Record a demo, Return.
The map’s title follows the central topic, so the sidebar now lists Weekend project.
Here are the keys we used, and the others that work on topics:
| Key | When a topic is selected | While typing in a topic |
|---|---|---|
| Tab | Add a child | Finish, and add a child of this topic |
| Return | Add a sibling | Finish |
| Option-Return | Insert a new line in the topic | |
| Space | Start editing it (images open a preview) | Type a space |
| Escape | Deselect, or leave focus if nothing is selected | Finish, keeping the text |
| Delete | Delete the topic and its branch | Delete text |
| Arrow keys | Move to the nearest topic that way | Move the text cursor |
| Any letter | Starts typing, if the topic is empty | Types it |
| ⌘C / ⌘X / ⌘V | Copy, cut, paste branches | Copy, cut, paste text |
| ⌘B / ⌘I | Bold / italic on the selected topics | |
| ⌘Z / Shift-⌘Z | Undo / redo | Undo / redo typing |
Notice that Escape finishes the edit like Return does and keeps what you typed. Use ⌘Z to take a change back.
With nothing selected, Tab adds a child of the central topic and the arrow keys select the center first.
Paste a list you already wrote
If the branch is already written somewhere, as a note or a list from a chat, paste it instead of typing it again.
Select the central topic, without editing it, and paste this indented list with ⌘V:
Plan
  Pick a date
  Ask Marco to help
Budget
Plan and Budget land under the center, and each indented line goes under the line above it. Bullets made with -, *, +, • or 1. work too, and the nesting is kept. The whole paste is one undo step, so ⌘Z removes all of it.
Paste while you’re still typing in a topic and the whole list goes into that one text field instead, because the text field gets ⌘V. Press ⌘Z, press Return to finish editing, and paste again.
Move around and focus
A map grows past the window fast. These are the keys for the canvas and the window:
| Key | Action |
|---|---|
| ⌘0 | Fit the map in the window |
| ⌘- / ⌘= | Zoom out / in |
| Shift-⌘F | Focus the selected branch, or leave focus |
| ⌘1 / ⌘2 / ⌘3 / ⌘4 | Map / Document / History / Presentation |
| Option-1 to Option-9 | Open the first nine maps in the sidebar |
| ⌘N / Option-⌘N | New map / new window |
| Shift-⌘N | Add or edit the selected topic’s note |
| Shift-⌘L | Auto Layout |
Select Build and press Shift-⌘F. Only Build and its children stay on the canvas, zoomed to fit. Tab and Return keep working inside the focus. Press Shift-⌘F again to see the whole map. The central topic can’t be focused, since its branch is the whole map.
Scrolling pans and pinching zooms, if your hand is already on the trackpad.
Add a note
A note keeps the details out of the topic, so the topic stays short.
Select Make a prototype and press Shift-⌘N. A note sheet opens with the cursor in it. Type Paper sketch first, then a clickable version and click Save. Return inside a note adds a new line, and Escape cancels. A small note icon appears under the topic, and hovering the topic shows the note.
Check the structure in Document
Press ⌘2. Document shows the same map as an outline, left side first, with the notes under their topics.
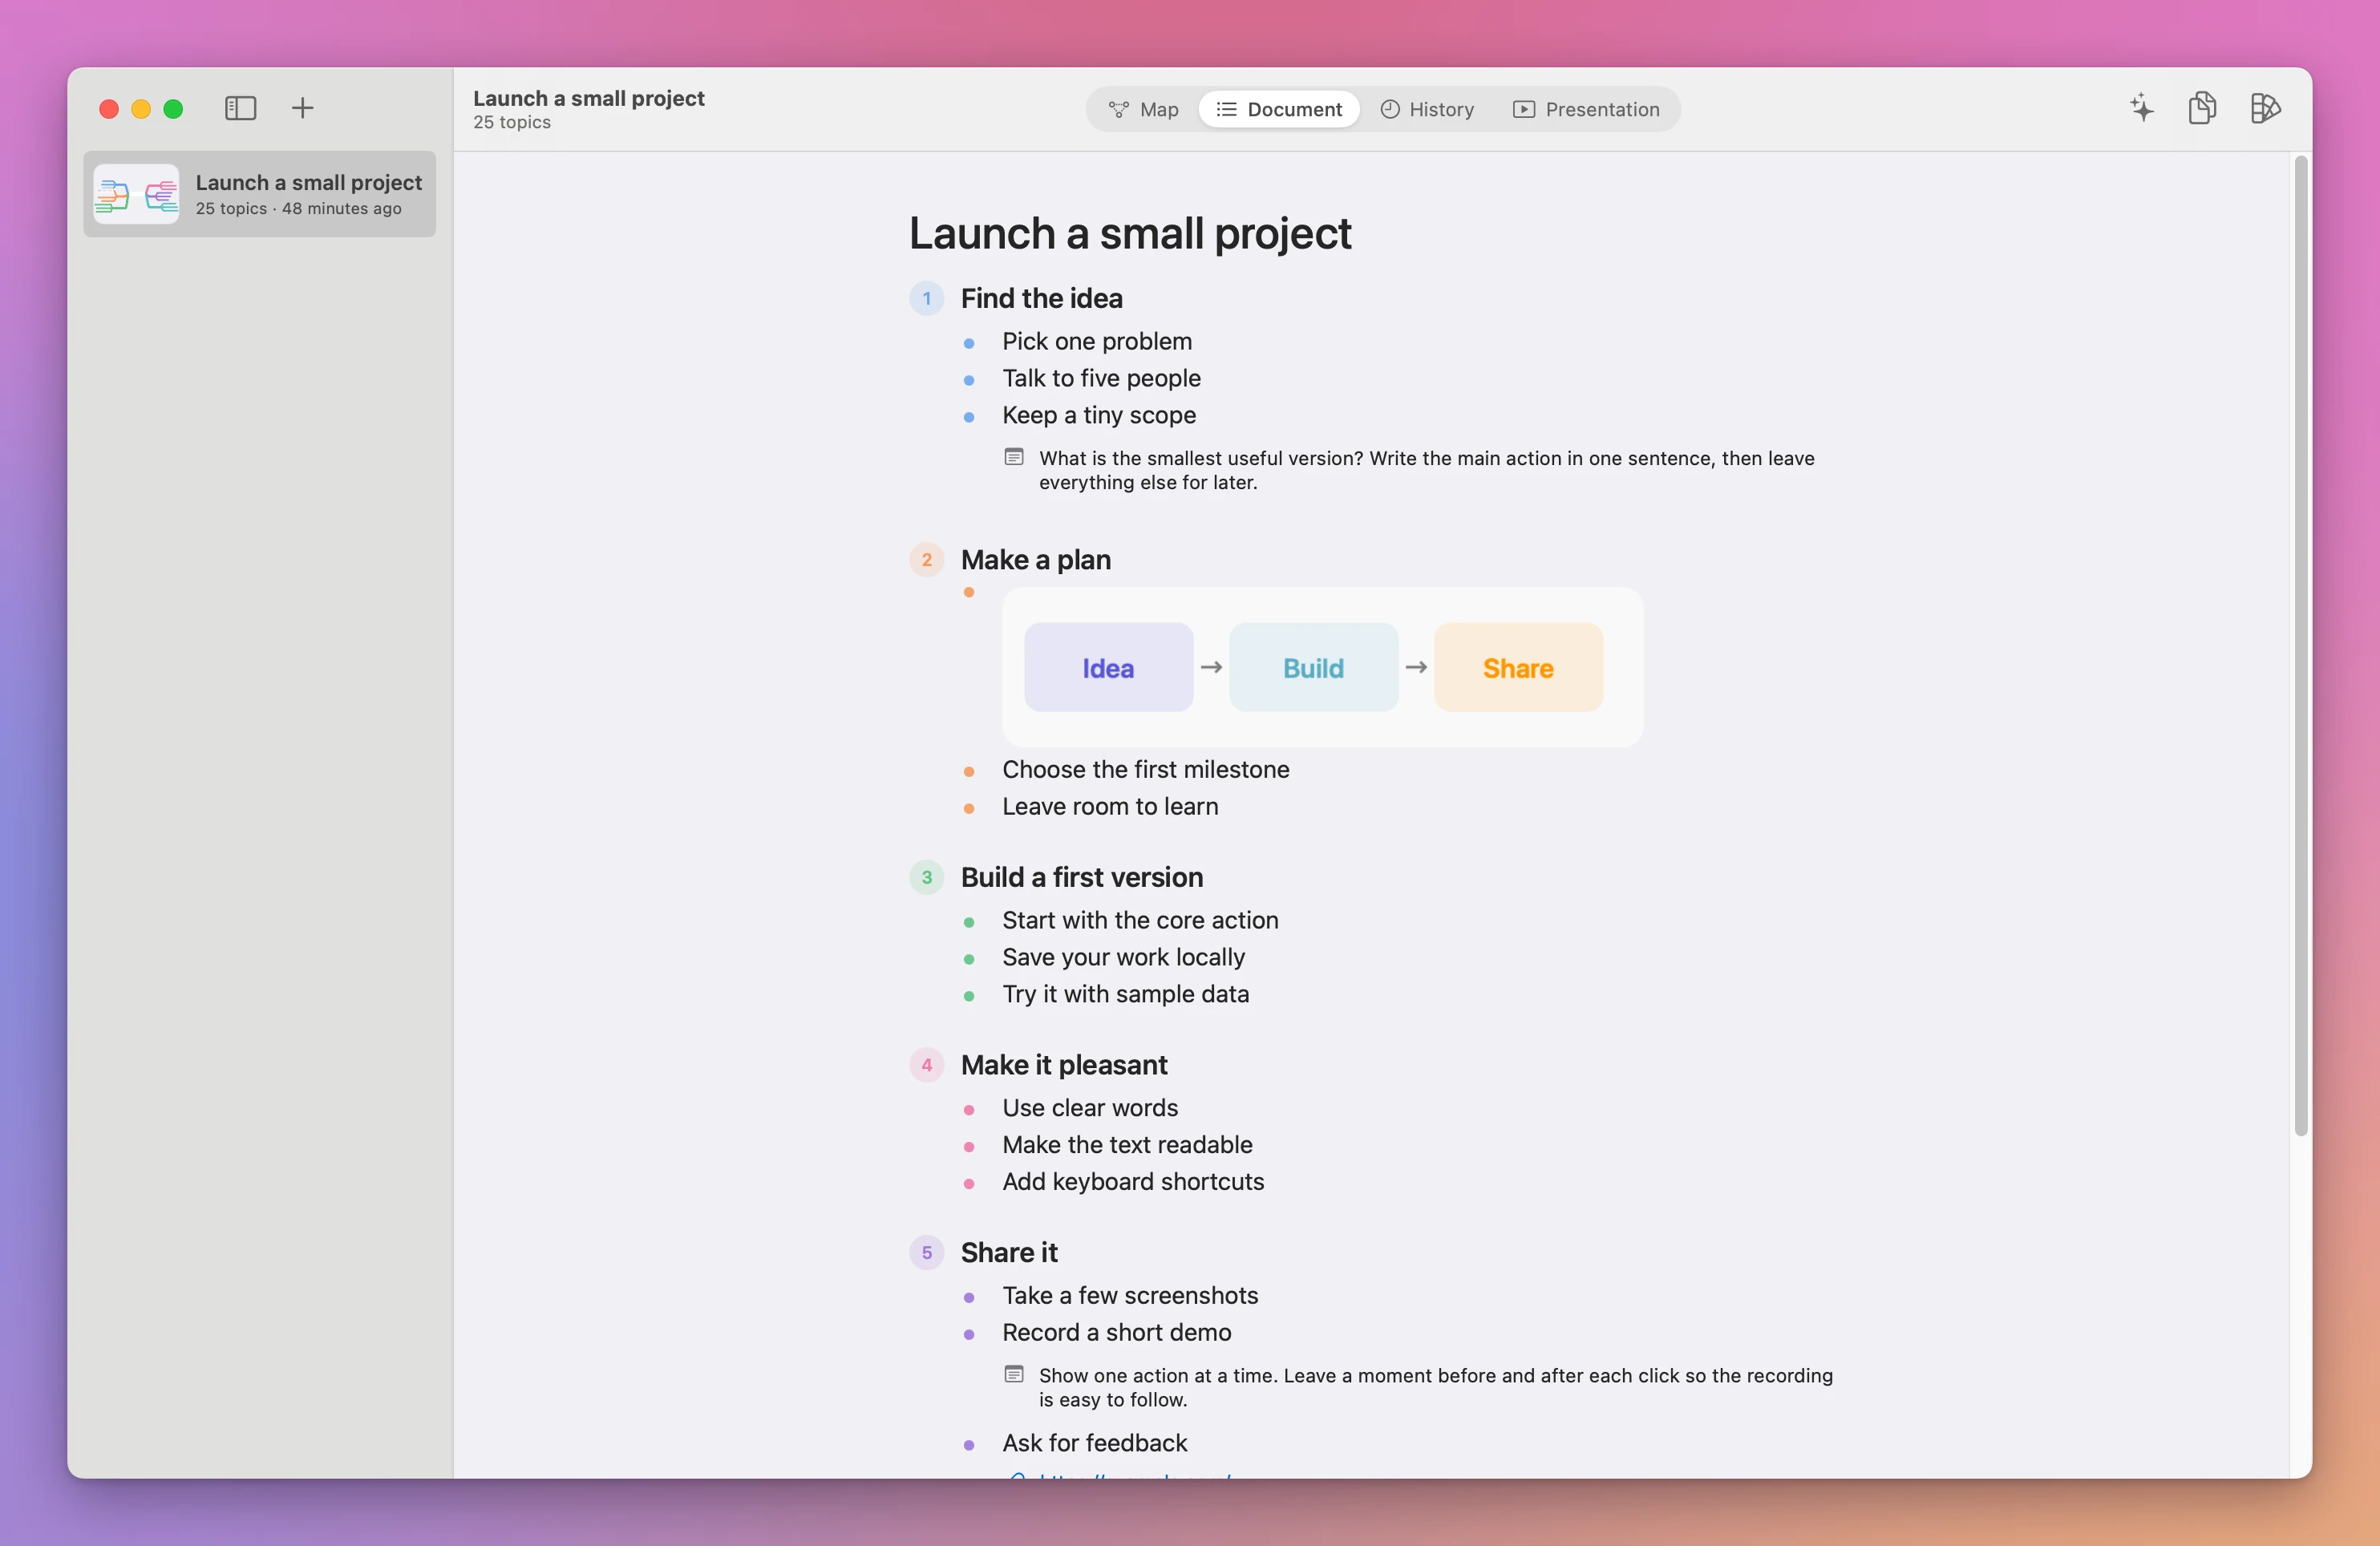
This is where a wrong nesting is easy to spot. If Test with a friend sits under Make a prototype, it was added with Tab where you meant Return. Go back with ⌘1, select it, press Delete, and add it again from Make a prototype with Return.
Present it
Press ⌘4 for Presentation, then ⌘Return to play. Every topic becomes a slide, parents before their children. Topics with children become chapter slides in their branch color.
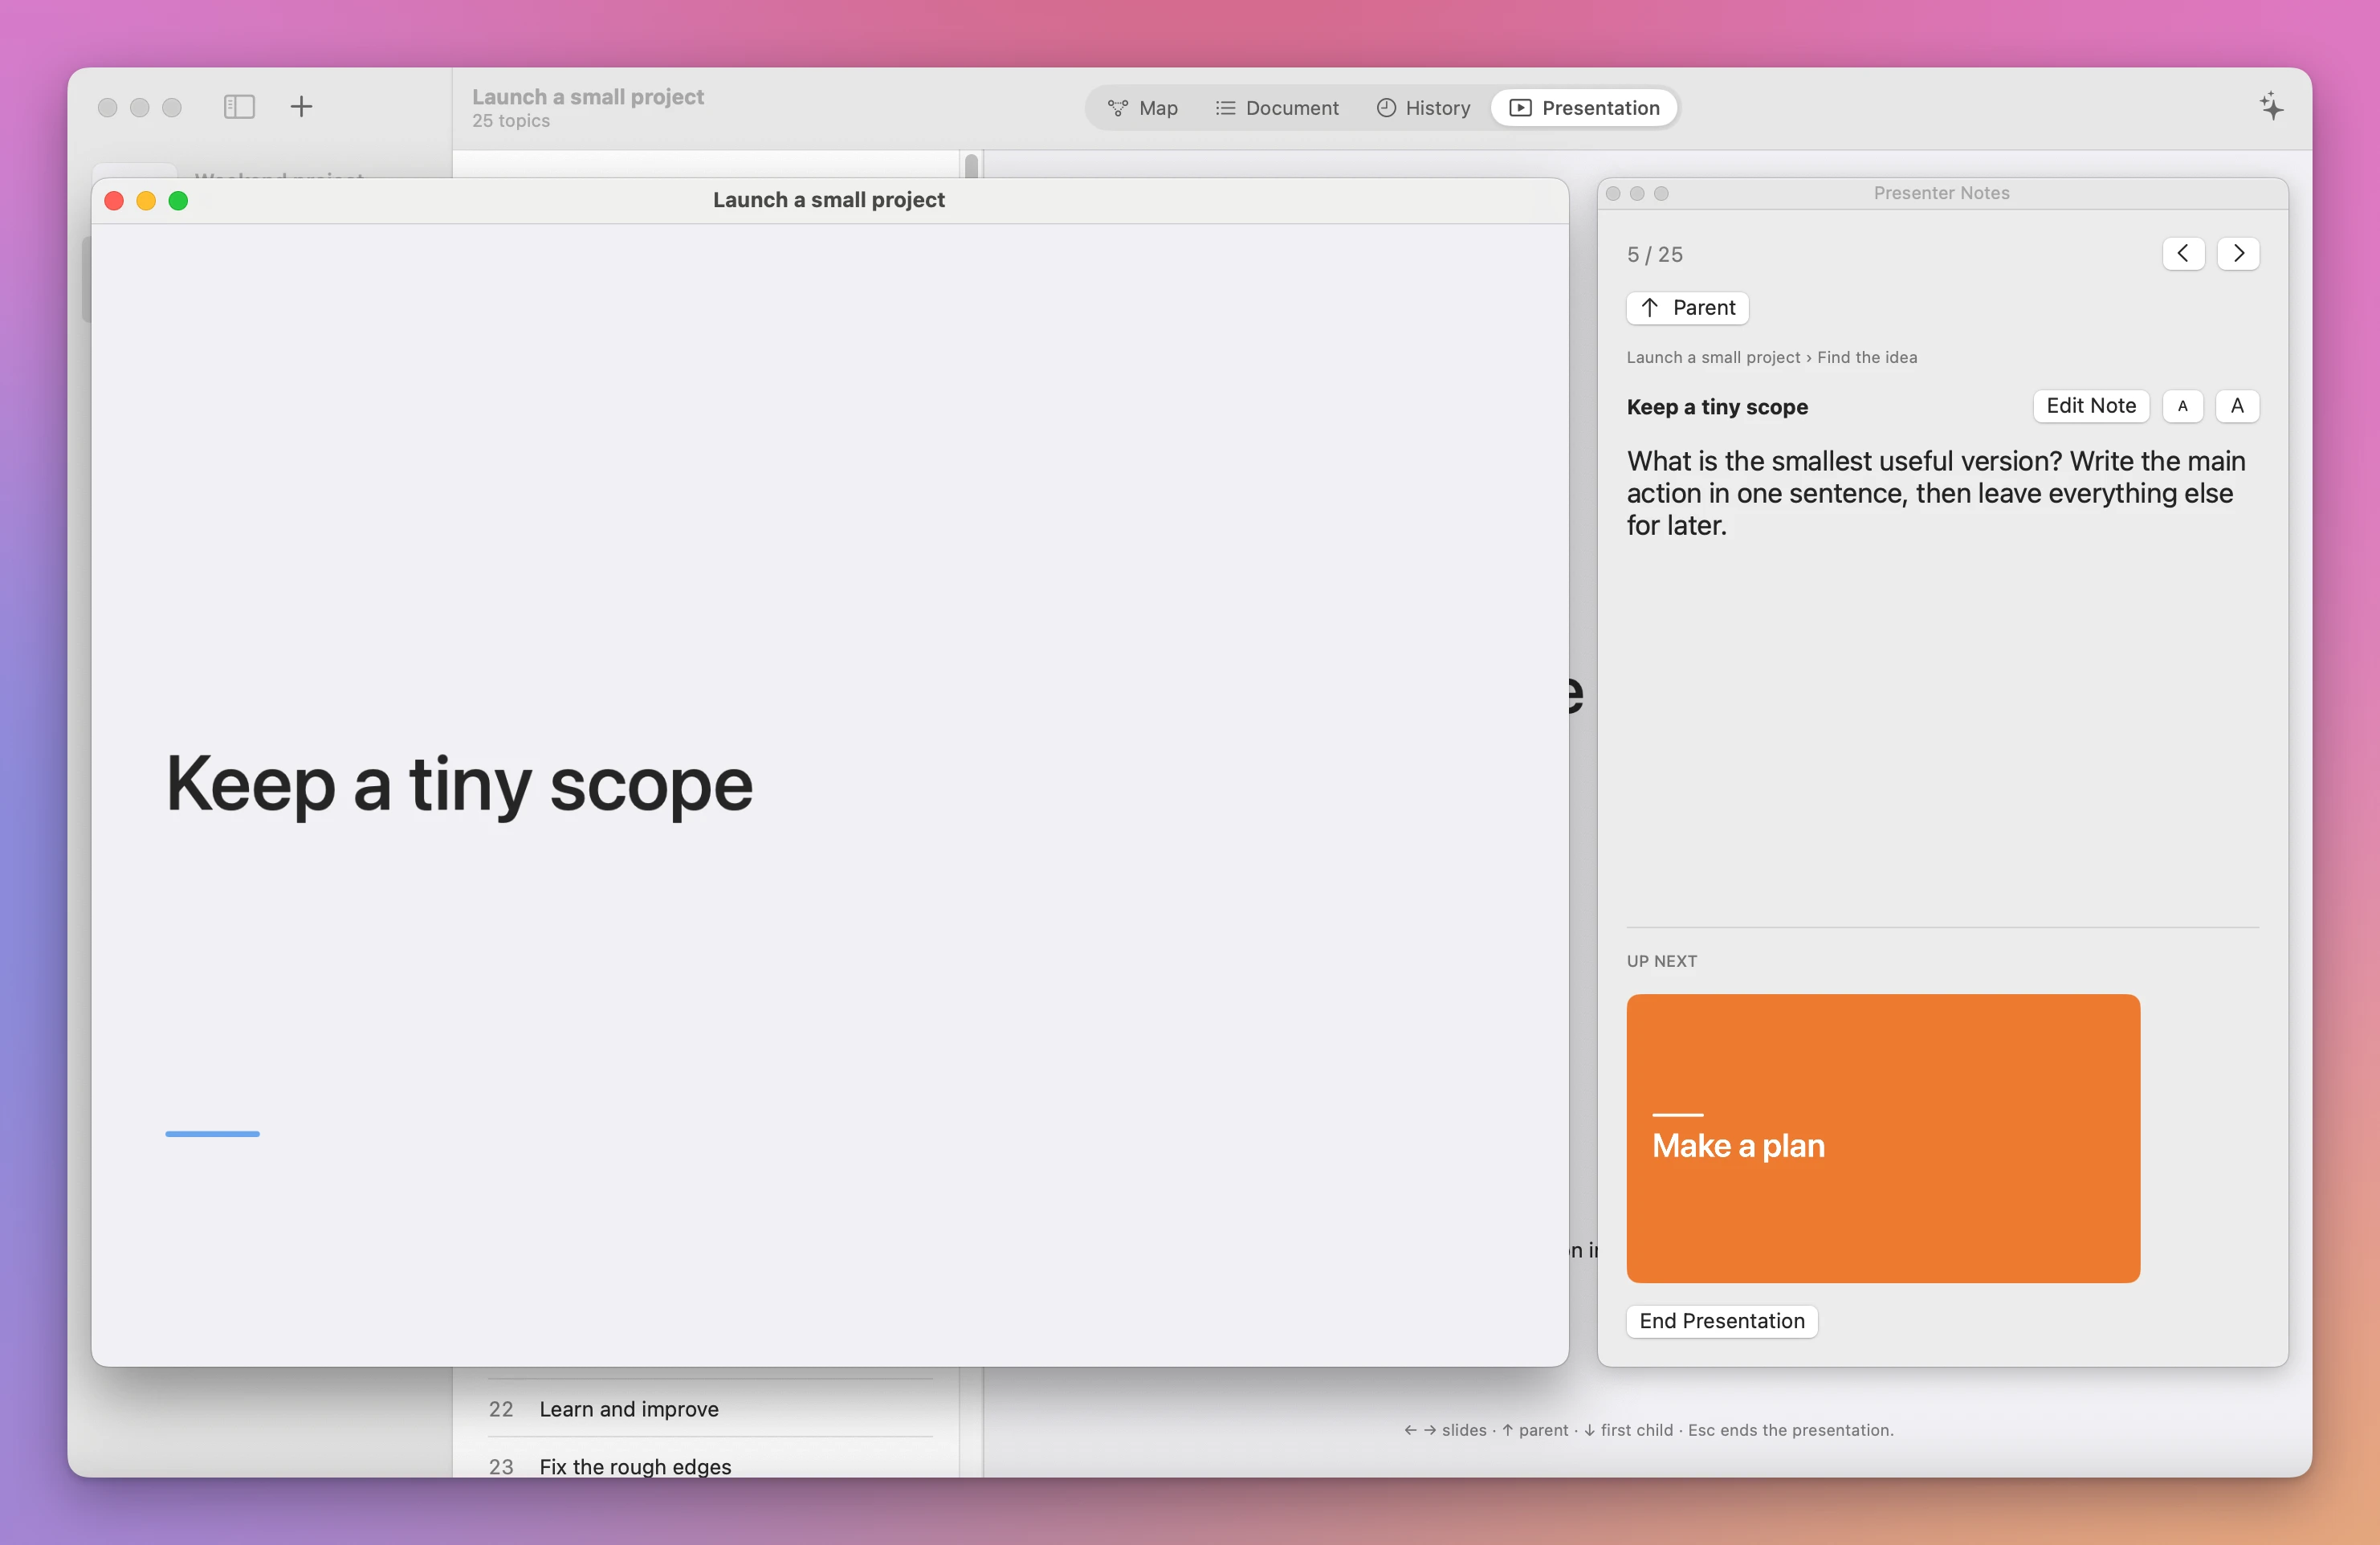
The audience window and the presenter panel are separate windows, so you can share only the audience one. These keys work while it plays:
| Key | Action |
|---|---|
| → or ← | Next or previous slide |
| ↑ | Go to the parent topic |
| ↓ | Go to the first child, or the next slide from a leaf |
| Space, Return, Page Down | Next slide |
| Page Up | Previous slide |
| Escape | End the presentation |
Page Down and Page Up are what most presentation clickers send, so a clicker works too.
If you focused a branch before pressing ⌘4, the presentation contains only that branch.
When a key does the wrong thing
You pressed Return to add a sibling and nothing new appeared: you were still typing, so Return finished the text. Press Return once more.
You pressed Tab or Return and the map didn’t react: the focus is in the sidebar or a toolbar field. Click an empty spot on the canvas, or press ⌘1, and use the arrow keys to select a topic again.
⌘Z undoes text, added and deleted topics, moves and pastes for the current session. After you quit, use ⌘3: History keeps the last 40 content changes plus the starting version, and Restore This Version brings one back.
Get Mind Map
Map ideas with notes and images, edit an outline and present slides. A native Mac app with a companion CLI and full MIT source.
See Mind Map → · Read the docs · $20. See the app page for tax details, with full source code.
Want me to talk about your product? You can sponsor this site.