The complete guide to Cursor
By Flavio
Updated
Tagged: AI
Learn Cursor from your first project to daily work: Agents Window, planning, visual edits, Debug Mode, models, project rules, skills, subagents, MCP, code reviews, Bugbot, Cloud Agents and the CLI.
Cursor started as a fork of VS Code with AI features added on top. Today it’s a complete agentic environment, in the same category as Claude Code or Codex. You describe a change, and the agent finds the relevant files, edits them, and runs commands to check its work.
The editor is still there, and it’s still based on VS Code, so you can open files and write code yourself. But Cursor also has the Agents Window, an interface built around the conversation with the agent, with your running app, files, terminal and Git beside it. That’s how I mainly use Cursor, and it’s where most of this guide happens.
To have something to work on, we’ll ask the agent to create a small sample project, a tic-tac-toe app. The project isn’t the point. It gives us a running app we can use to try the tools that help us direct the agent and review its code. Later we’ll add project instructions, a reusable skill and a subagent, look at external tool connections, code reviews and Cloud Agents, and try the CLI.
The screenshots come from Cursor versions between late 2025 and May 2026. Some menus, models and plans have changed since then, and I’ll point out the differences that matter for these steps.
What Cursor does
A model on its own can write code from a prompt. Cursor gives it tools to work on your actual project: read files, edit them, run commands, open the app in a browser.
Say a button doesn’t work. The agent finds its event handler, reads the code around it, tries a fix, then runs the app or the tests to see if the fix worked. You still click the button yourself at the end, because the agent’s summary can sound sure of itself while the button is still broken.
You can work this way from the Agents Window, the editor, or a terminal with the CLI. Cloud Agents do the same work on a remote machine.
In this guide the project and the development server stay on your computer. The model doesn’t: Cursor sends your prompt and the relevant code to the model provider to process it.
If you’re still deciding which kind of tool suits you, I wrote about the tradeoffs in IDE, CLI, vibe coding tool, …how to decide?.
Install Cursor and sign in
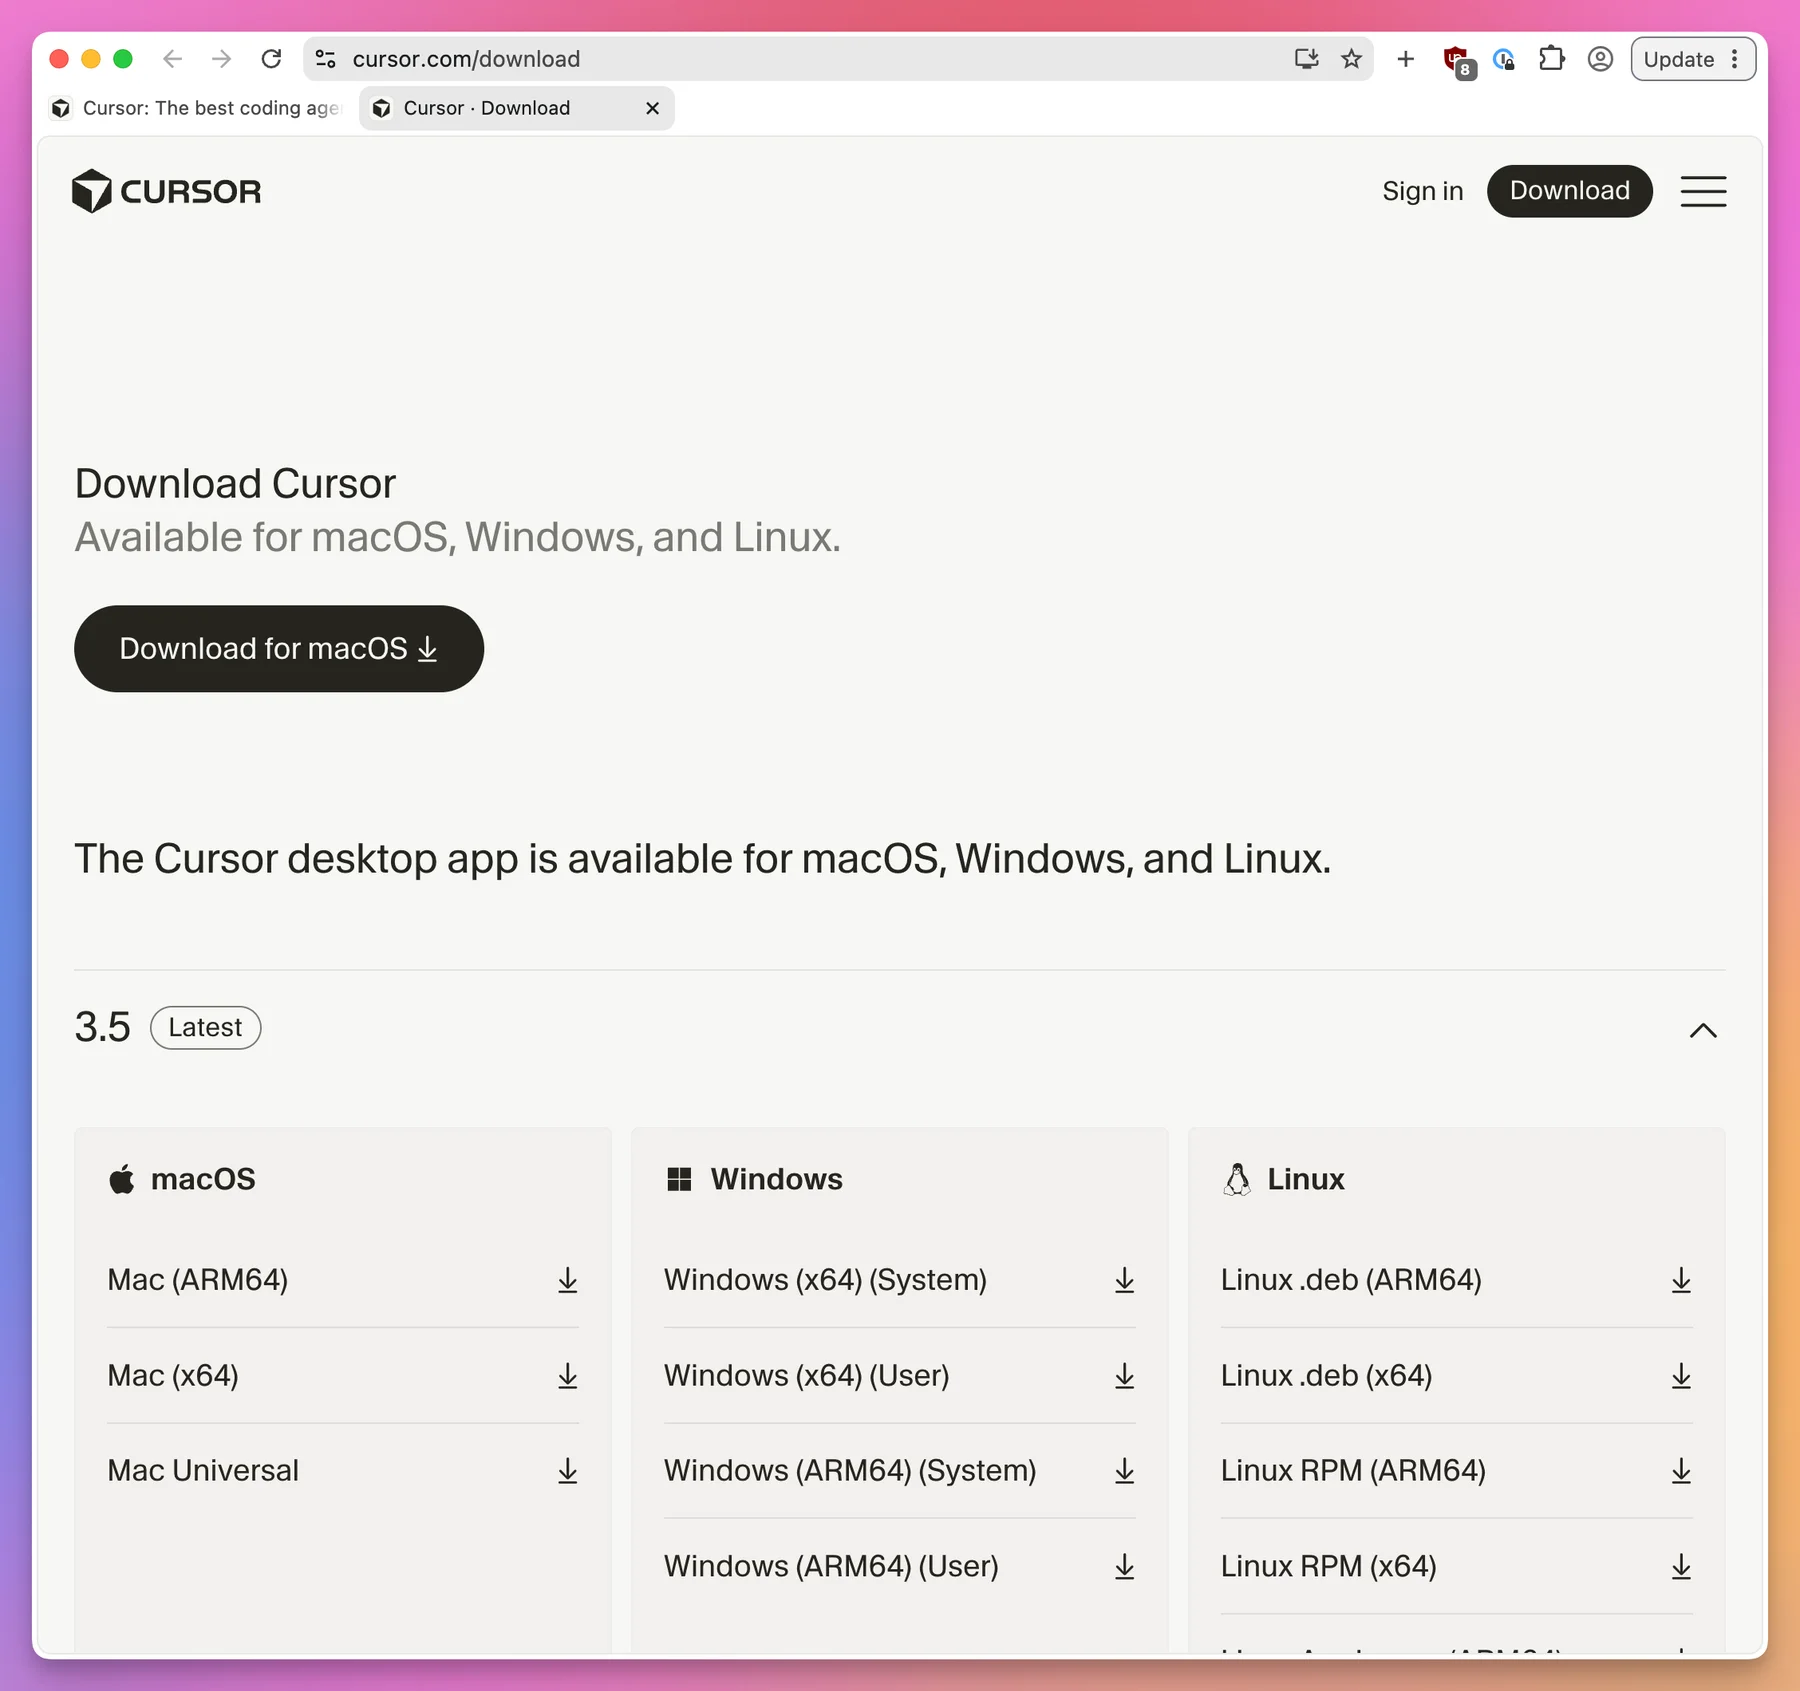
Download the installer for your system from cursor.com/download.
Run it and open Cursor. You can browse files without an account, but the AI features need you to sign in. The welcome screen has a Sign in button:
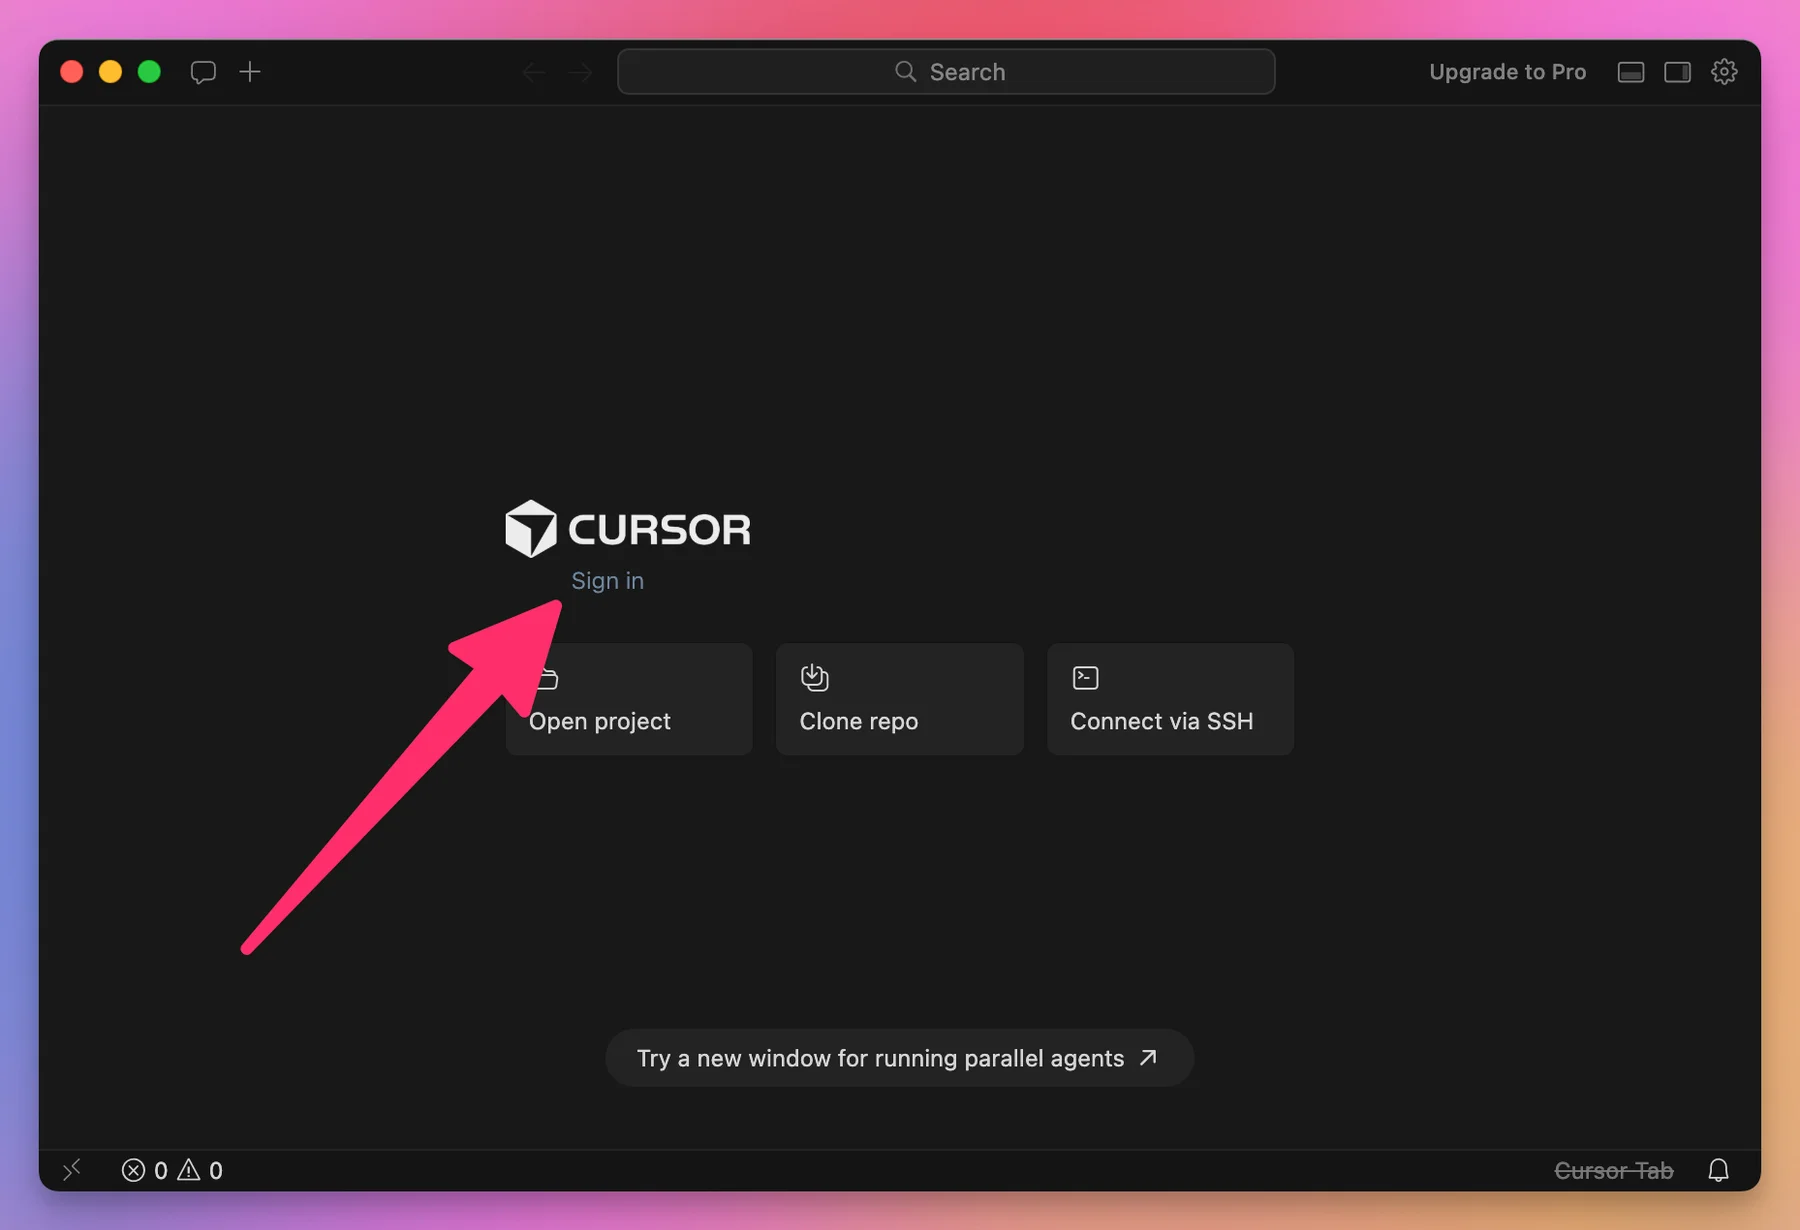
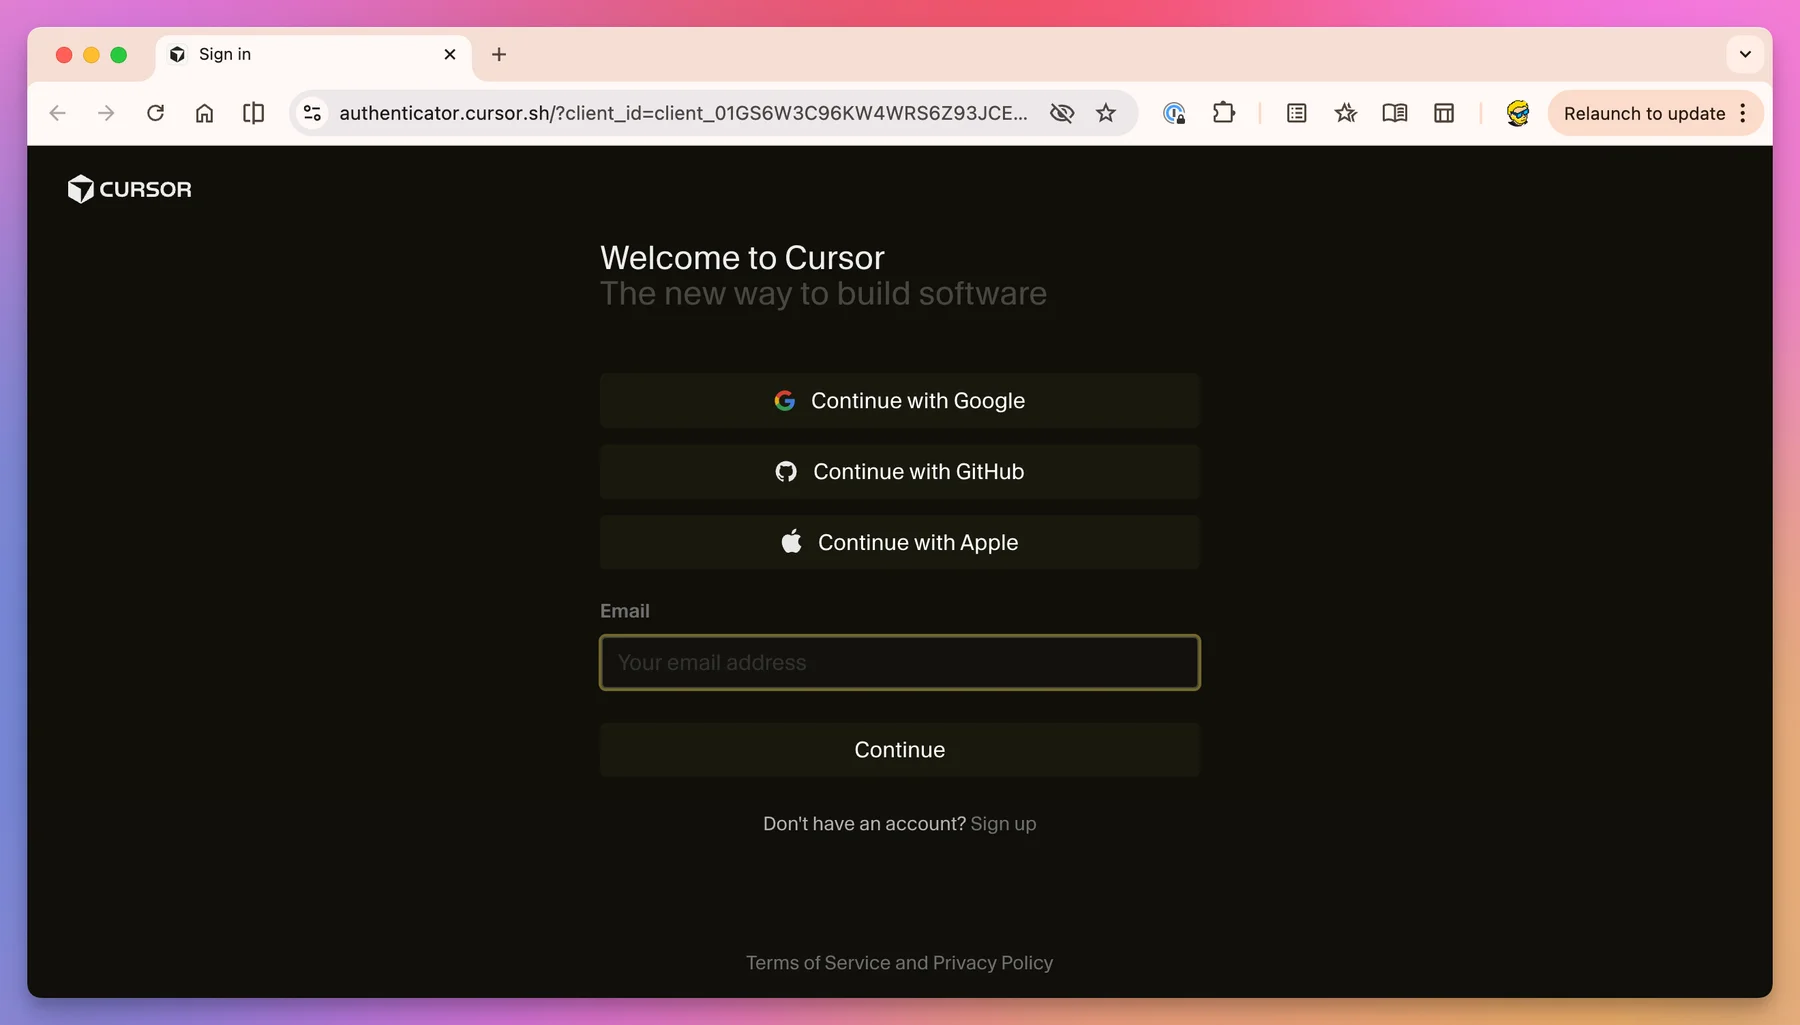
It opens the sign-in flow in your browser. When you’re done, go back to the app.
If you’ve used VS Code, the editor will look familiar: file explorer, tabs, integrated terminal, source control.
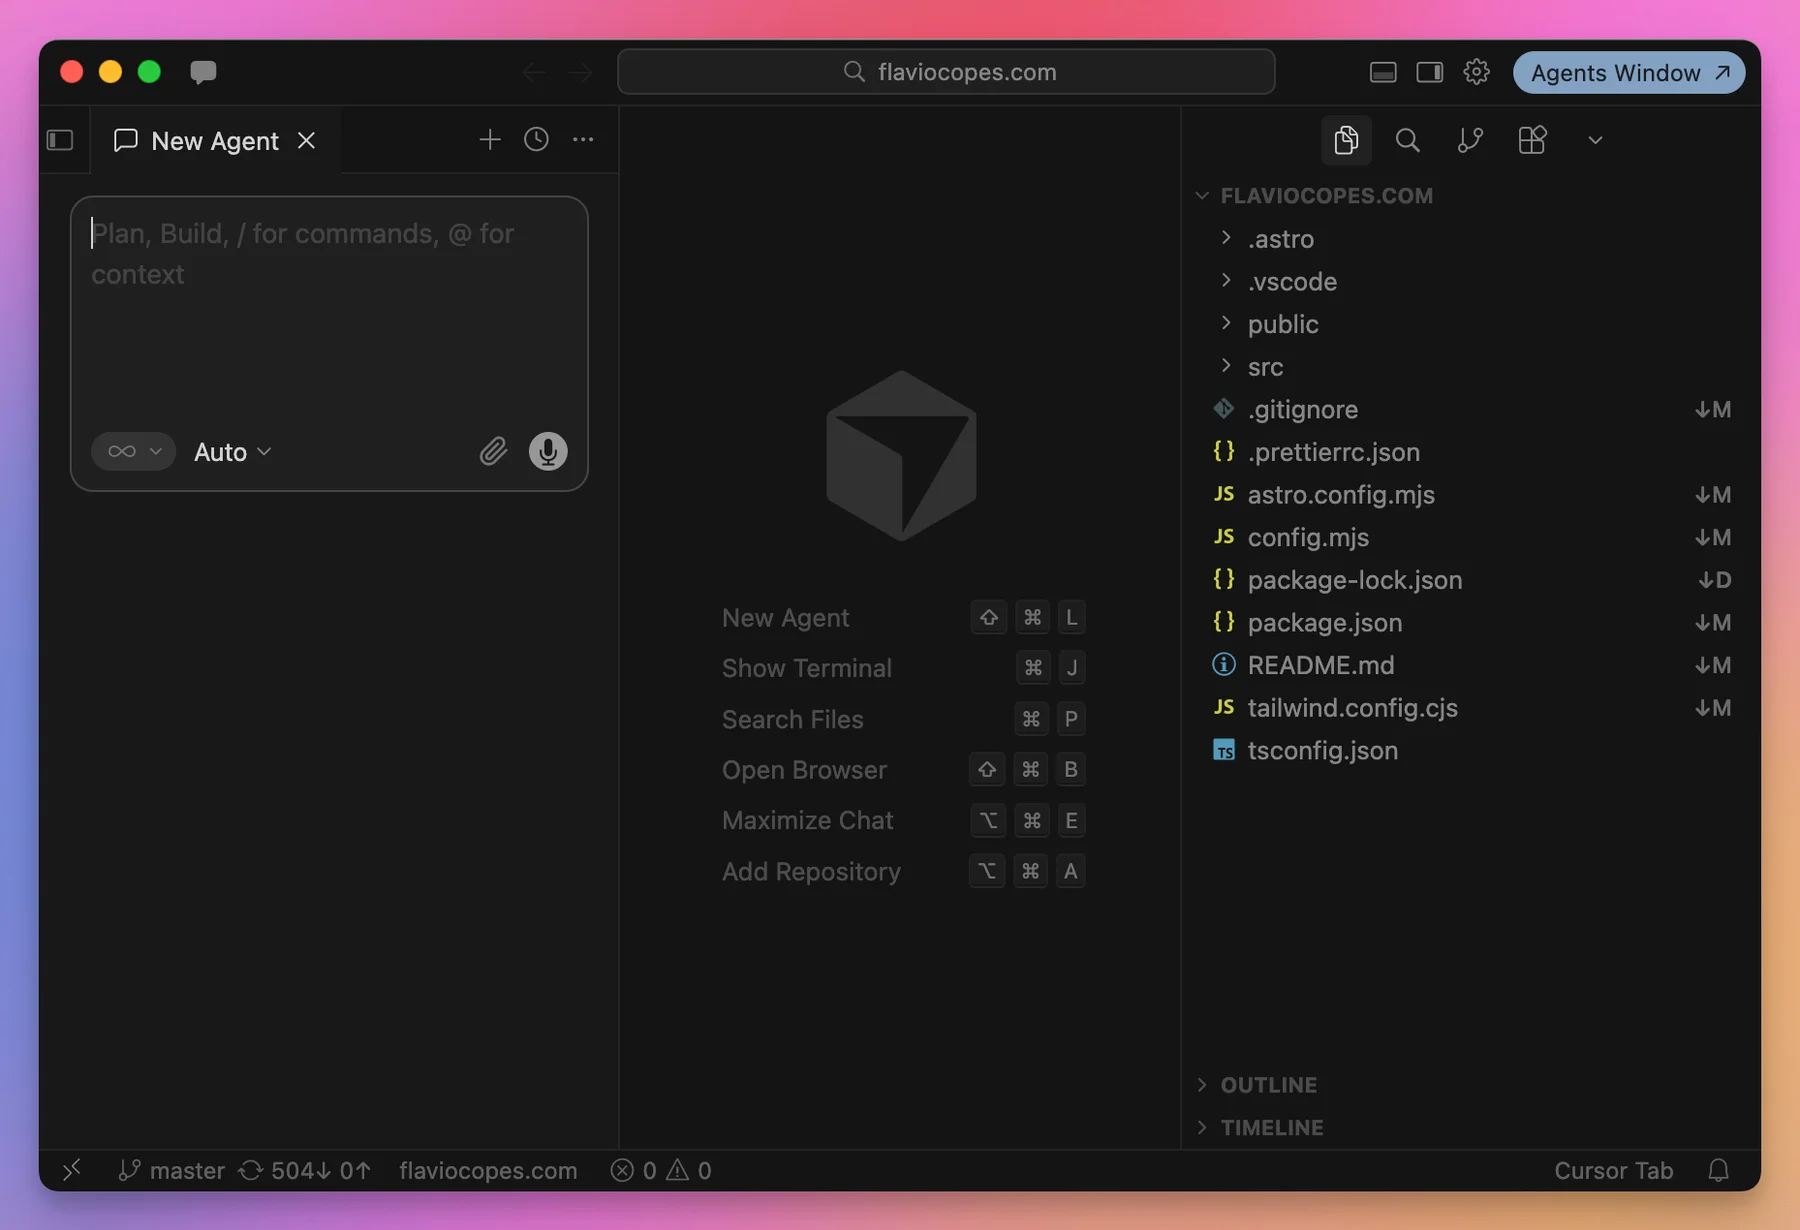
We’ll work in the Agents Window. Open the Command Palette (Cmd+Shift+P on macOS, Ctrl+Shift+P on Windows and Linux) and run Open Agents Window. To go back to the editor, run Open IDE. Cursor’s Agents Window documentation describes both.
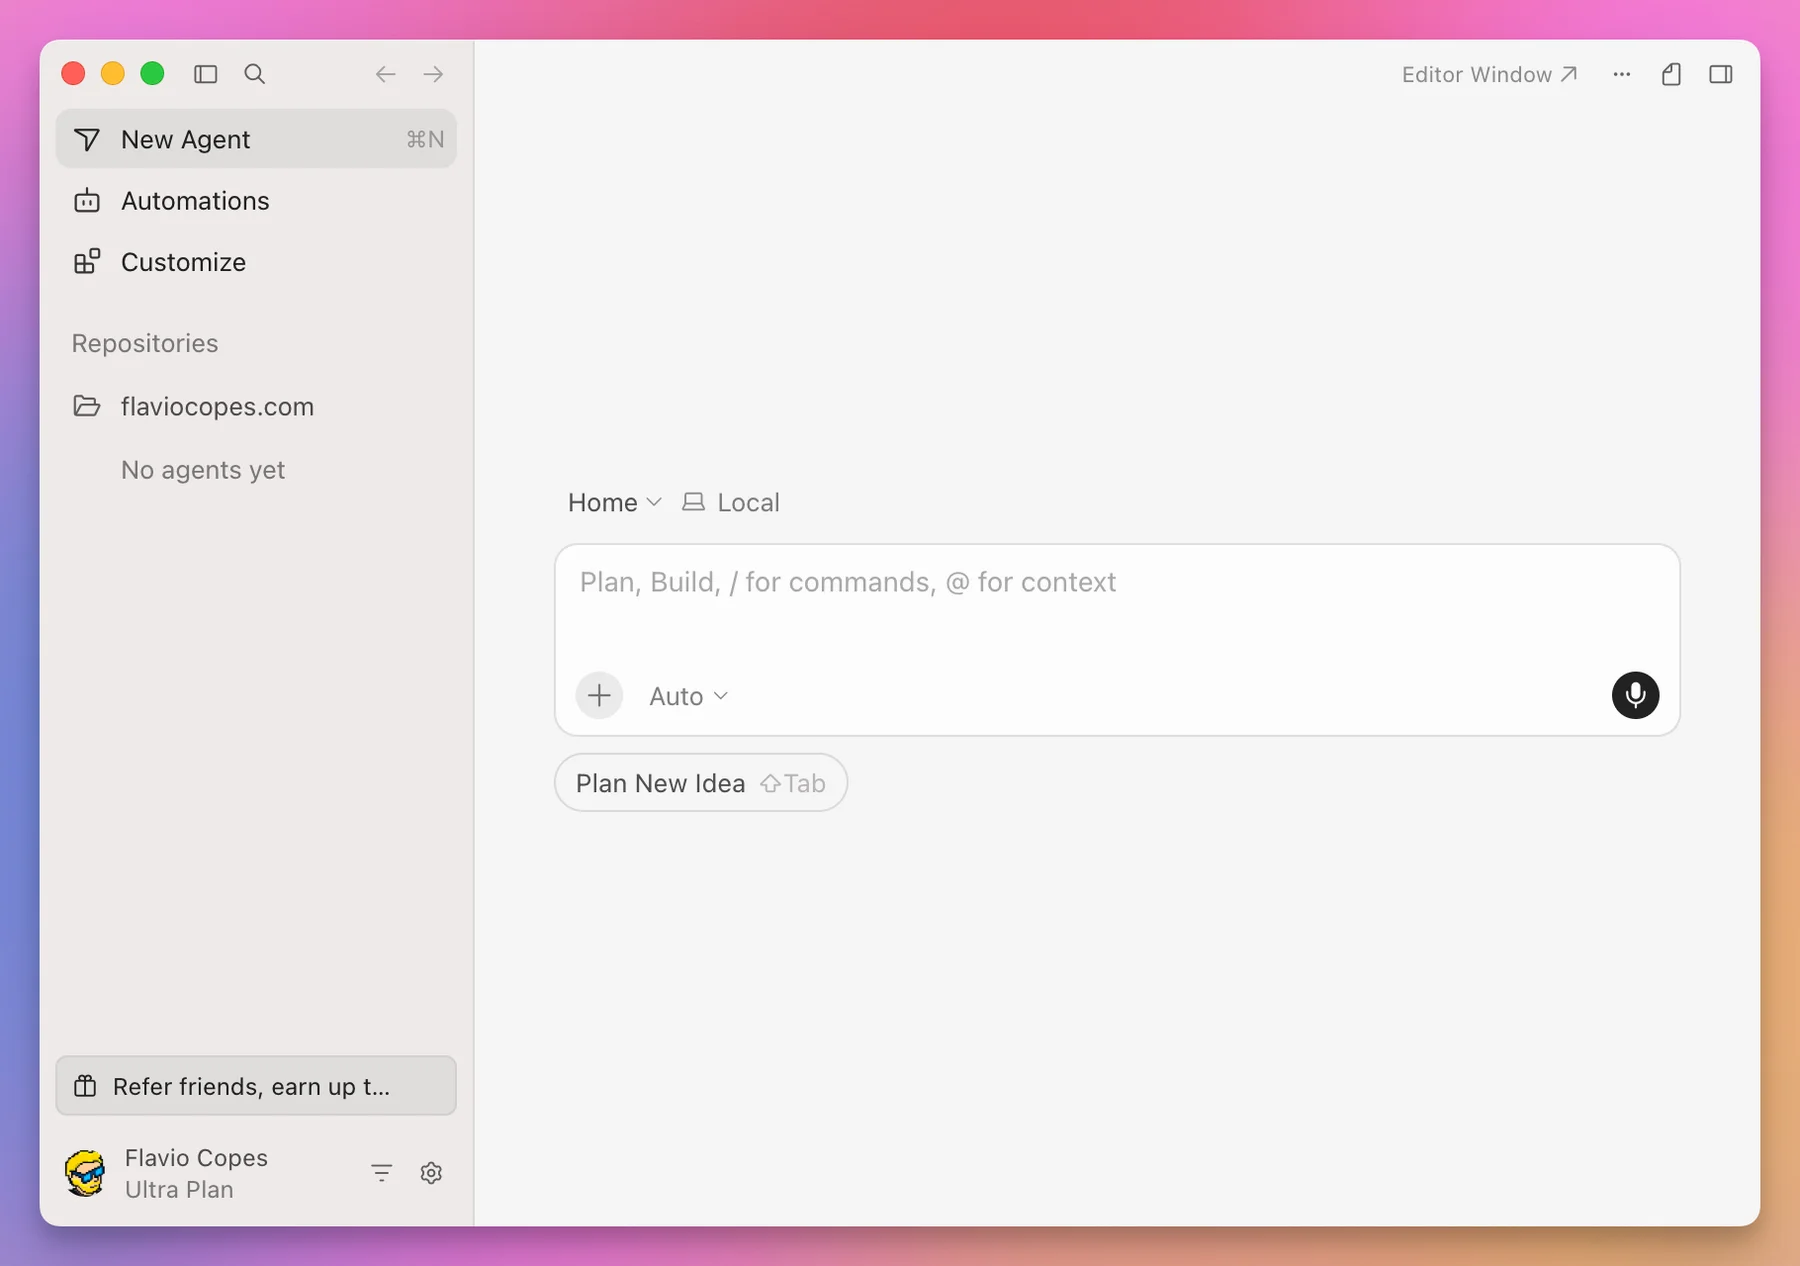
For now we only need three parts of it: the conversation, the workspace picker, and the side panel that shows files or the browser.
Free usage, paid plans, and models
Cursor has a free tier with limited AI usage. New paid subscriptions are part of the X subscription, which bundles Cursor, Grok and X. Their included Cursor-model usage refreshes weekly and is shared with Grok. Older Cursor subscriptions keep their legacy billing. The pricing page and your account dashboard tell you which one you’re on.
The screenshots show an older Ultra account, so the prices you see in them may not apply to you.
The thing to understand is the difference between included usage and separately billed usage. On new subscriptions, third-party models need an eligible plan and prepaid credit, so a model can show up in the picker without the monthly price covering it. Cursor’s models and pricing guide explains the pools and the legacy plans.
My advice is to try a small real task before buying a higher tier, and see how much usage it takes.
| Choice | What to check |
|---|---|
| Your subscription | Included usage, reset period, and spending settings |
| The selected model | Whether your plan includes its usage |
| Higher effort or larger context | Whether the task needs the extra processing |
| Fast options | The price difference for the speed increase |
| Your own API key | Supported features, provider billing, and account eligibility |
Create your first project
We’ll build tic-tac-toe. Two players take turns choosing a square, the app shows whose turn it is, detects a win or a draw, and lets us start a new game. It’s small enough to check by playing, and it has a few classic bugs to look for, like accepting a move after the game has ended.
You’ll need Node.js, npm and Git. Check them in a terminal:
node --version
npm --version
git --version
Use a current Node.js LTS release. Vite requires Node.js 20.19+ or 22.12+, and some templates need a newer one. If installation complains about an unsupported engine, check the Vite setup requirements and update Node first.
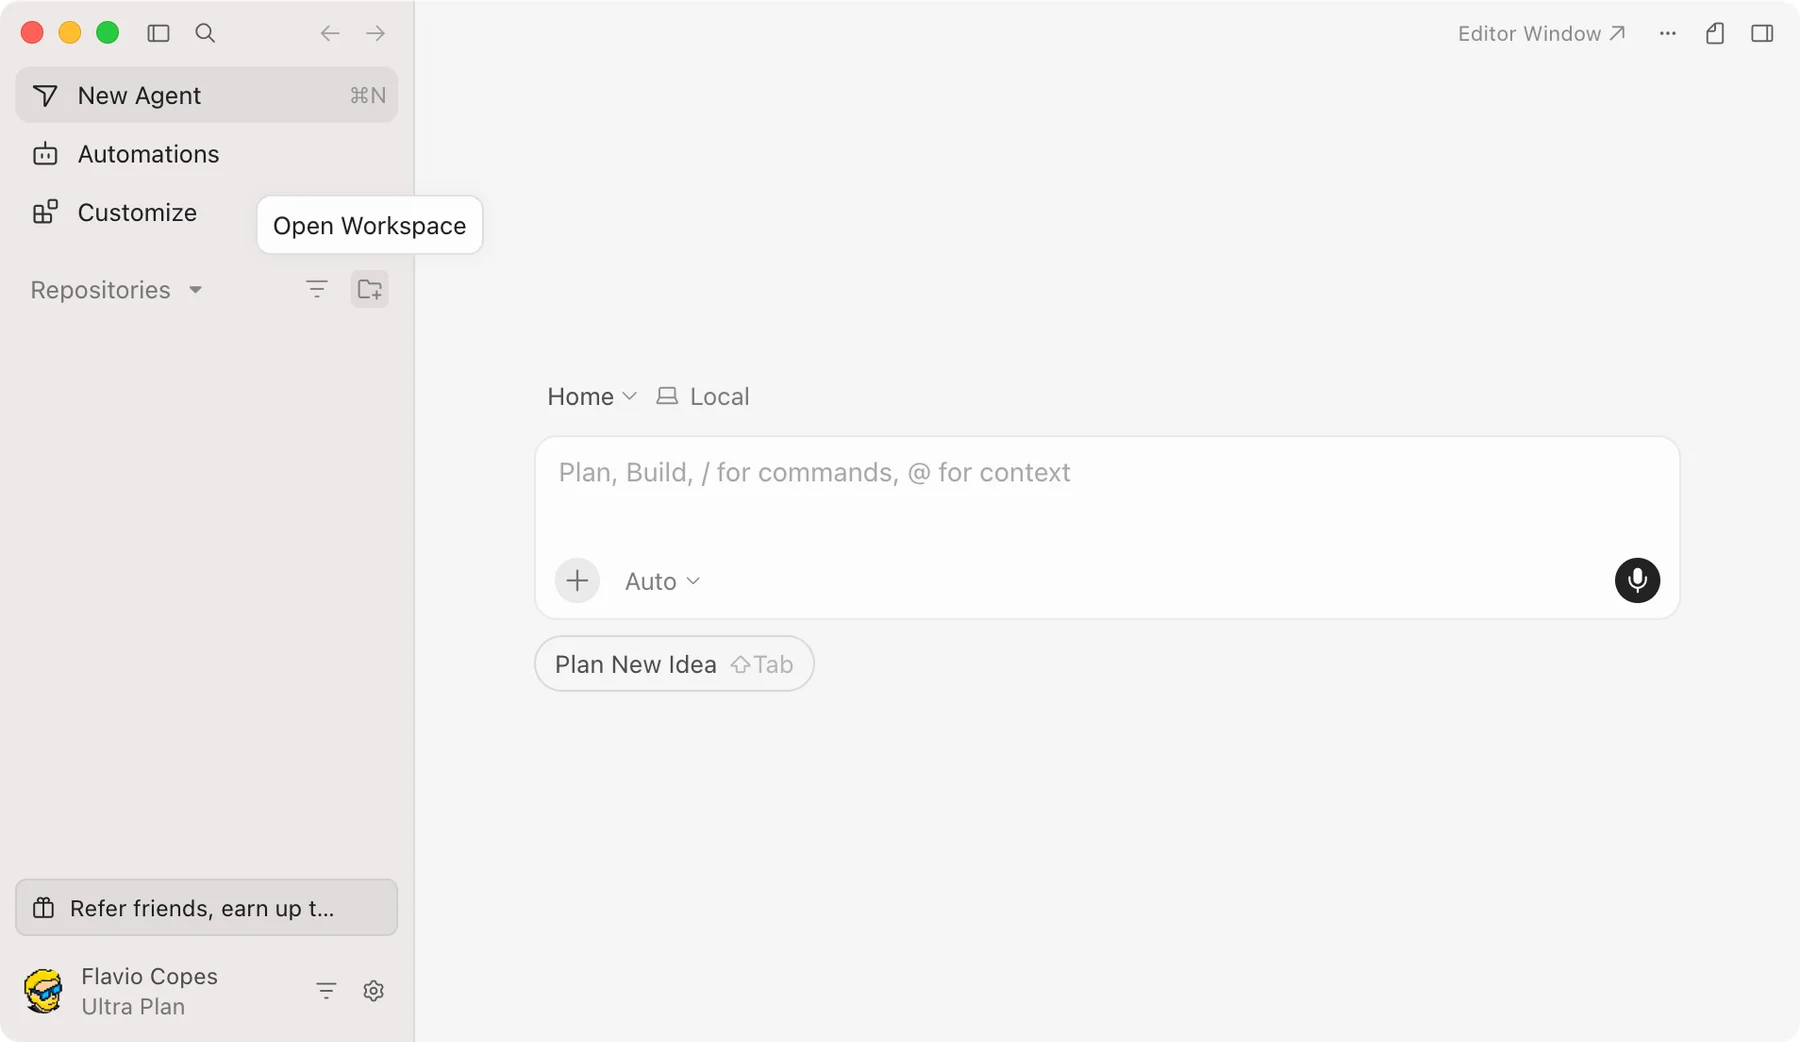
In the Agents Window, open the workspace picker:
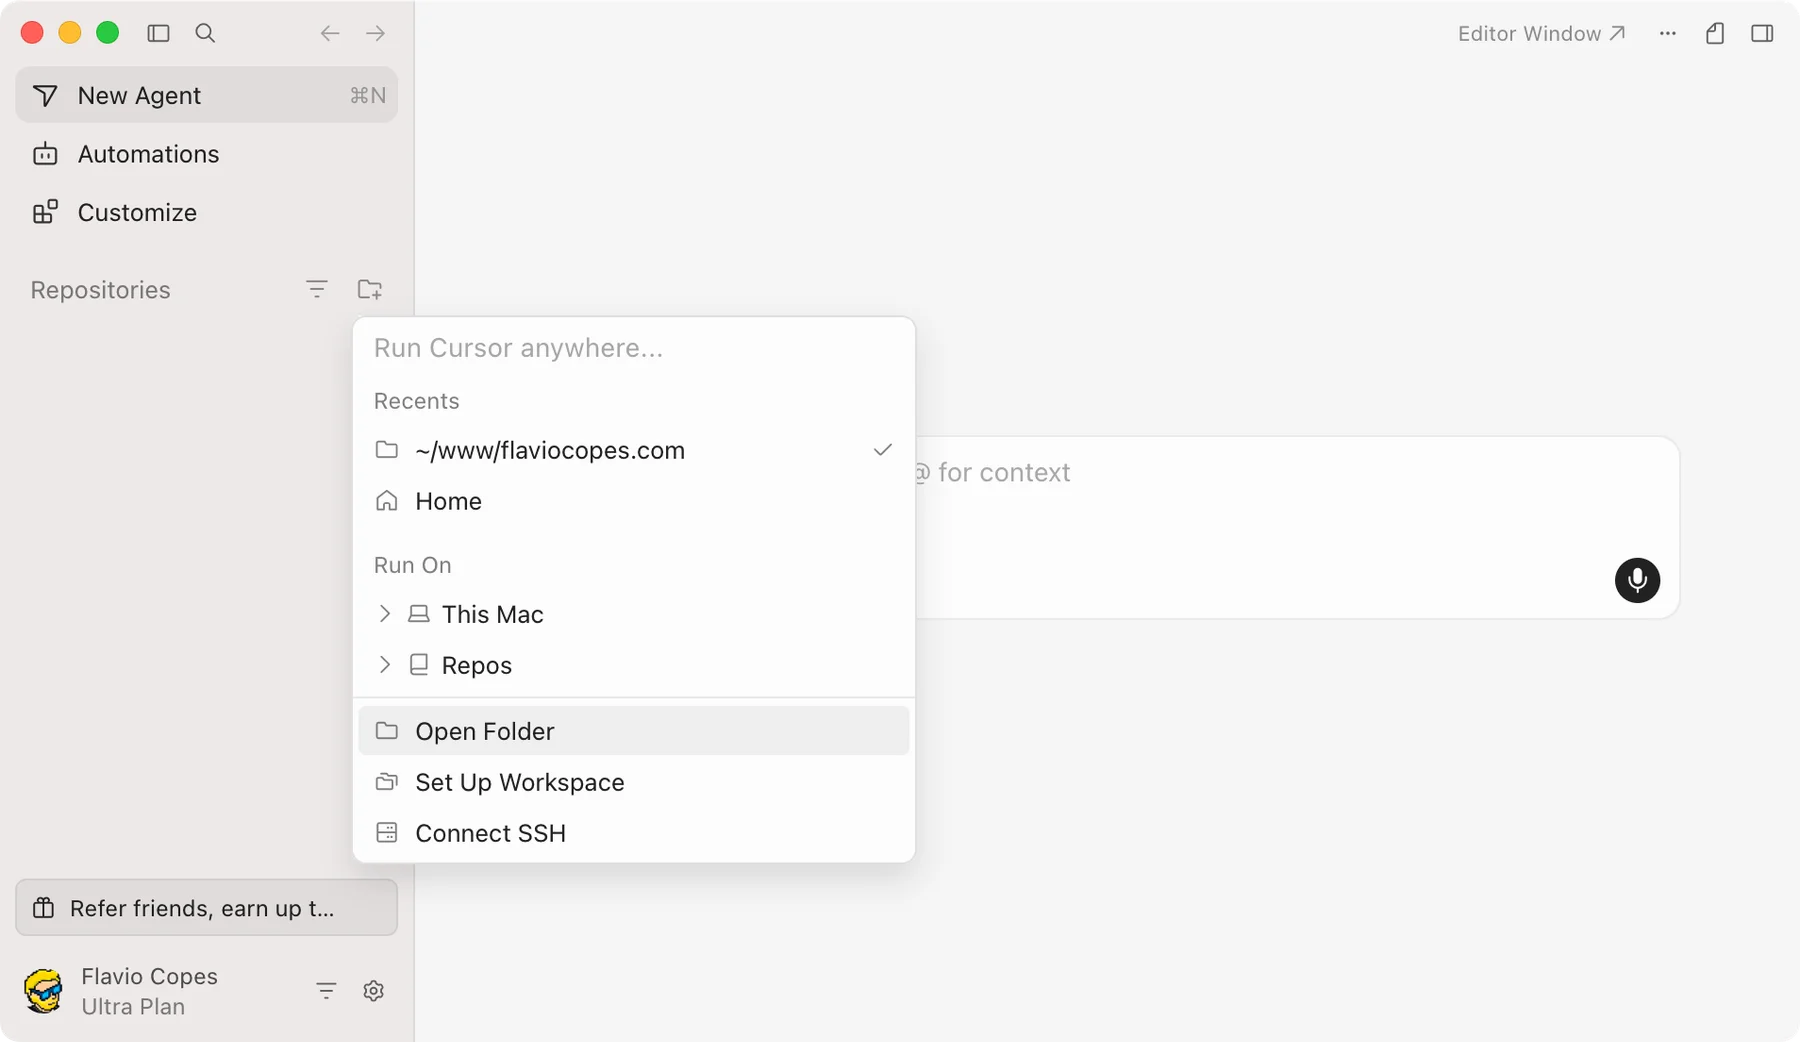
Choose Open Folder:
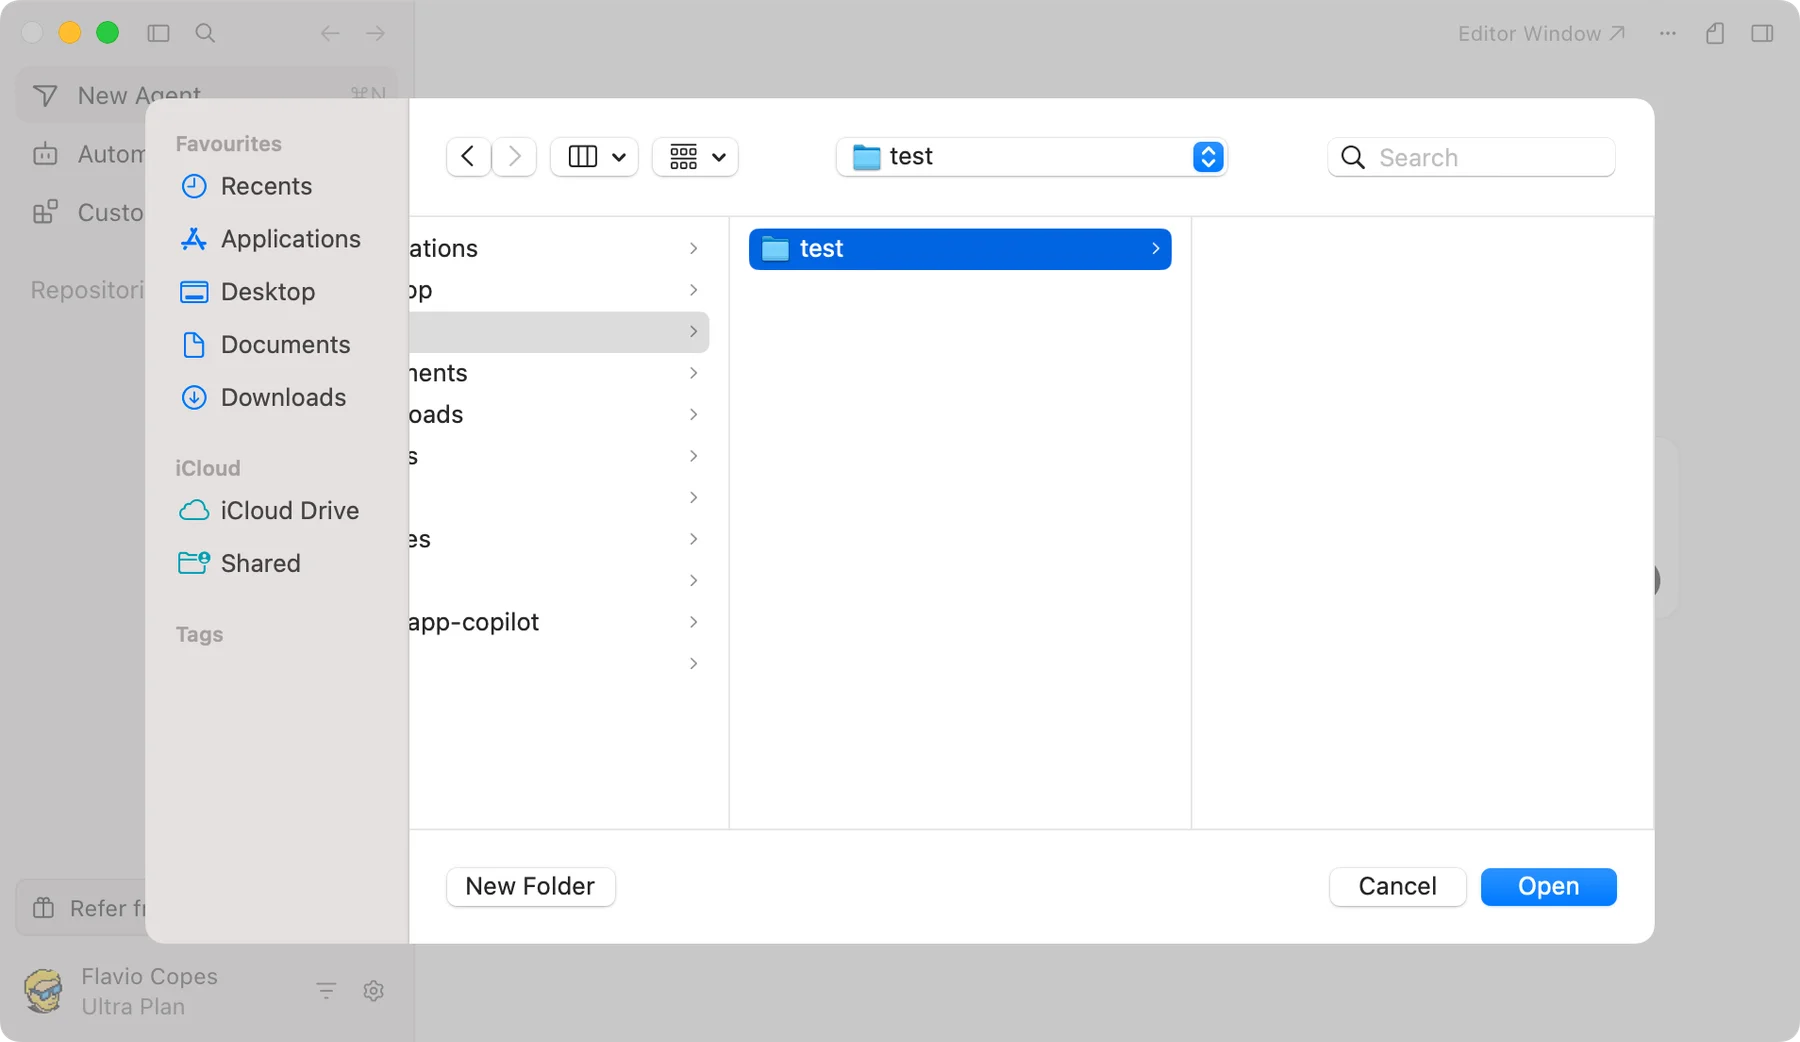
Create an empty folder called tic-tac-toe where you keep your projects, and open it. That’s where Cursor will create the app.
The simplest way to start is a short prompt:
Create a sample Vite + React app featuring a simple tic-tac-toe game.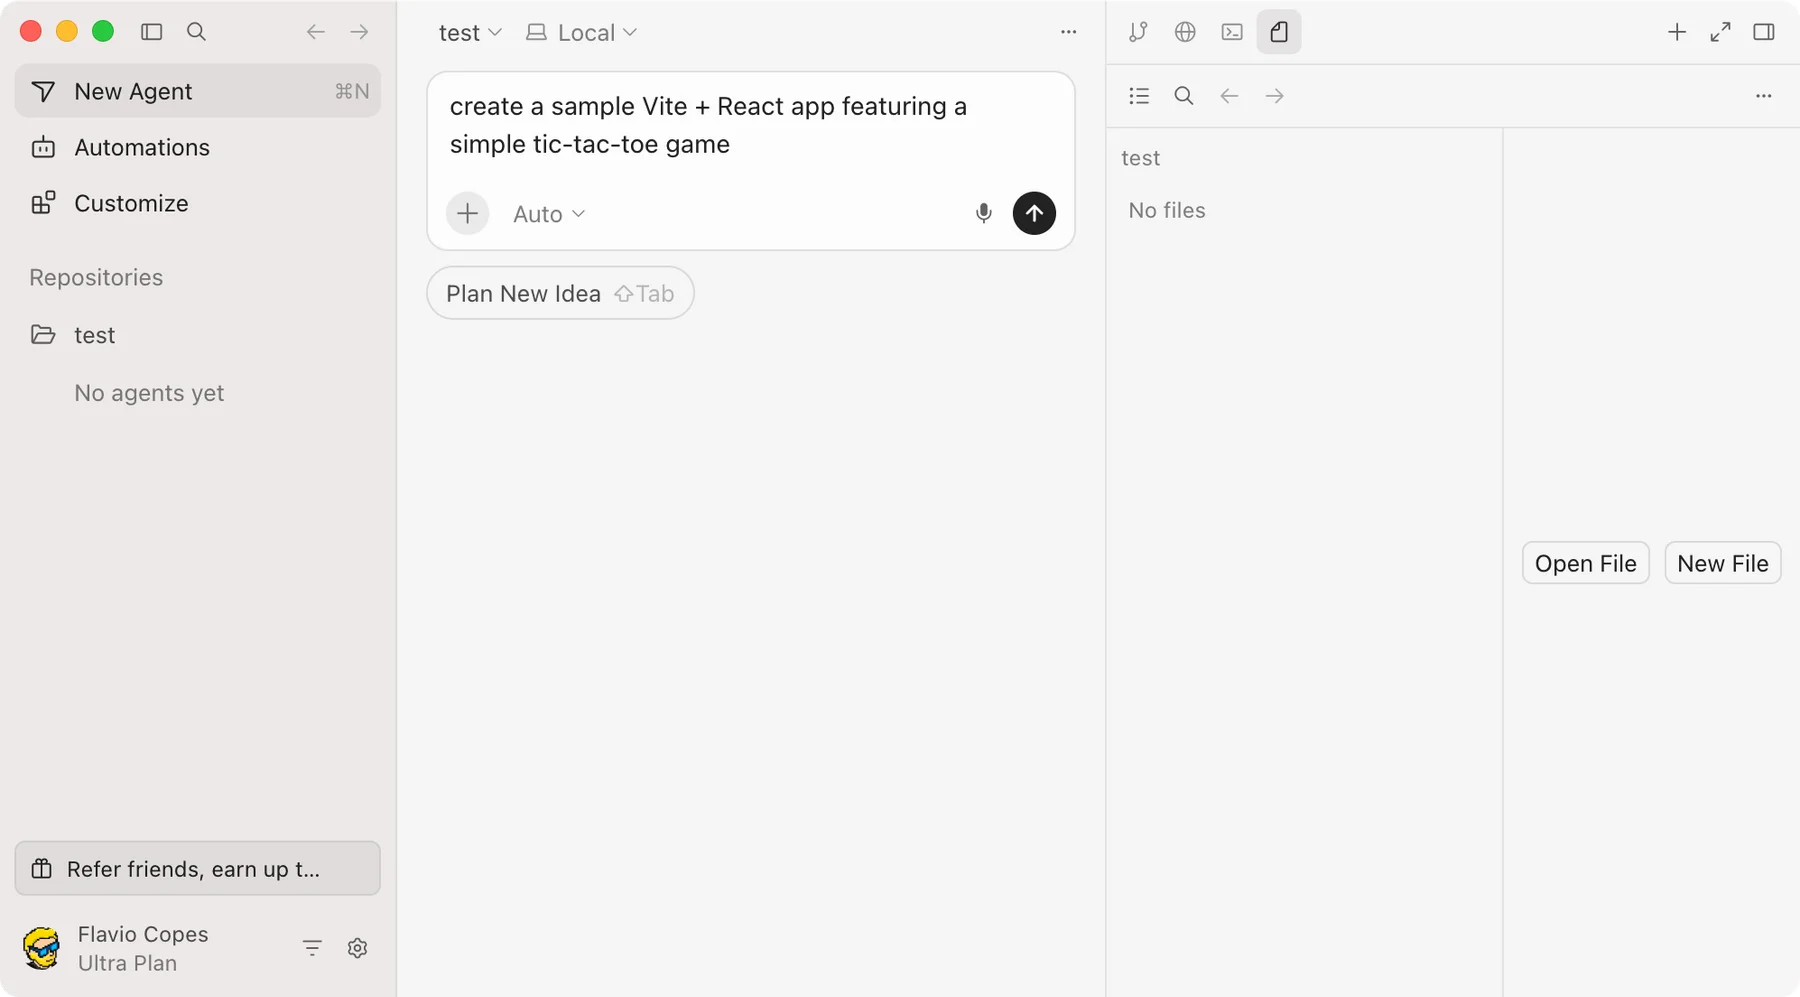
A better prompt describes the behavior you want, without telling the agent how to implement it:
Build a local two-player tic-tac-toe game with Vite and React.
Use JavaScript and npm. Keep everything in this project folder.
Show whose turn it is, prevent playing in occupied squares,
detect wins and draws, and add a New game button.
Keep the layout usable on a phone.
Use accessible buttons for the squares and a text status message.
Do not add accounts, a backend, or online multiplayer.
Run the production build and report the command and result.
Your code and design will look different from mine. That’s fine, the requirements in the prompt are what you check against.
Cursor creates the files and runs the setup commands. Some commands ask for approval: installing the project’s dependencies is expected, while a command that touches another folder deserves a question.
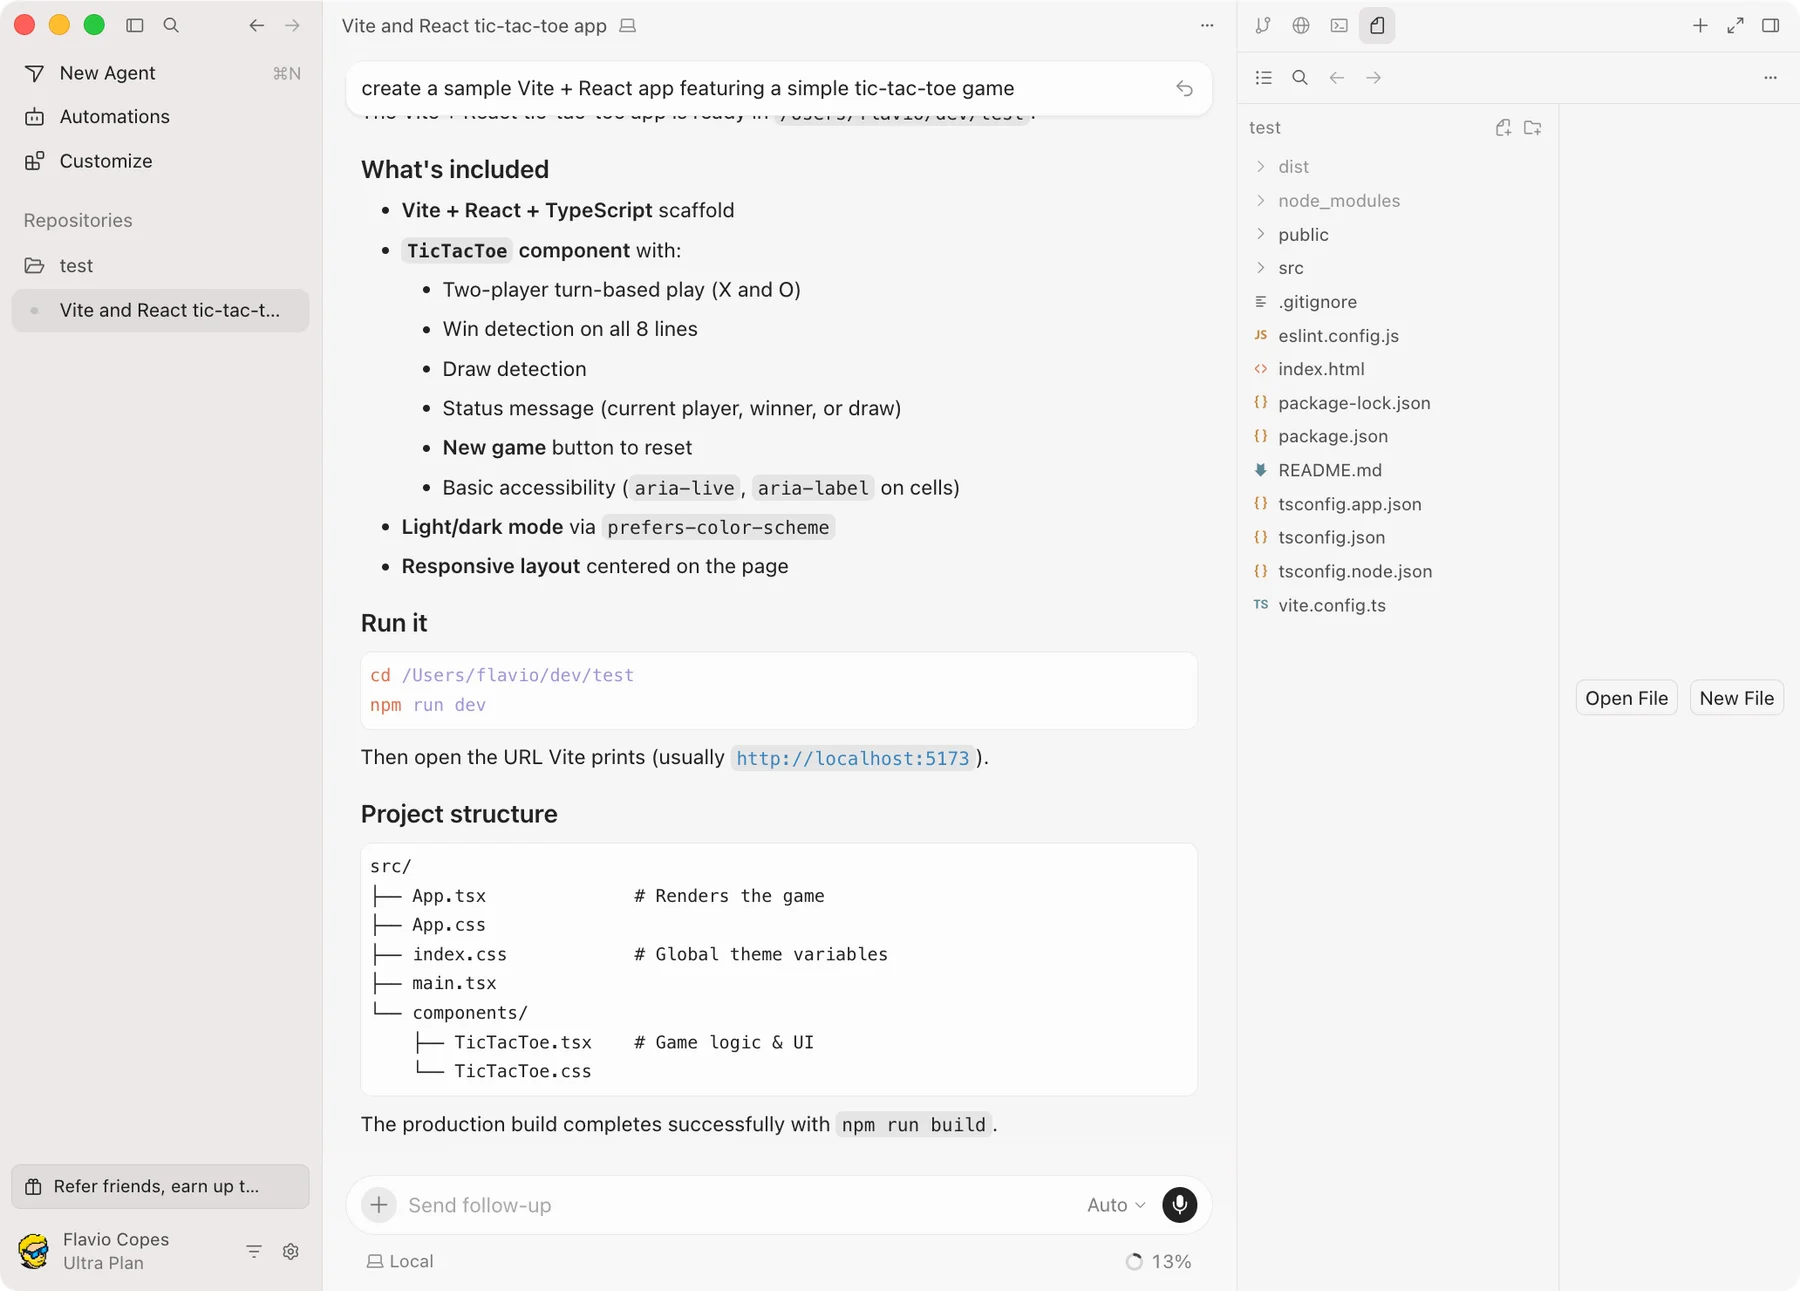
Run the app
Once the files are ready, ask:
Run the app and open it in the built-in browser.Cursor starts the development server and opens its local URL in the side panel.
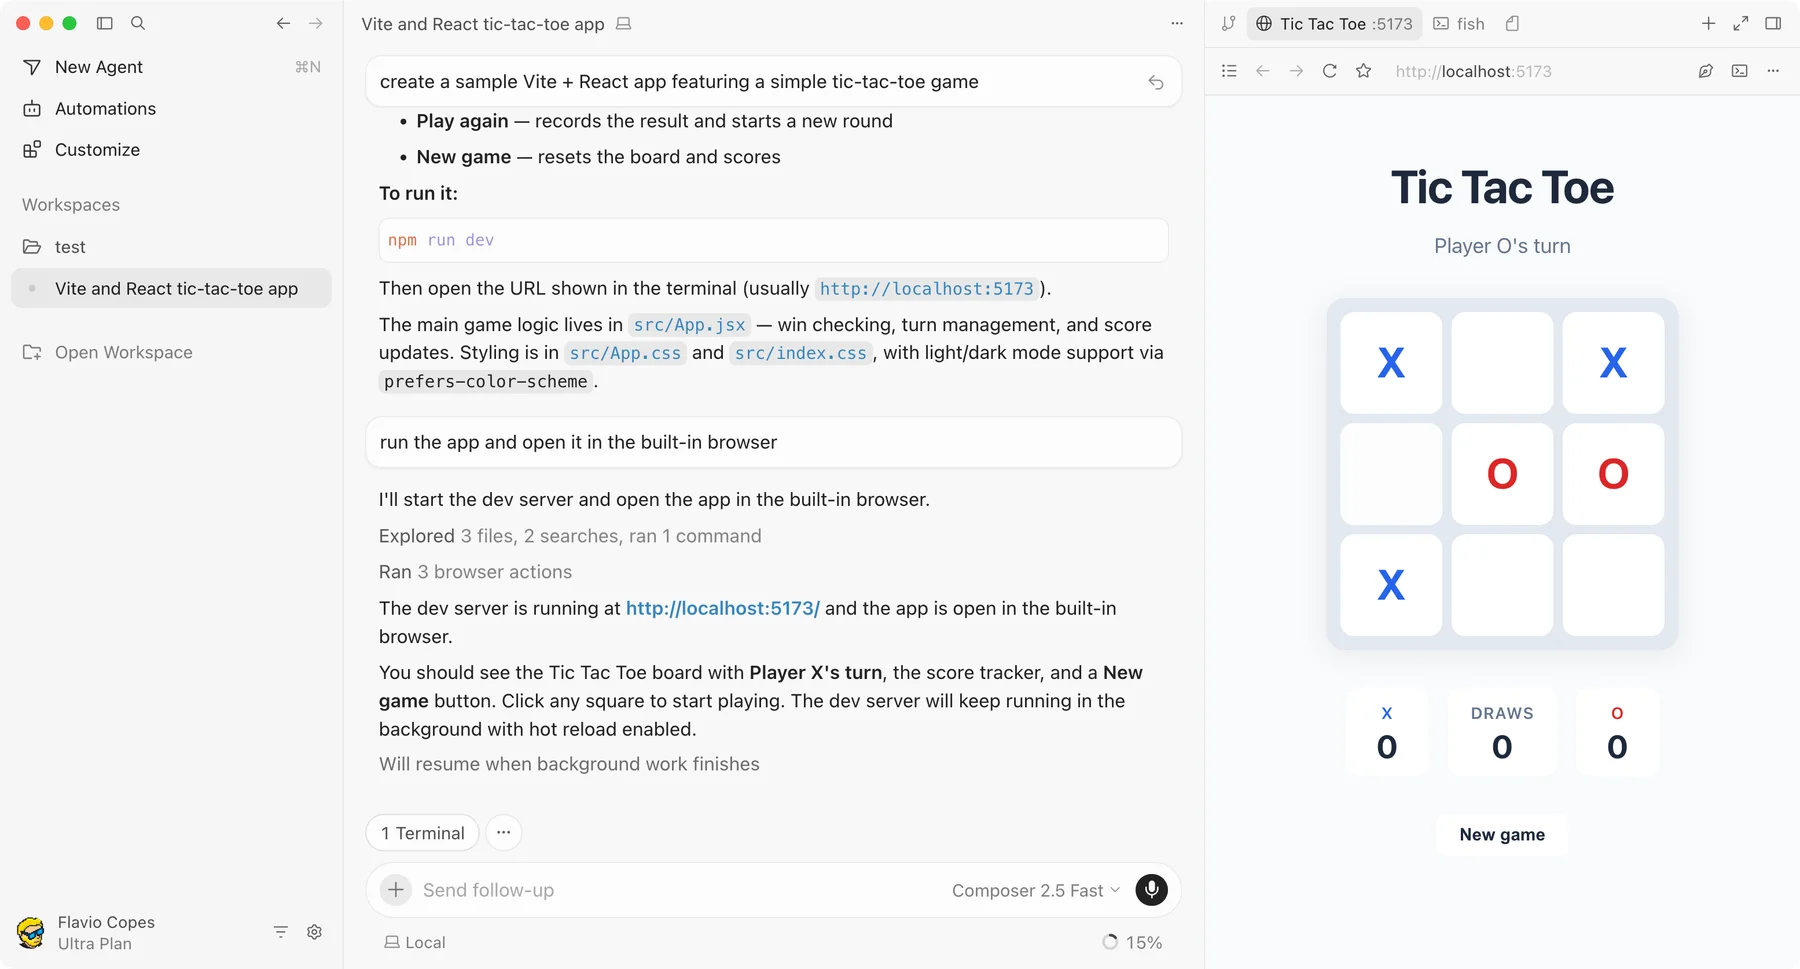
This only runs the app on your computer. Publishing it on the Internet is a separate deployment step.
You can also start the server yourself. A Vite project has a dev script in package.json, which you run from the project folder:
npm run devOpen the URL it prints. If the usual port is taken, Vite picks another one.
If the terminal says Vite is missing, you’re probably not in the folder with package.json, or the dependencies aren’t installed yet. Run npm install in the project folder and try npm run dev again. No need to install Vite globally.
If the browser panel stays blank, check that the server is still running and that the URL matches the one it printed, then read the browser error.
Use the side panel
The panel beside the conversation lets you look at what the agent is doing while it works.
The file view shows what it created: package.json, a source folder, the main components. A good first question for the agent is which file holds the game rules and which one holds the styles.
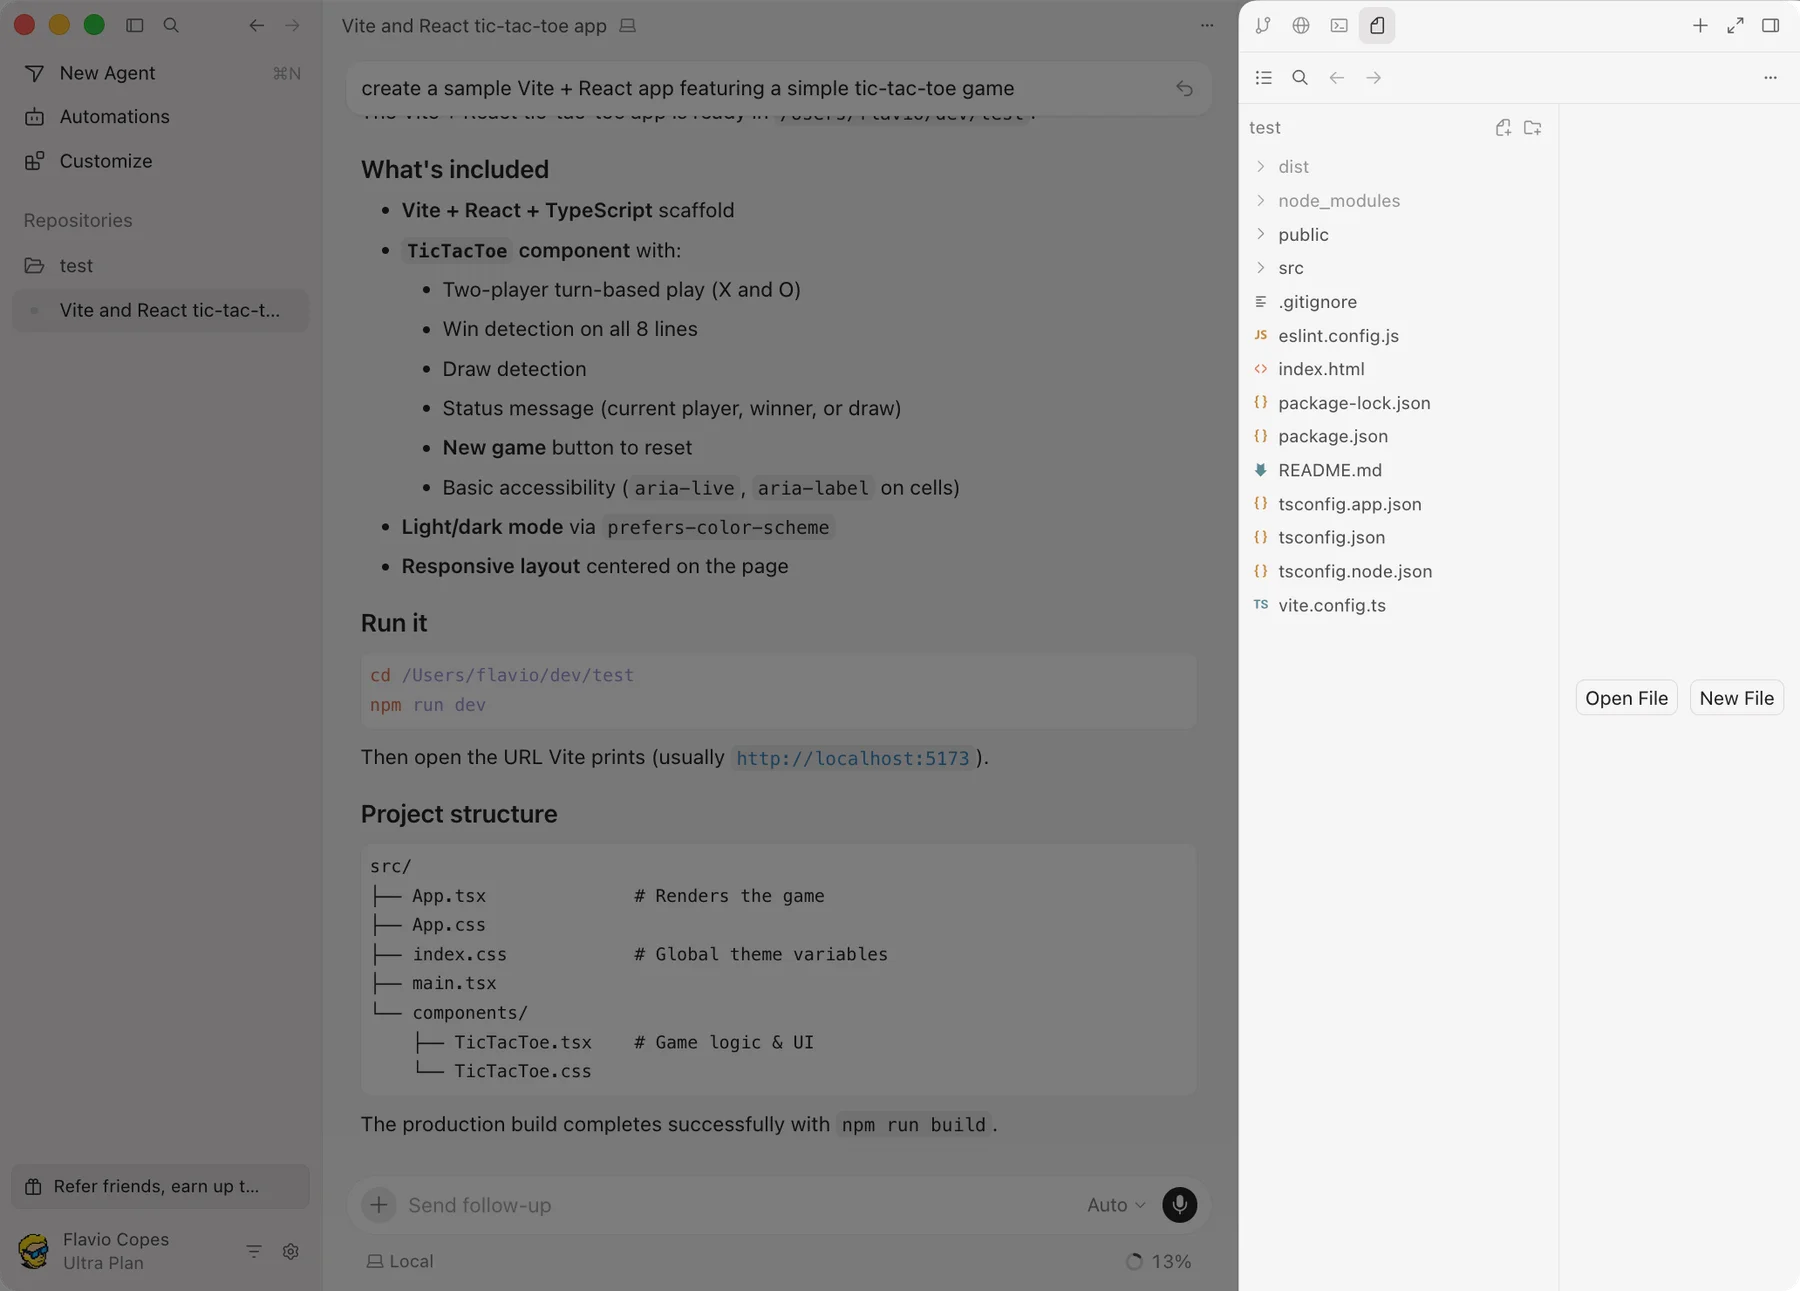
The terminal shows command output, which is where you look when an install fails or the server stops.
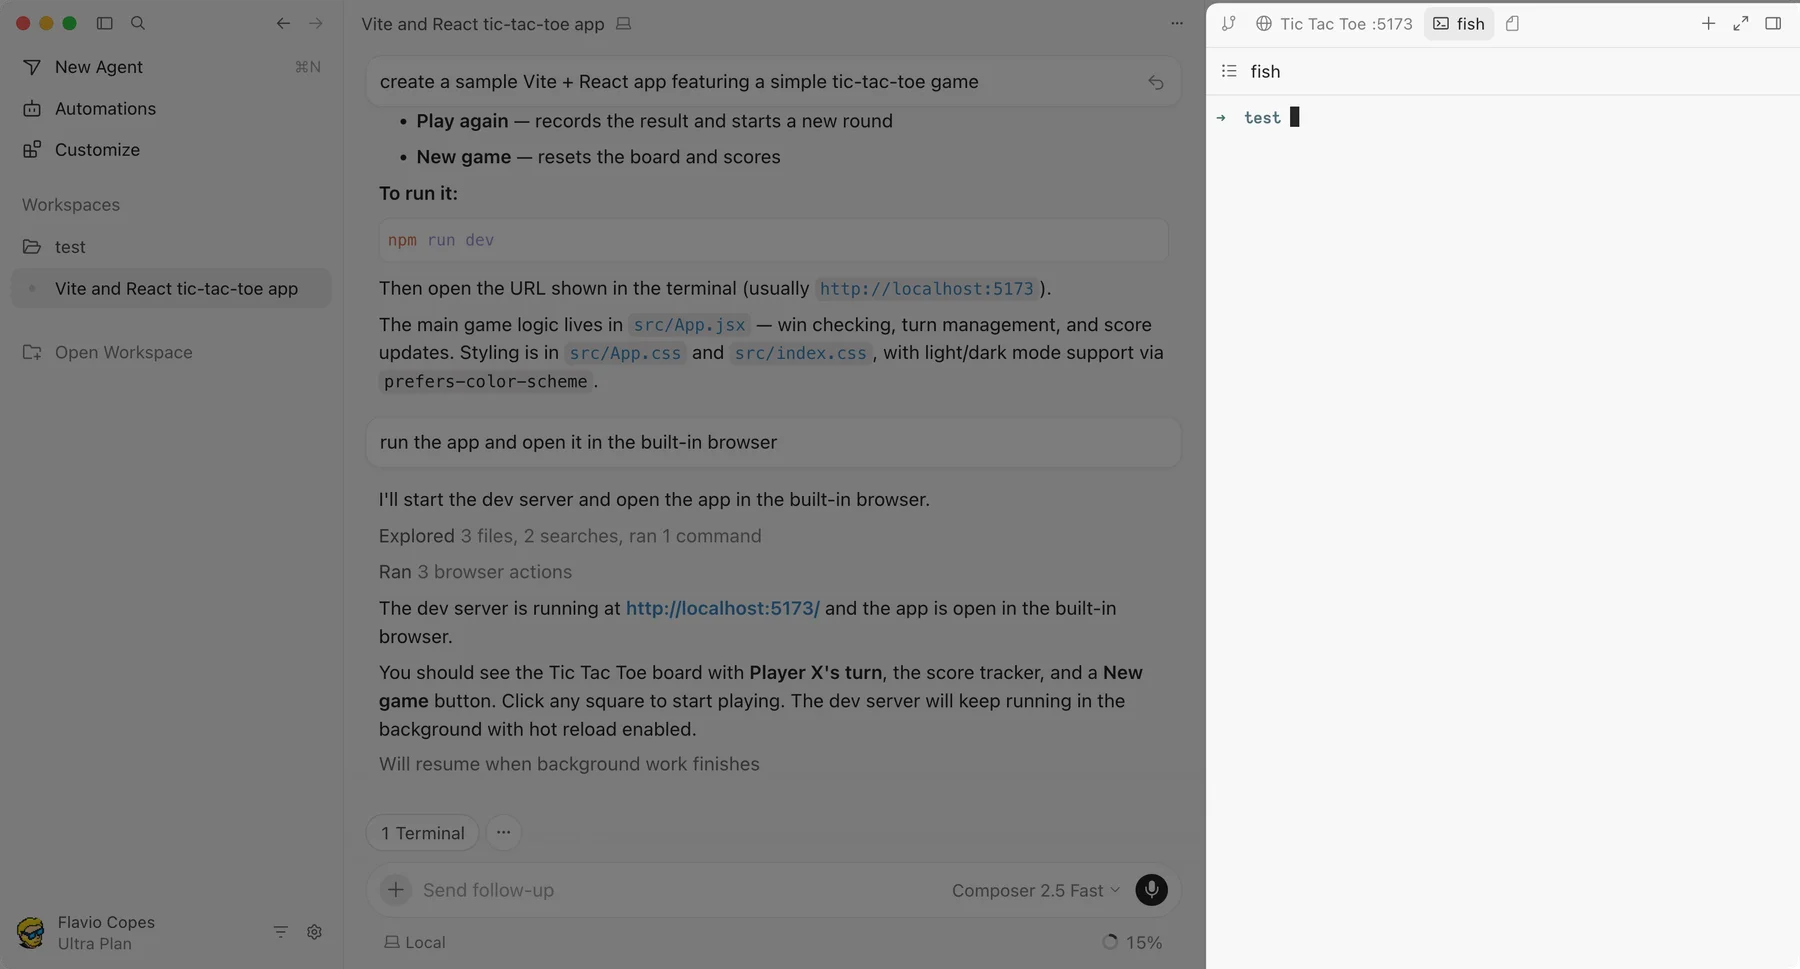
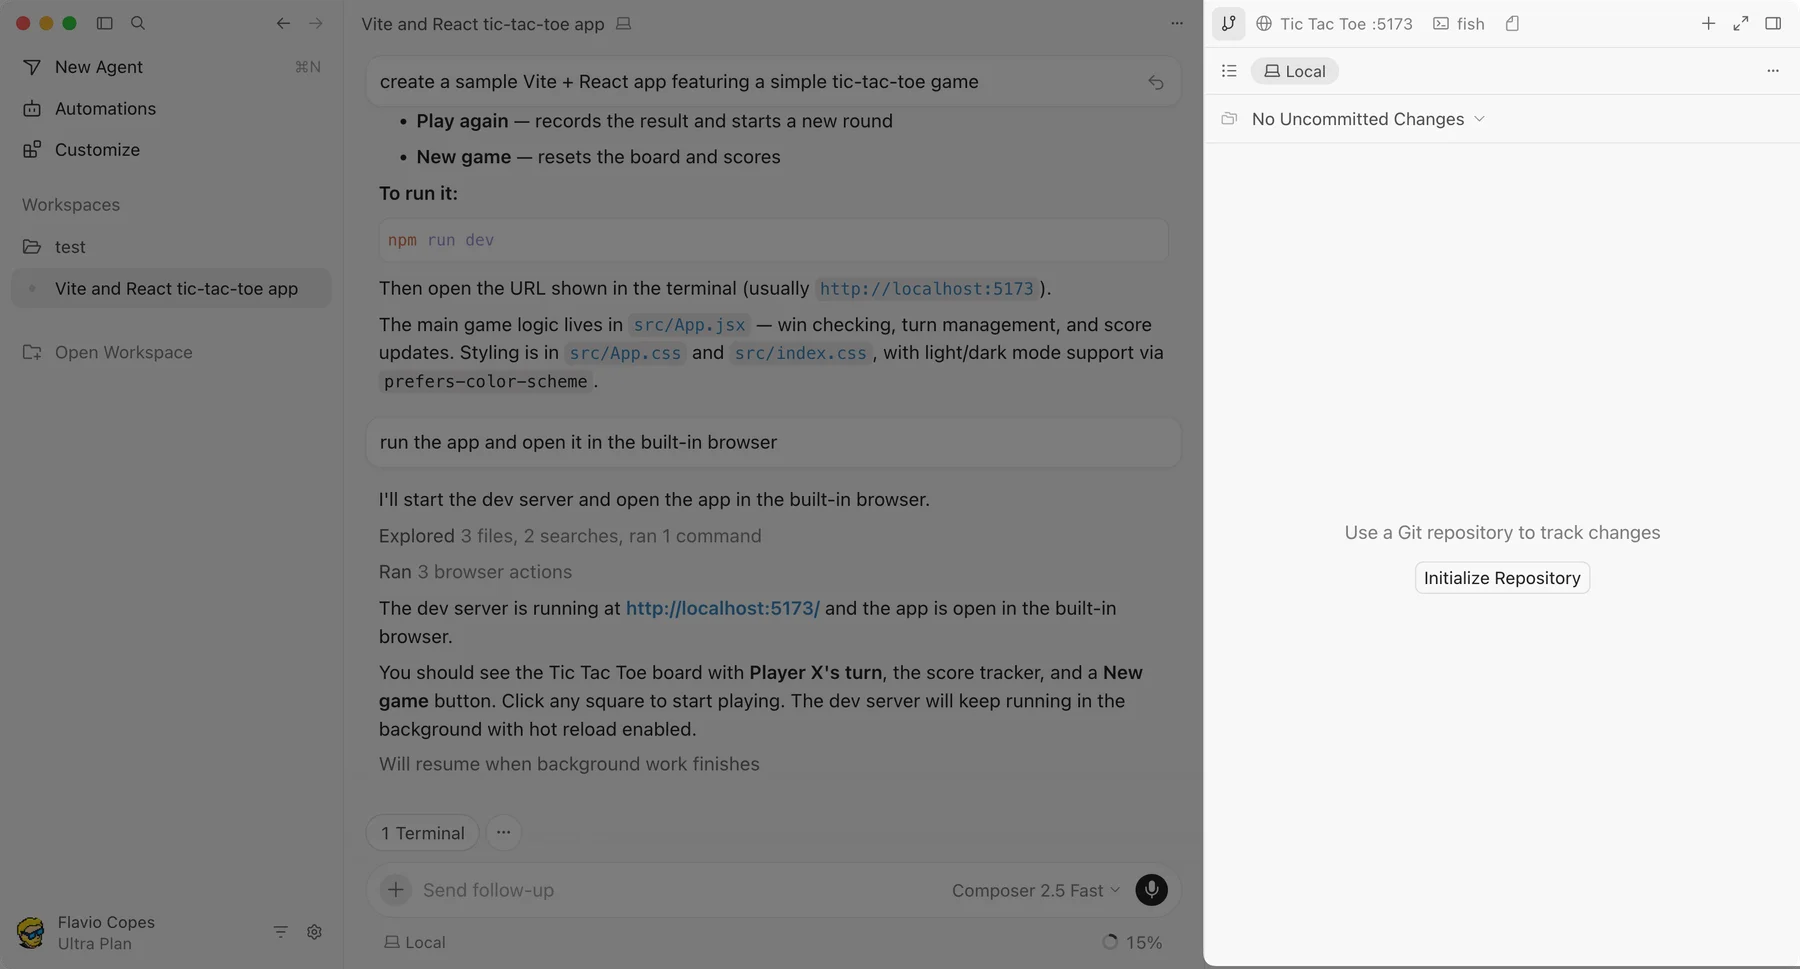
The Git panel shows changes once the folder is a Git repository. In a brand-new folder it’s empty because there’s no repository yet, even though the agent created plenty of files.
You can hide the panel when you want more room. For web work I keep the browser open, so I see each change as soon as the agent makes it.
| Panel | Use it to answer |
|---|---|
| Files | Where did the agent put the code? |
| Browser | What does the application do? |
| Terminal | What happened when the command ran? |
| Git | What changed since the last saved version? |
Check what the agent built
Before asking for more, play the game. Win once, draw once, click an occupied square, and click an empty square after someone has won.
When something doesn’t work, describe the exact steps. You don’t need to know which React state variable is wrong to report the bug precisely:
X wins across the top row. After the winning move,
I can still click an empty square and add another mark.
Stop accepting moves after a win or draw.
Keep New game working and check both cases.
When the fix is in, repeat the steps, and try what’s next to it too, like starting a new game after a draw.
Then commit this working version. If the folder has no repository yet, run git init first, and if Git asks for your name and email, set them up (the Git course covers that). Check that .gitignore excludes node_modules/ and dist/, look at git status --short, and stage the app files, package files and configuration. Cursor’s Source Control panel lets you pick them one by one. A message like Add tic-tac-toe sample app is enough.
If you want to understand the React code the agent wrote, the free React course covers components, state and events. It makes it much easier to notice when a fix changes more than it should.
Ask, Plan, Agent, and Debug
The mode picker next to the input decides what the agent does with your request.
Ask is for understanding code without changing it:
Explain how this game detects a winner.
Point me to the relevant function and describe its inputs.
Don't change any files.
Plan is for settling an approach before writing code. Cursor researches the project, asks you questions, and writes a plan you can edit. Shift+Tab in the input switches to Plan Mode, and the planning documentation explains how to save the plan in the workspace.
A scoreboard is a good feature to plan:
Plan a scoreboard for X wins, O wins, and draws.
Keep the score between games while the page stays open.
Add a separate Reset scores action.
Explain where the state should live before implementing.
Read the plan for things you didn’t ask for, like saving scores across page reloads or a new dependency to hold state that React can handle. When it looks right, switch to Agent and let it implement the plan. For a small change, like fixing a label, go straight to Agent.
Debug is for a bug you can reproduce but can’t explain. It changes files too, adding temporary logging, so it’s not a read-only mode. We’ll see it in a moment.
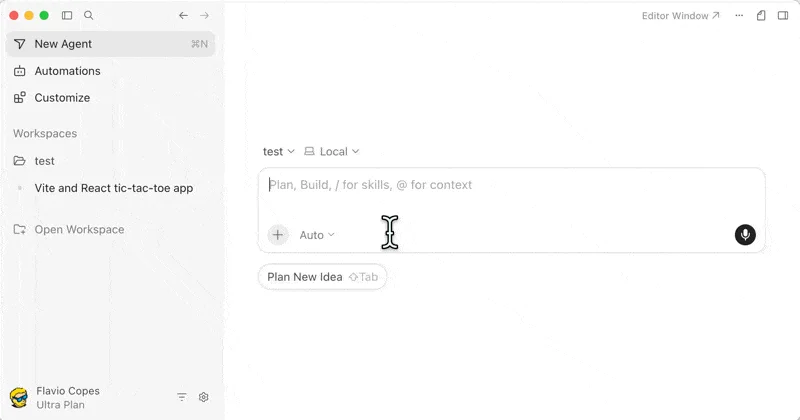
The screenshot also shows Multitask, which runs several requests at the same time in versions that have it. While you’re learning, finish one change before starting the next, so you always know which request caused what.
| Need | Useful starting point |
|---|---|
| Understand existing code | Ask |
| Decide how a feature should work | Plan |
| Implement a clear change | Agent |
| Investigate a reproducible runtime problem | Debug |
Whatever the mode, your permission settings still decide which commands and tools can run.
Fix a bug with Debug Mode
Debug Mode doesn’t jump straight to a fix. It reads the code, comes up with a few hypotheses about the cause, and adds logging where it needs runtime data to tell them apart. Then it asks you to reproduce the bug.
I used it on a real problem in this site’s build. Building printed warnings about the headers file, so I picked Debug from the mode menu and pasted them:
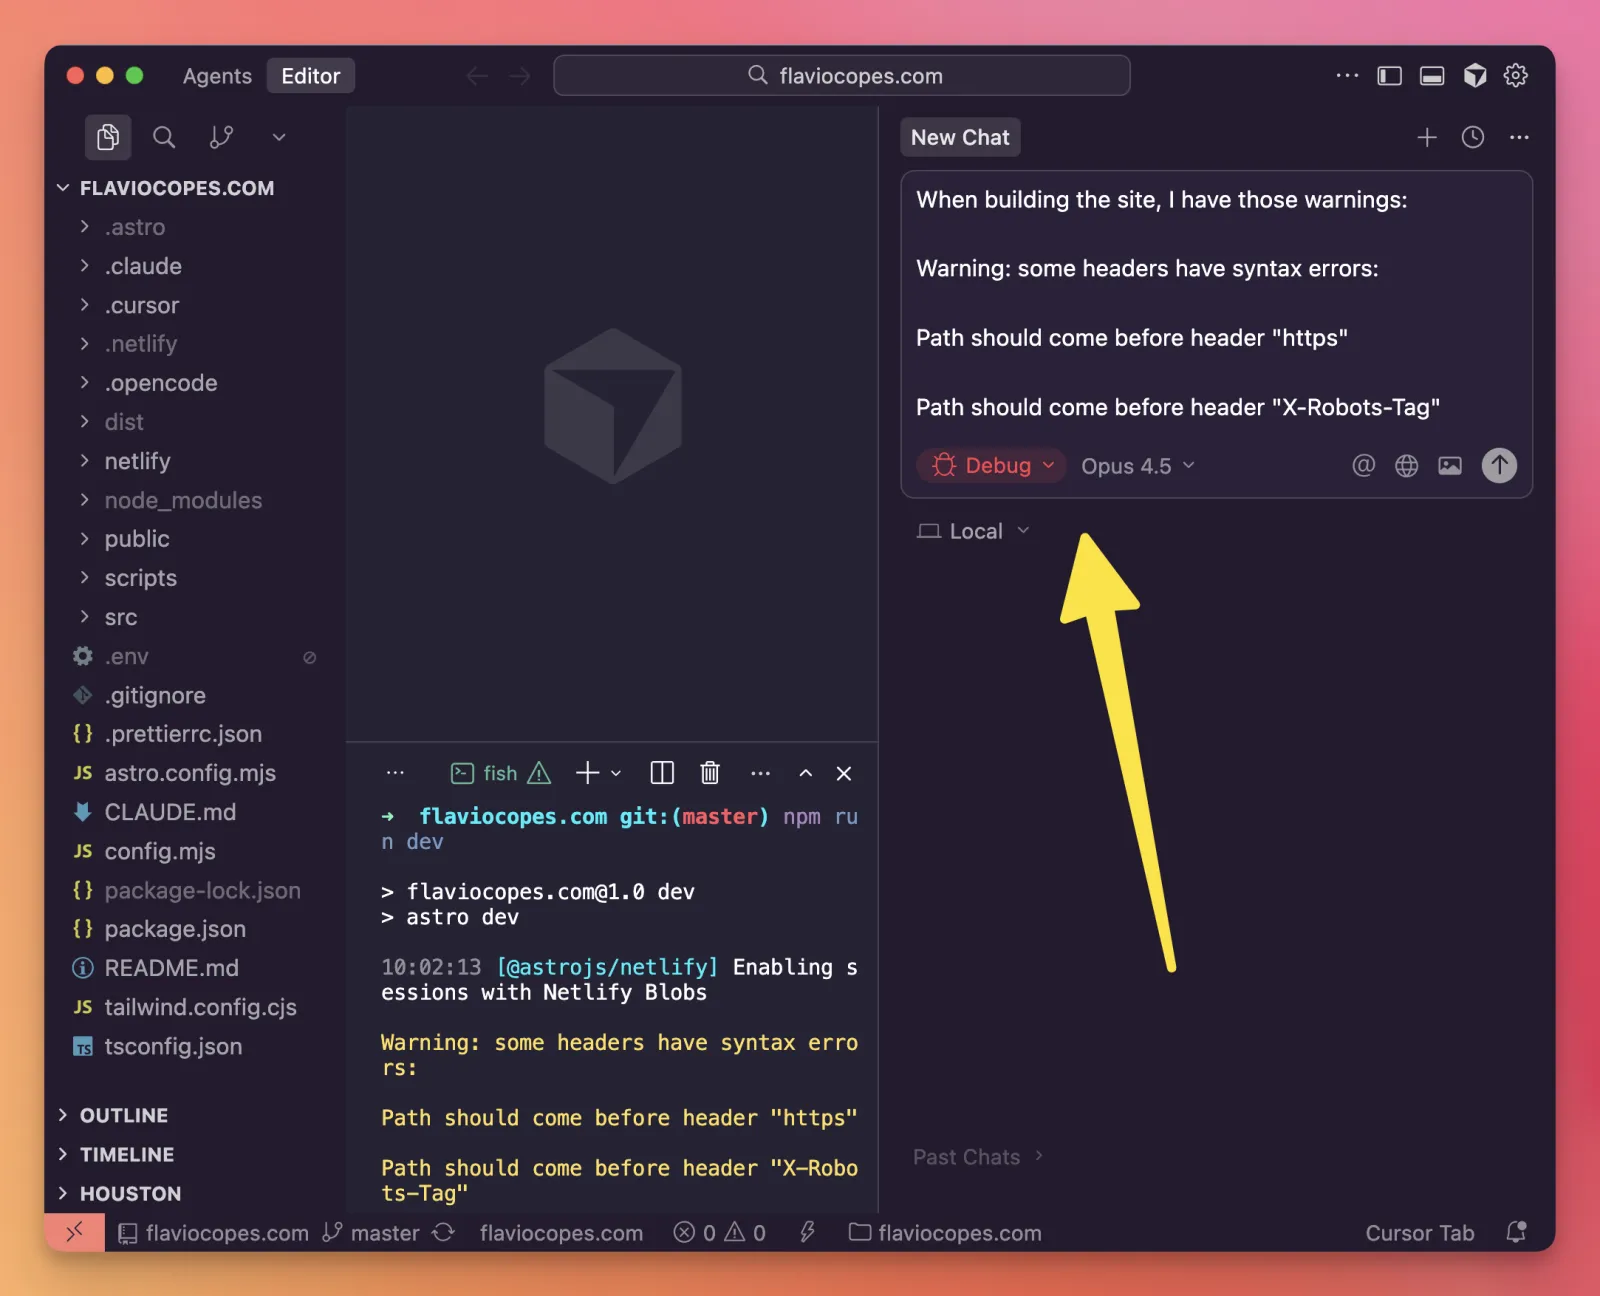
It found an invalid path pattern in _headers, fixed it, and listed the steps to rebuild and check the warnings were gone:
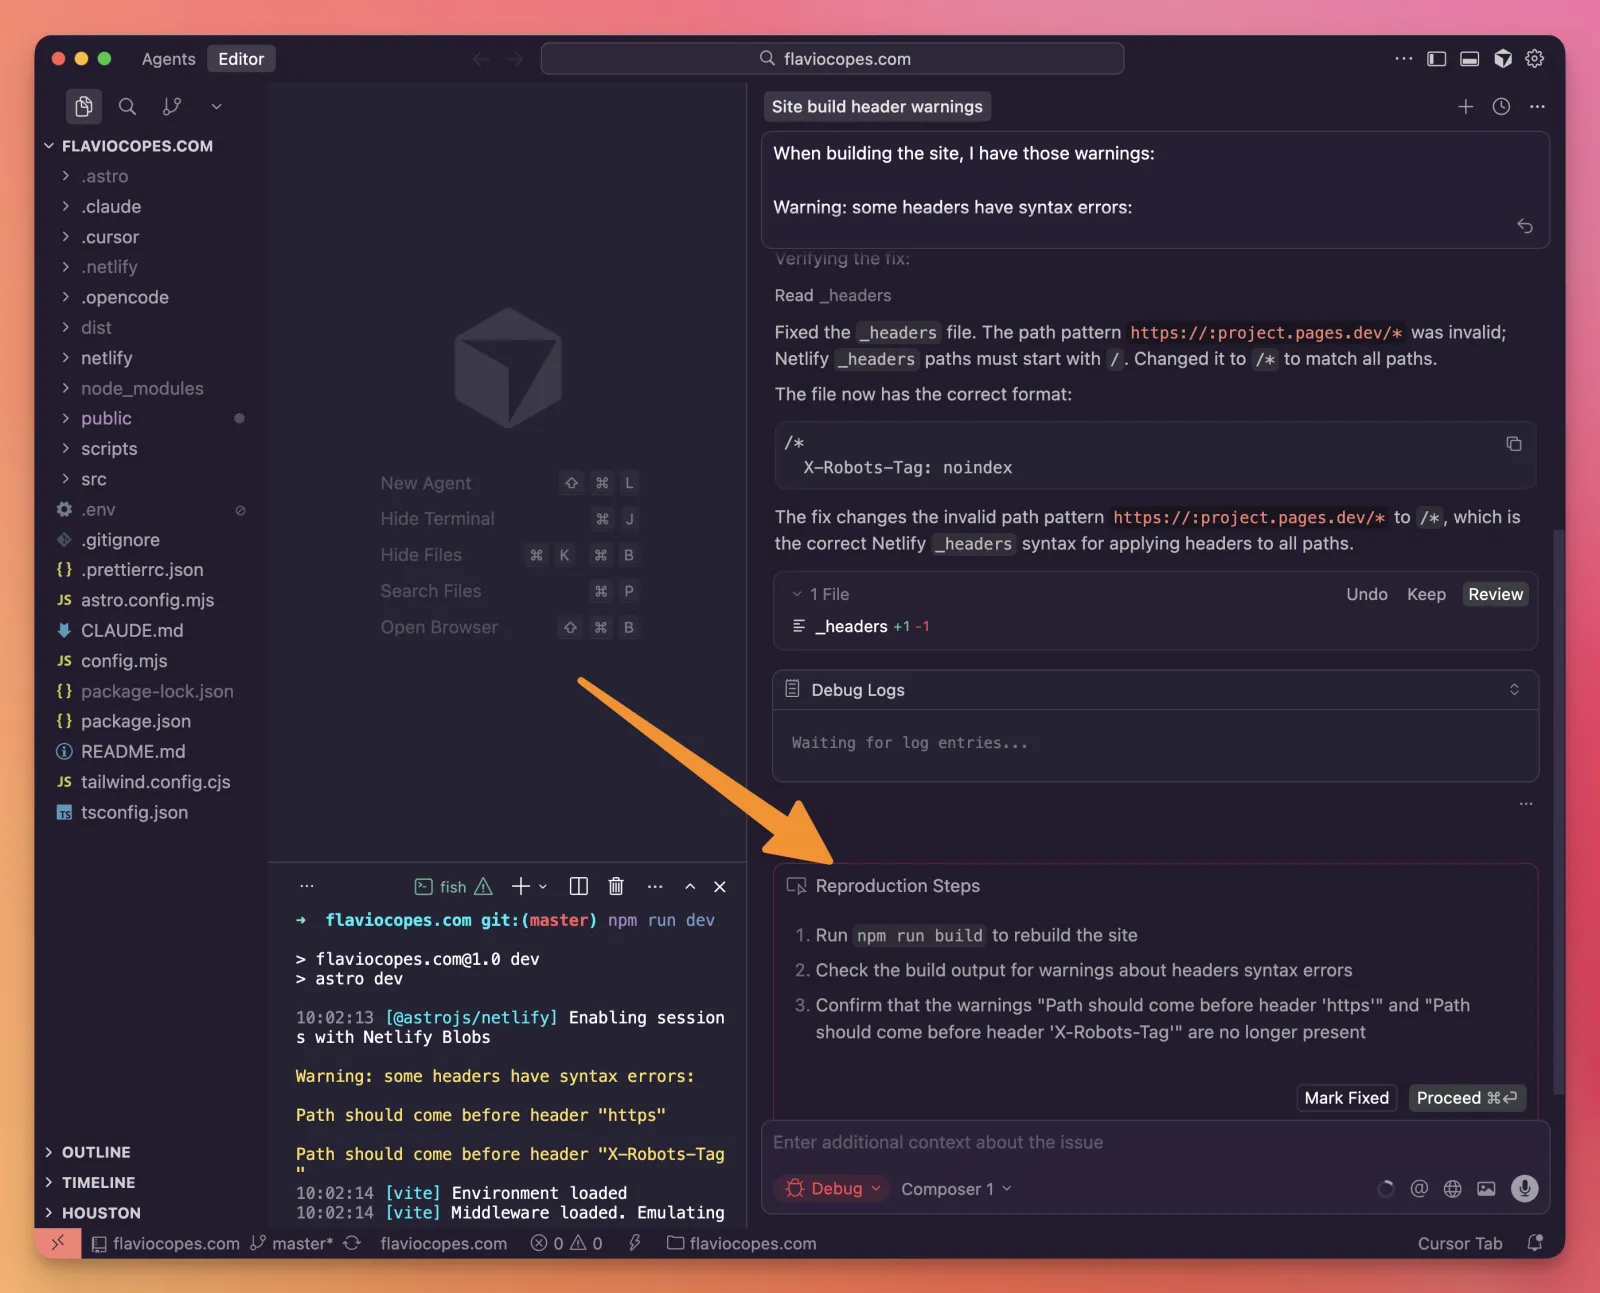
If the bug is gone, click Mark Fixed. Cursor removes any logging it added and leaves only the fix. If it’s still there, say what happened. It adds more logging, you reproduce again, and it narrows the cause down.
My fix was right the first time, so there was nothing to clean up. On a harder bug the back and forth is what makes it work, since you’re the one who can see whether the bug is really gone.
Change the interface with Design Mode
Describing a visual change in words is hard. “The second blue thing below the heading” can easily point the agent at the wrong element.
Design Mode lets you click the element in the built-in browser and attach your request to it. Cursor sends the selection and a screenshot along with your note. Current versions call it Annotate in the toolbar, earlier ones show a Design Mode icon. The Design Mode documentation has the current controls.
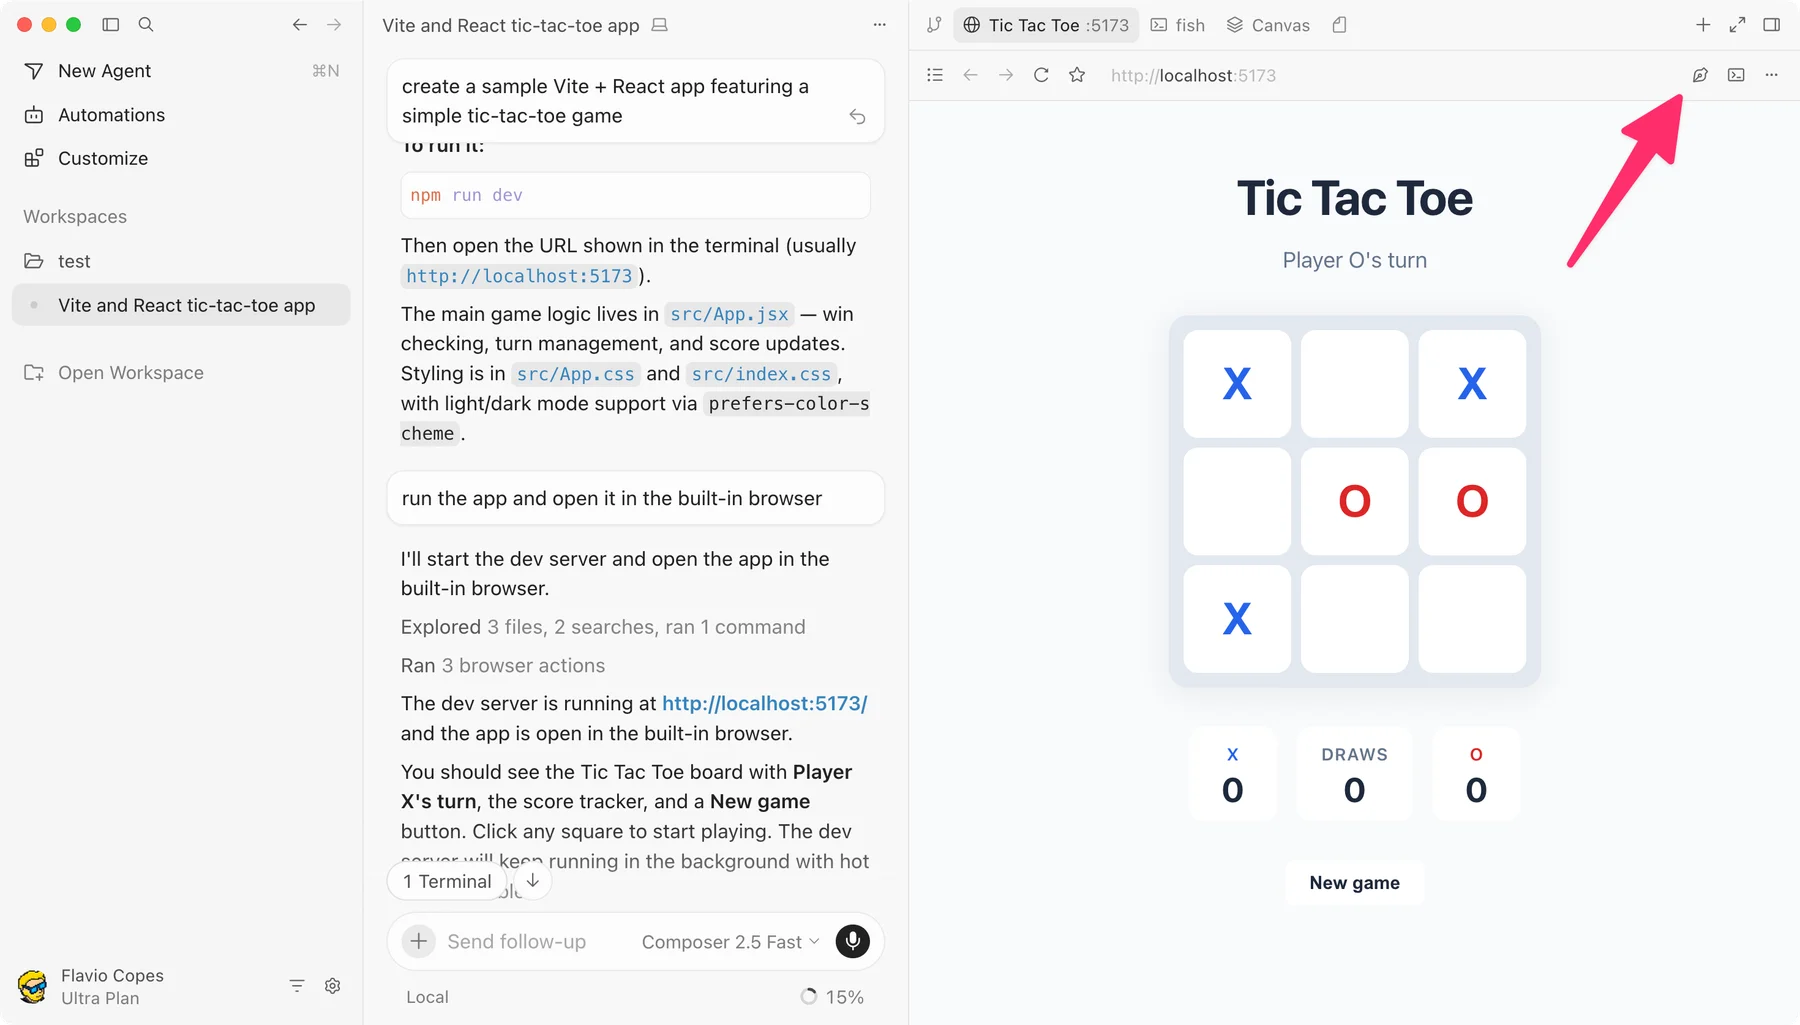
Turn it on and click one of the game’s marks. A note opens:
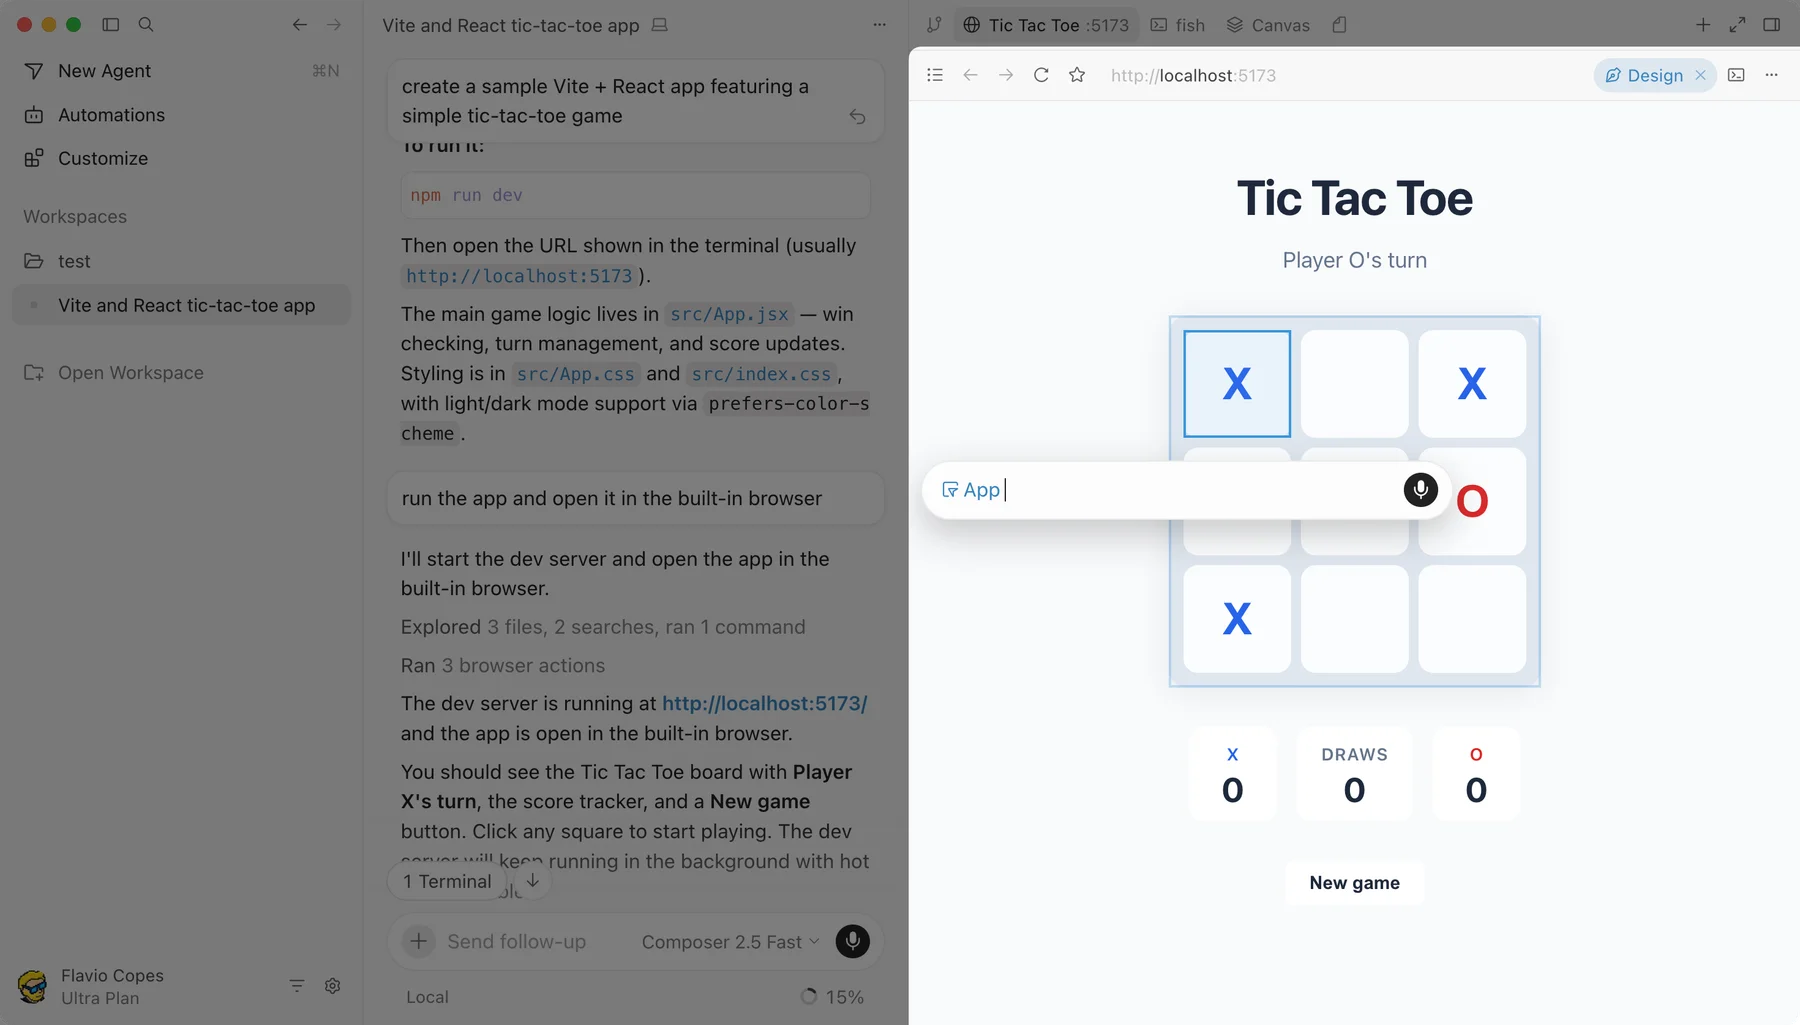
I asked to change its color to yellow:
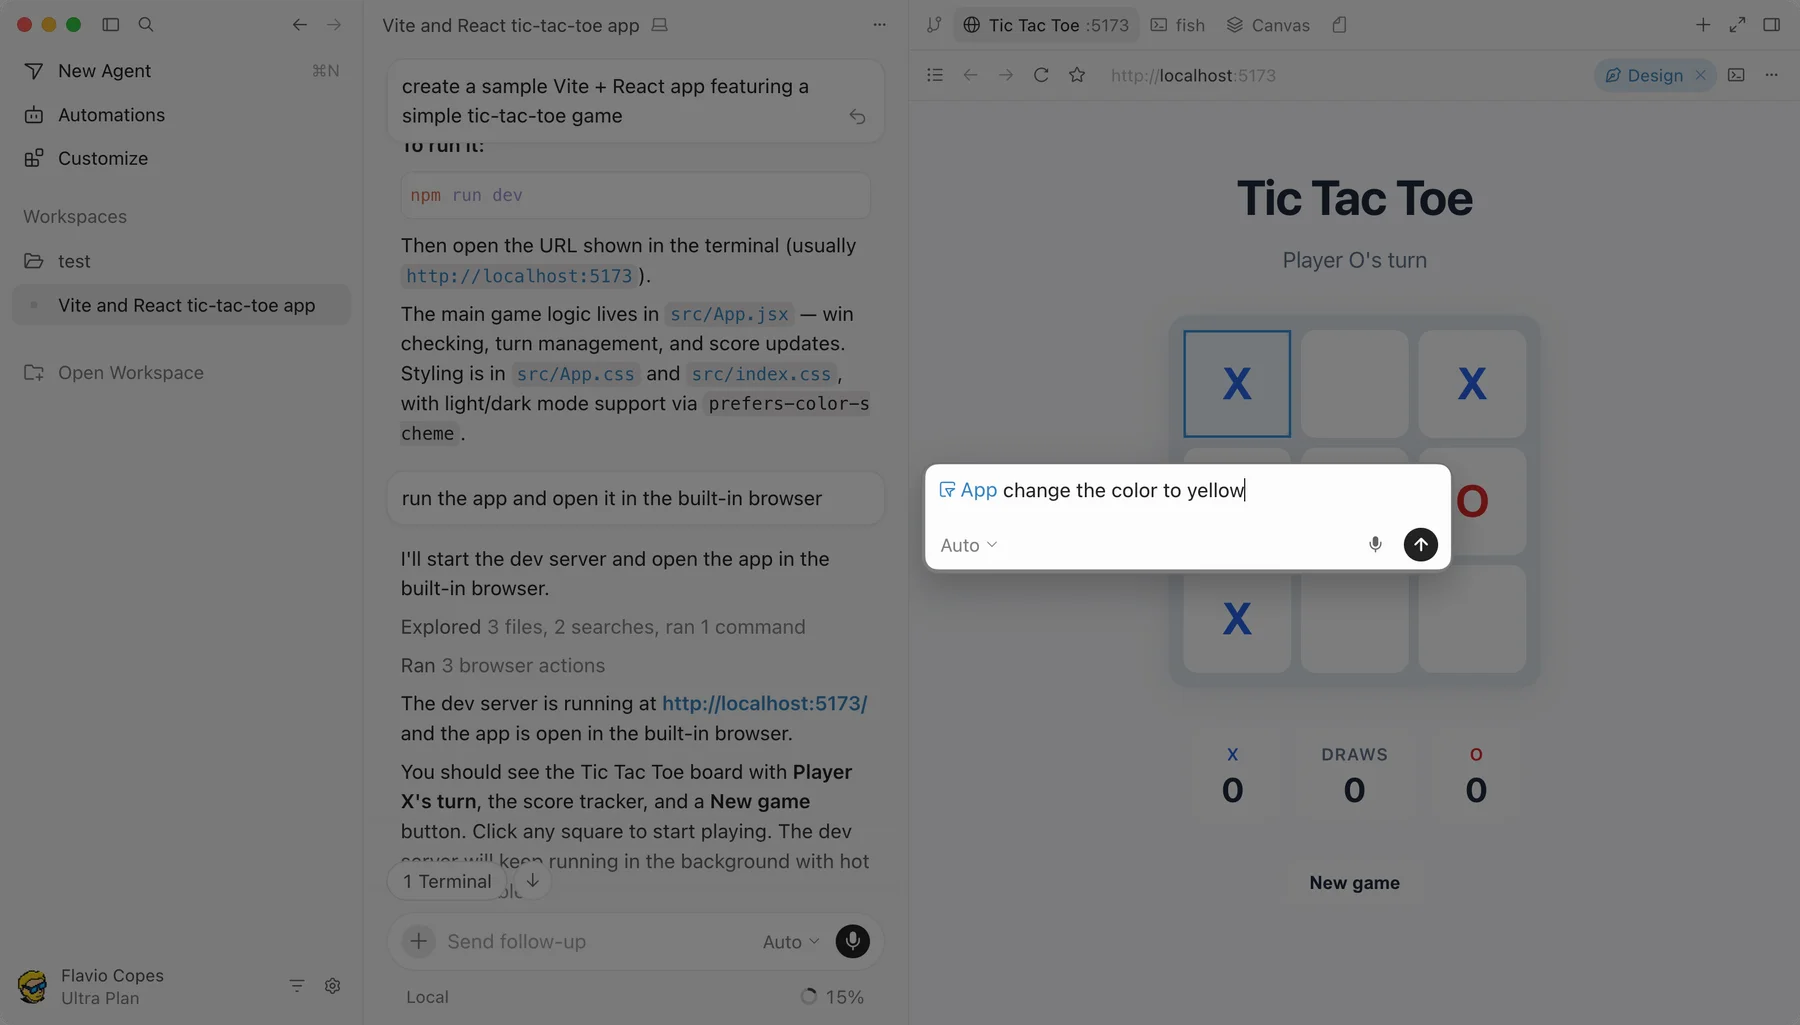
Cursor changes the code and the preview updates:
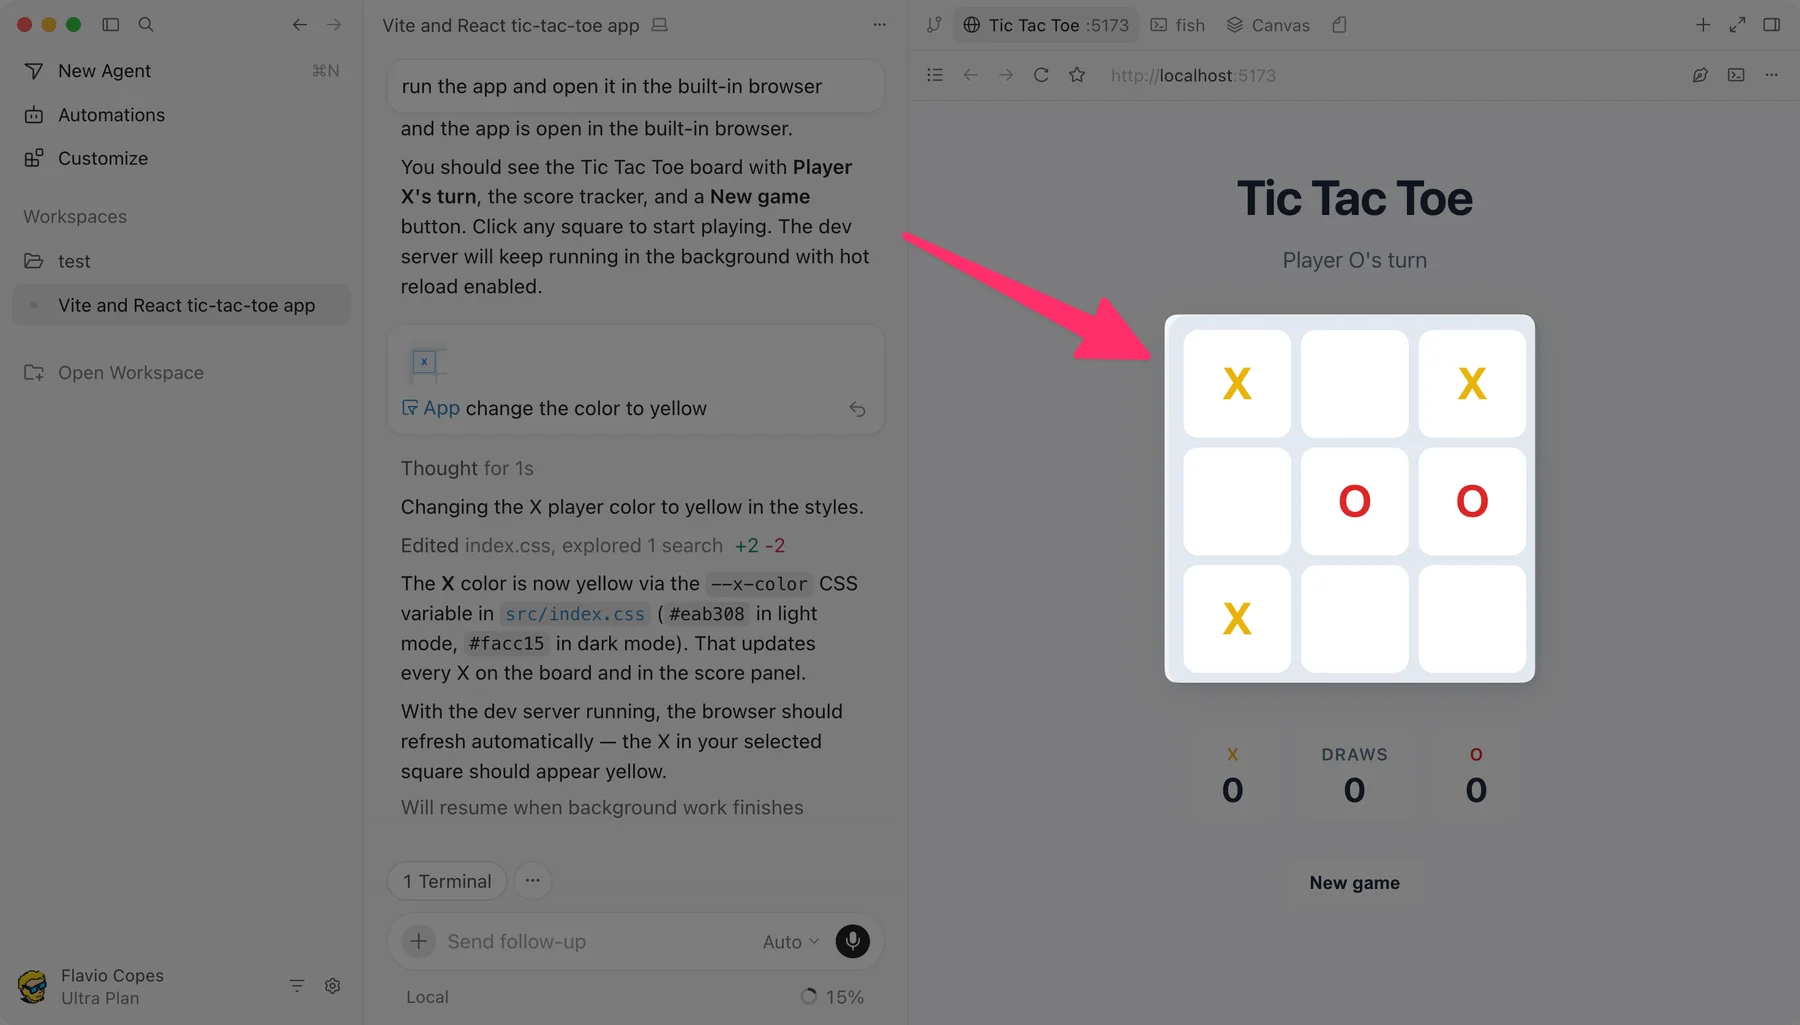
Add constraints to the note, like whether a bigger button should still match the others, or the phone width where a heading wraps badly. Try this one:
Make the New game button easier to tap on a phone.
Keep the board inside the viewport at 375px width.
Preserve the current desktop layout.
Then look at both widths. You selected one element, but the agent might change a class that other elements share. With color changes, also check that the text stays readable, including hover and disabled states.
Generate images
Cursor can also generate images. When a project needs a quick illustration or a placeholder hero image, ask for it in the conversation:
Generate a hero image for the home page, matching the site's colors.The agent reads the project for context and uses an image model (Nano Banana Pro when I tried it) to create the file. If you have usage left on your plan, you don’t need a separate image tool for this.
Choose a model deliberately
The model picker sits beside the input. Depending on your account and version, you’ll see automatic routing options and models you can pick directly.
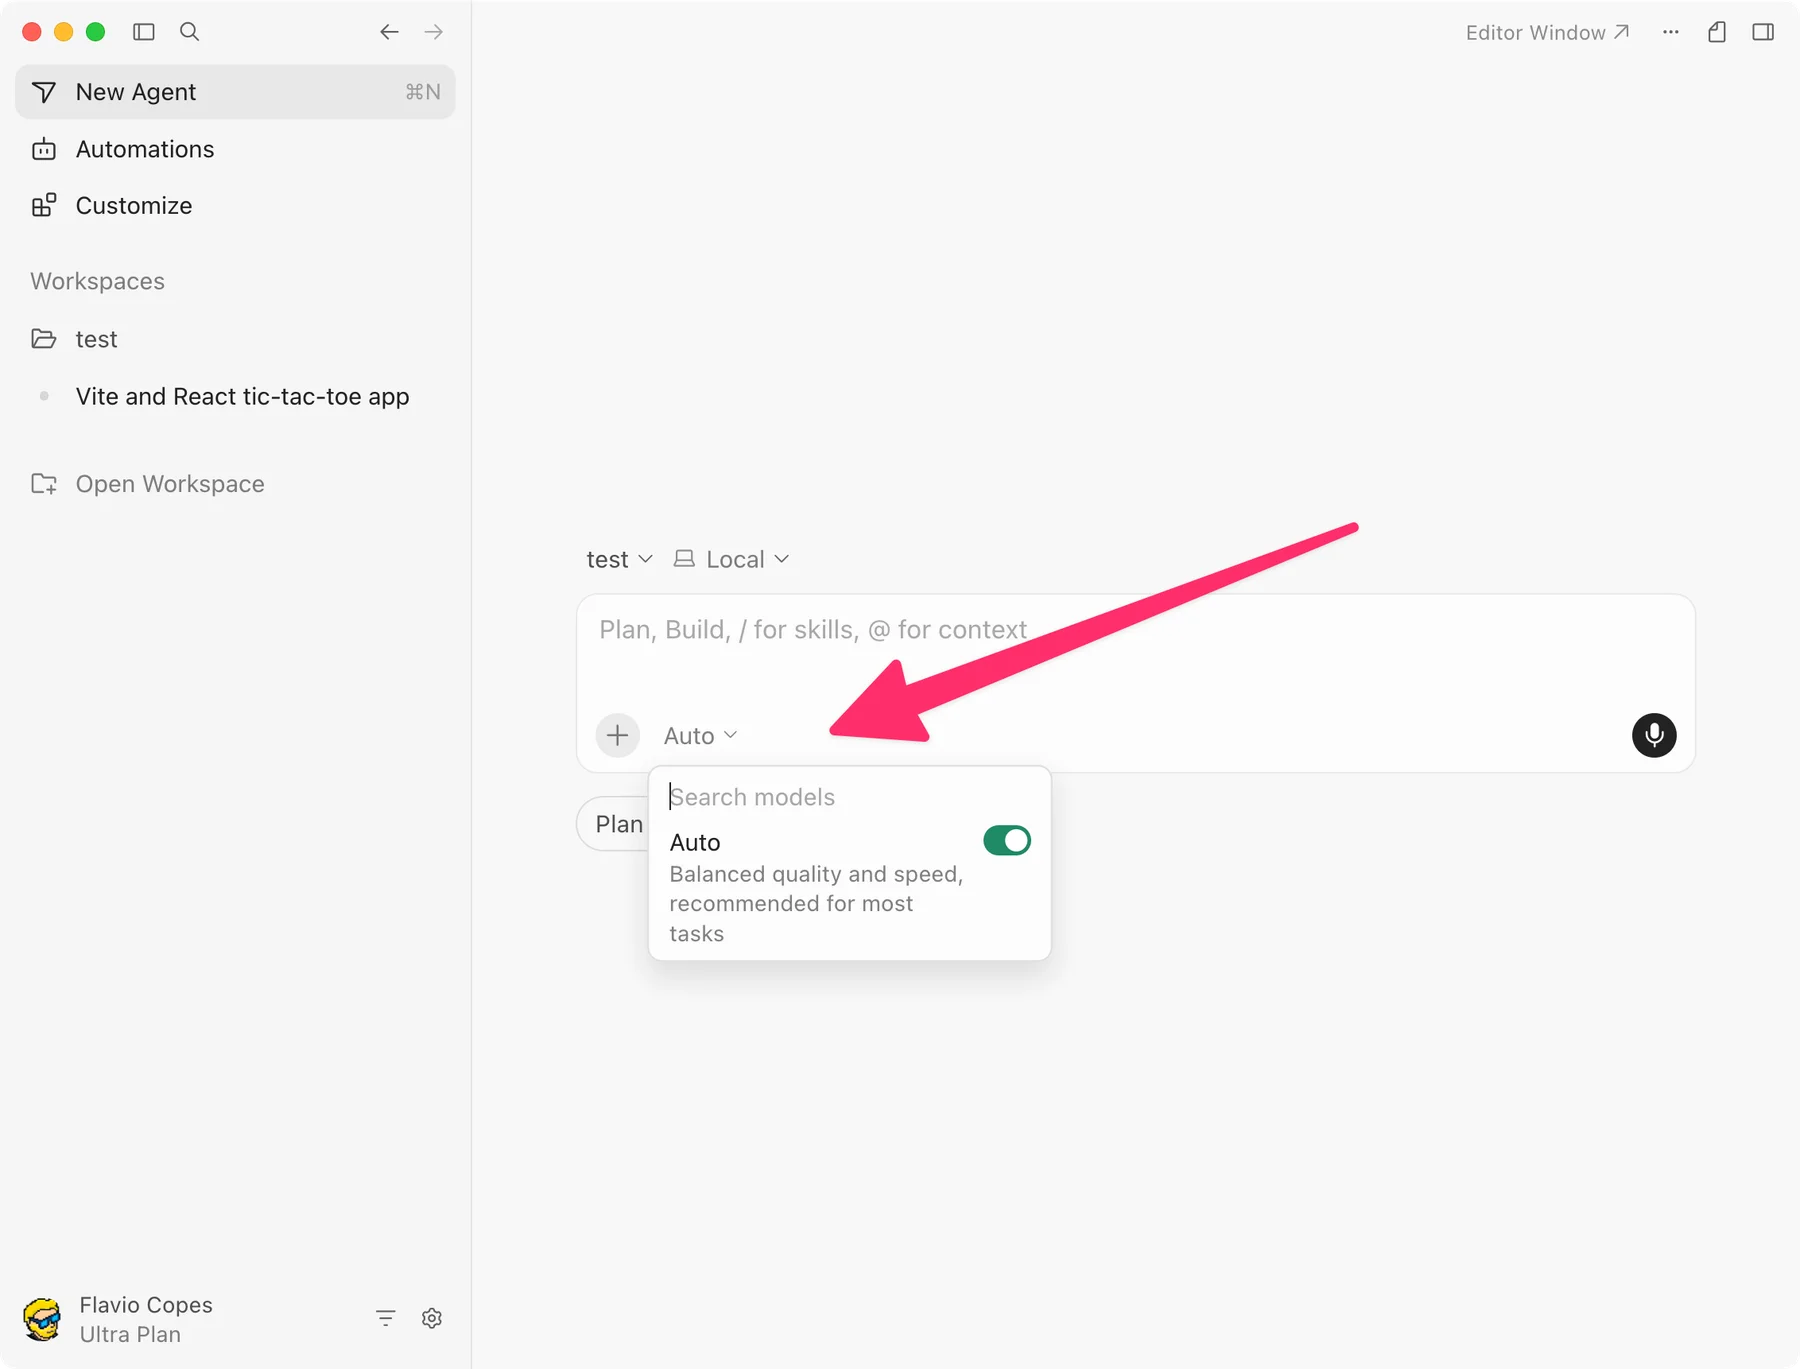
I used Composer for quick iterations here. The list also has models from other providers, and the names change often, so pick from what your account offers today.
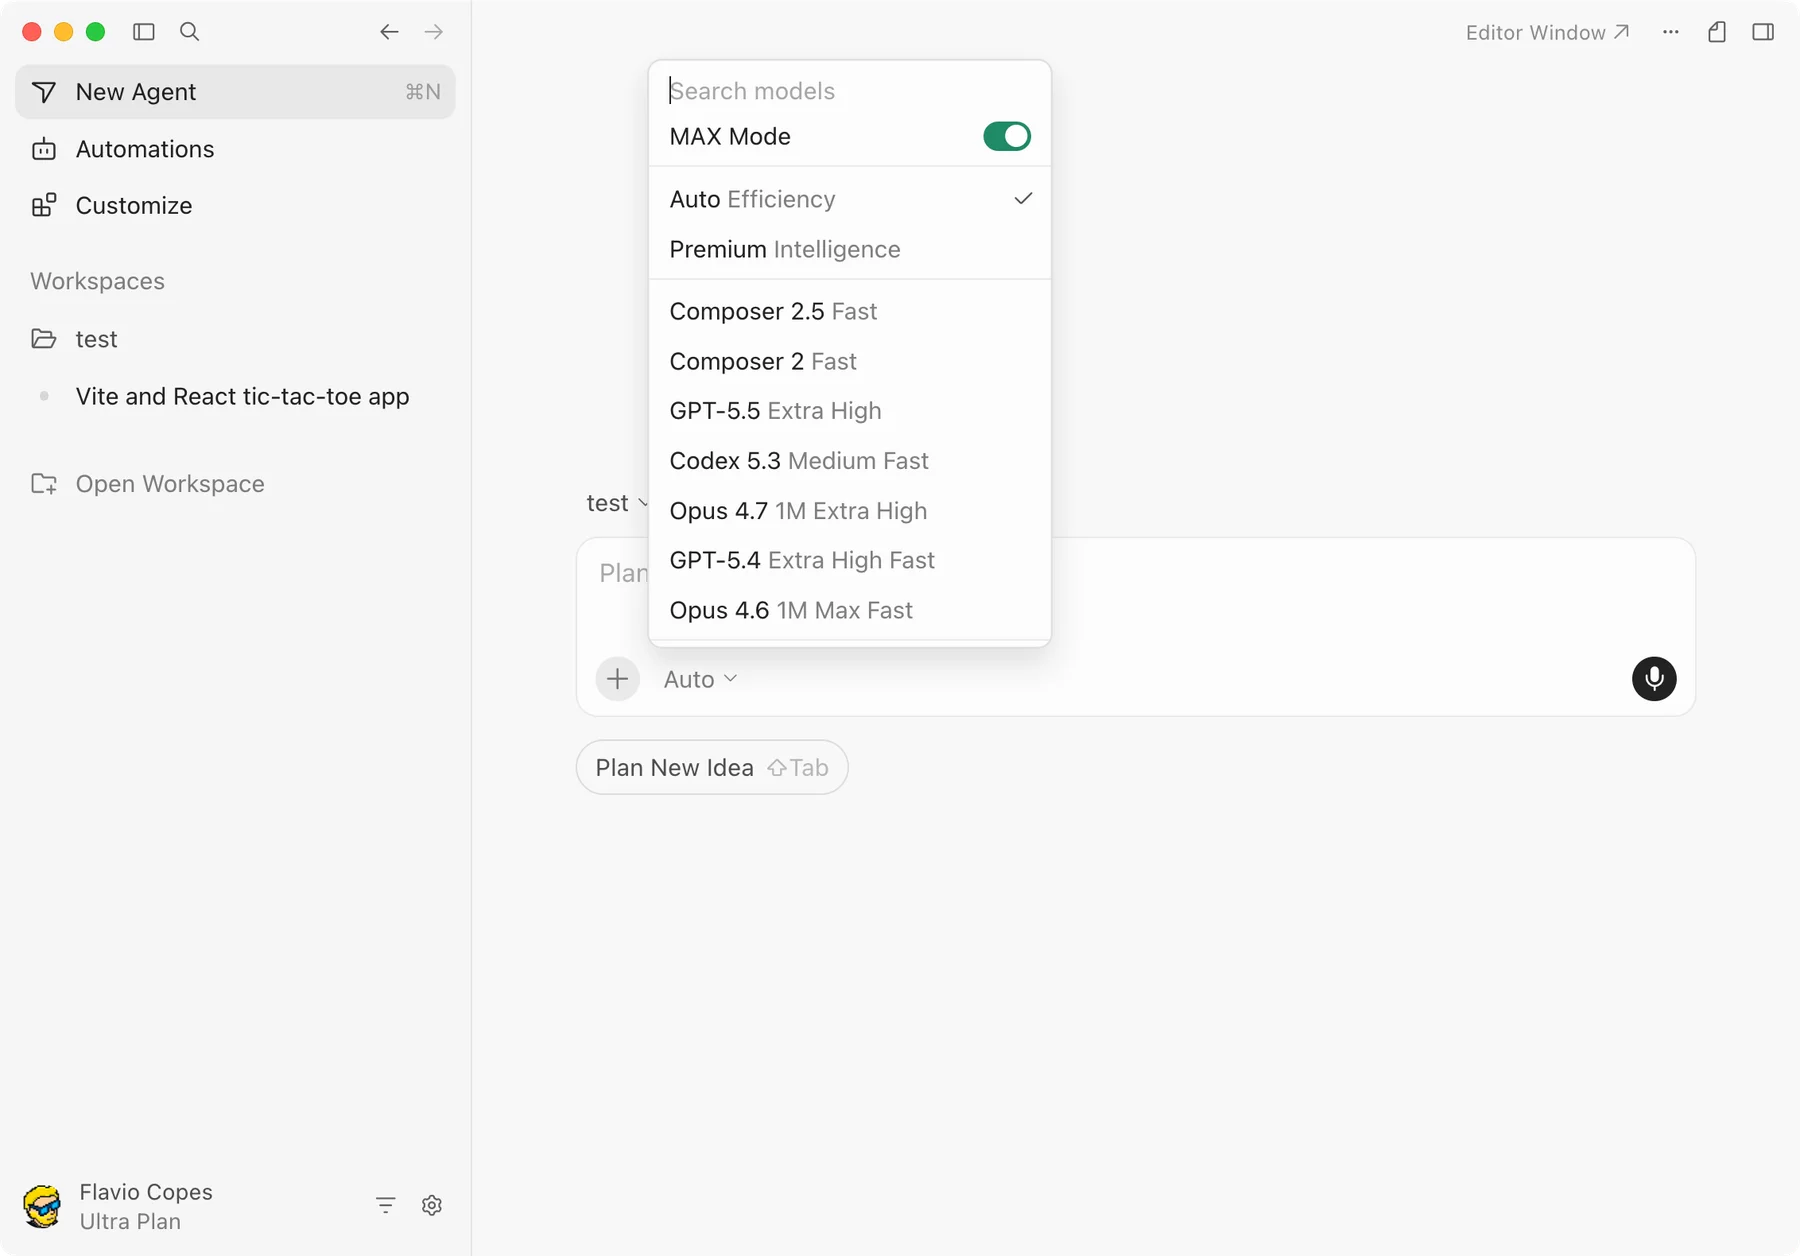
For a small styling change, a fast and cheap model is enough. For a hard bug, try a stronger reasoning model, after giving it the reproduction and the relevant files.
When an answer is bad, look at the request before switching models. Often the expected behavior or the error message is missing, or the agent is working in the wrong folder.
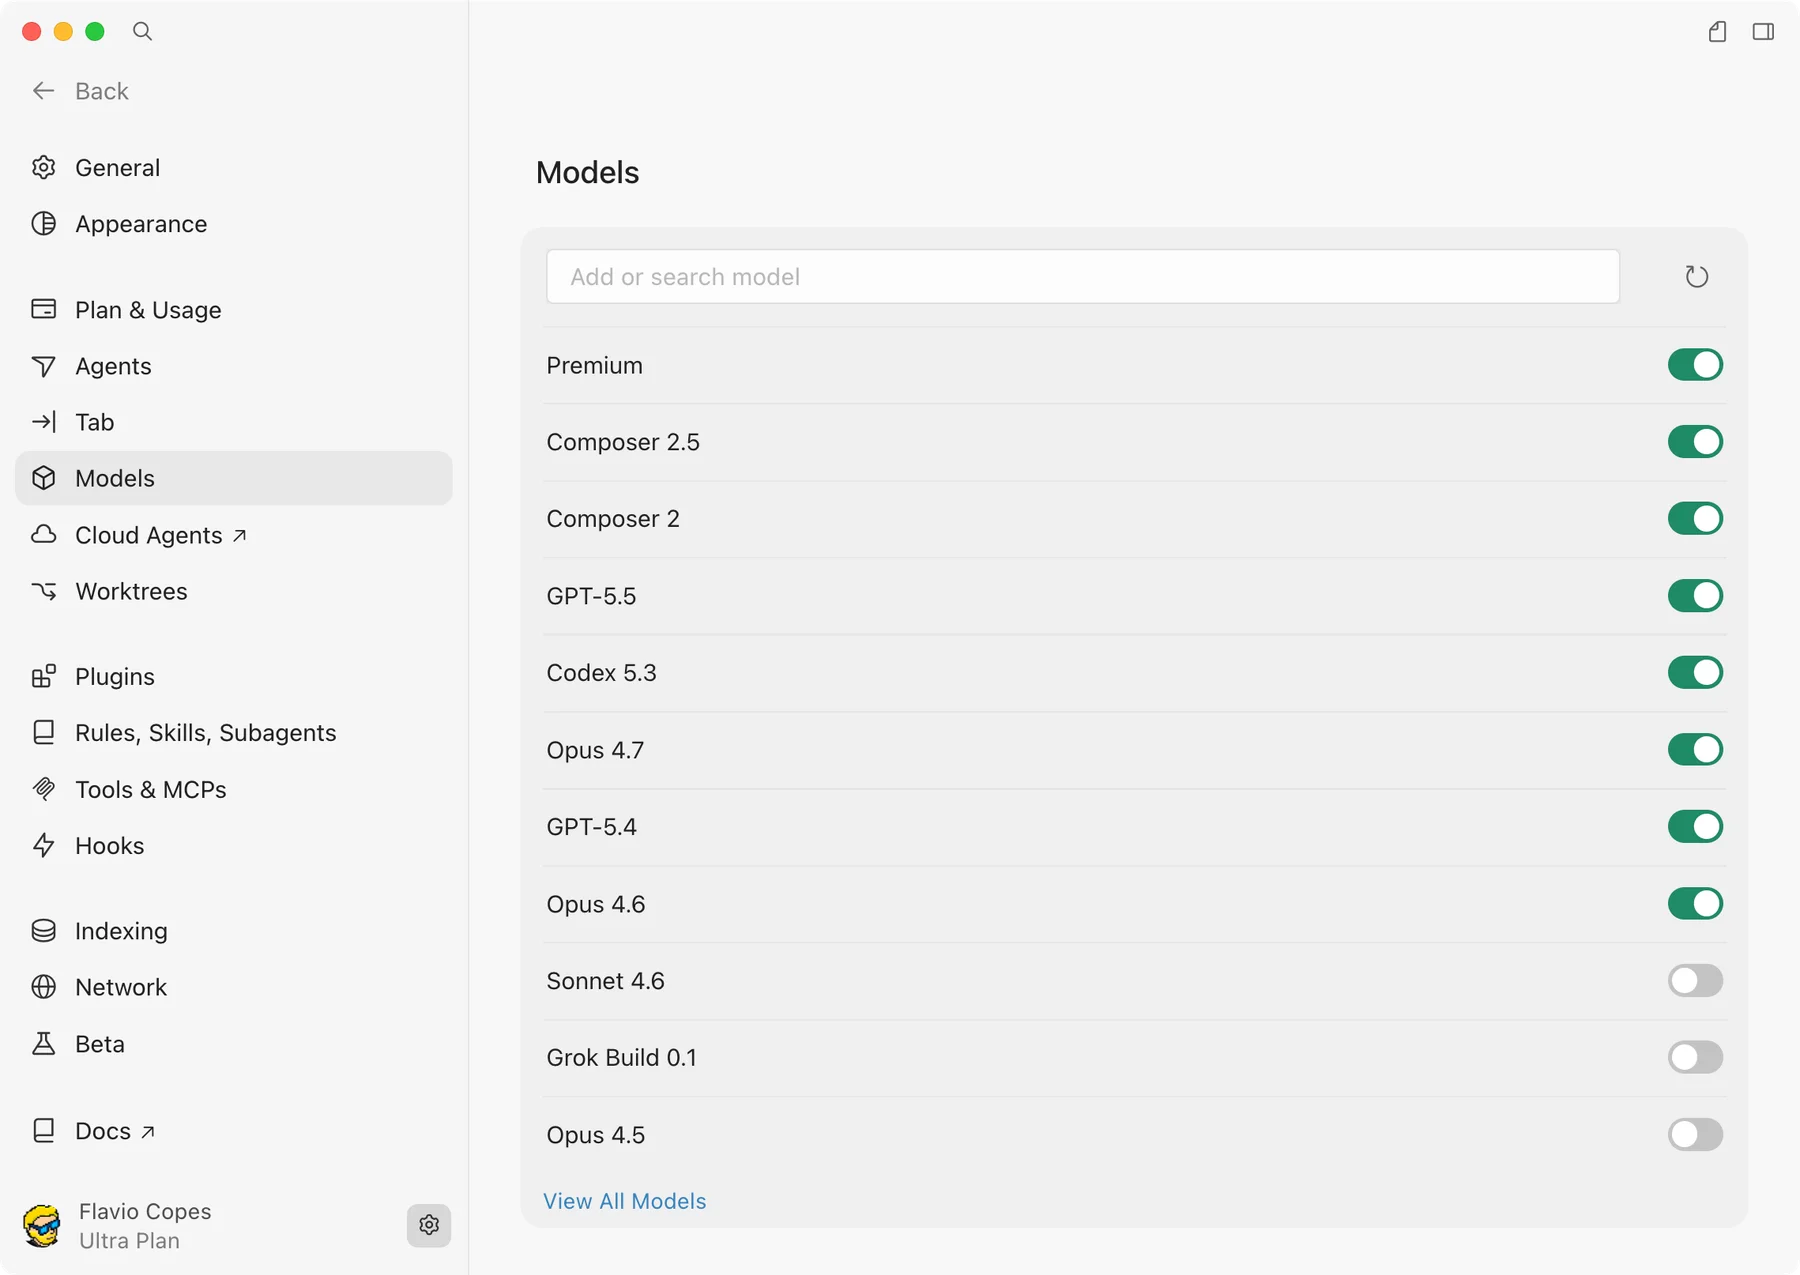
You can choose which models appear in the picker in the settings:
Some models also have effort, context or speed options, which vary by model and account:
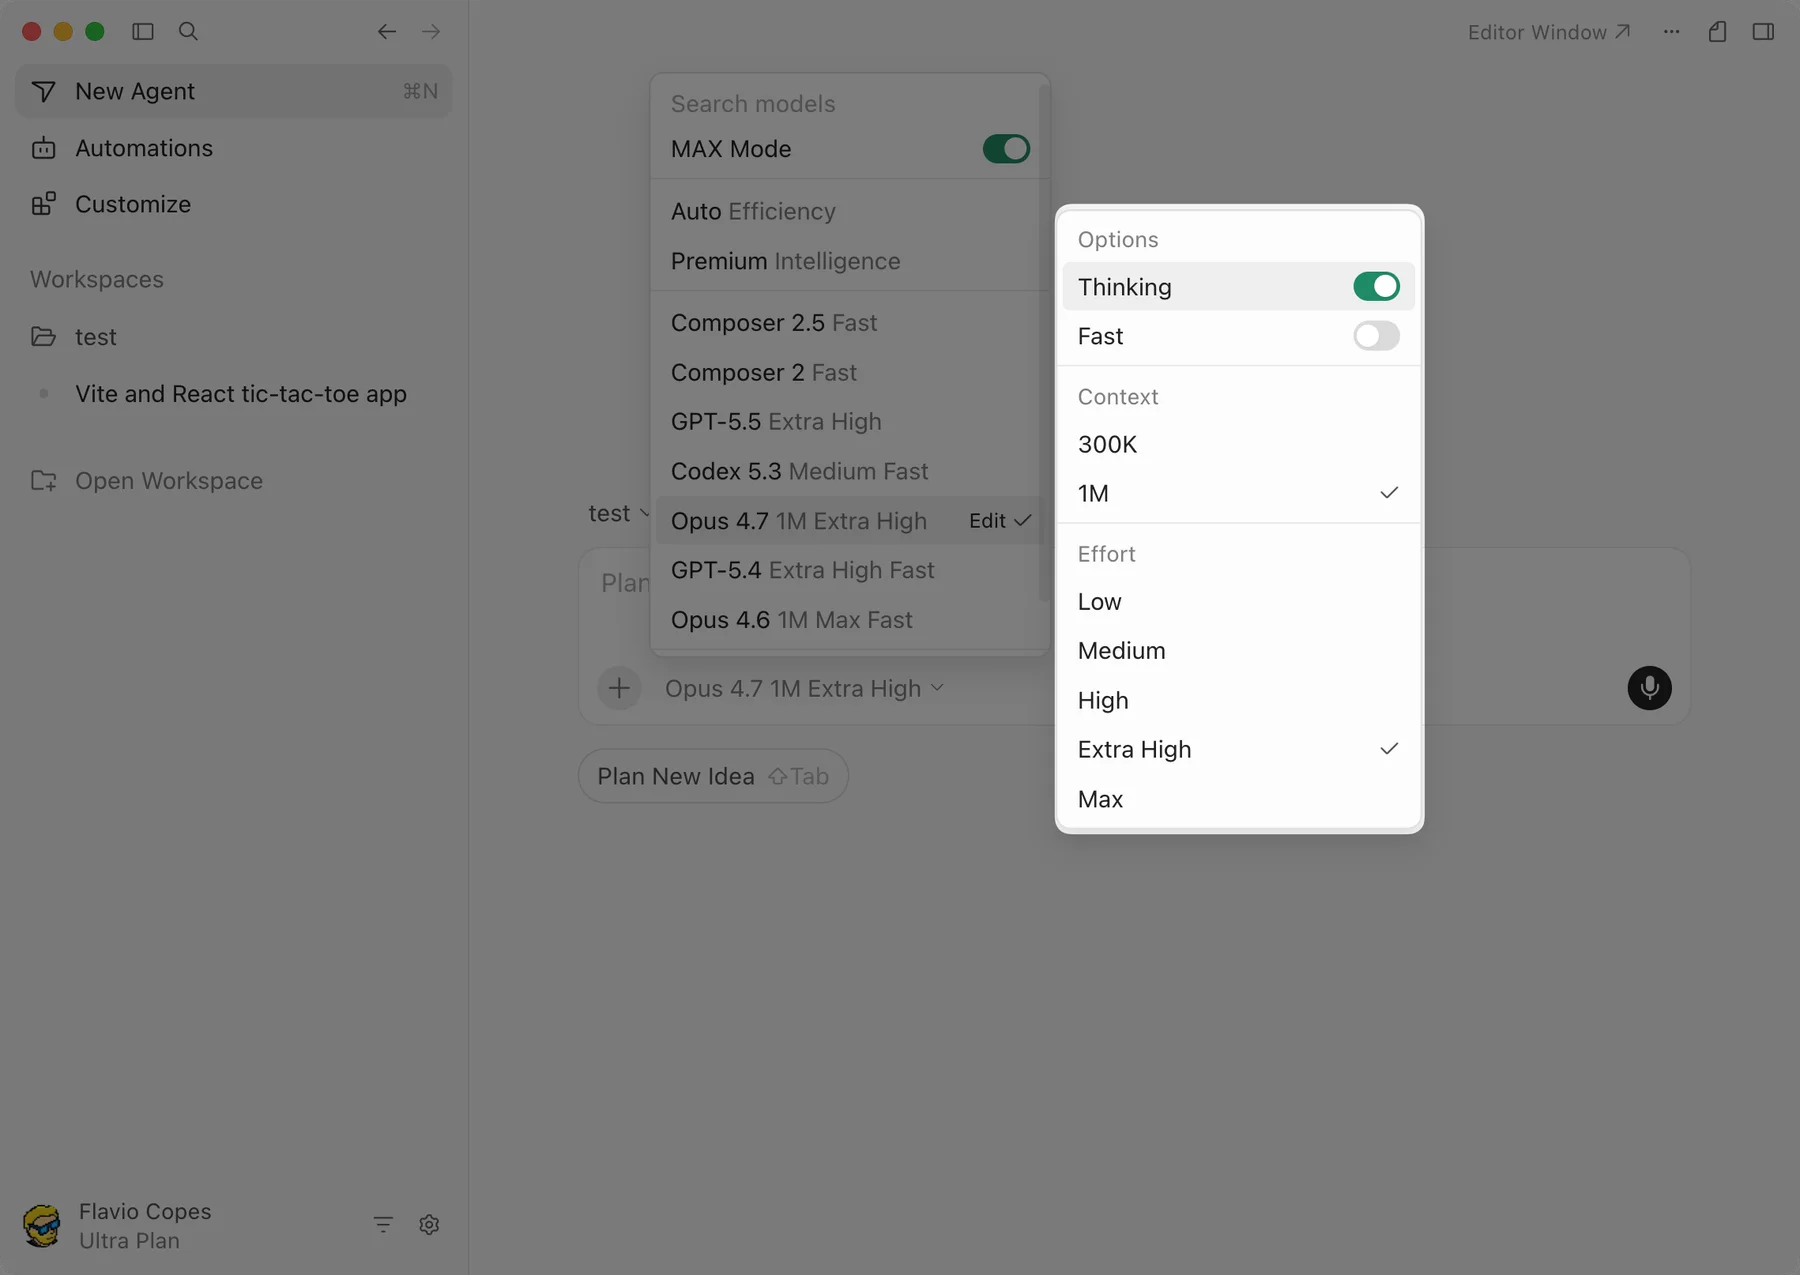
If you want to compare, change one setting at a time. Take the same reproducible bug in a saved copy of the project, keep the prompt identical, and switch only the model or the effort level.
A bigger context window holds more, but the agent still has to find what matters in it. A short bug report and the right files work better than a huge context.
Give Cursor the context it needs
A new conversation starts knowing nothing about your task. Name the feature or the file when you know it, attach a screenshot for a visual problem, and paste the exact error for a failed command.
On a project you didn’t just create, start by asking the agent to look around:
Read the README and package.json, then find the code for the game.
Explain how to run it and where the state is managed.
Don't change files yet.
Correct anything it gets wrong before asking for changes. If it thinks our browser-only game has a backend, tell it.
When a conversation has drifted across several unrelated tasks, start a new one with a short handoff: what changed, what still fails, which checks already ran. Decisions that should last belong in files the next conversation can read, like the rules we’ll write in a moment.
After a failed attempt, describe what the app does now. “Try again” with no new information tends to send the agent down the same path.
Attach the file you want it to read
In the chat input, type @ followed by part of a filename, like @App, and pick the React component that shows the game’s status. It appears as a chip in your prompt. Then ask:
Read the attached component.
Explain which message appears during a game, after a win, and after a draw.
Don't change files. Cite the relevant file and function for each answer.
Compare the answer with the file. If it mentions a function that doesn’t exist, check which file you attached. You can also attach a whole folder when the task spans it, which is better than throwing the entire repository at every request. The prompting guide lists the other context types.
Exclude private and irrelevant files
Sooner or later a project gets local notes or credentials. Decide what stays out of the AI context before those files show up, with a .cursorignore file in the project root:
private-notes/
.env*
*.pem
If the file already exists, add your patterns to it. It uses Git-style patterns, and Cursor already excludes many generated and sensitive files by default (see the ignore-file reference).
.cursorignore only covers Cursor’s own file-context features. A terminal command or an MCP tool can still read those files, so keep secrets out of prompts, and rely on operating-system or tool permissions when you need a real boundary. It also has nothing to do with Git: you still need .gitignore to keep files out of commits.
Turn on Privacy Mode
Open Cursor Settings → General and enable Privacy Mode. According to Cursor, this keeps your code from being used for training by Cursor and its model providers.
Your prompts and code are still sent to those services to be processed. If you use your own provider API key, read that provider’s data policy too. Cursor’s privacy guide covers the current controls.
Write project rules
Rules tell Cursor how the project works, so you stop repeating the same instructions in every chat.
The simplest start is an AGENTS.md file in the project root. For our game it could be:
# Project instructions

This is a local two-player tic-tac-toe game built with Vite and React.

- Keep game rules separate from display styling.
- Use the existing package manager and scripts in package.json.
- Don't add dependencies for game logic or simple styling.
- Run `npm run build` before finishing.
- Also check wins, draws, occupied squares, and reset in the browser.
- Before finishing a UI change, check the game at 375px width.
- Explain what changed and which checks ran.
The dependency rule, for example, stops the agent from pulling in a library for something a few lines of code can do.
Cursor also supports rules in .cursor/rules/ as .mdc files, which you can apply always, by file pattern, manually, or when relevant. They’re useful when different parts of a larger project need different instructions. The rules documentation explains the options.
Keep always-applied rules short: the stack, the commands, a few decisions. A long procedure belongs in a skill or a document the agent reads when it needs it. And when a command changes, update the rules, or the next chat will try to run a script that no longer exists.
Make a reusable skill
A skill is a folder with a SKILL.md file that teaches the agent a specific workflow. It can also include scripts or reference files.
I think of skills as recipes: when to use one, the steps to follow, and how to check the result. Here’s one for our game, saved as .agents/skills/check-game/SKILL.md:
---
name: check-game
description: Check the tic-tac-toe game after changes to its rules or interface.
---

Read package.json and use the existing verification scripts.
Run npm run build.
Run the app and check a horizontal win, a diagonal win, and a draw.
Check that occupied squares and finished games reject new moves.
Start a new game and confirm the board and turn indicator reset.
Check the layout at 375px width.
Report any failed check and say when a check could not be performed.
Type / and pick the skill to attach it to a message. Cursor also picks a skill on its own when its description matches the task. Project skills live in .agents/skills/ or .cursor/skills/, and personal ones in the same folders under your home directory.
Personal skills stay on your computer. Only ~/.cursor/skills/ can sync to Cloud Agents; ~/.agents/skills/ isn’t copied to remote sessions. The skills documentation has the details.
You can open a skill in the settings to read its instructions:
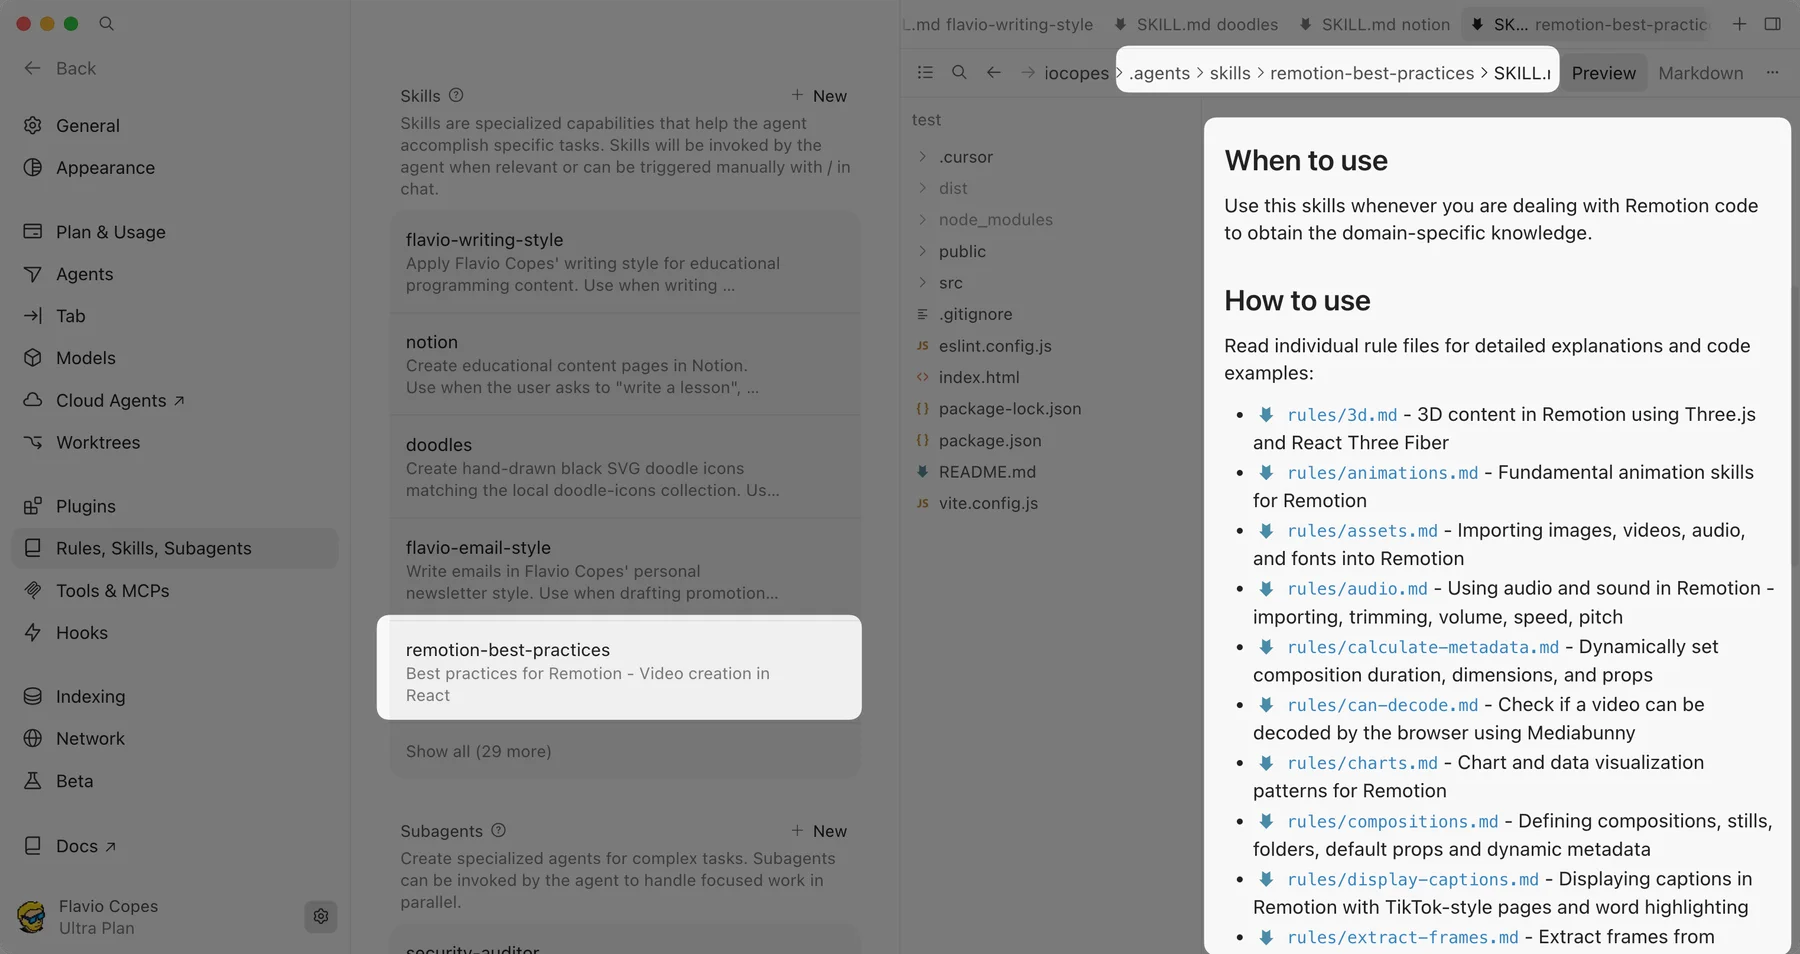
Our skill includes a browser check, which needs the browser tools. Without them, the last line of the skill makes the agent say so instead of pretending the check passed.
Give each skill one small job. Checking the game is one, deploying it would be another.
Delegate work to subagents
In a long task, the conversation fills up with search results, terminal output and browser snapshots. Subagents handle part of the work in their own context, and only the result comes back to the main conversation.
Cursor ships with three that it uses on its own when it makes sense: Explore searches the codebase, Bash runs shell commands, and Browser drives the built-in browser. You don’t need to configure them.
You can create your own. A subagent is a Markdown file with YAML frontmatter, in .cursor/agents/ for the project or ~/.cursor/agents/ for all your projects. This one reviews code for security issues, saved as security-auditor.md:
---
name: security-auditor
description: Security review for auth, payments, and sensitive data.
model: inherit
readonly: true
---

Audit the code for security vulnerabilities:

- SQL injection and XSS
- Authentication bypass
- Hardcoded secrets
- Missing input validation
- Insecure data handling

Report findings with severity and file locations.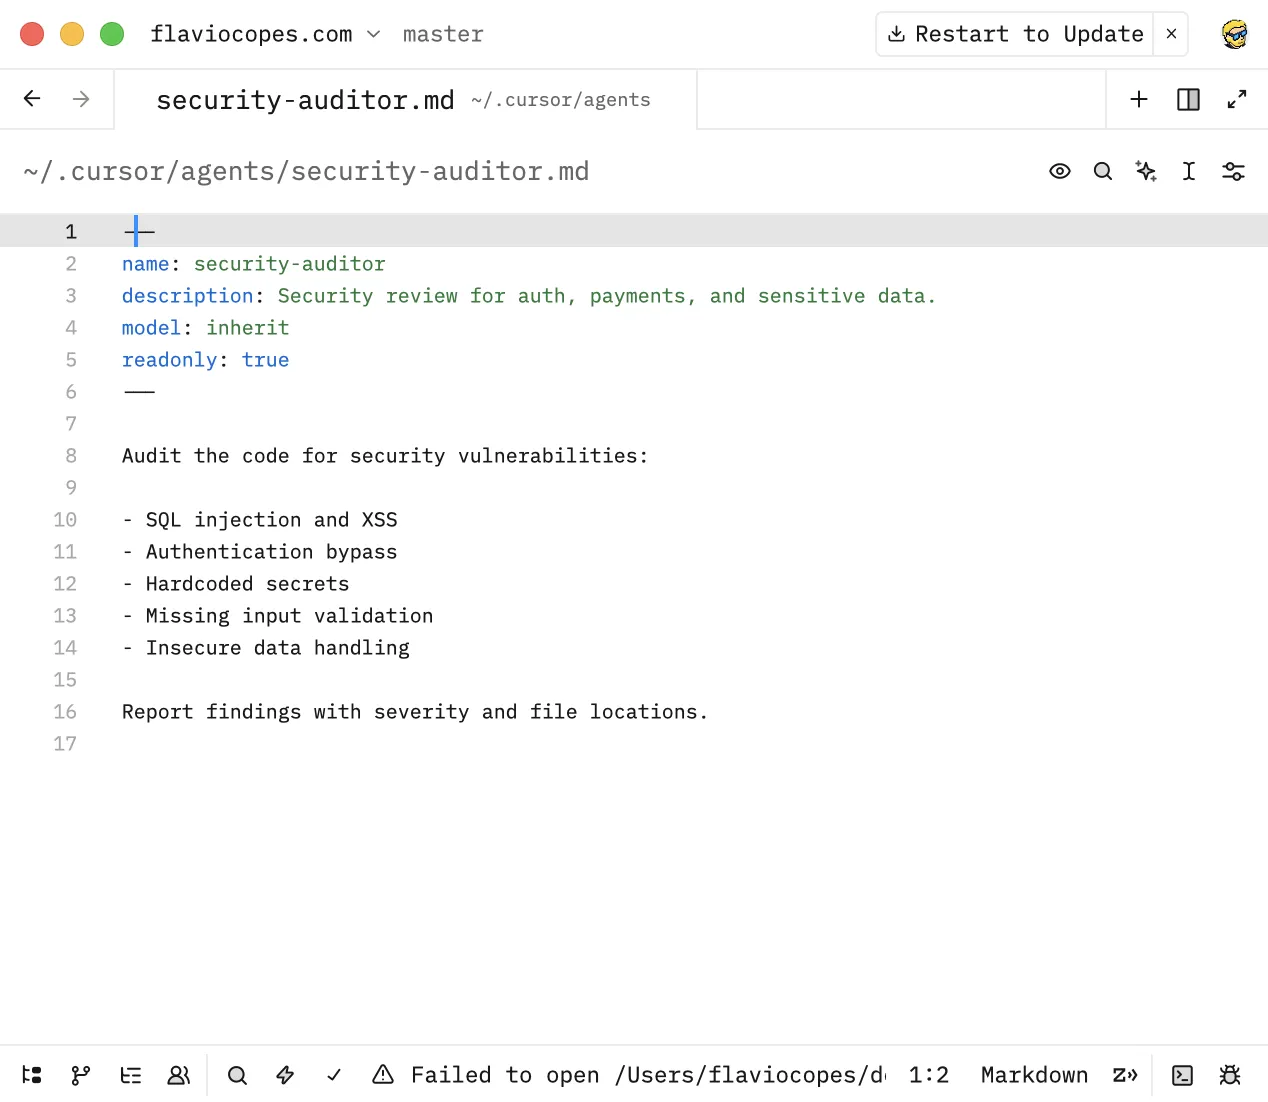
The body is the prompt the subagent follows. These are the frontmatter fields:
| Field | Default | What it does |
|---|---|---|
name | filename | Display name and identifier |
description | none | Helps the agent decide when to use it |
model | inherit | inherit, fast, or a specific model ID |
readonly | false | If true, it can read but not edit files |
is_background | false | If true, it runs without blocking the main agent |
Write a specific description. “Helps with coding” gives the agent nothing to decide with, while “Security review for auth, payments, and sensitive data” tells it exactly when to delegate.
The agent can pick a subagent on its own based on that description. You can also call it with /security-auditor, or ask for it by name:
Use the security-auditor to review any form on the site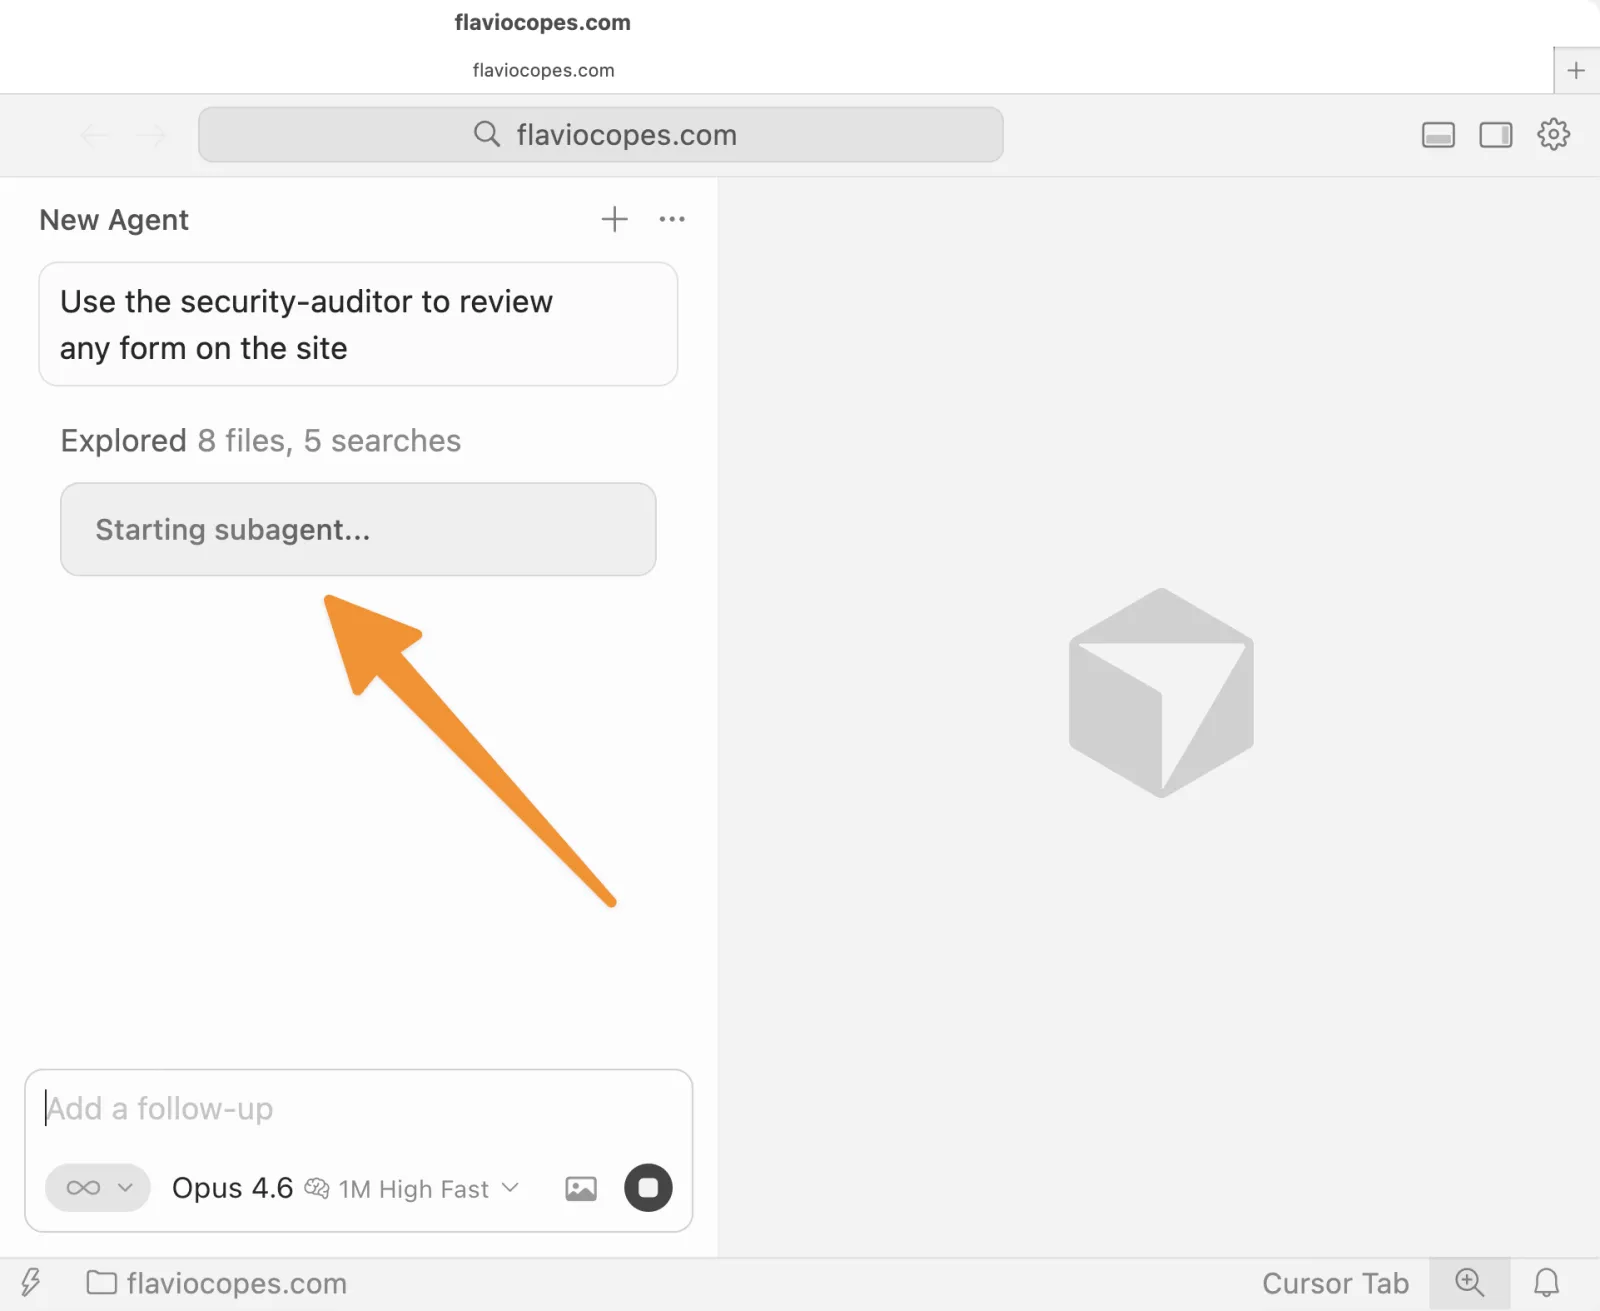
Since I set readonly: true, it only reports findings and leaves the fixes to me.
Several subagents can run in parallel, for example one running the linter, one checking security and one running the tests. Each one starts with a clean context, without the parent conversation’s history, and uses its own tokens, so five parallel subagents cost roughly five times as much. A subagent can’t start another subagent.
I use them for long, noisy or parallel work like test suites and reviews. For a quick edit, the main agent is faster.
Connect external tools with MCP
MCP stands for Model Context Protocol. An MCP server gives the agent tools or data from another system: a Notion server can read pages, a database server can run queries. Before connecting one, look at which tools it exposes and what access you’re giving it.
Our game doesn’t need any external service, so this part is optional. Add a connection when you have a real use for it, like reading a spec you keep in Notion.
Cursor’s Customize page lists the available integrations:
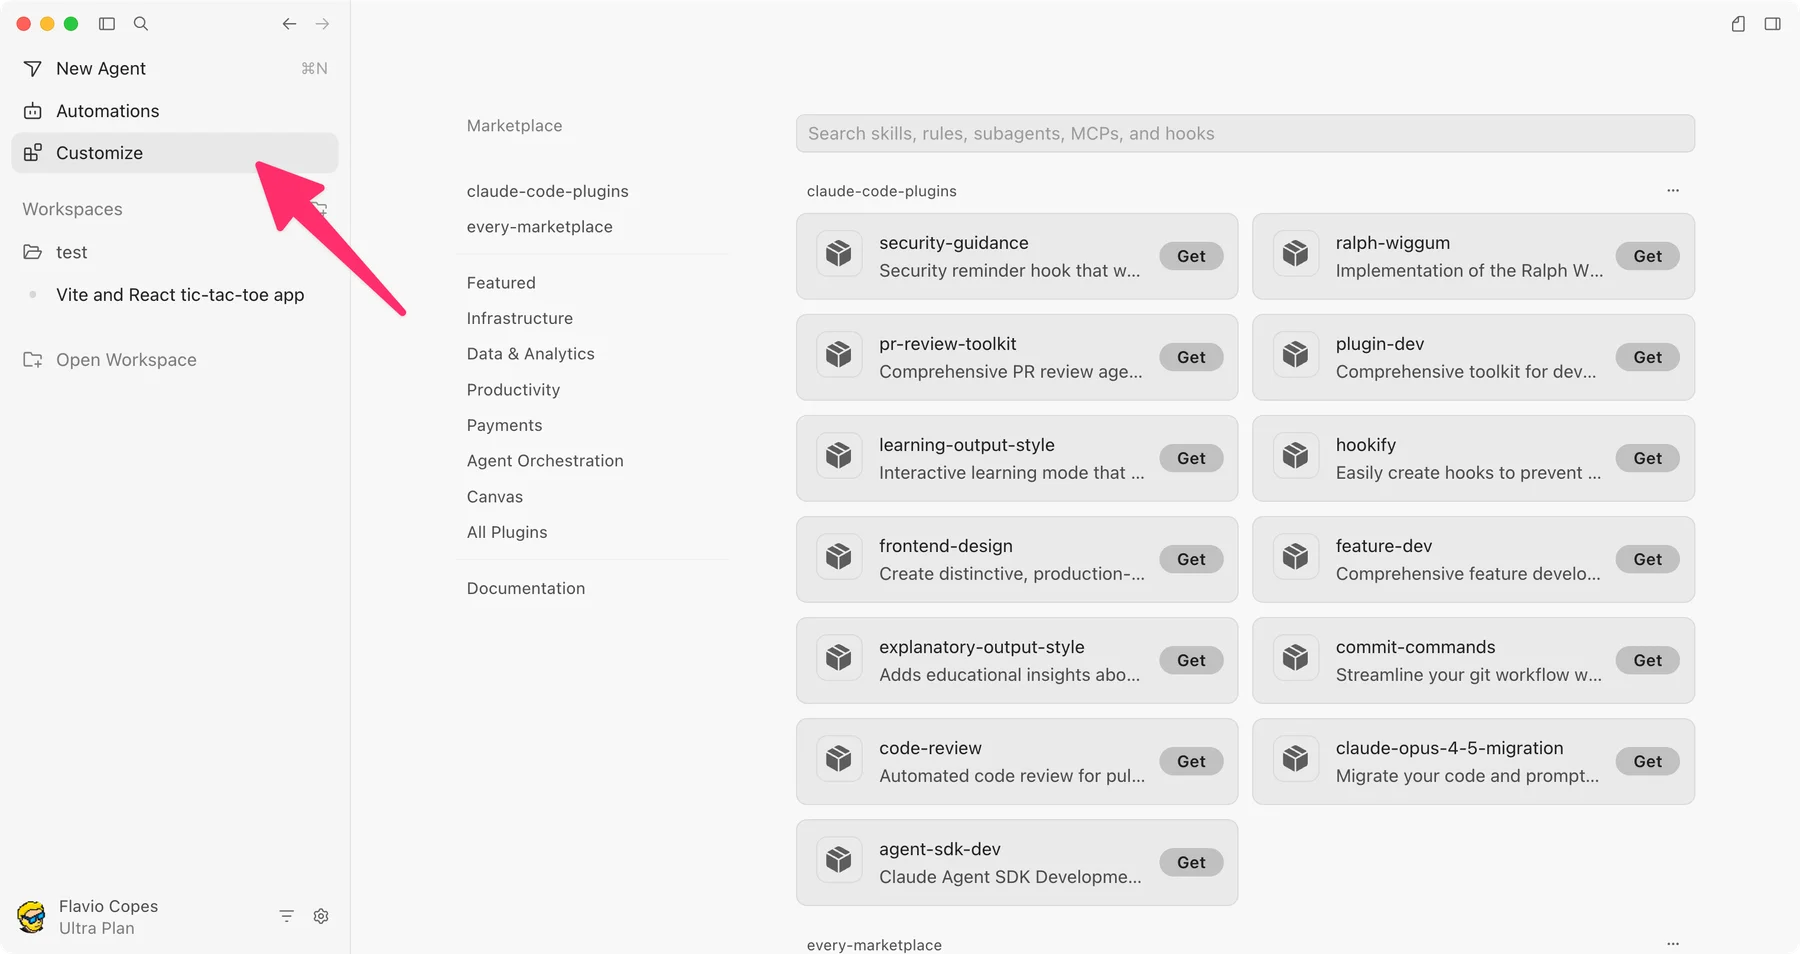
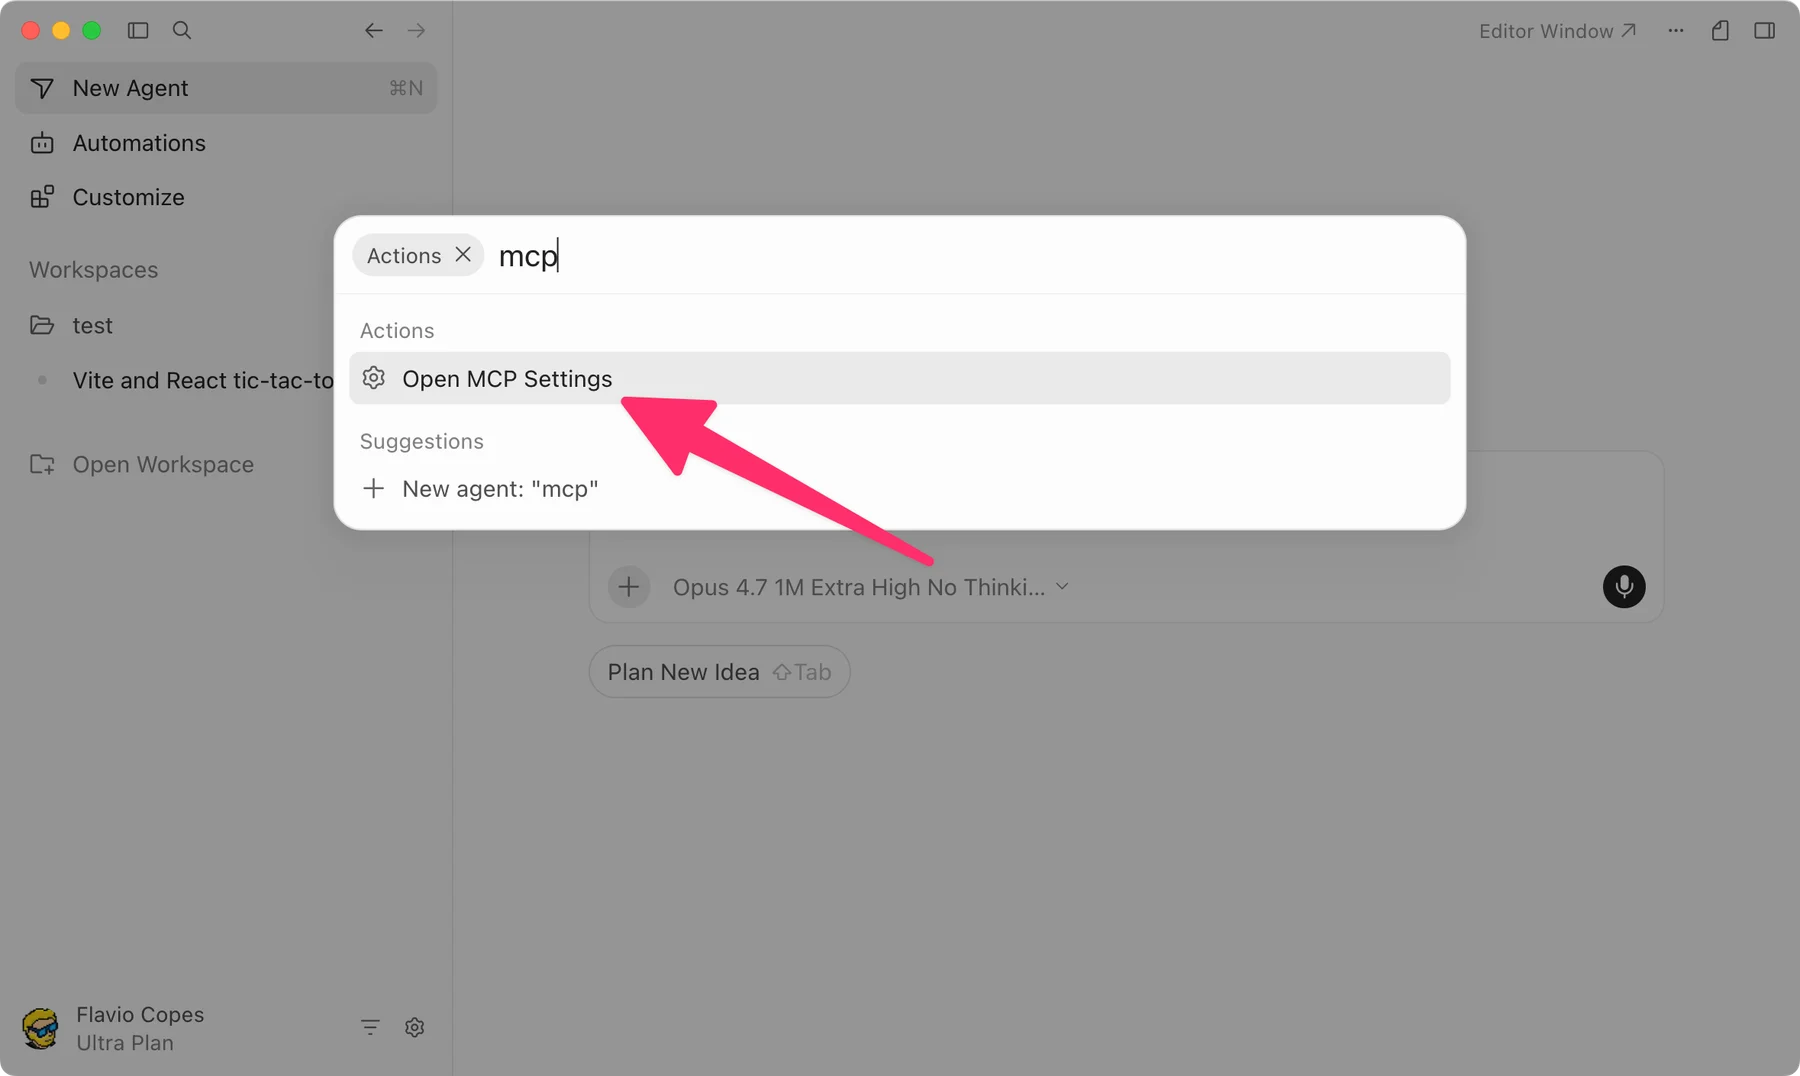
You can install them there, or open the MCP settings from the Command Palette:
To configure a server by hand, Cursor reads .cursor/mcp.json in the project and ~/.cursor/mcp.json for your user. A local server runs as a process on your computer, a remote one is reached through a URL. Follow the setup instructions of the service you’re connecting, and see Cursor’s MCP documentation for the configuration format.
Once connected, the settings show the server and its tools:
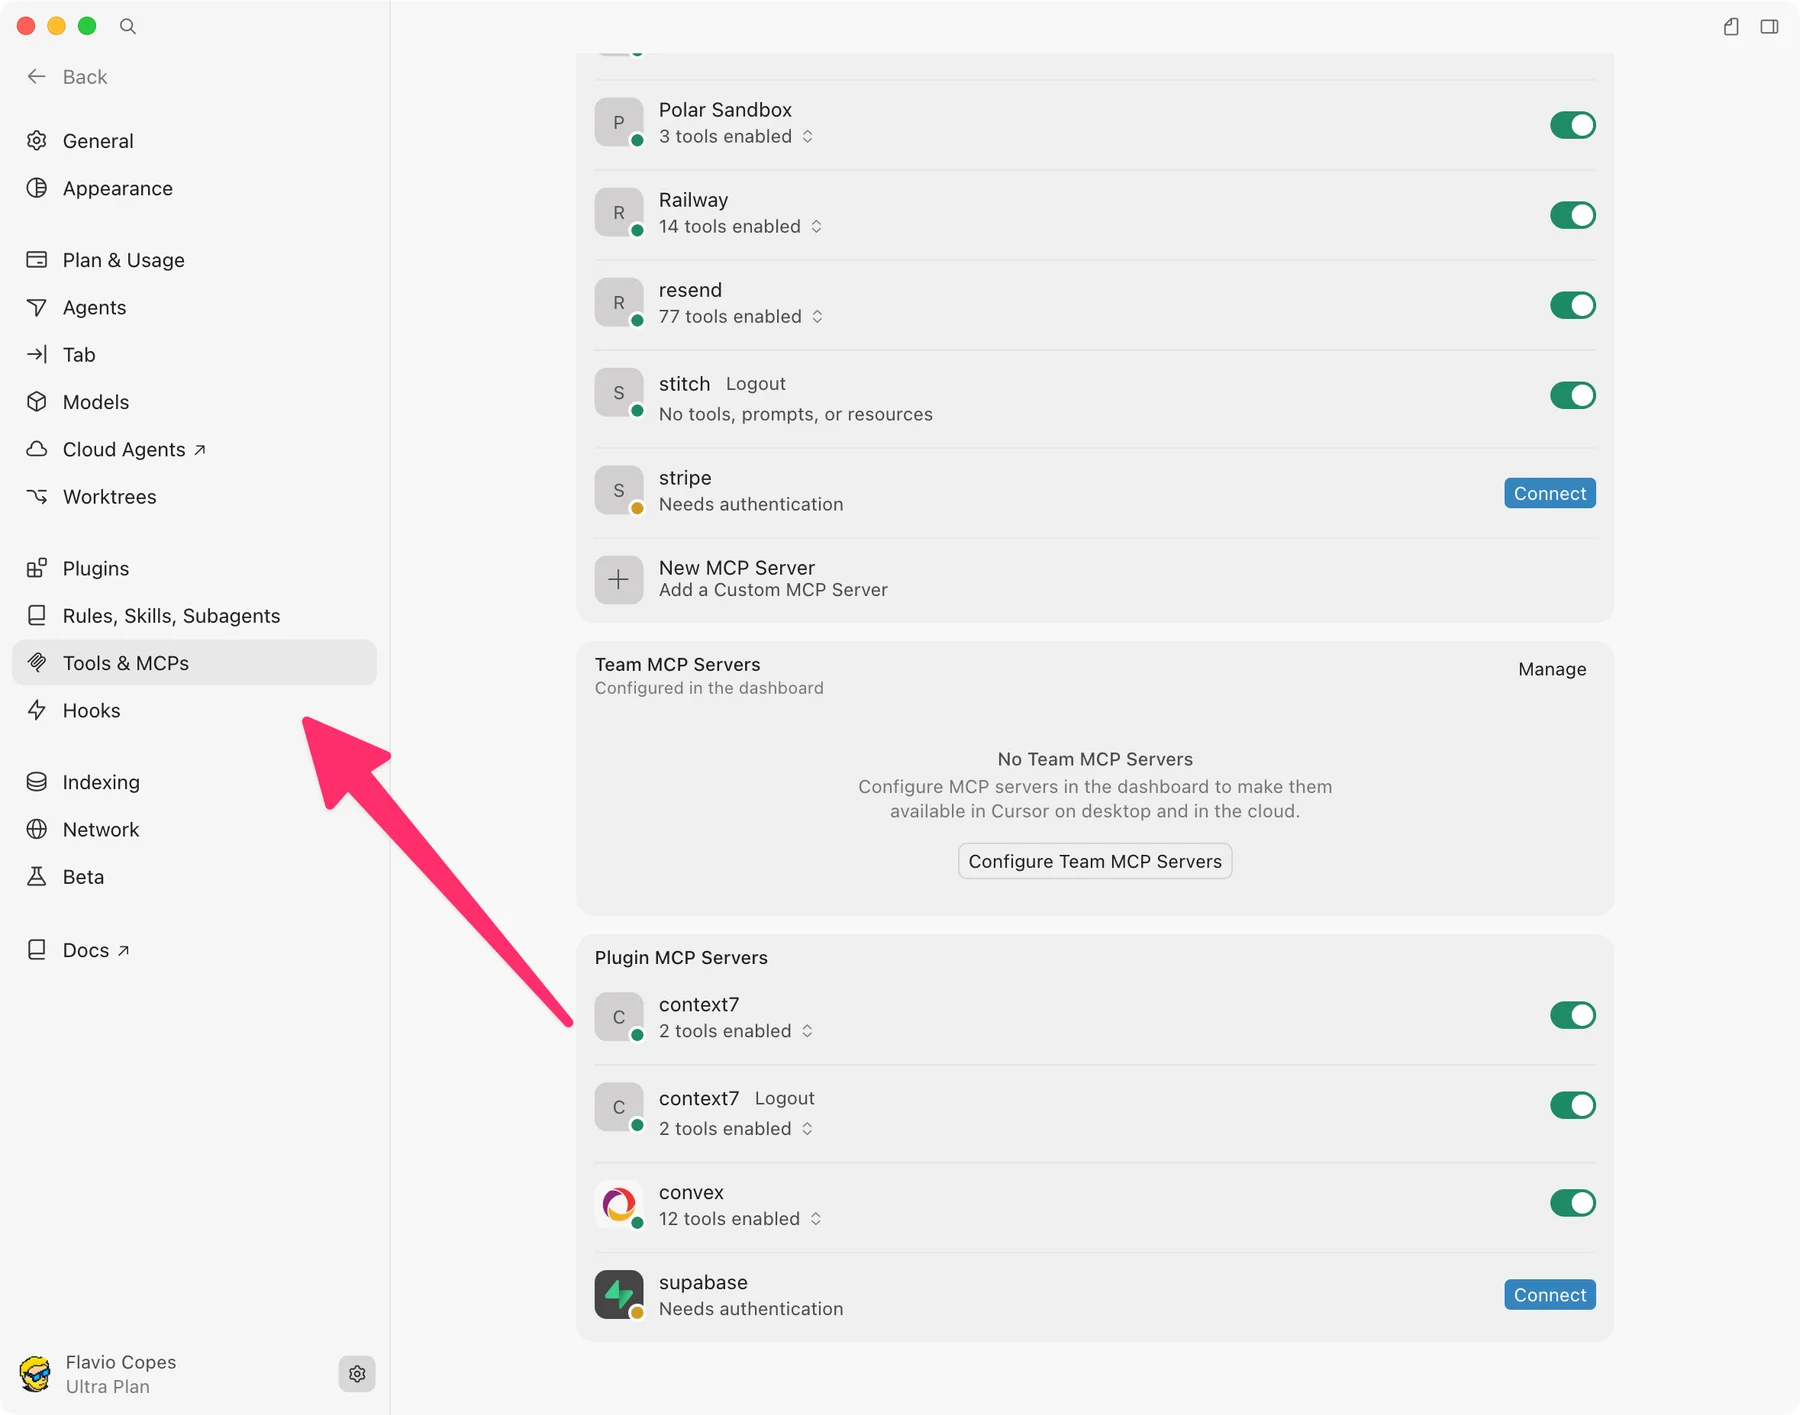
Start with a small read, like listing the pages the connection can see, then ask for the document you need:
Read the game requirements from the connected project notes.
Compare them with the current app and list missing behavior.
Don't edit the notes or the code yet.Be explicit when you want the agent to write to an external system. An edit to a Notion page doesn’t show up in your Git diff, so you won’t see it when you review the code.
Also, a server running locally can still send your data to a remote service. Check where it goes before you share anything sensitive.
Connect a public documentation server
To try MCP without connecting a private account, we’ll use OpenAI’s documentation server. It searches and reads OpenAI’s public docs (it doesn’t call the OpenAI API for you), and we’ll use it to look up how the Codex extension works inside Cursor.
It needs no API key or sign-in. Your queries still go to OpenAI, so keep them general. The server is documented in OpenAI’s Docs MCP guide.
Create .cursor/mcp.json in the game’s root folder:
{
  "mcpServers": {
    "openaiDeveloperDocs": {
      "url": "https://developers.openai.com/mcp"
    }
  }
}
If the file already lists other servers, add openaiDeveloperDocs inside the existing mcpServers object instead of replacing it.
Save, restart Cursor, and reopen the game workspace. In Customize, enable the server if it isn’t already, and wait for its tools to appear. Then ask:
Use openaiDeveloperDocs to find the official instructions for using the
Codex IDE extension in Cursor. Read the most relevant documentation page,
then explain the installation and sign-in steps with a source link.
Don't install anything or change project files.
Open the tool-call details in the response. You should see a documentation search and a page read, then an answer that links to an official page. If the agent answers from memory without calling the tool, ask it again to use the connected server.
You don’t need to install Codex. The point is to see Cursor fetch current information through a real connection.
When a connection fails
| What you see | What to check |
|---|---|
| Server never appears | JSON syntax, file location, and the open workspace |
| Connection or protocol error | Exact endpoint URL, network access, and server status |
| Server connects but no tool runs | Enabled tools, the request, and any approval waiting for you |
| An unexpected sign-in request | Confirm the server URL; this public example needs no credentials |
To stop using a server, disable it in Customize, or delete its entry from .cursor/mcp.json and restart Cursor.
Control tool permissions
The agent does more than edit files. It runs commands, calls external services and fetches pages from the network, and the permission settings decide which of those happen without asking you.
For local agents, the Run Modes are Auto-review, Allowlist and Run Everything, under Settings → Agents → Approvals & Execution. Auto-review runs allowlisted calls, runs shell commands in a sandbox where it can, and uses a classifier to judge the rest, which can make mistakes. Run Everything runs every tool call without the sandbox or the classifier. Read the Run Modes guide before changing these. Cloud Agents run on their own machines with different controls.
When an approval shows up, read the command and what it acts on. npm run build in the game folder obviously belongs to the task. A command that deletes another directory doesn’t.
Keep credentials out of rules files and prompts, and use each tool’s own authentication. A secret you commit to Git stays in the history even after you delete it from the file.
Review and save a change with Git
Commit each working version before asking for something bigger, so the next diff starts from a known state.
If the folder isn’t a Git repository yet, create one from the project folder:
git initBefore staging, look at what you’re about to commit. A Vite project ignores node_modules/ and the build output in .gitignore. Make sure no local secrets are in the list.
You can ask Cursor to explain the pending changes:
Review the current diff.
Explain the behavior changes and call out unrelated edits.
Don't commit or push yet.
For the scoreboard, the diff should be about score state, how scores are displayed, and resetting them. If it also swaps the styling system or adds a backend, ask why.
Then run the checks. For a Vite project, the production build is:
npm run buildA passing build tells you the code compiles, not that a draw increments the draw counter. Play a draw and look at the counter.
When you’re happy, stage the files and commit. The free Git course covers staging, commits, branches and recovery if they’re new to you.
Ask Cursor to find issues
Before you commit, you can ask Cursor to review the code. The simplest way is to ask in the conversation:
Find issues in this codebase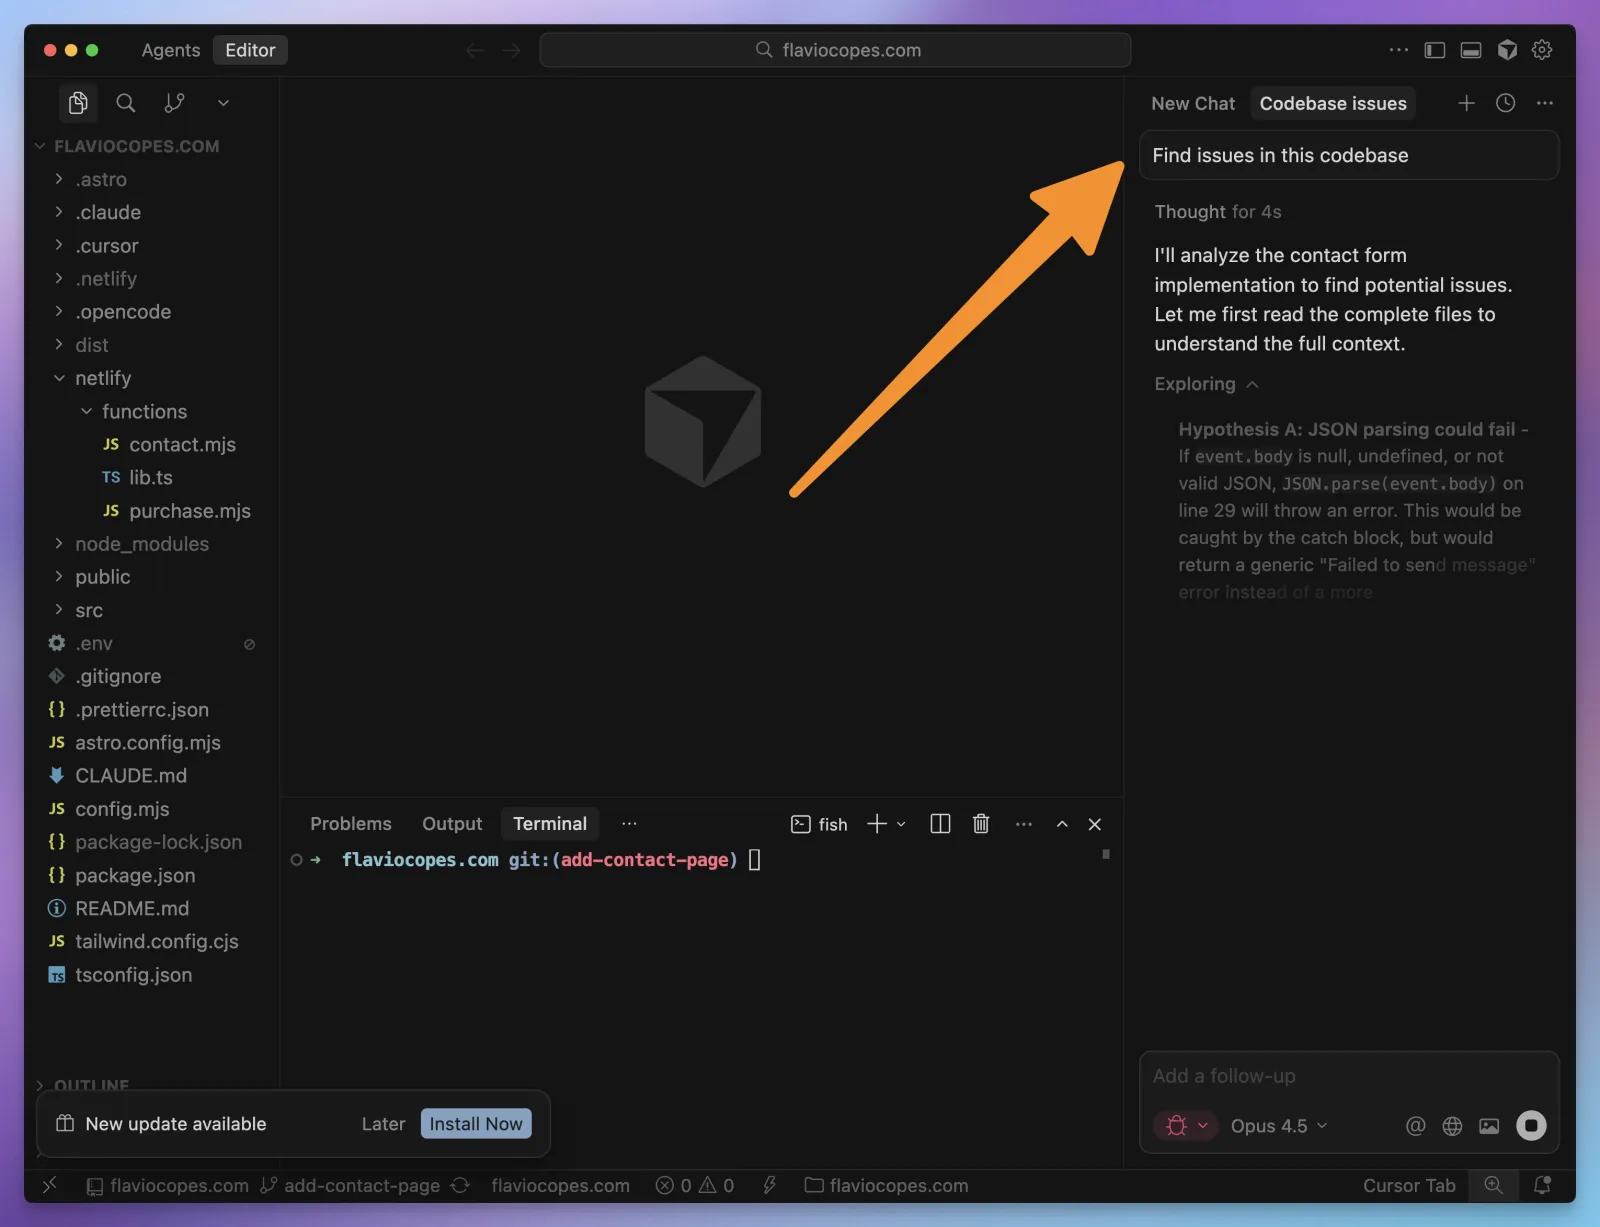
A whole-project review is slow and broad, so I usually narrow it down, like Do a code review of the contact page feature in this Git branch. You can also ask it to write the review to a Markdown file, so you can go through it later.
In the Agents Window, when the agent finishes a change you get a review view with the diff. It has a Find Issues button:
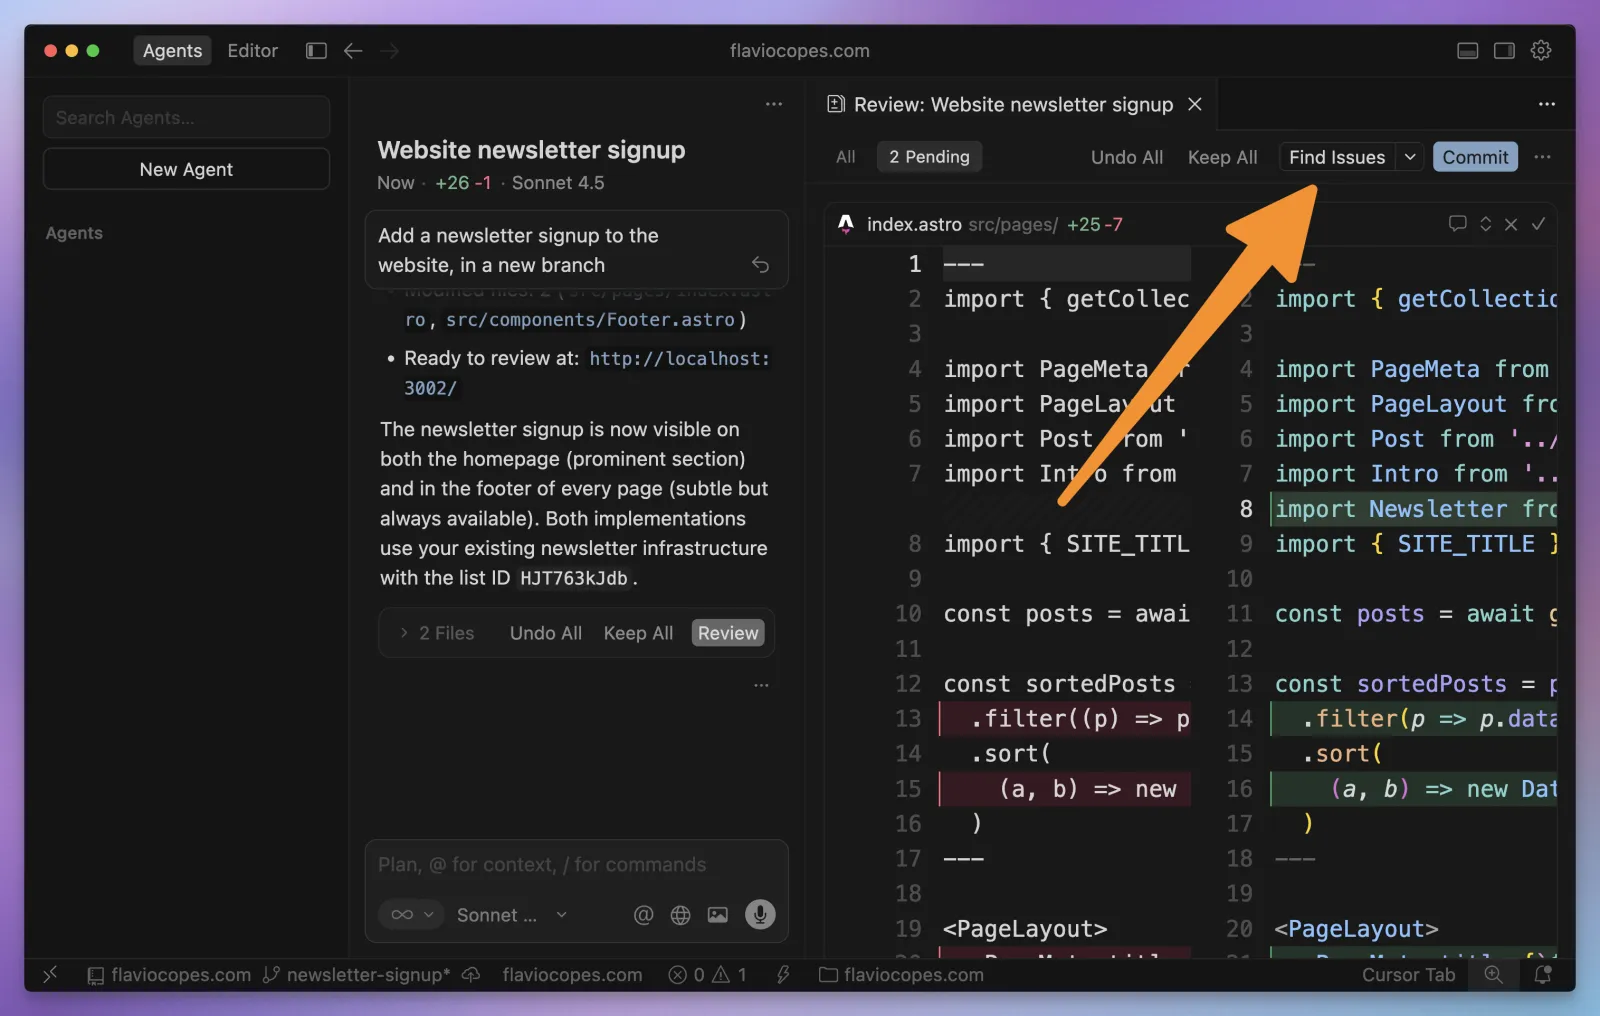
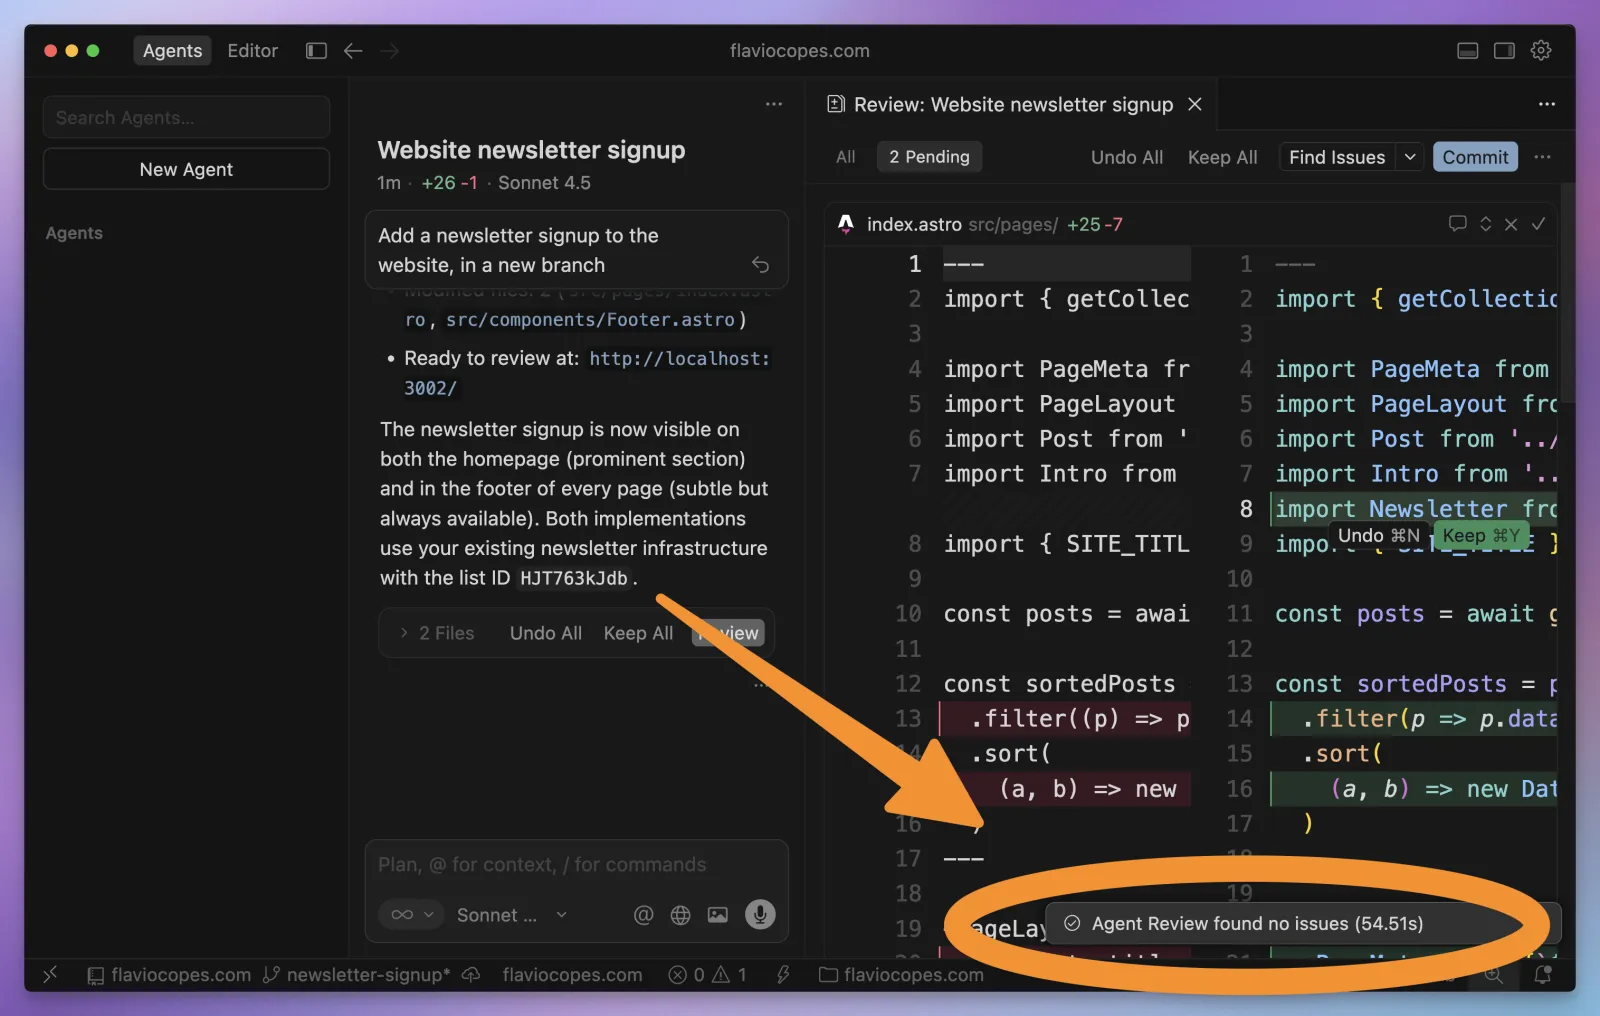
Click it and the button changes to “Reviewing…”. In my case, after about a minute it found nothing:
Review pull requests with Bugbot
Bugbot does the same kind of review on GitHub or GitLab pull requests. It’s a bot that comments on the PR.
Open the Bugbot tab in the Cursor dashboard, connect GitHub, and give it access to the repositories you want reviewed. Then click Link Account back in the dashboard. From there, every new or updated pull request in those repositories gets a review:
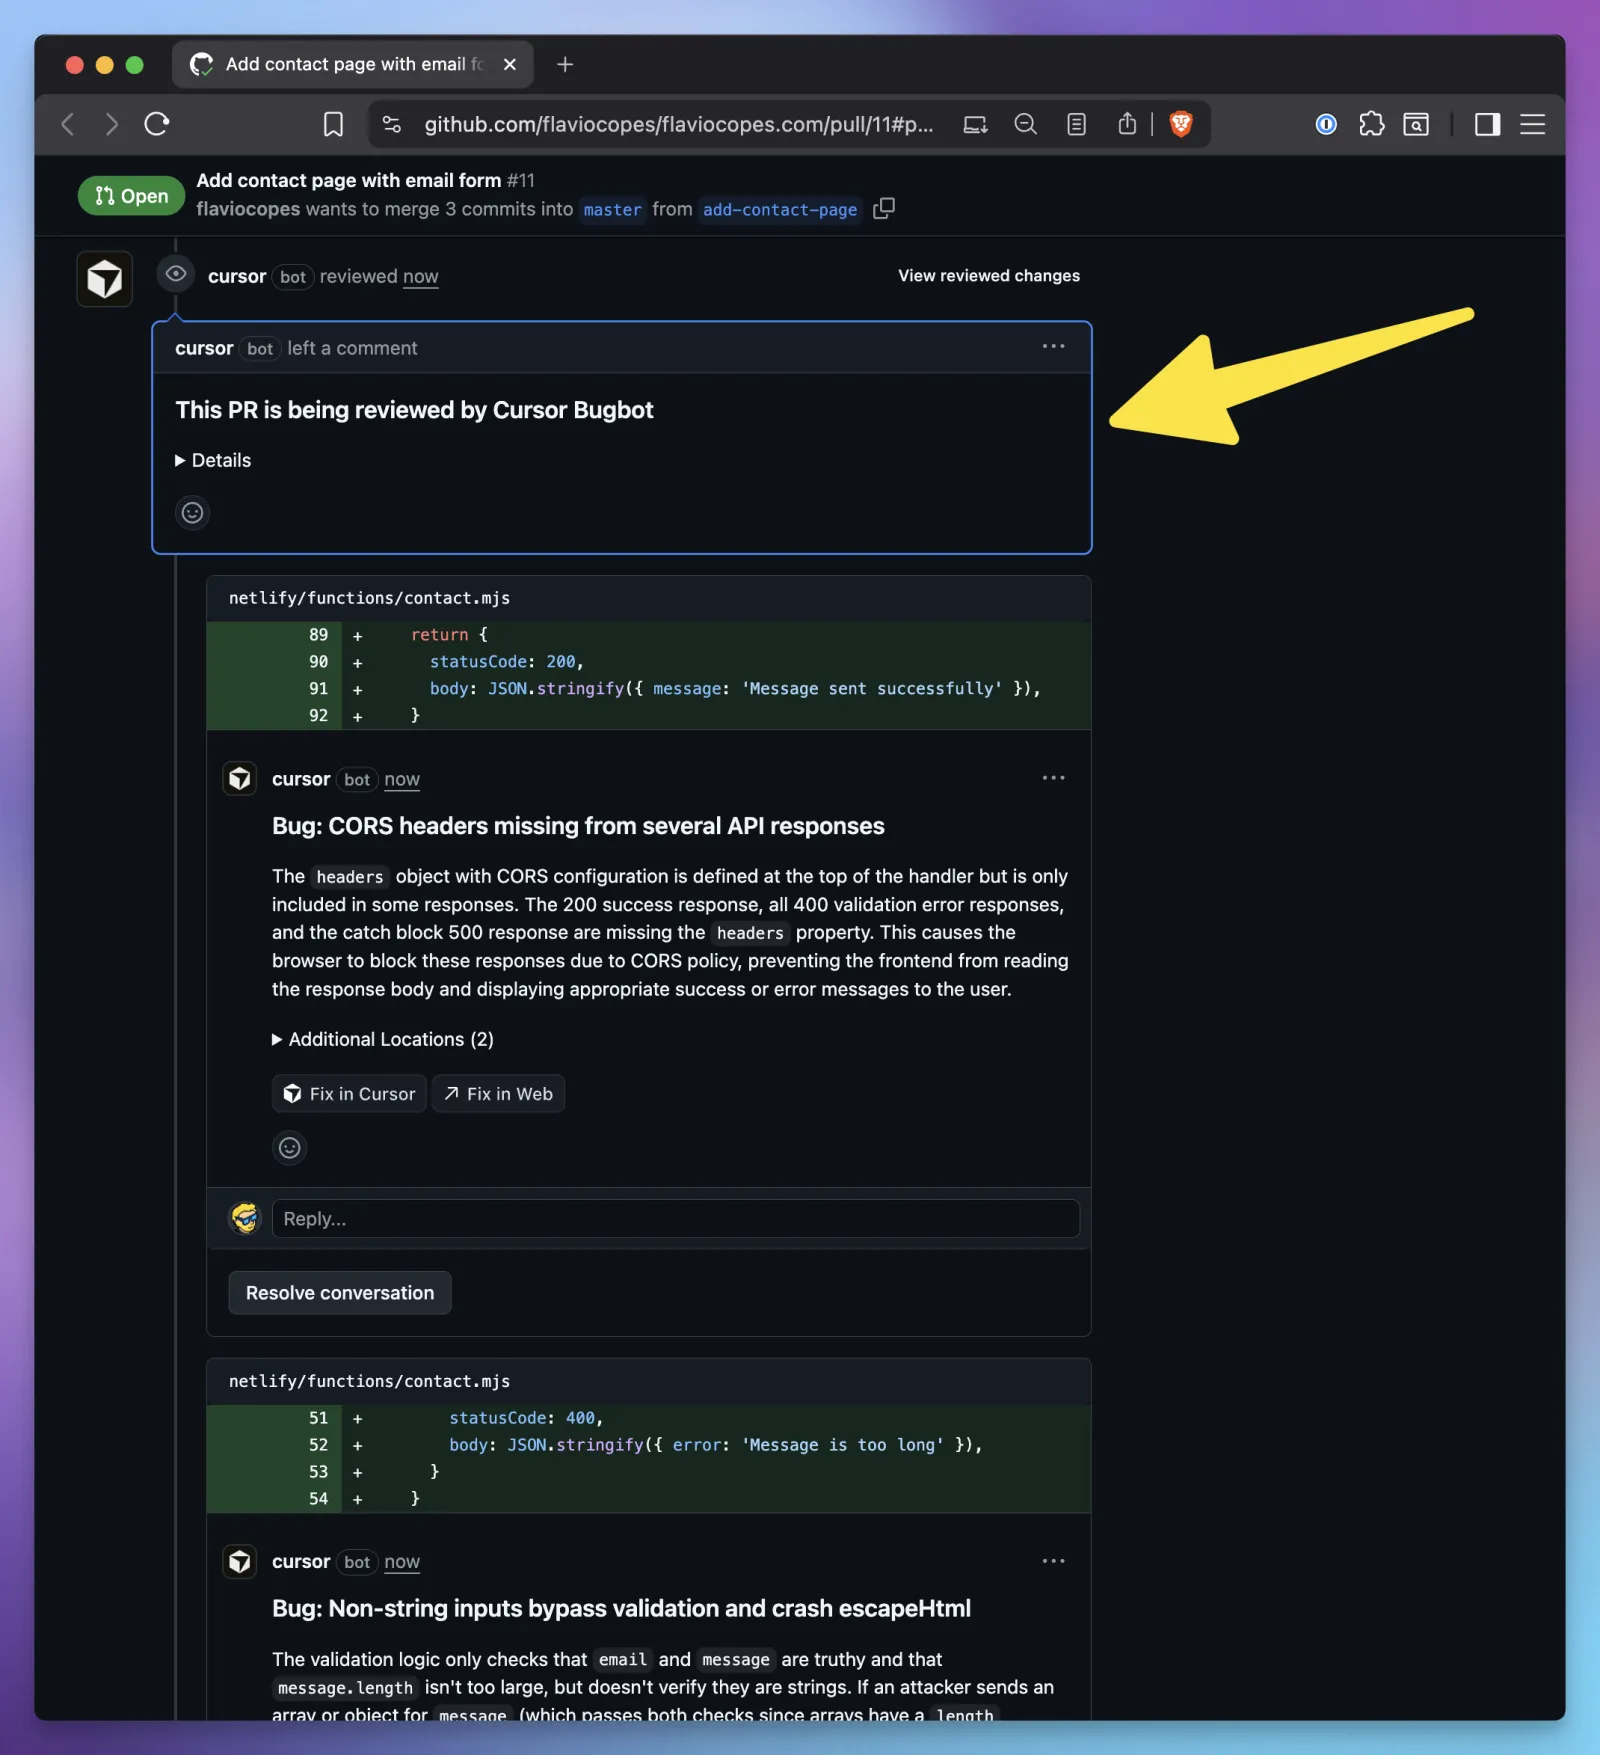
Each comment has a Fix in Cursor button that opens Cursor with a prompt ready to verify and fix that issue:
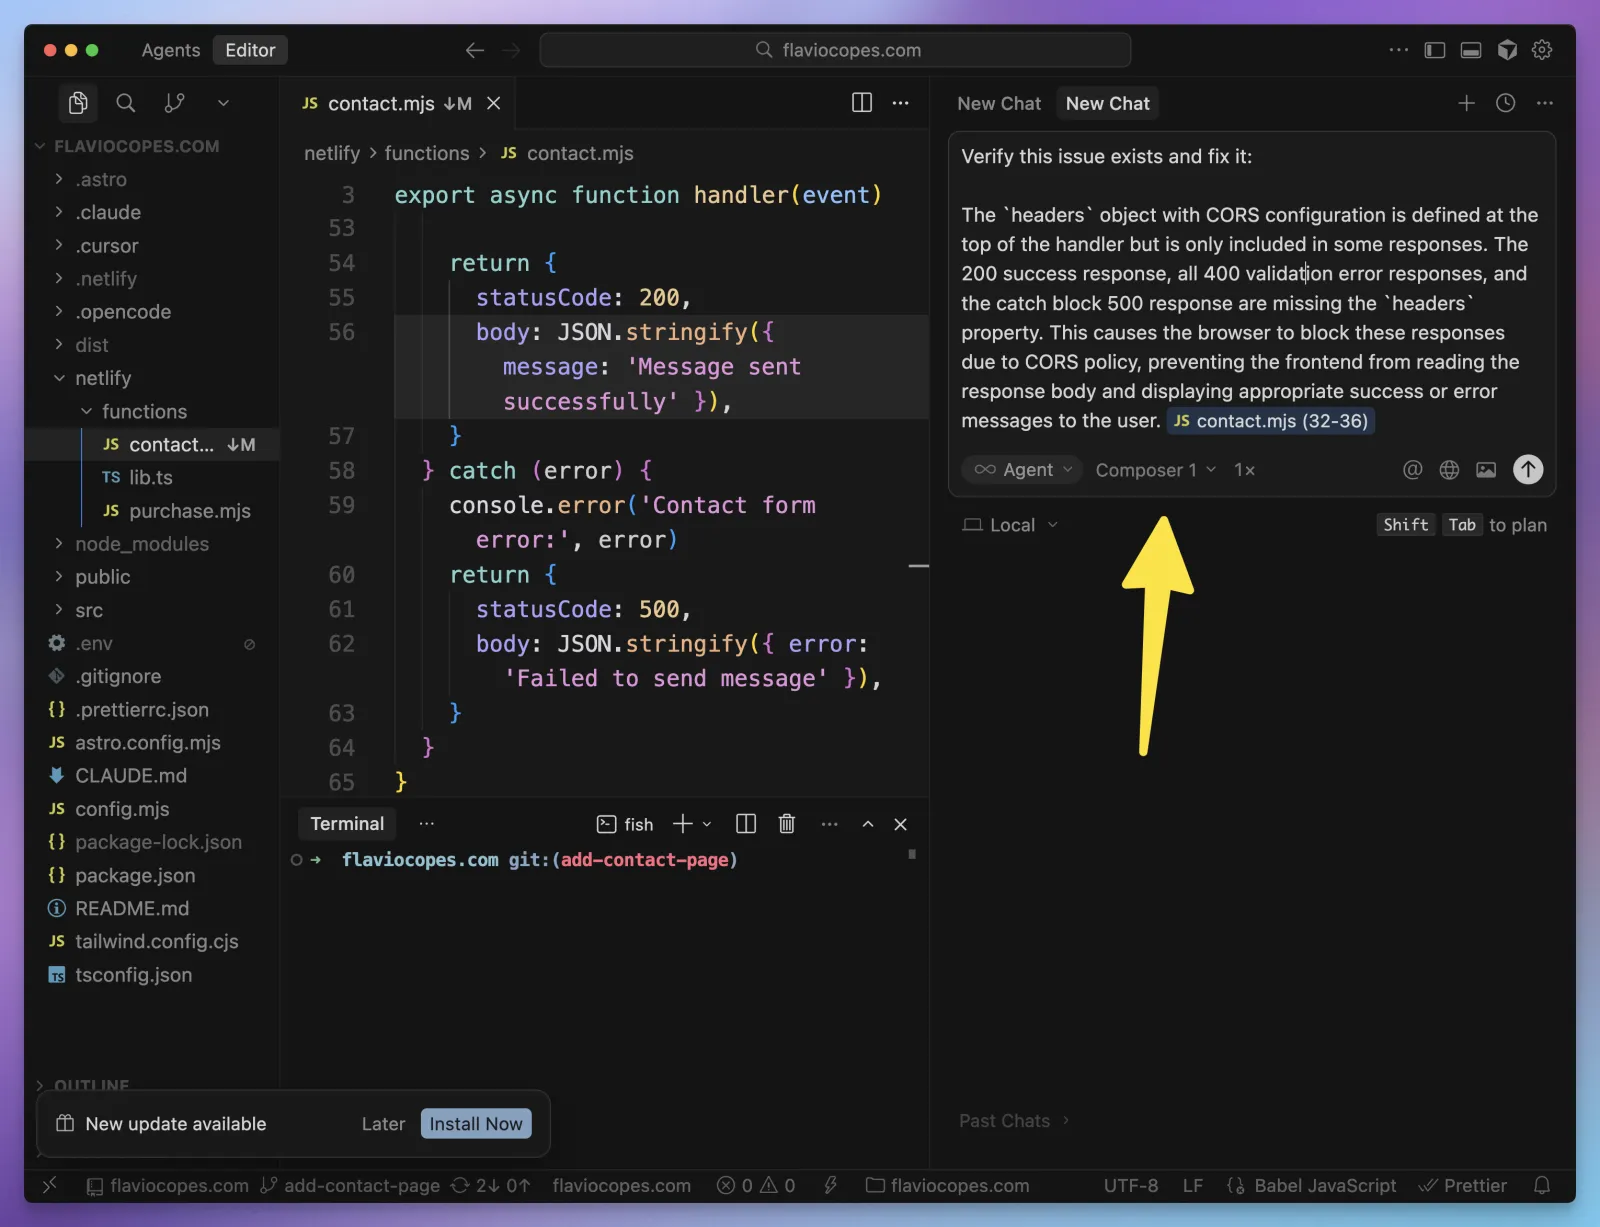
Fix in Web does the same in a Cloud Agent instead.
Bugbot is billed on top of your Cursor plan. The free account gives you a small monthly allowance to try it, and I used mine up in a few tests. Check the pricing page before you turn it on for a busy repository.
Recover from an unwanted change
Let’s undo a change on purpose, so you know how it works before you need it.
Start from a committed, working game. If you have edits you want to keep, commit them or copy them somewhere first. Then ask Agent for a small visible change:
Change the New game button label to 'Start over'.
Keep its behavior, styles, and all other labels unchanged.
Try it, then pretend you liked the old label better.
Stop the agent if it’s still working. Hover over the request and choose Restore Checkpoint, or open the checkpoint from the chat timeline. Cursor shows a preview of what it will restore. Pick the checkpoint from before the label request.
Cursor creates checkpoints while Agent works and keeps them apart from Git. Restoring changes the files and leaves the chat as it is. The checkpoint documentation has the current controls.
The button should say New game again. Play a game to check it still resets, and look at git diff, especially if you edited files by hand after that checkpoint, because restoring brings back the whole file state and can drop those edits too.
| What you want to do | Use |
|---|---|
| Reject one unwanted edit during review | That edit’s diff controls |
| Return the Agent’s files to an earlier session state | Preview and restore a checkpoint |
| Keep a reviewed version for future work or another machine | A Git commit |
| Recover only part of a file mixed with useful edits | Inspect the diff and make a targeted correction |
The last row is for when a file mixes the change you don’t want with work you do. Say the label change landed in the same component as a useful accessibility fix. Ask for a targeted correction instead of restoring:
Restore only the button text from 'Start over' to 'New game'.
Keep the accessibility change and my existing manual edits.
Show the resulting diff and don't commit yet.
Then compare the file with your last commit to see that your own edits are still there.
Checkpoints only cover files. A message the agent sent to an external service, or a deployment it ran, stays done. And if the conversation keeps pushing the approach you just undid, start a new chat and explain what you restored and what you want instead.
Work in the code editor
I spend most of my time in the Agents Window, but the editor is handy when you want to write a small change yourself and get help with one function. We’ll write a helper for the game’s turn label, to try autocomplete and a selected-code request. Commit the game first, so you have something to compare with.
Run Open IDE from the Command Palette (Cmd+Shift+P on macOS, Ctrl+Shift+P on Windows and Linux). It opens the same workspace in the editor, and Open Agents Window takes you back. The interface guide explains the switch.
Use the Explorer, or Cmd+P (Ctrl+P elsewhere) to find a file by name. Open the main React component and see how it picks the turn, win and draw messages.
Try Tab suggestions
Create src/turn-label.js and start typing an exported function called turnLabel with a player parameter. Cursor’s Tab feature suggests the rest as gray text.
Accept the suggestion only if it’s what you want. The first version of the file should be:
export function turnLabel(player) {
  return `Next player: ${player}`
}
If the suggestion is different, or none appears, finish it yourself. turnLabel('X') should return Next player: X, and turnLabel('O') should return Next player: O.
| Action | Default shortcut |
|---|---|
| Accept the whole Tab suggestion | Tab |
| Reject it | Escape, or keep typing |
| Accept the next word on macOS | Cmd+Right Arrow |
| Accept the next word on Windows/Linux | Ctrl+Right Arrow |
Accepting word by word is useful when the suggestion starts right and then goes somewhere you don’t want. Tab can also suggest jumping to another place in the file. Look where it wants to take you before you follow it.
The Tab indicator in the status bar lets you snooze suggestions or turn them off for a file type. The Tab guide covers the rest of the controls.
Send a selected function to Agent
Now let’s handle an invalid player value, a small change that’s easy to review.
Select the whole turnLabel function and press Cmd+L on macOS or Ctrl+L on Windows and Linux to attach it to Agent. Cmd+K / Ctrl+K works too. Older tutorials call this Inline Edit, which Cursor replaced with sending the selection to Agent (see sending selected code to Agent).
The prompt should reference src/turn-label.js and the selected lines. Ask:
Change only the selected turnLabel function.
Keep the existing labels for X and O.
For every other value, return 'Choose X or O'.
Use no dependencies and leave the rest of the project alone.
The diff should add a small input check and keep the existing labels. Something like:
export function turnLabel(player) {
  if (player !== 'X' && player !== 'O') {
    return 'Choose X or O'
  }

  return `Next player: ${player}`
}
The agent may write it differently. Check the behavior with Node from the project folder:
node --input-type=module -e "
import assert from 'node:assert/strict'
import { turnLabel } from './src/turn-label.js'
assert.equal(turnLabel('X'), 'Next player: X')
assert.equal(turnLabel('O'), 'Next player: O')
assert.equal(turnLabel(null), 'Choose X or O')
assert.equal(turnLabel('Z'), 'Choose X or O')
console.log('Turn labels passed')
"
This works with the module setup of a standard Vite React project. If yours is set up differently, ask the agent to use the project’s own test setup.
Agent edits the files directly. In the diff view you keep the hunks you want and reject the others. Selecting code tells the agent where to focus, but it can still edit other lines, so look at the whole diff.
Once the helper passes, ask Agent to use it for the game’s turn message, leaving the win and draw messages alone. It should find the right component and import path in your version. Then play a win and a draw again. In a TypeScript project, let the agent follow the project’s conventions for types.
Run Cloud Agents
Cloud Agents run a task on a virtual machine in the cloud instead of your computer. The agent clones your repository, works on a new branch, and pushes it when it’s done. You can close your laptop and come back to the result.
To start one from the Agents Window, switch the location under the prompt from Local to Cloud:
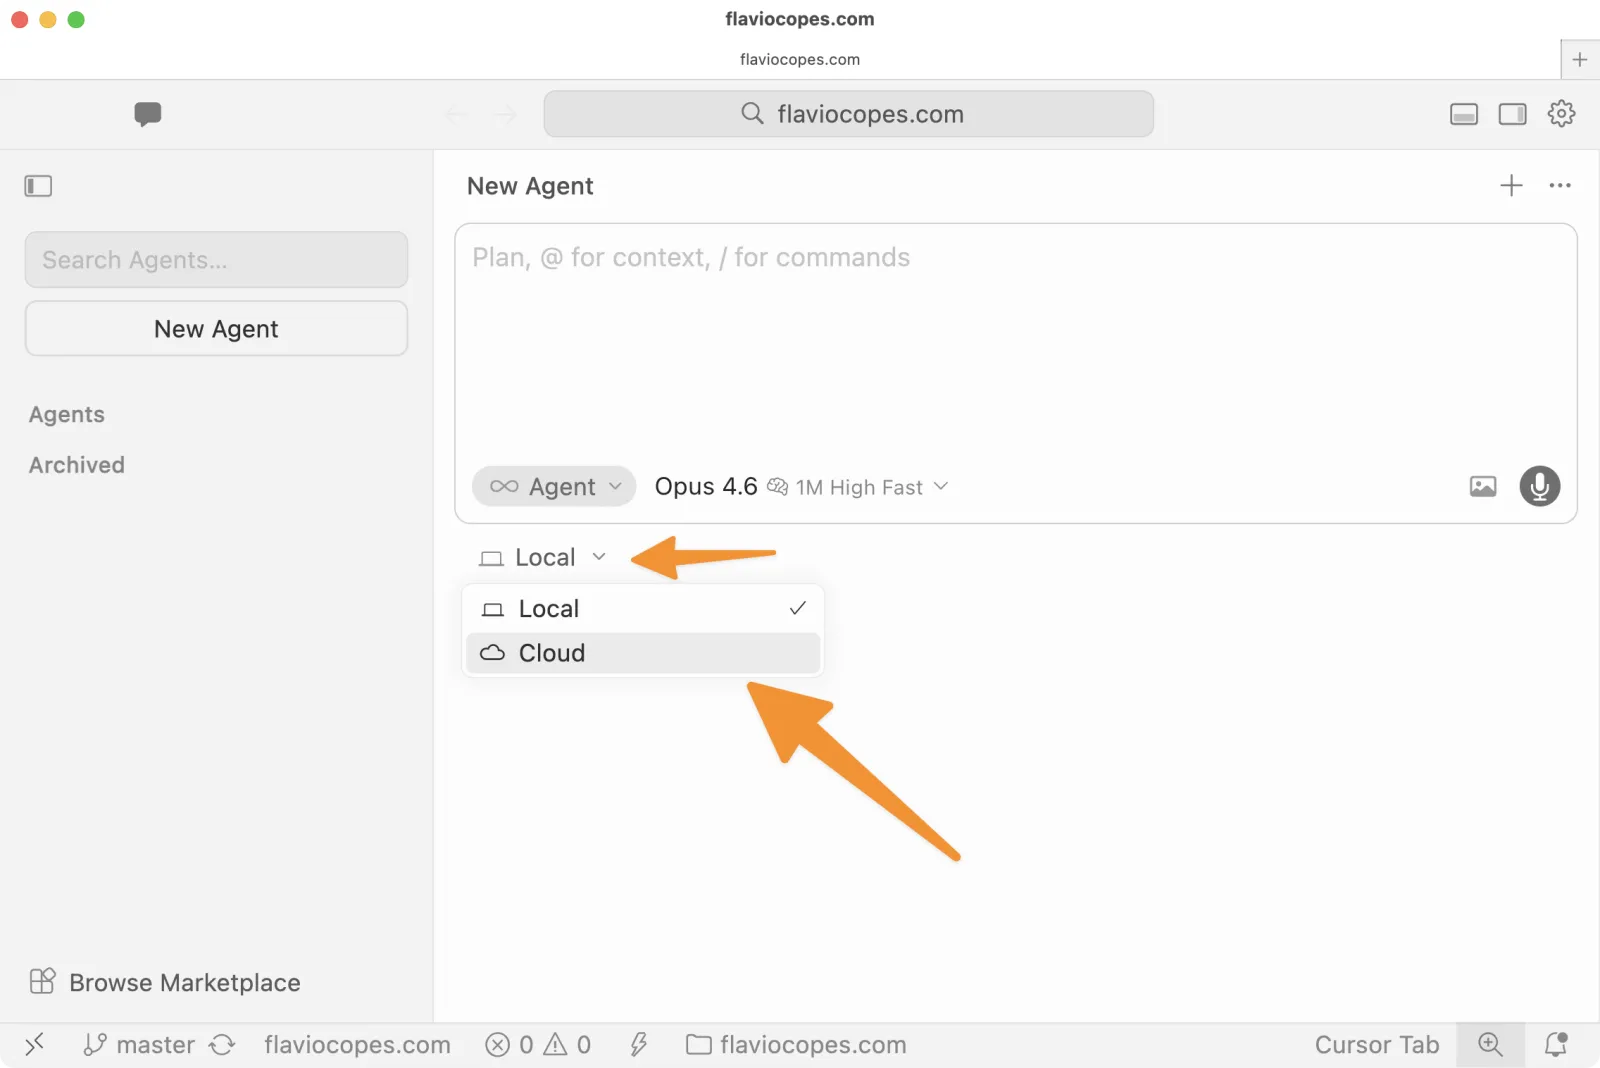
You can also start and follow them from cursor.com/agents.
There’s some setup the first time. Connect GitHub or GitLab with read-write access, so the agent can clone the repository and push its branch. Cloud Agents need a trial or paid plan, and they’re charged at API rates on top of the subscription, so you’ll set a spending limit the first time you use them.
They can build and test the code, control a browser, and use MCP servers. You configure those servers in the Cloud Agents settings of the dashboard, with any secrets they need, because your local MCP configuration stays on your computer.
Each Cloud Agent gets its own environment and branch, so you can start a bug fix, a feature and a refactor at the same time. You review each branch like any other pull request.
Use Cursor from the terminal
Cursor’s CLI gives you the same agent in a terminal, without the app. It’s handy if you already live in the terminal, or for a quick review of a project folder.
On macOS, Linux and WSL, install it with:
curl https://cursor.com/install -fsS | bashThis downloads and runs Cursor’s install script. For Windows, and for the latest command, see Cursor’s CLI documentation.
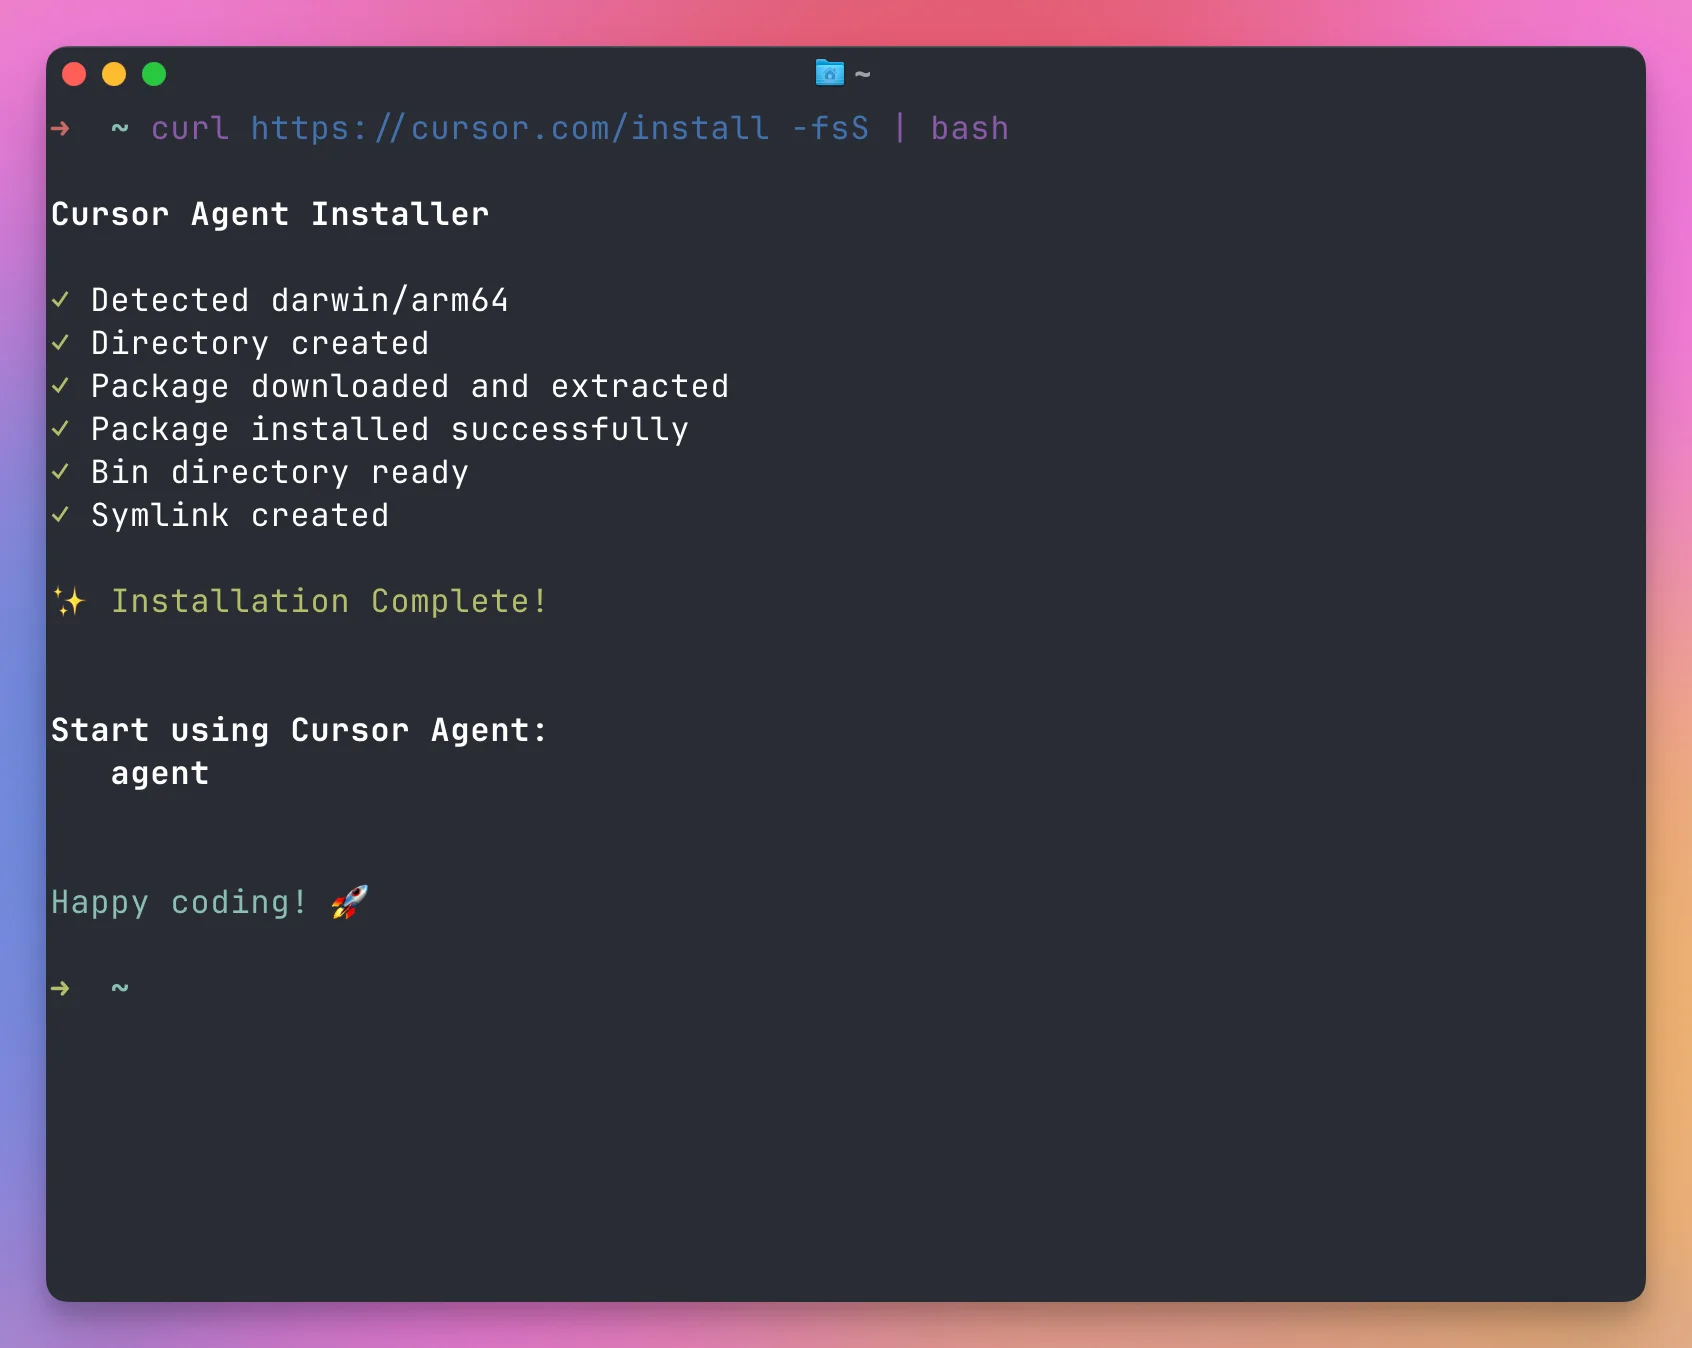
Open a terminal in the game folder and check the command:
agent --versionOther tools use the name agent too, Grok Build for example. Cursor also installs cursor-agent, which always means Cursor’s CLI:
cursor-agent --version
cursor-agent
If agent --version says Cursor, both commands start the same thing. If neither exists, open a new terminal and follow the PATH instructions the installer printed.
The first run asks you to sign in:
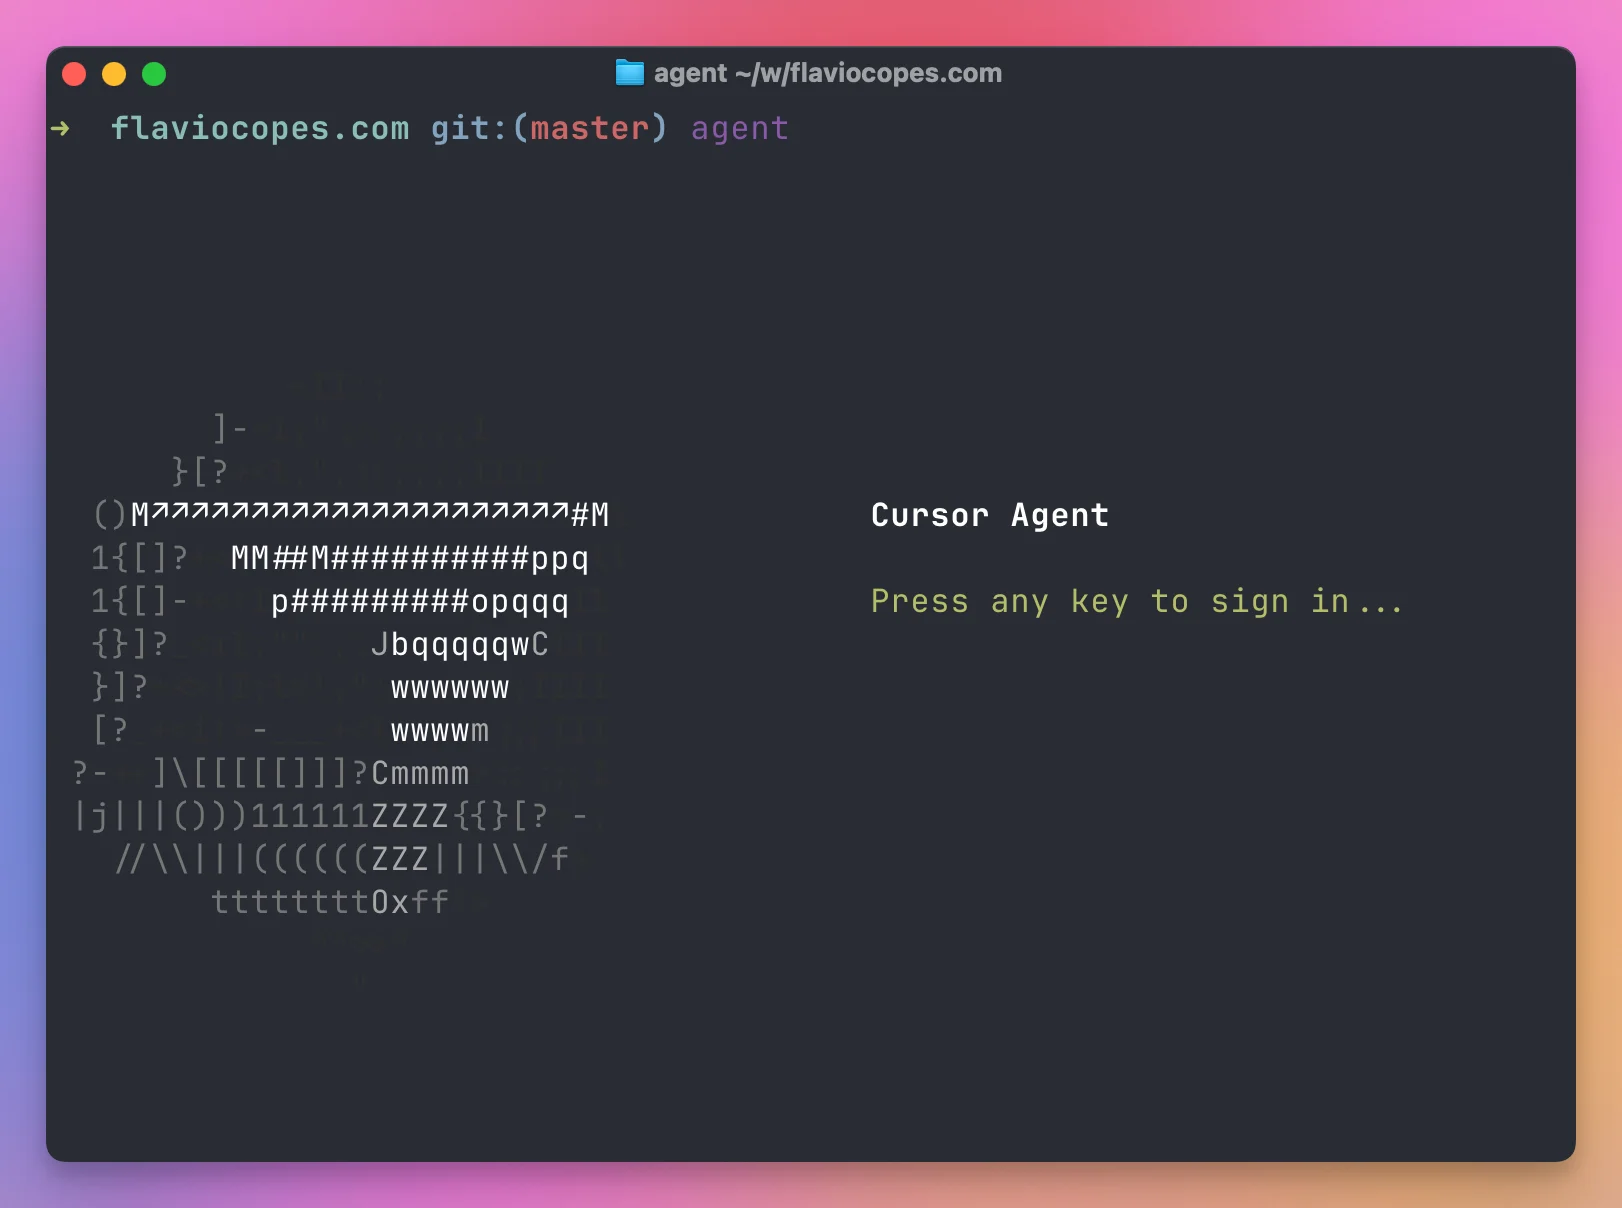
Then it asks whether you trust the folder. Look at the path before you accept: started from your home directory, the agent can reach far more than the tic-tac-toe folder.
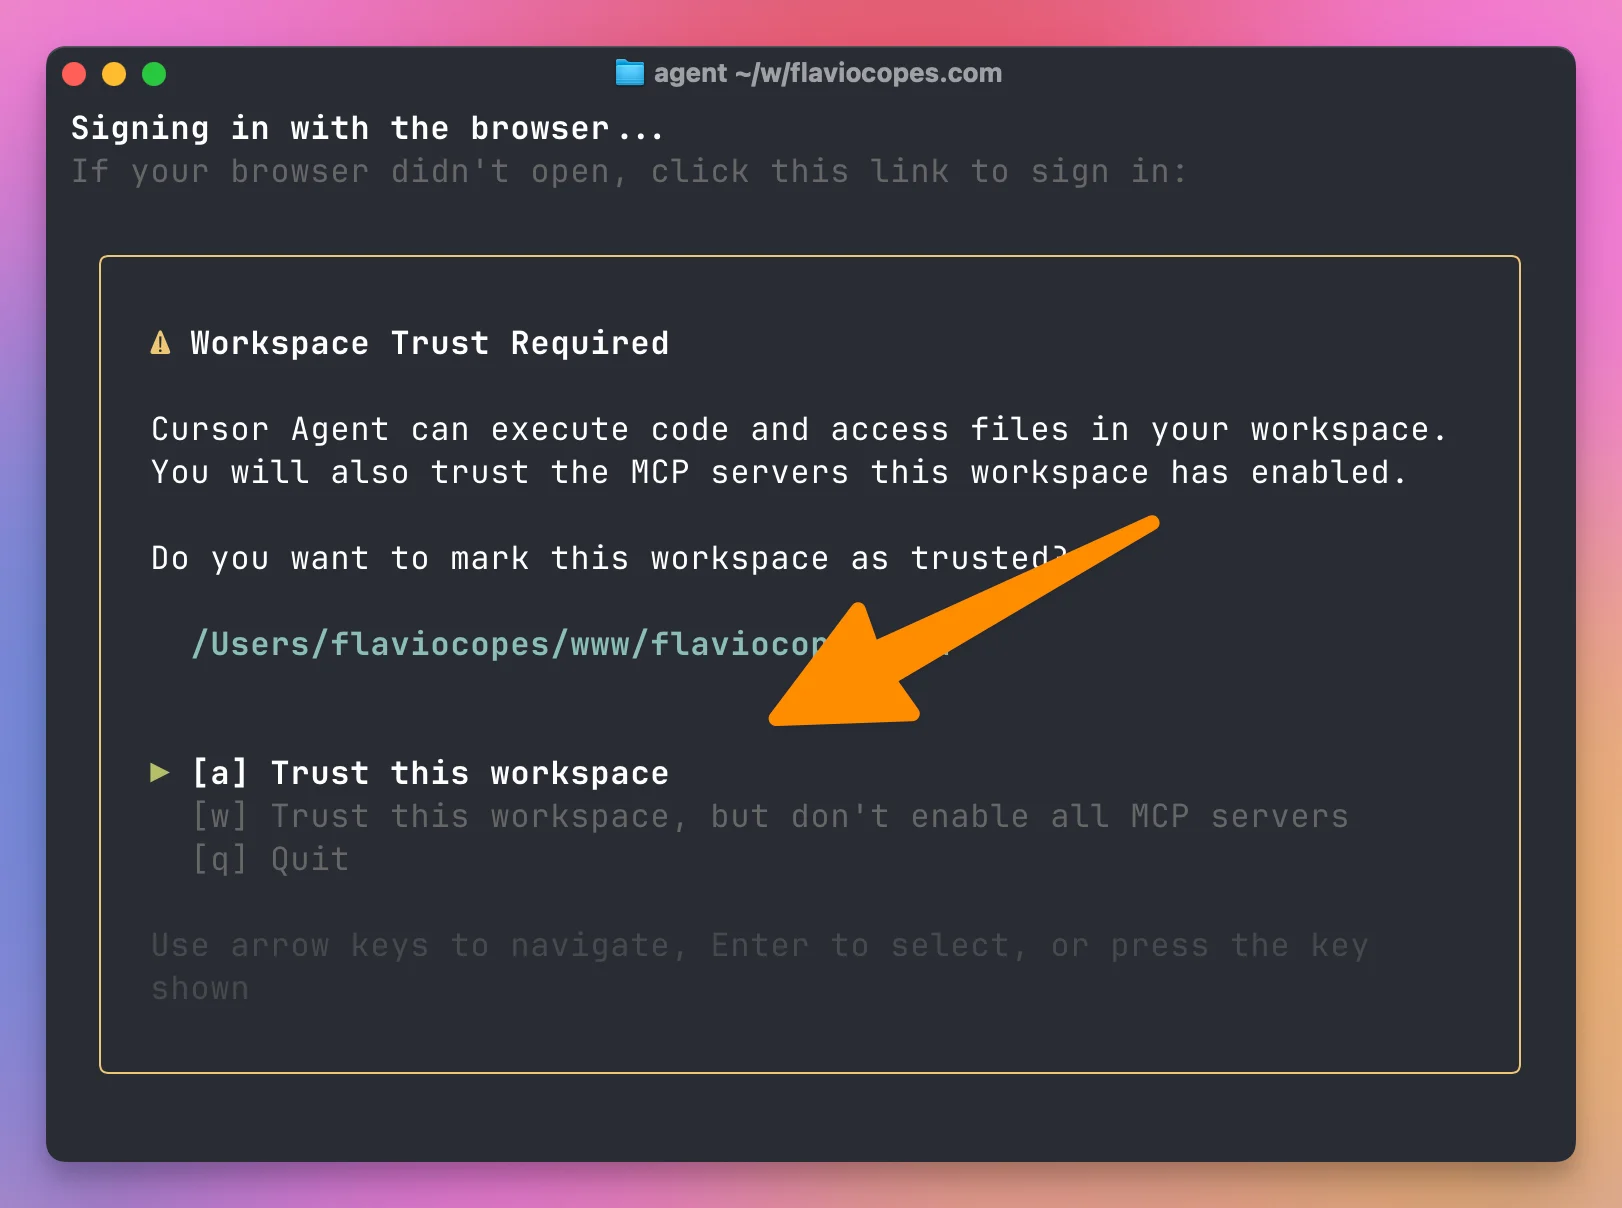
From there, you describe tasks like in the app:
Review the game rules and identify missing edge cases.
Explain each issue with steps to reproduce it.
Don't edit files yet.
Here’s the same kind of request on an existing codebase, asking for improvements:
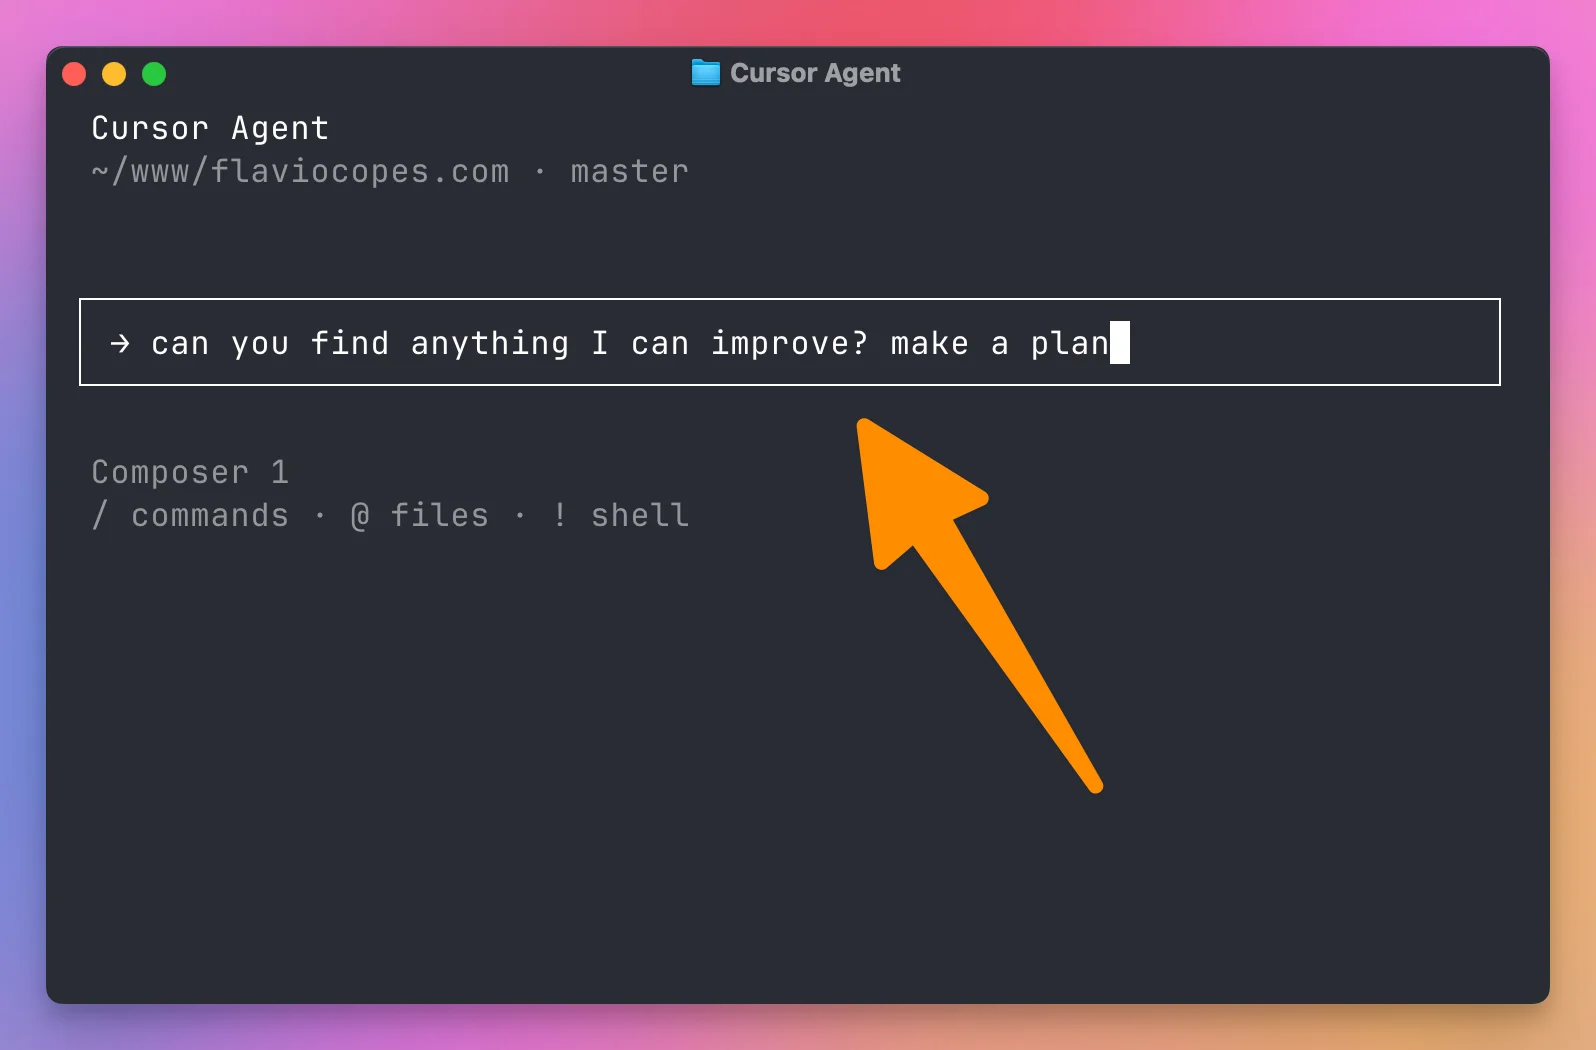
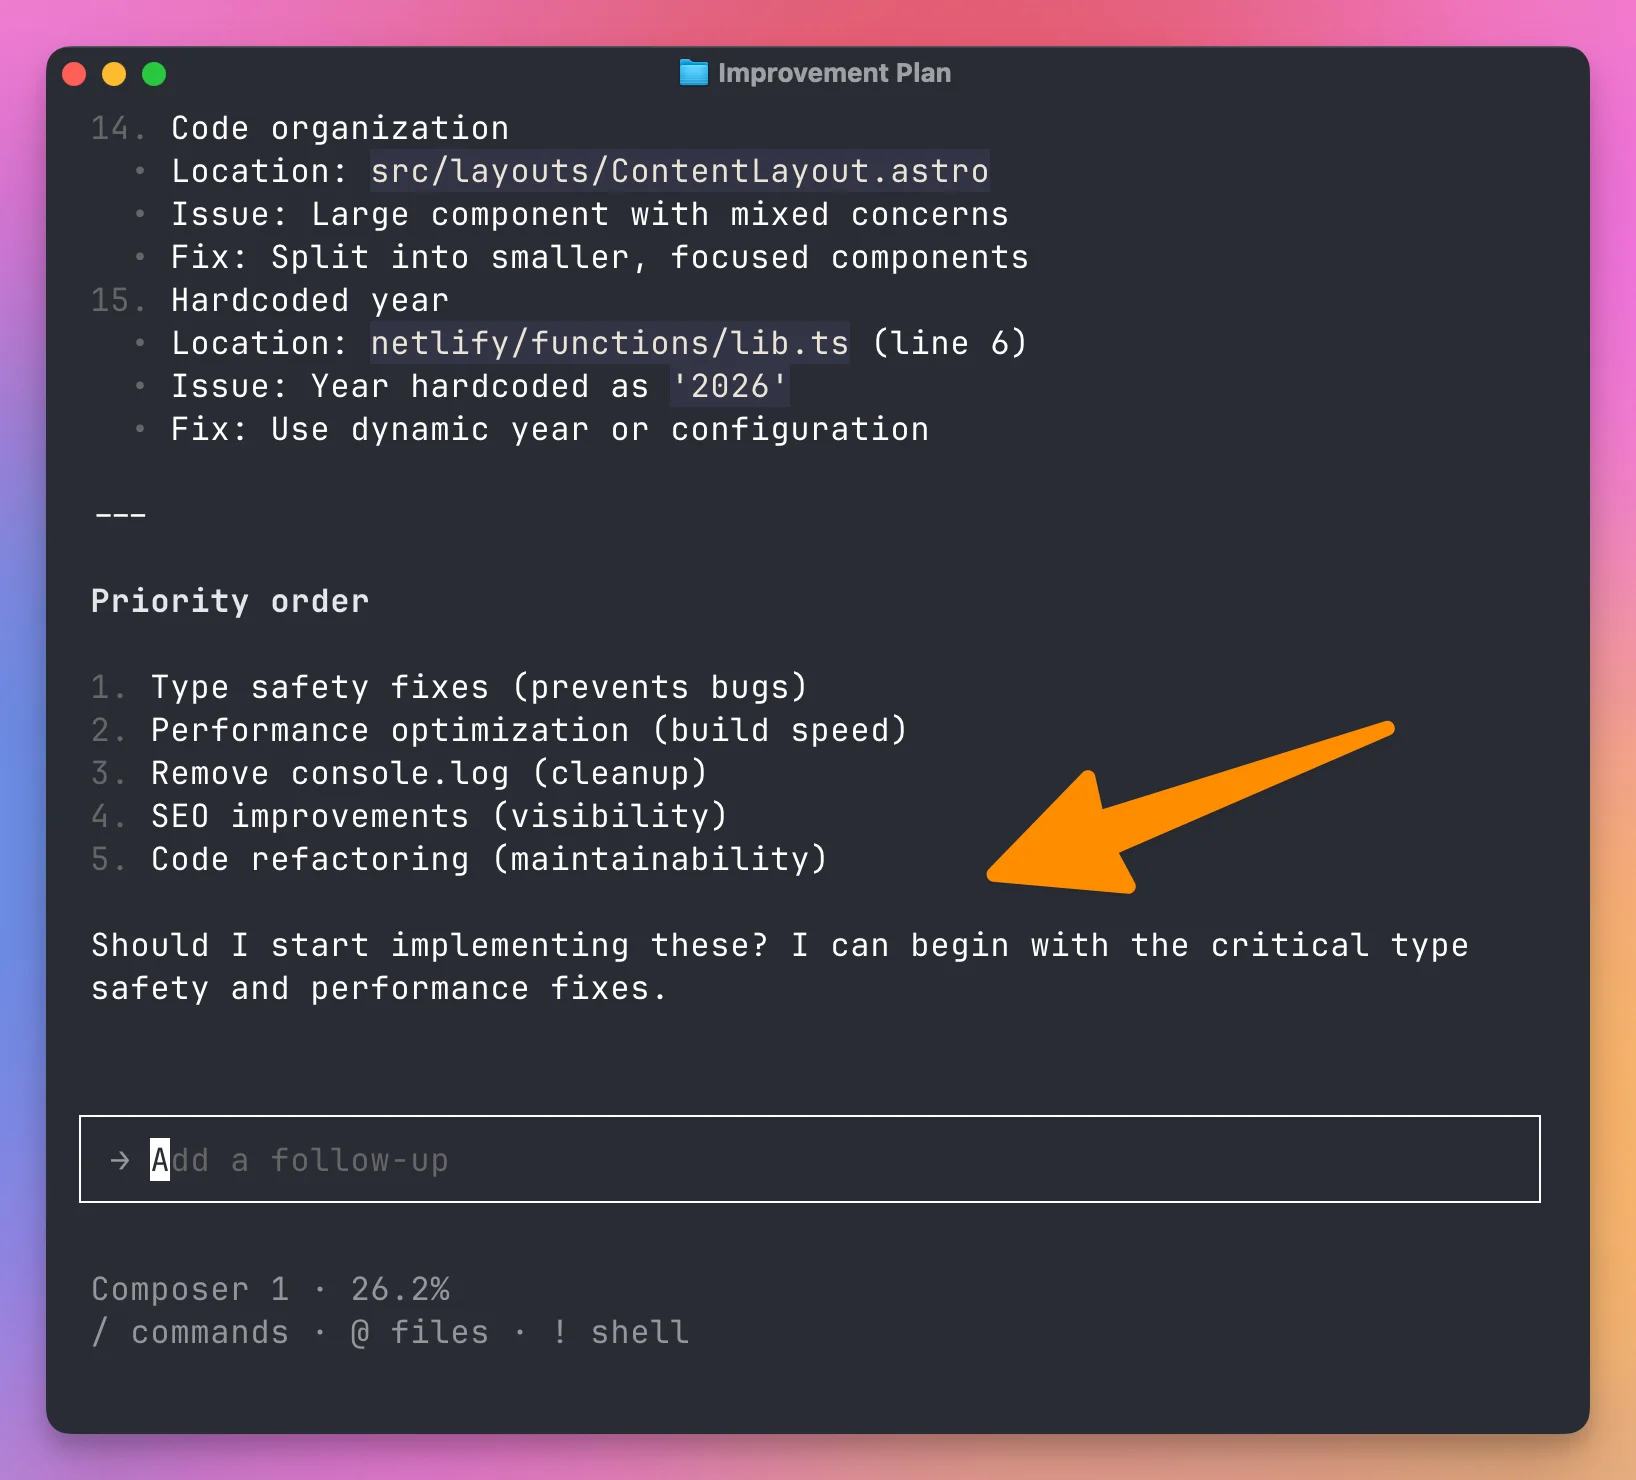
It lists what it found, and you decide what to implement. Some suggestions are cleanup that has nothing to do with what you’re working on.
Type / to see the available commands:
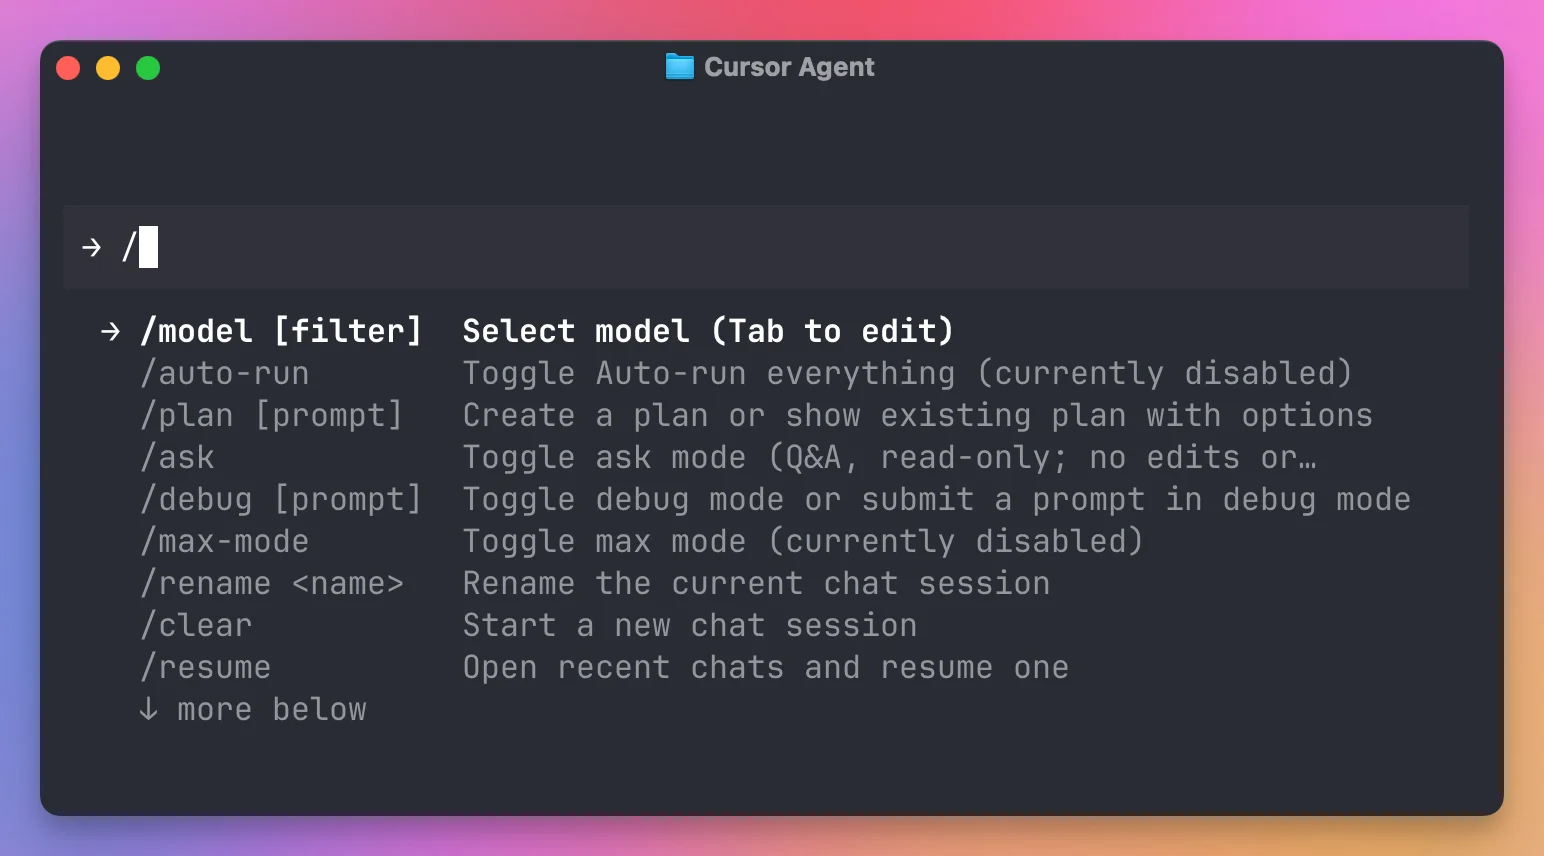
I use /model to choose a model, /clear to start a fresh conversation, and /open to open the project in the IDE. Your version may have more.
Type @ to attach a file:
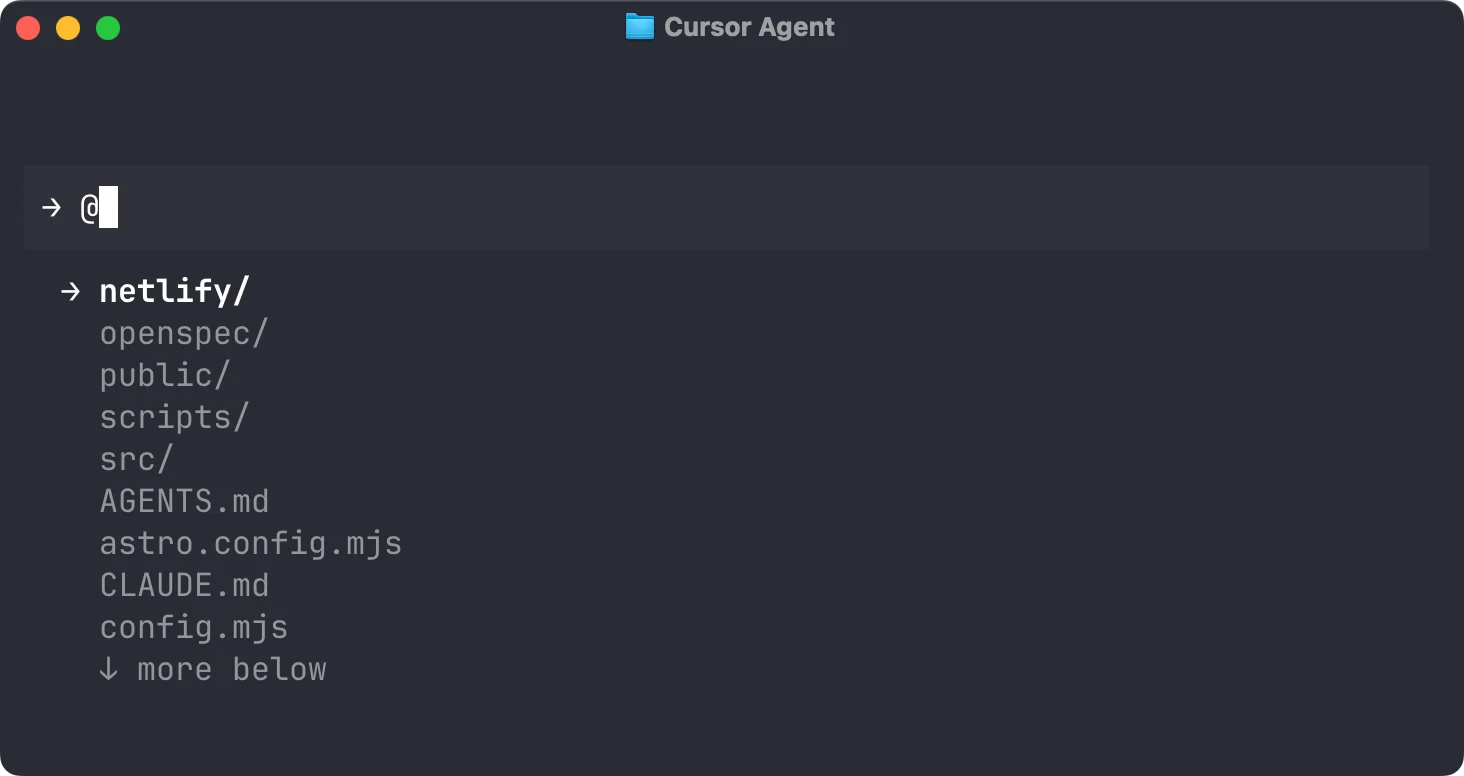
The CLI can run shell commands too. I keep the development server in a separate terminal, so its output stays visible while the agent works.
When a conversation goes wrong
If the agent keeps solving a different problem, stop it and look at what it changed.
Keep the changes that are useful by committing them. Discard the rest with Git or the review controls, being careful with files where you also had your own uncommitted edits.
Then ask again, more narrowly. “Fix reset” says little. “After pressing New game, the previous winner is still shown” tells the agent what to look for. Include what you tried and what you expected.
| Problem | Next useful action |
|---|---|
| Agent edits the wrong feature | Stop and name the intended behavior and files |
| Preview is blank | Check the server URL and runtime errors |
| A fix causes another failure | Give both reproductions and inspect the shared logic |
| Model usage disappears quickly | Check the selected model and billing settings |
| Instructions keep being forgotten | Put stable project decisions in rules |
| A connection cannot read a document | Check the server status and document access |
| Conversation contains several unrelated tasks | Start a fresh chat with a short handoff |
Ask the agent to say which checks it couldn’t run. “Build passed; browser behavior not checked” is a good report, because you know exactly what’s left to do.
How I use Cursor
I do most of my work in the Agents Window rather than the editor. For a web application, I keep the running page beside the conversation and use small requests. I use Design Mode for a specific layout problem, then inspect the diff and check the page at a narrow width.
For a change that affects several parts of an app, I start with a plan. I want the agent to find the existing implementation and explain what it intends to reuse before creating new abstractions.
I keep the project’s stack, commands, and important constraints in rules. A repeated procedure, such as checking a release, becomes a skill once I know which steps are useful.
I don’t like how easy it is to start more work than I can review. Each parallel agent leaves me another change to check. For my own projects, I usually finish one task before opening another.
Want me to talk about your product? You can sponsor this site.
Related posts about ai: