How to make a passport photo at home on a Mac
By Flavio
Updated
Take the photo against a plain light wall, crop it to the size your passport asks for, check the head size, and print it at 100%. Here's how far Preview gets with a 2 × 2 inch US photo, and the shorter way.
You need a passport photo, and you’d rather take it at home than pay a booth. The photo itself is easy. The hard part is the size: a US passport photo is 2 × 2 inches, and the head, from the chin to the top of the head, must be between 1 and 1 3/8 inches.
On a Mac you can do it with Preview, which comes with every Mac: crop the photo to a square, give it a size of 2 × 2 inches, and measure the head. Then you print it at 100%. Below is every step as it went on a test Mac, and where Preview stops helping.
The numbers in this tutorial come from the US Department of State’s Foreign Affairs Manual, 8 FAM 402.1, “Passport Photographs”. Rules change, so check the official page for your passport before you print. Whether a photo is accepted is always the passport office’s decision.
How do I take the photo?
The camera is the least of it. What matters is the setup:
- Stand in front of a plain light wall, about a meter from the camera.
- Look straight at the camera, with the camera at the height of your eyes.
- Ask someone else to take it, so your arm and the angle don’t show.
- Leave space around your head and shoulders. You’ll crop later, and you can’t add what isn’t there.
The manual also asks for a photo taken in the last six months, in color, on a “plain, white, off-white, or light-colored background”, without glasses unless you can’t remove them for medical reasons. It says “Digital manipulation and/or retouching of the facial image on photographs is not acceptable”, so don’t touch up the face or swap the background.
How do I crop it to 2 × 2 inches in Preview?
The portrait in these screenshots is a drawing made for testing, not a real person, and the screenshots are from macOS 15 Sequoia.
- Open the photo in Preview.
- Hold down Shift and drag a box around the head and shoulders. Shift keeps the box square, and Preview shows its size in pixels next to the pointer. Try to put the head in the middle.
- Choose Tools › Crop.
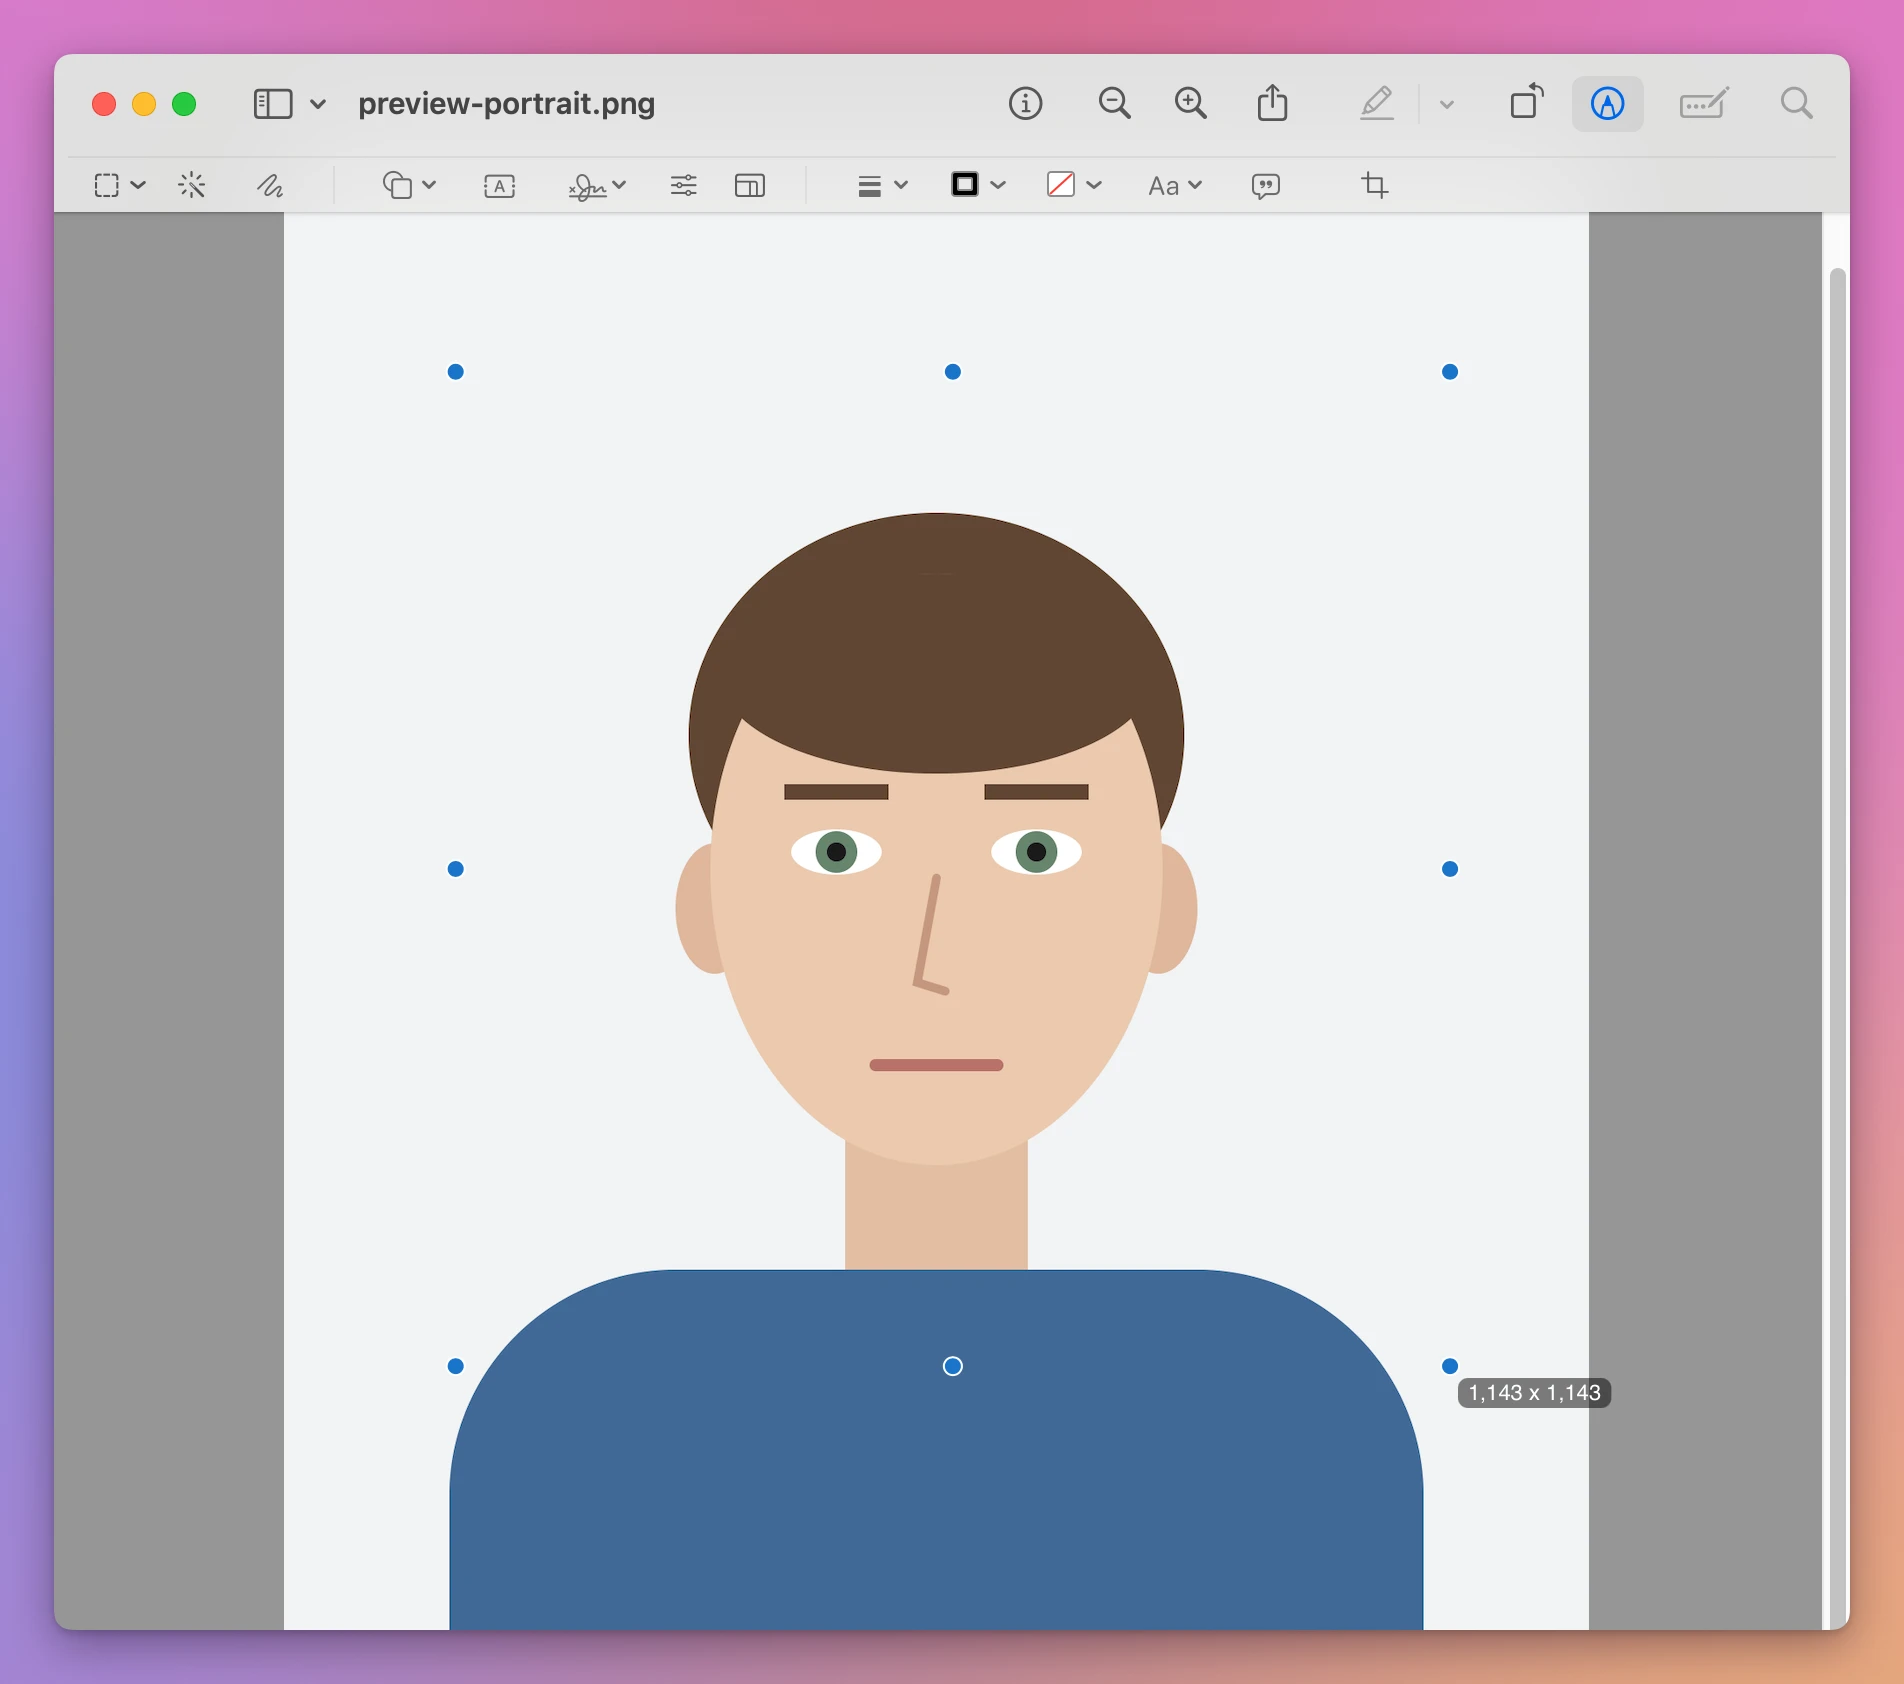
Without Shift, the box here came out 1,142 × 1,145 pixels, and the next step gave 2 × 2.01 inches instead of 2 × 2. Shift fixed it.
Now give the square its printed size:
- Choose Tools › Adjust Size….
- Set the unit menu next to Width to inches.
- Type 300 in Resolution, with pixels/inch next to it.
- Type 2 in Width. With Scale proportionally on, Height becomes 2 too.
- Click OK, then File › Save.
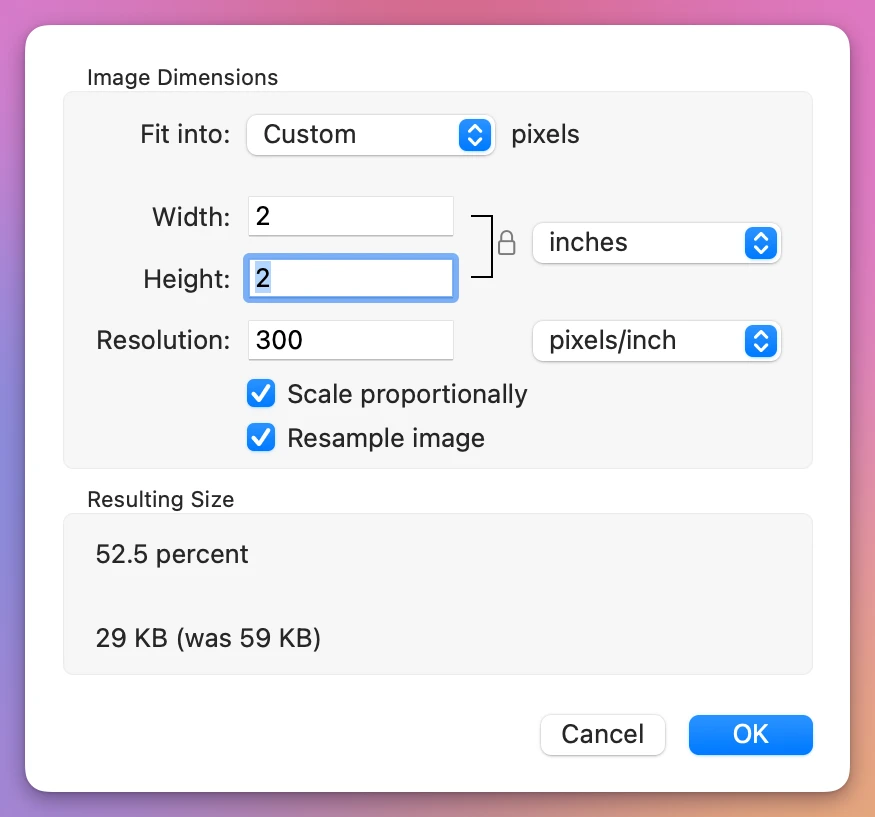
The file was now 600 × 600 pixels at 300 pixels per inch, which prints at 2 × 2 inches when you print it at 100%.
How do I check the head size?
Before printing the 600 × 600 pixel photo, drag a selection from the top of the head to the bottom of the chin. At 300 pixels per inch, its height should be 300 to 412 pixels. Measure the head under the hair.
Here it was 356 pixels, or 1.19 inches. If the head falls outside the range, undo the crop and adjust the square before resizing again. Leave enough of the original photo around the head for that adjustment. Preview also leaves the centering to you.
Preview or Passport Photo Sheet?
| Preview | Passport Photo Sheet | |
|---|---|---|
| The size | You type 2 × 2 inches and 300 pixels per inch | Picked from the document, from the government’s page |
| The head size | You measure a box in pixels and do the sum | Two lines on the head, and a check in inches |
| The head centered | By hand | Yes |
| Copies to print | One photo per file | As many as fit on a 4 × 6, with cut marks |
| What you print | The photo, at 100% | A 4 × 6 JPEG at 300 dpi for a kiosk, or a PDF |
The shorter way
Passport Photo Sheet is a Mac app I made for this. You pick the document, open the photo, and put two lines on the head. The app crops, sizes and centers the photo from the rule, and saves a sheet of copies. It costs $20, paid once. It isn’t made by, affiliated with or endorsed by any government or passport office, and it can’t promise a photo will be accepted.
On the test Mac, set to the United States, it opened on United States passport and 4 × 6 in paper. Choose a Photo… opened the drawn portrait.
When the app finds a face, it places the two lines itself, and you check them. It didn’t find one in the drawing, which the Mac’s face detection doesn’t see as a face, so it said “No face found”, and Save Sheet… stayed off with “Place both lines on the head to turn on saving.” next to it. A click on the top of the head, then one on the chin, placed them by hand:
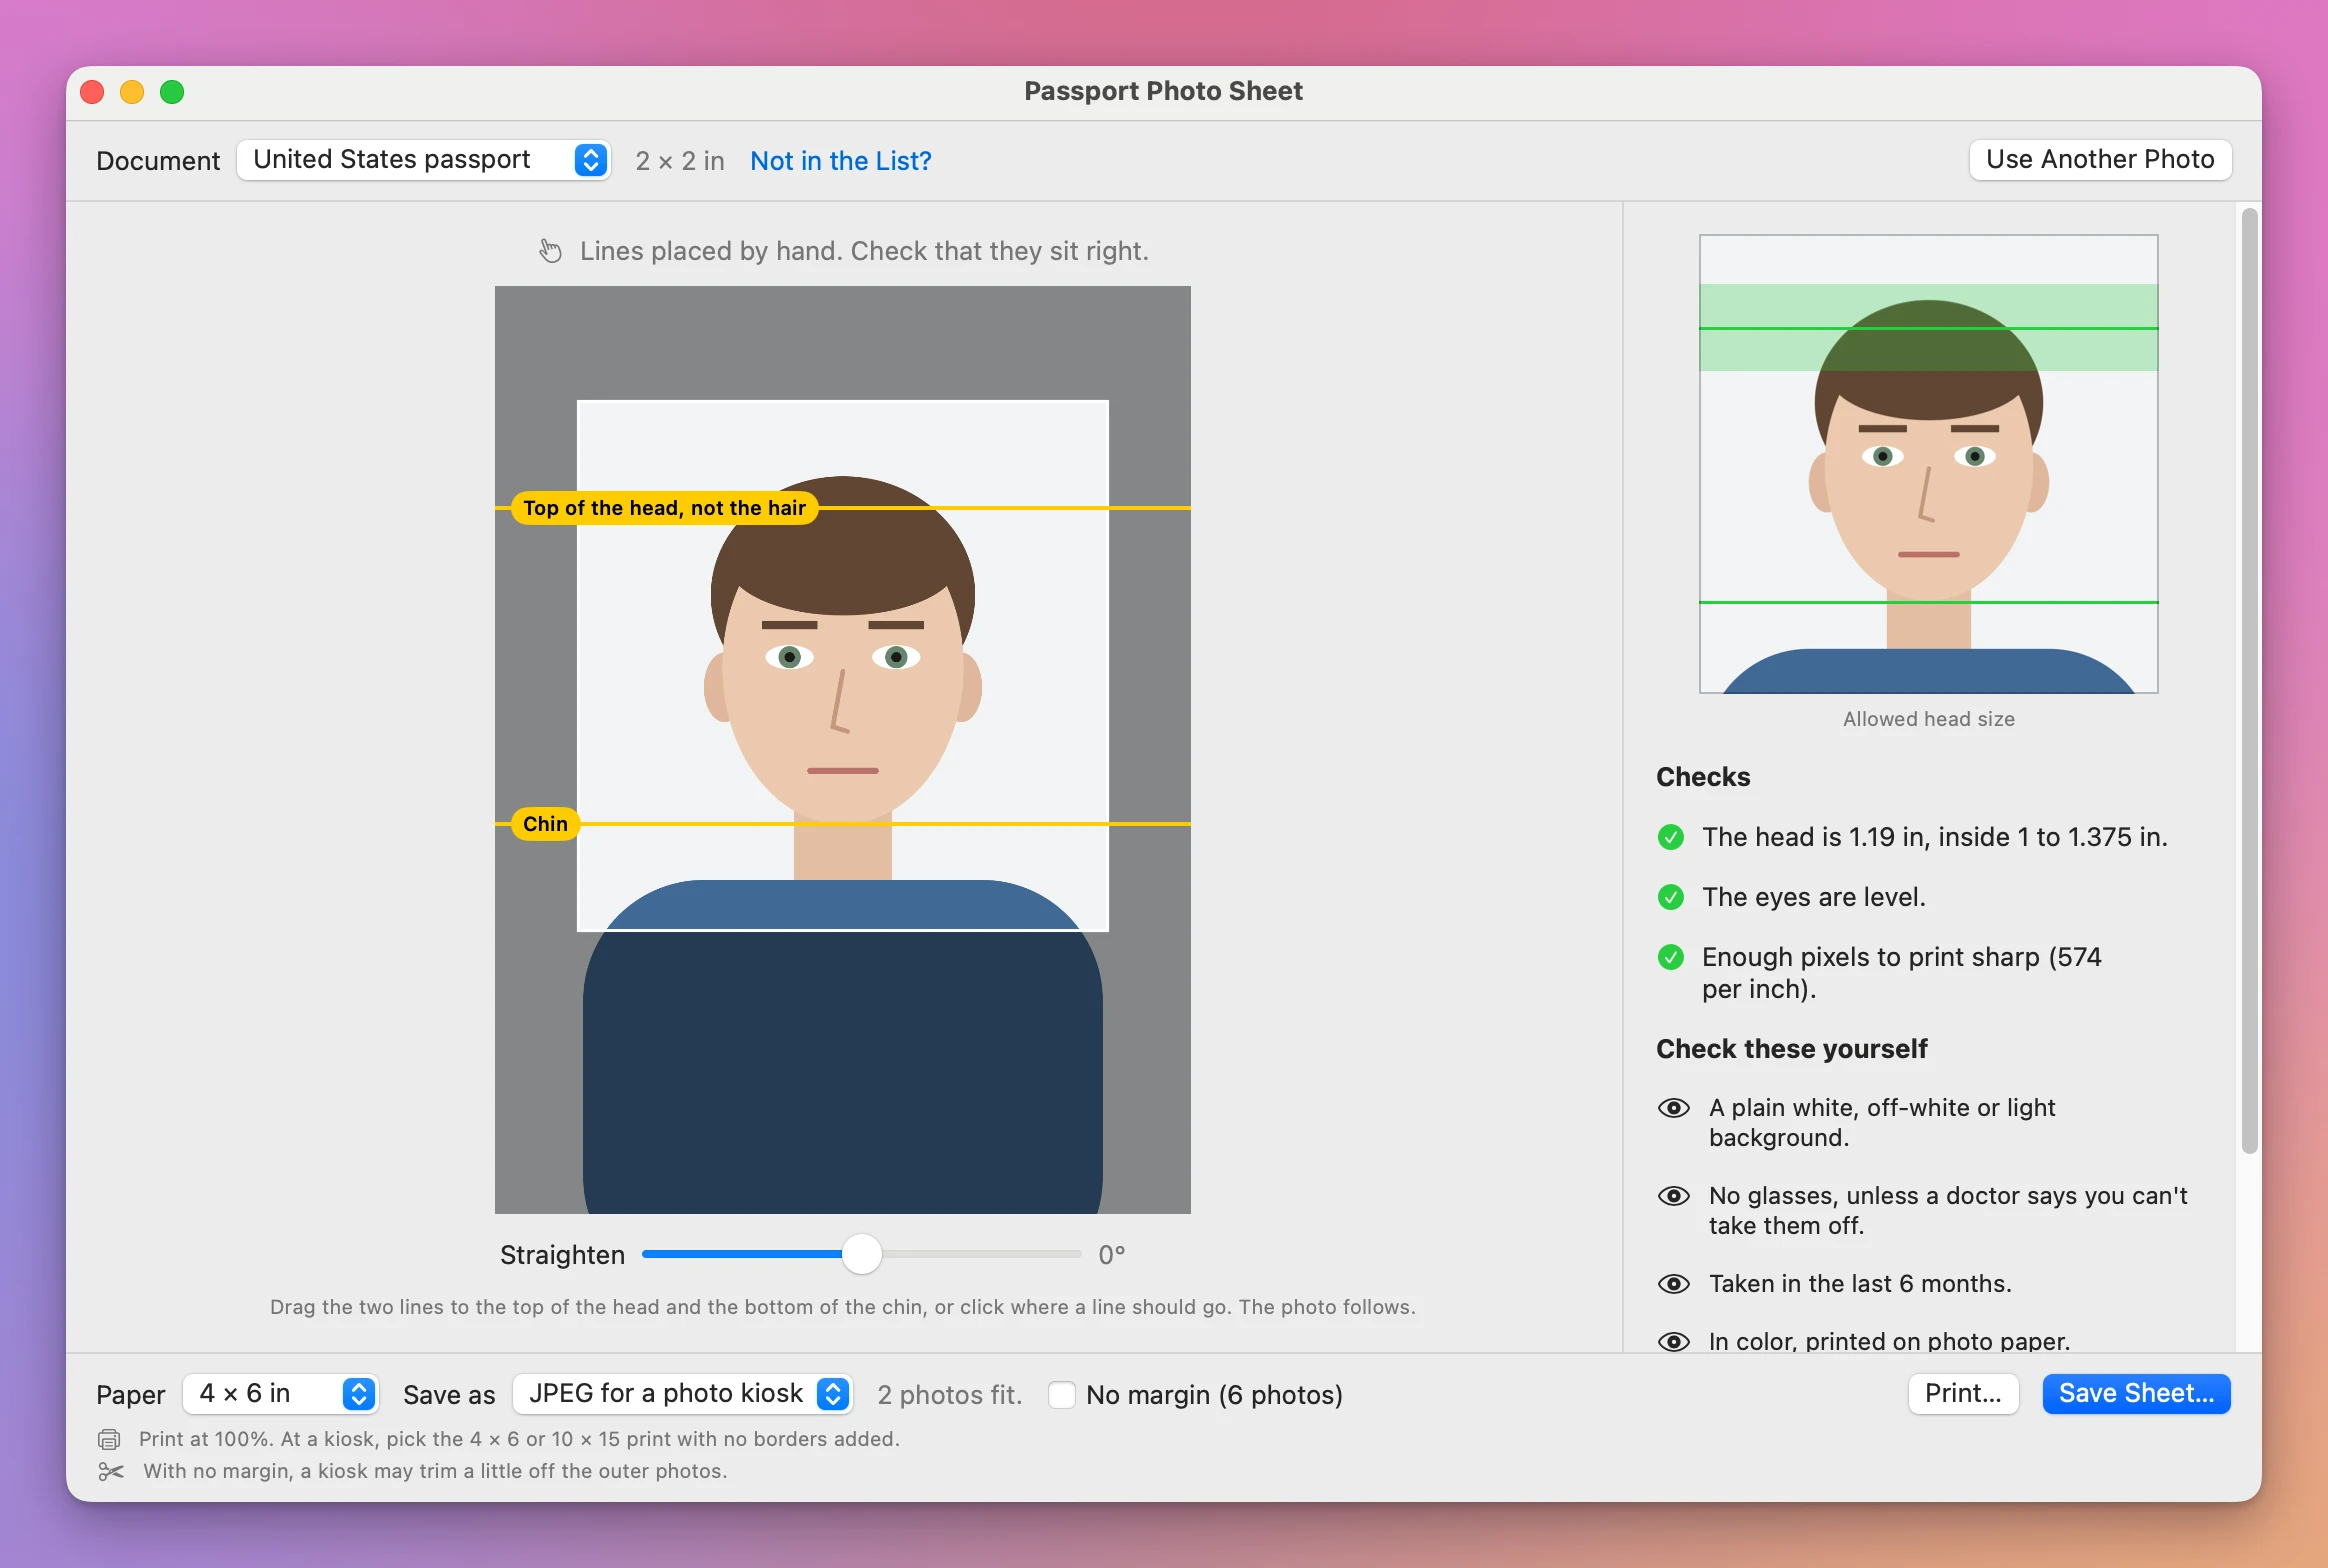
The top line says what the rule means: “Top of the head, not the hair”. The photo on the right follows the lines, with a green band where the top of the head may go. Under it, the checks gave “The head is 1.19 in, inside 1 to 1.375 in.” Under those, a list says what you check yourself, like the background and glasses.
The app doesn’t change the background or retouch the face. Its window says why: “Most rules forbid altered photos.”
With JPEG for a photo kiosk in Save as, Save Sheet… asked for a name and a folder, then:
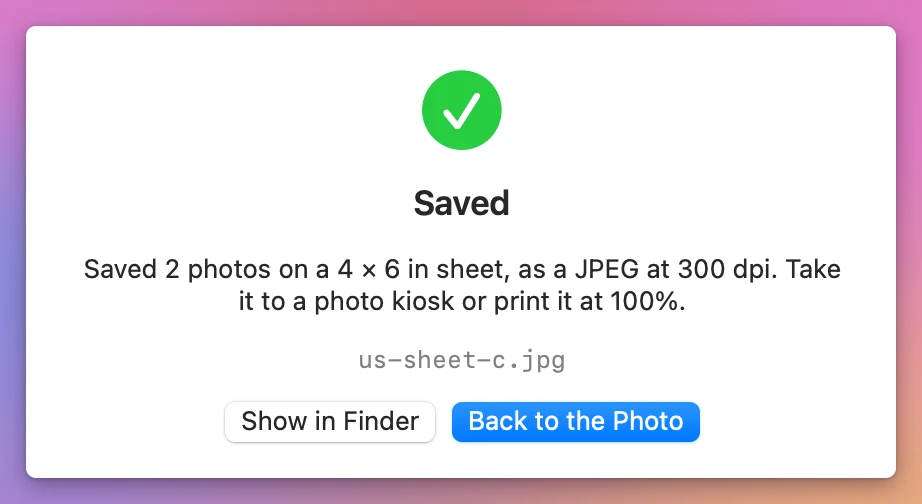
The file measured 1200 × 1800 pixels at 300 dpi, which is 4 × 6 inches, and each of the two photos on it was 600 pixels, 2 inches, wide and tall. The line under the save bar says how to print it: “Print at 100%. At a kiosk, pick the 4 × 6 or 10 × 15 print with no borders added.” Then cut along the marks.
Get Passport Photo Sheet
Make passport and visa photos at home at the exact size the rule asks for: pick the document, place two lines on the head, and save a 4 × 6 sheet with cut marks to print at a photo kiosk.
See Passport Photo Sheet → · Read the docs · $20. See the app page for tax details.
Want me to talk about your product? You can sponsor this site.