How to create an Apple TV app
By Flavio Copes
Build a tvOS app with SwiftUI, share code with your Mac app, design it for the Siri Remote, make its layered icon, and install it on your own Apple TV.
An Apple TV app is a SwiftUI app built for a different platform. If you’ve made an app for the Mac or the iPhone, you already know most of what you need.
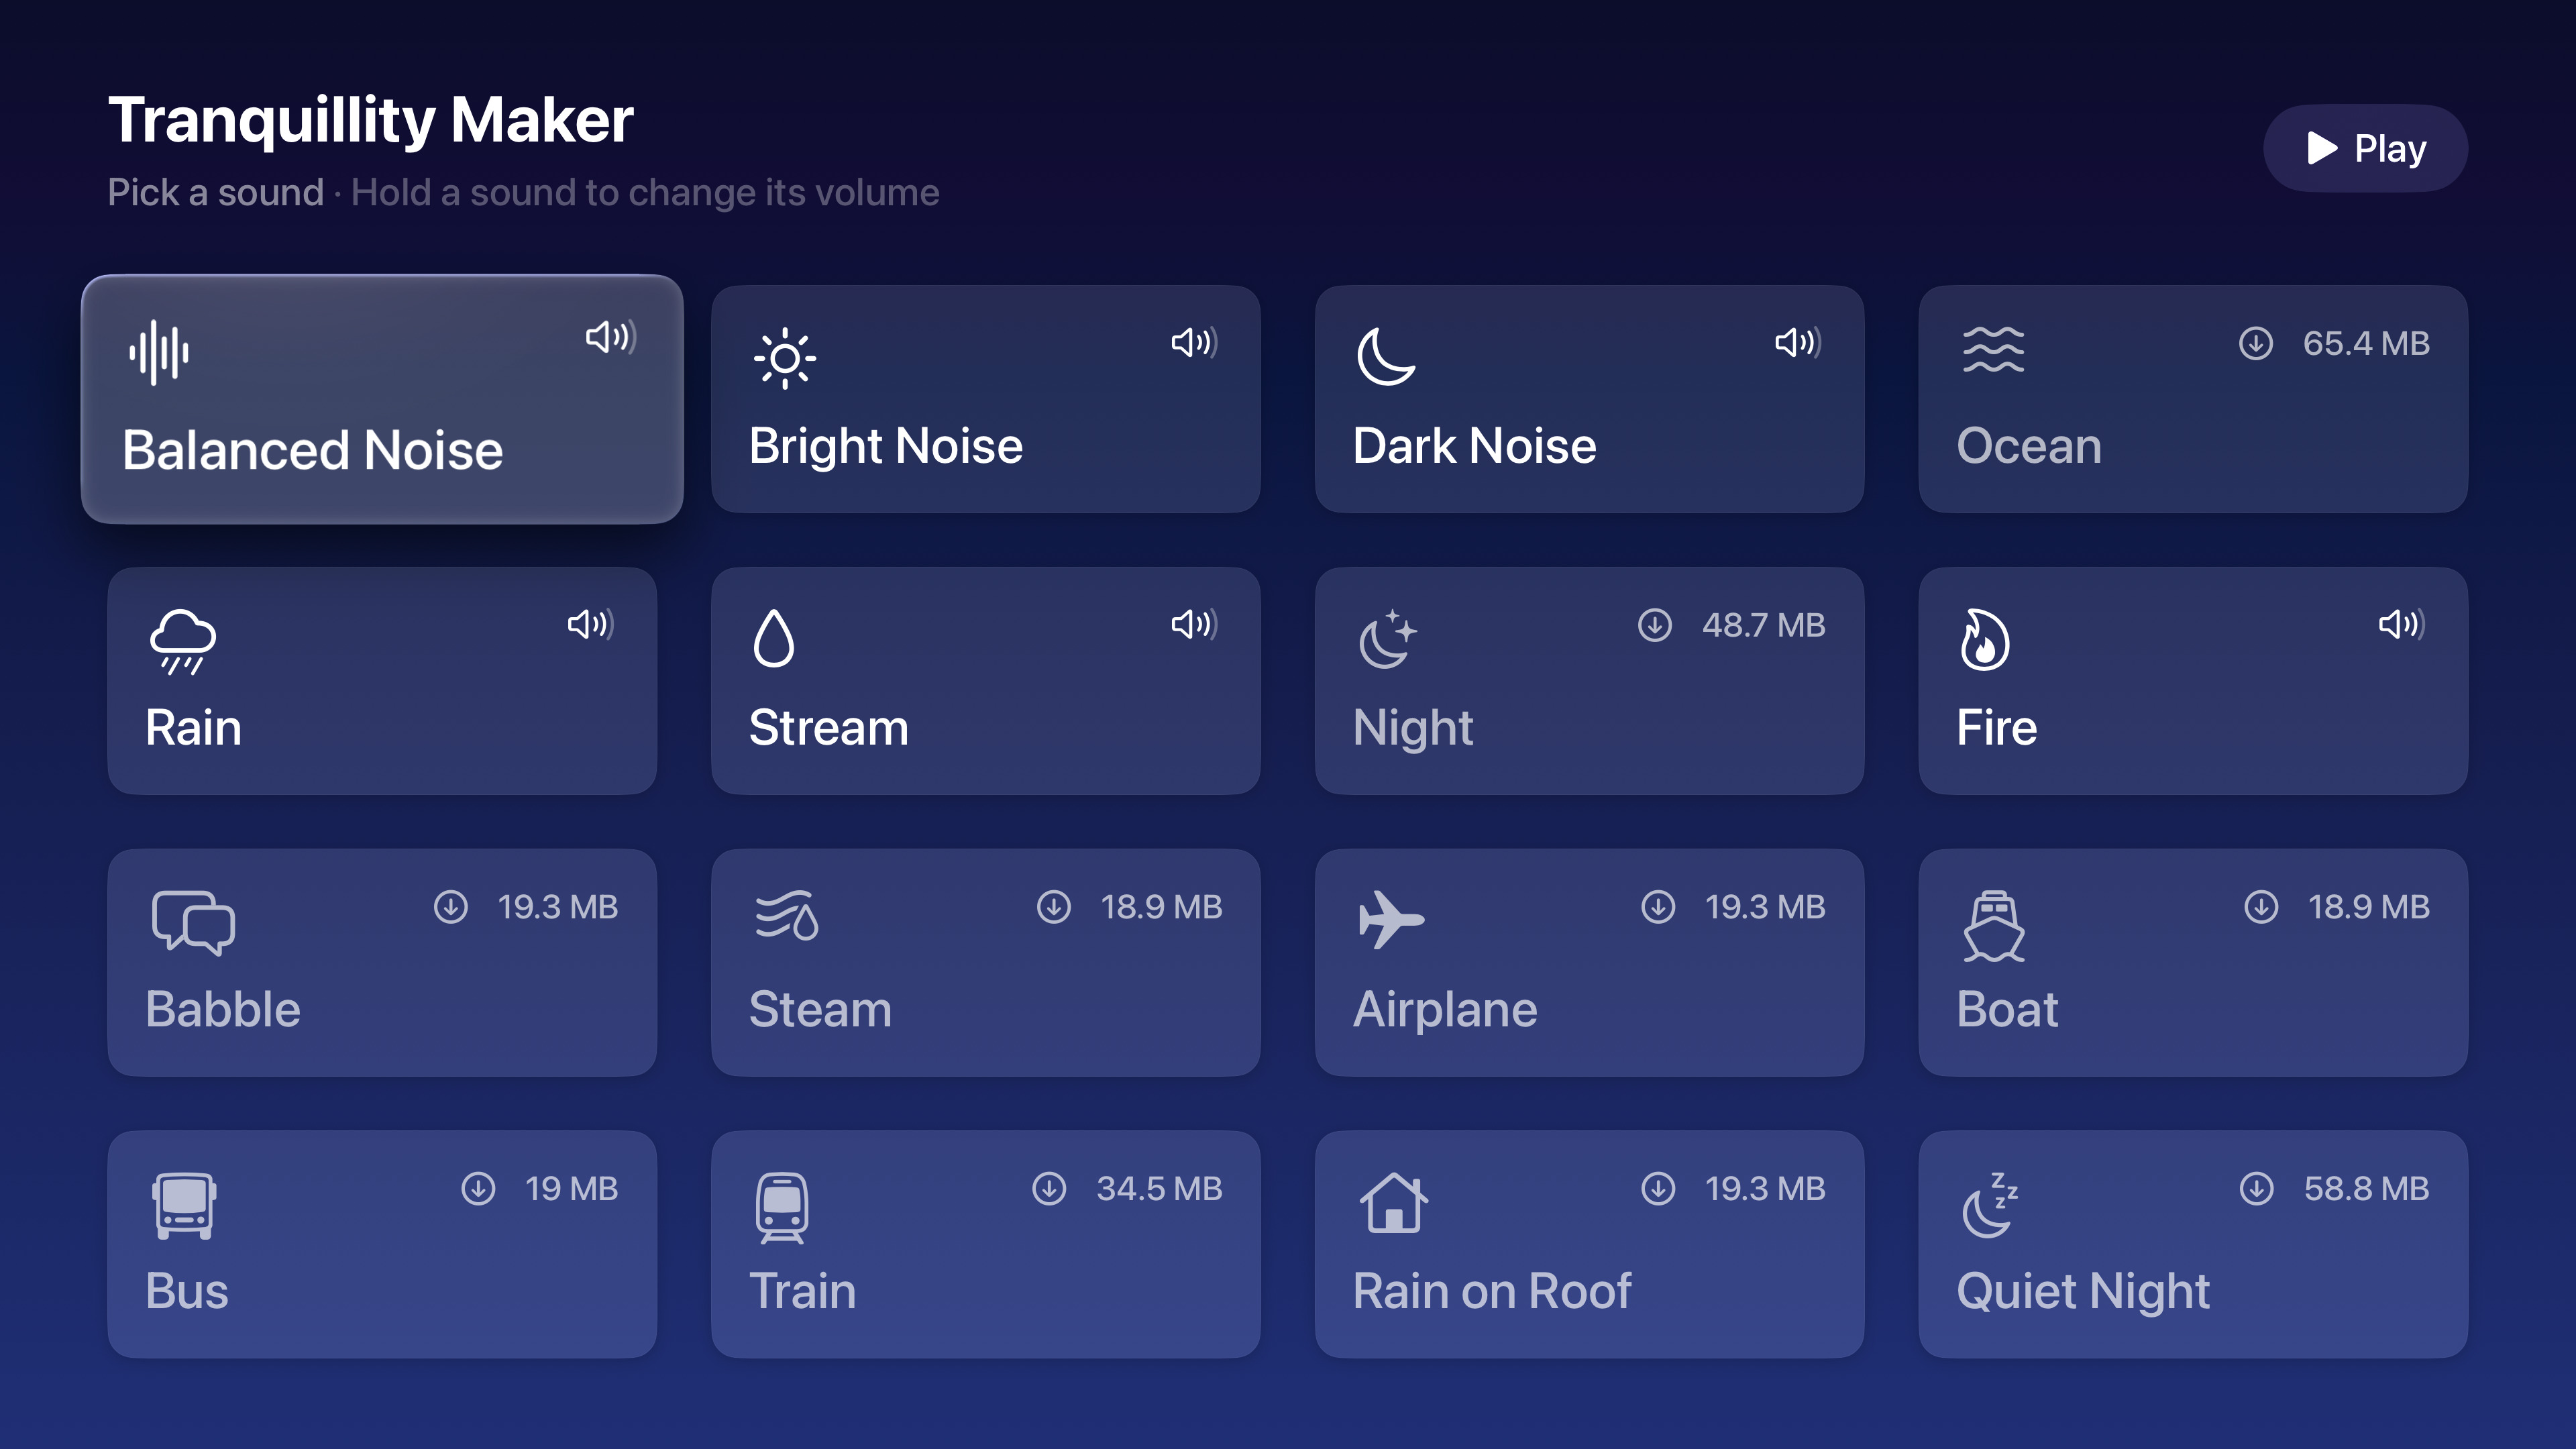
I found out by adding an experimental Apple TV version to Tranquillity Maker, my Mac app that mixes the Background Sounds built into macOS. It took about an hour to go from “could this run on the TV?” to rain playing in my living room. I’ll use it as the example for every step.
If SwiftUI is new to you, start with my free SwiftUI course. It covers the views and state this post builds on.
What you need
You need Xcode with the tvOS platform. Xcode comes with the tvOS SDK, but the simulator is a separate download. Get it in Xcode → Settings → Components, or from the terminal:
xcodebuild -downloadPlatform tvOSYou also need an Apple TV to install the app on, and an Apple developer account to sign it for your device. I wrote about what the free account and the paid program let you do.
Add a tvOS target
A target is one app your project builds. Your Mac app and your Apple TV app can be two targets in the same project, and share source files.
In Xcode, choose File → New → Target, then tvOS and App. Tranquillity Maker generates its project with XcodeGen, so its Apple TV target is a few lines in project.yml:
SoundscapeTV:
  type: application
  platform: tvOS
  sources:
    - SoundscapeTV
    - Soundscape/Sound.swift
    - Soundscape/Channel.swift
    - Soundscape/Mixer.swift
The SoundscapeTV folder has the screen made for the TV. The other three files are the Mac app’s audio engine, compiled into both apps. When I fix a bug in the crossfade, both apps get the fix.
The entry point looks like any SwiftUI app:
@main
struct SoundscapeTVApp: App {
  @State private var mixer = Mixer()

  var body: some Scene {
    WindowGroup {
      TVMixerView()
        .environment(mixer)
    }
  }
}
Share code with #if os()
The shared files have to compile for tvOS, and some APIs don’t exist there.
Process is one of them, because an Apple TV app can’t run other programs. The Mac version of Tranquillity Maker unzips its downloads by running ditto, so for tvOS I wrote a small zip reader with Apple’s Compression framework. Code that works on one platform only goes behind #if os():
#if os(macOS)
let downloads = URL.applicationSupportDirectory.appending(path: "Soundscape/Sounds")
#else
let downloads = URL.cachesDirectory.appending(path: "Sounds")
#endif
This example is about storage, the biggest difference from the Mac. An Apple TV app gets about 500 KB of permanent storage, through UserDefaults. Everything else goes in Caches, and tvOS deletes it when it runs low on space. Tranquillity Maker keeps the sounds it downloads there, and downloads them again when they’re gone.
Design for the remote
There’s no pointer on the TV. You swipe on the remote, and the focus engine moves the focus from one control to the next. The focused control grows a little, so you always know where you are.
Buttons take the focus without any extra work. Give them the .card style, and they lift and shine like the apps on the home screen:
Button {
  mixer.select(channel)
} label: {
  Label(channel.sound.name, systemImage: channel.sound.symbol)
}
.buttonStyle(.card)
Tranquillity Maker puts 16 of these in a LazyVGrid with four columns. Text styles are much bigger on tvOS, so the same .headline you’d use on the Mac reads fine from the couch.
Some controls are missing. SwiftUI has no Slider on tvOS, and the Mac app has a volume slider on every sound. On the TV, you hold a sound to open a menu with its volume levels:
.contextMenu {
  Button("Volume 50%") { channel.volume = 0.5 }
  Button("Volume 100%") { channel.volume = 1 }
}
The remote’s play/pause button has its own modifier:
.onPlayPauseCommand {
  mixer.togglePlayback()
}
That handles the button while your app is open. From the home screen, the press goes to MPRemoteCommandCenter, the same API the Mac uses for the play/pause key on the keyboard. Tranquillity Maker already had that code for the Mac, and it worked on the TV unchanged.
Keep playing in the background
An audio app has to keep playing when you leave it. Add the audio background mode to Info.plist:
<key>UIBackgroundModes</key>
<array>
  <string>audio</string>
</array>
Then tell tvOS your app plays audio, before you start the audio engine:
try? AVAudioSession.sharedInstance().setCategory(.playback)Siri, or another app that plays something, can still interrupt your audio. That stops your audio engine, so listen for AVAudioSession.interruptionNotification and update your app’s state. Tranquillity Maker pauses the mix, and pressing Play brings it back.
The icon is a stack of layers
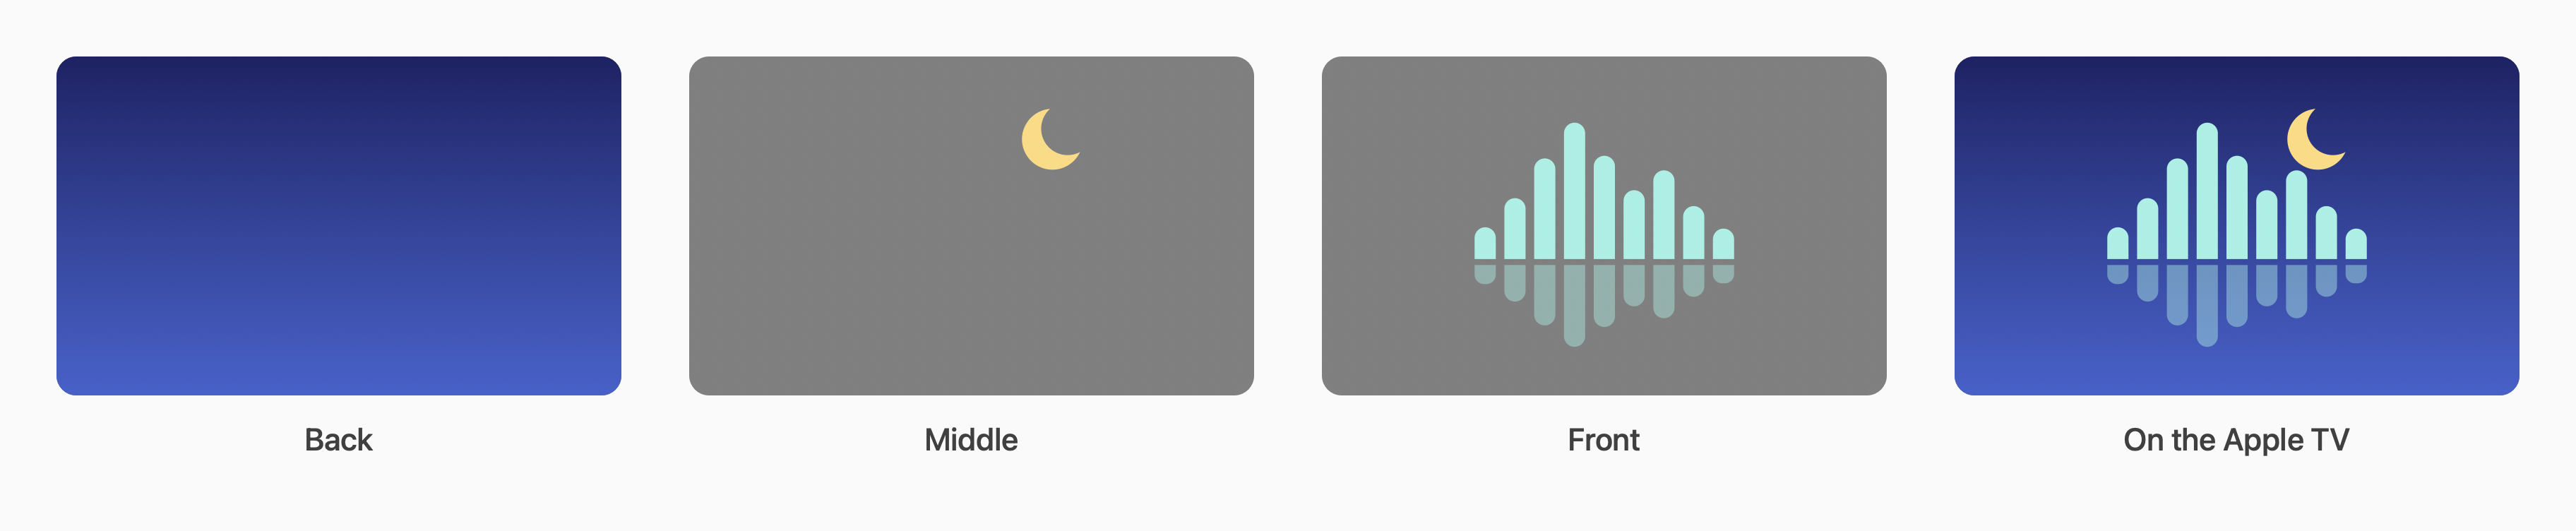
An Apple TV icon is a rectangle made of two to five layers. When the focus moves onto it, the layers shift against each other, and the icon looks like it has depth.
Icon Composer makes icons for the Mac, the iPhone, the iPad and the Apple Watch, but not for the Apple TV. Here the layers go in an asset catalog, in an App Icon & Top Shelf Image set. It holds the icon at 400×240 points, at 1x and 2x, and the App Store icon at 1280×768. It also holds two Top Shelf images, 1920×720 and 2320×720. That’s the wide banner the home screen shows when your app sits in the top row. The back layer has to be opaque.
Tranquillity Maker draws its Mac icon in code, so I drew the Apple TV icon from the same shapes. The sky is the back layer, the moon is the middle one, and the mountains are in front:
Then set the target’s ASSETCATALOG_COMPILER_APPICON_NAME build setting to the name of the set.
Try it in the simulator
In Xcode, pick an Apple TV simulator as the run destination and press ⌘R.
To take a screenshot you don’t need the simulator window. simctl runs the simulator in the background, so nothing shows up on your screen. That’s also how coding agents check their work on my apps without taking over my screen, for the same reason I gave them a test VM for my Mac apps:
xcrun simctl boot "Apple TV 4K (3rd generation)"
xcrun simctl install booted 'Tranquillity Maker.app'
xcrun simctl launch booted com.flaviocopes.soundscape.tv
xcrun simctl io booted screenshot tv.png
xcrun simctl shutdown booted
The simulator runs on your Mac, and it can read your Mac’s files. In Tranquillity Maker, the sounds macOS had already installed showed up as ready, while the real Apple TV had to download every one of them. It also follows your Mac’s language and region, so my screenshots came out with Italian decimal commas until I added -AppleLocale en_US -AppleLanguages "(en)" to the launch command.
Install it on your Apple TV
The Apple TV has no cable to your Mac, so Xcode installs your app over the network. First you pair them:
- Put the Mac and the Apple TV on the same network.
- On the Apple TV, open Settings → Remotes and Devices → Remote App and Devices.
- In Xcode, open Window → Devices and Simulators, click Pair next to your Apple TV, and type the code it shows.
An iPhone needs Developer Mode turned on in Settings before it runs your apps. I looked for the same switch on my Apple TV and couldn’t find it. It was already on after pairing: xcrun devicectl device info details showed it as enabled.
Then choose your team under Signing & Capabilities, pick the Apple TV as the run destination, and press ⌘R. Xcode builds the app, copies it to the TV and opens it. The app stays on the home screen. With a paid developer account it keeps working for a year, then you install it again.
You can do the same from the terminal. xcodebuild builds and signs the app for your Apple TV, and devicectl installs it and opens it. Both find the Apple TV by the name you gave it:
xcodebuild -scheme SoundscapeTV -destination 'platform=tvOS,name=Living Room' -derivedDataPath build \
  -allowProvisioningUpdates -allowProvisioningDeviceRegistration build
xcrun devicectl device install app --device "Living Room" 'build/Build/Products/Debug-appletvos/Tranquillity Maker.app'
xcrun devicectl device process launch --device "Living Room" com.flaviocopes.soundscape.tv
The two -allowProvisioning flags let xcodebuild register the Apple TV with your developer account and create its signing profile, which Xcode’s Run button does for you. After the first build, this is how my coding agent puts a new build on the TV while I keep working.
Shipping it
Most apps go to the App Store, with TestFlight for testers first. Both start from Product → Archive in Xcode, the same as for an iPhone app.
Tranquillity Maker can’t go that way, and its Apple TV version is only an experiment. The sounds are the property of Apple Inc., and tvOS doesn’t come with them. You build it yourself from the source code on GitHub, and the README’s Legal section explains what Apple’s license means for the sounds on an Apple TV.
Want me to talk about your product? You can sponsor this site.
Related posts about swift: