How to avoid the "Open Anyway" message when building macOS apps
By Flavio Copes
macOS blocks apps downloaded from the internet until people click Open Anyway. Sign your app with a Developer ID and notarize it, and it opens normally.
To avoid the “Open Anyway” message, sign your app with a Developer ID certificate, send it to Apple to be notarized, and staple the ticket Apple sends back to the app. People who download it then get the normal dialog for apps from the internet, with an Open button, and they never have to visit System Settings.
You need the paid Apple Developer Program for this, $99 a year. Signing alone doesn’t fix it, because an app signed with a Developer ID but not notarized gets blocked the same way as an unsigned one.
I shipped my Mac apps without a Developer ID until October 2026, and every README explained where to find Open Anyway. Then I moved all seven apps to signing and notarization in one day. Whether the $99 is worth it is in Should you pay for the Apple Developer Program?.
Why macOS blocks your app
When you download a file with a browser, macOS adds an extended attribute called com.apple.quarantine to it. Files that arrive through AirDrop, Mail or Messages get it too. You can see it with xattr:
xattr -p com.apple.quarantine ~/Downloads/NoteRepo.app0083;6ac3f9d5;Safari;BAAE2B26-786B-4F4D-BA6D-3120E5EBDC9FThe first time you open a quarantined app, Gatekeeper checks it. It looks for a Developer ID signature and a notarization ticket from Apple. An app that doesn’t have both gets this:
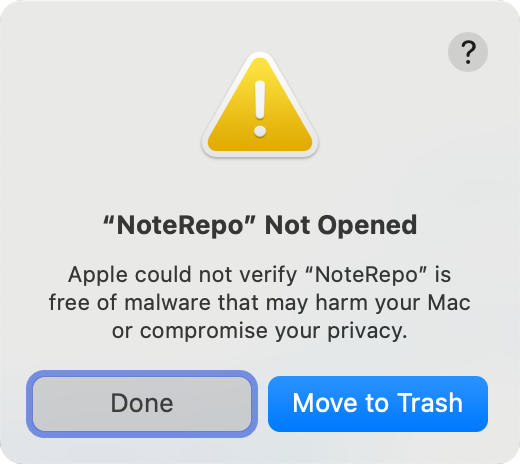
There’s no button to open it. Up to macOS Sonoma you could Control-click the app and pick Open, but Sequoia removed that shortcut. Now the user goes to System Settings → Privacy & Security, scrolls down to the Security section and clicks Open Anyway:
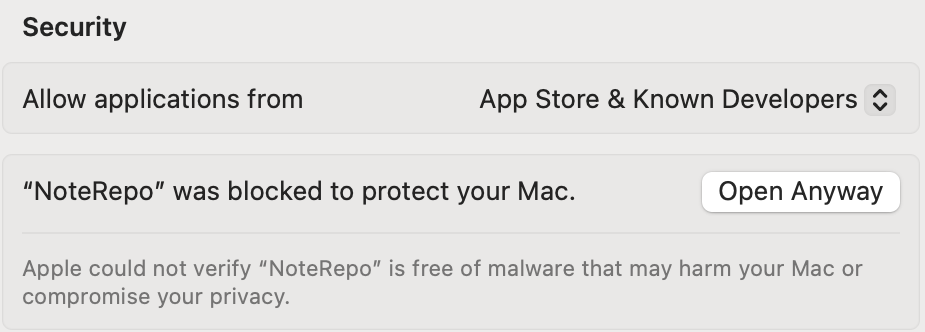
Then macOS shows a second warning with its own Open Anyway button, and asks for an administrator password.
Be careful when you test this yourself. An app you build on your own Mac has no quarantine flag, so it opens without any of these dialogs. You won’t see the problem until someone downloads your app.
Signing isn’t enough
spctl runs the same check from the terminal:
spctl -a -vv NoteRepo.appHere’s what it says about three builds of my apps. An ad-hoc signed build, the kind you can make with a free account, is rejected:
Calculum.app: rejectedA build signed with my Developer ID but not notarized is rejected too:
NoteRepo.app: rejected
source=Unnotarized Developer ID
origin=Developer ID Application: Flavio Copes (DGFKNTAG99)
Only the notarized one is accepted:
Soundscape.app: accepted
source=Notarized Developer ID
origin=Developer ID Application: Flavio Copes (DGFKNTAG99)
That NoteRepo build is the copy sitting in my build folder right now. My build script signs every build with my Developer ID, and only the release script sends it to Apple. I opened it in my test VM with a quarantine flag, and it got the same “Not Opened” dialog as the ad-hoc app.
What you need
You need a membership in the Apple Developer Program. I explained the steps in How to join the Apple Developer Program.
Then you need a Developer ID Application certificate, and only the Account Holder can create one. In Xcode, open Settings → Accounts, select your team, click Manage Certificates, then + and Developer ID Application. You can also create it under Certificates, Identifiers & Profiles on developer.apple.com.
The app itself has to meet Apple’s notarization requirements. The main ones are a Developer ID signature on every executable in the bundle, the hardened runtime turned on, a secure timestamp in the signature, and no com.apple.security.get-task-allow entitlement, which Xcode adds to debug builds. Xcode takes care of all of them when you distribute with Developer ID.
Notarize with Xcode
Archive the app with Product → Archive. In the Organizer window, select the archive, click Distribute App and pick Direct Distribution. Xcode signs the app with your Developer ID and uploads it to Apple’s notary service.
The scan is automated, so nobody looks at your app. Apple says it usually takes less than an hour, and for my apps it took less than a minute each. When it finishes, Xcode downloads the ticket and staples it to the archive. Export the archive again to get the app with the ticket inside, then zip it and publish it.
Notarize from a script
My apps build from scripts, so they notarize with notarytool, which comes with Xcode.
You save your credentials in the keychain once. Create an app-specific password at account.apple.com under Sign-In and Security, then run:
xcrun notarytool store-credentials notary --apple-id [email protected] --team-id DGFKNTAG99It asks for the password and saves everything as a profile called notary, so the password never sits in your script. DGFKNTAG99 is my team ID, you’ll find yours on your account’s membership page.
Now sign the app:
codesign --force --options runtime --timestamp \
  --sign "Developer ID Application: Flavio Copes (DGFKNTAG99)" build/NoteRepo.app
--options runtime turns on the hardened runtime and --timestamp adds the secure timestamp. If your app embeds frameworks or helper tools, sign those first, from the inside out, and the app last.
Zip the app, send the zip to Apple and wait for the answer:
ditto -c -k --keepParent build/NoteRepo.app NoteRepo.zip
xcrun notarytool submit NoteRepo.zip --keychain-profile notary --wait
You want status: Accepted. If you get Invalid, pass the submission ID it printed to notarytool log and it tells you which file broke which rule:
xcrun notarytool log 2efe2717-52ef-43a5-96dc-0797e4ca1041 --keychain-profile notaryWhen it’s accepted, staple the ticket to the app and zip it again:
xcrun stapler staple build/NoteRepo.app
ditto -c -k --keepParent build/NoteRepo.app NoteRepo-2.2.0.zip
Stapling puts a copy of the ticket inside the app. Without it, Gatekeeper has to fetch the ticket from Apple’s servers, which doesn’t work on a Mac that’s offline. You can’t staple a zip, so you staple the app and zip it again, and that second zip is the one you publish.
These are the steps NoteRepo’s scripts/notarize.sh runs for every release.
If you build with Electron or Tauri, their packaging tools run the same steps when you give them your Apple credentials. Electron Forge has an osxNotarize option, and my free Electron course explains signing in Sign the application. Tauri notarizes during tauri build when the APPLE_ID, APPLE_PASSWORD and APPLE_TEAM_ID environment variables are set.
Check it before you publish
Run the check on the app inside the zip you’re about to publish, not on the copy in your build folder:
ditto -x -k NoteRepo-2.2.0.zip /tmp/check
spctl -a -vv /tmp/check/NoteRepo.app
xcrun stapler validate /tmp/check/NoteRepo.app
You want accepted with source=Notarized Developer ID from spctl, and The validate action worked! from stapler. My free Ship macOS Apps course goes through every step in more detail, from enabling the hardened runtime to stapling and verifying the ticket.
What your users see now
macOS still asks once, because the app came from the internet. This time the dialog says Apple checked it for malicious software and found none, and there’s an Open button:
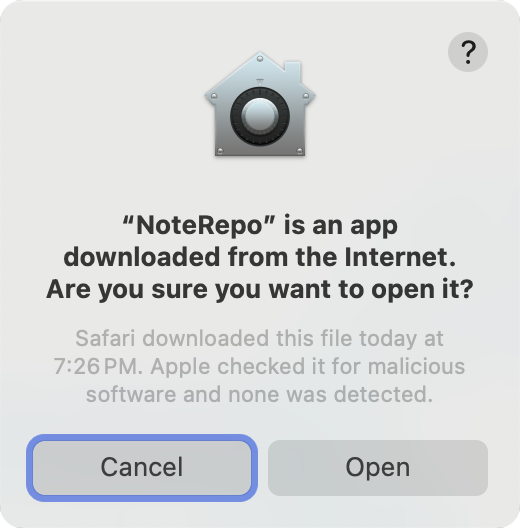
They click Open, and from then on it opens like any other app.
Notarization can’t help on a Mac managed by a company, though. IT can set those Macs to allow only apps from the App Store, and then your app is blocked whatever you do.
Want me to talk about your product? You can sponsor this site.
Related posts about swift: