How to make two-sided flashcards with a printer that prints one side
By Flavio
Print each back next to its front on one side of the paper, then fold the sheet, glue it shut and cut. Lay it out with a two-column table in TextEdit, or choose Fold and glue in Flashcard PDF Printer.
You want flashcards with a country on the front and its capital on the back. Your printer prints on one side of the paper, and you’d rather not write every back by hand.
Print the fronts and the backs side by side, on the same side of the sheet. Then fold the sheet down the middle, glue the two halves together and cut the cards apart. You can lay that out for free with a table in TextEdit, the writing app that comes with the Mac. Or you can use Flashcard PDF Printer, a Mac app I built, which has a Fold and glue choice for this.
How do you do it for free in TextEdit?
Here are eight cards, made on a test Mac with macOS 15 Sequoia. The list was put together for this example.
- Open TextEdit and choose Format > Table…. A small Table window opens next to the new table.
- In the Table window, click the arrows until Rows says 8 and Columns says 2. Here the table started with 2 rows and 3 columns.
- Click the first cell and type a front. Press Tab, type its back, and press Tab again for the next card: Italy, Rome, France, Paris, down to Canada and Ottawa.
- Press Command-A to select everything. Click the size box in the toolbar, type 36 and press Return. Then click the second of the four alignment buttons to center the words.
- Choose Format > Wrap to Page to see the page as it prints, then press Command-P.
- Fold the printed page on the line between the two columns, with the words on the outside. Glue the two halves together, then cut along the other lines.
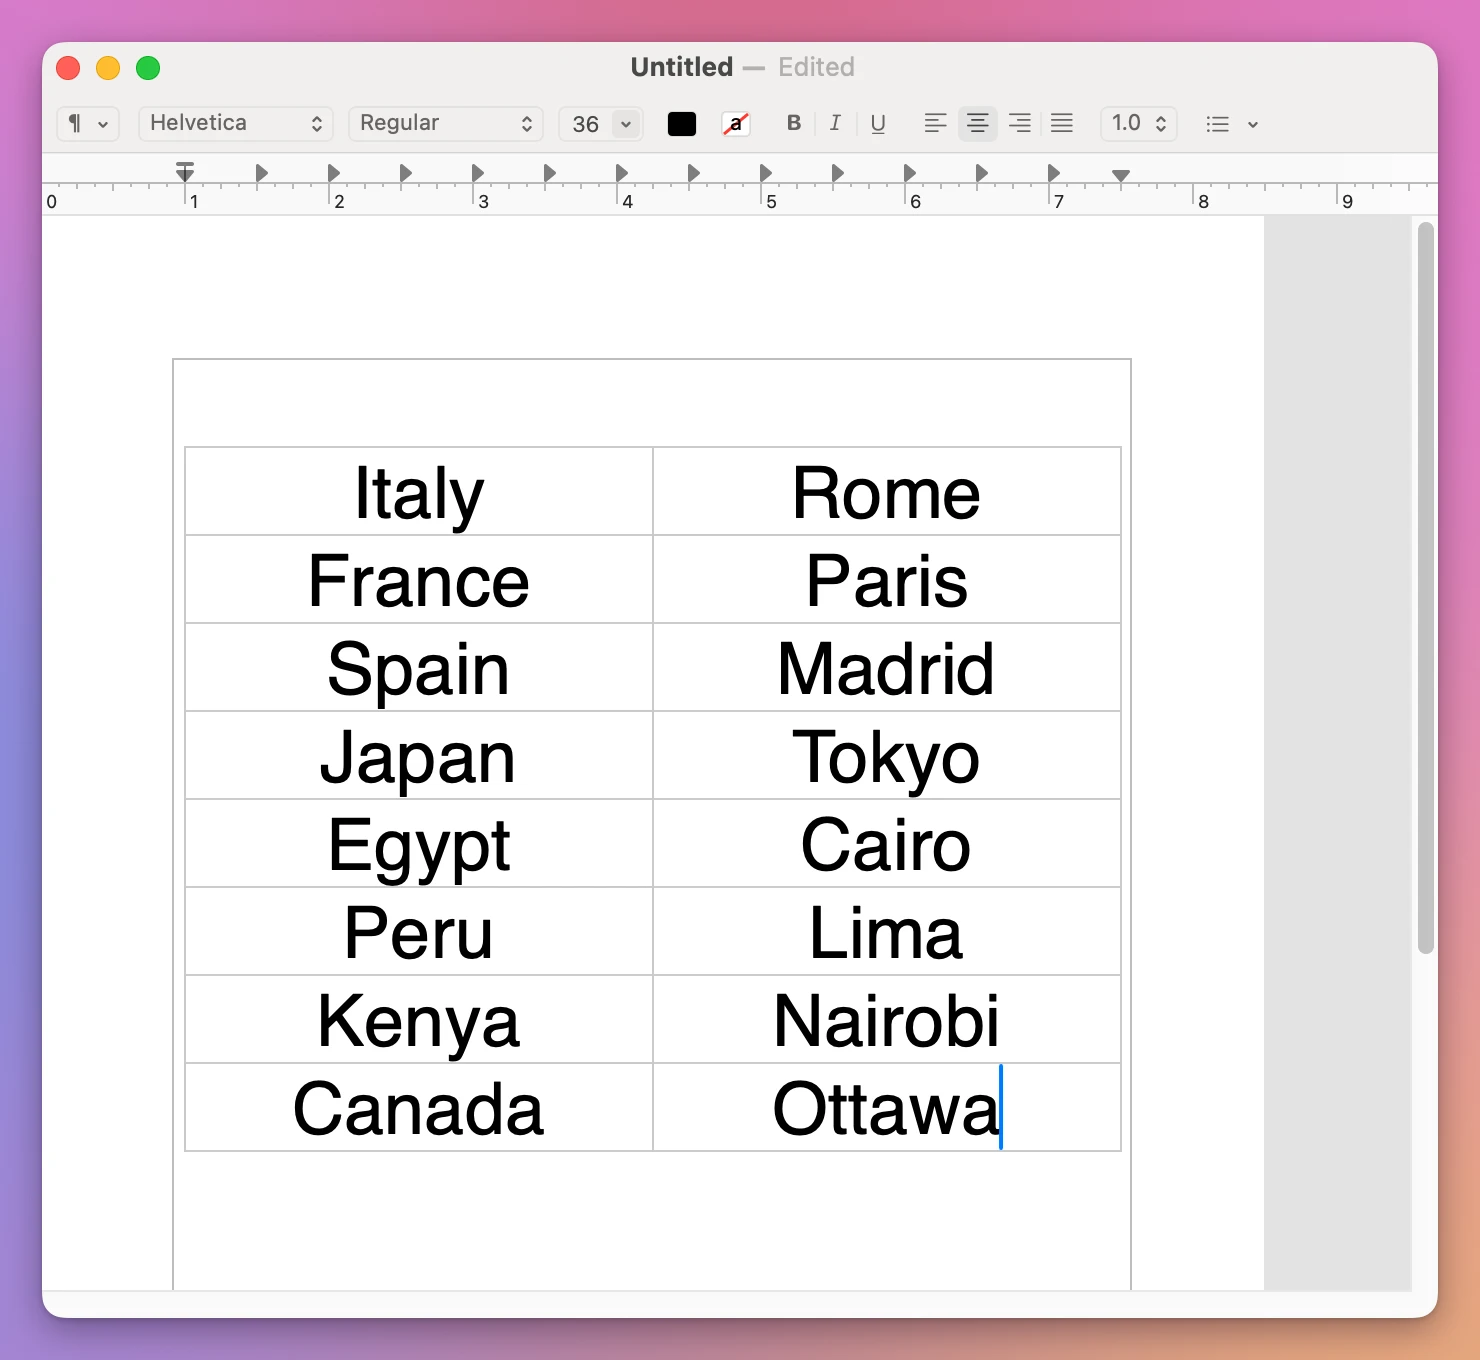
Each back is typed next to its front, in the same row. Nothing gets swapped, which is what a page of backs printed on the other side needs.
The print window said “Page 1 of 1”. The test Mac has no printer, so step 6 wasn’t done here.
What does the free way cost?
The typing is sixteen words and fifteen presses of Tab, plus about a dozen clicks. The cards are small, though. Each cell is as tall as its line of text, so at size 36 a card measured about 83 × 16 mm. The eight cards filled less than half of a US Letter page.
The line to fold on is the one between the two columns. Here it sat in the middle of the page, but it’s the same thin gray as the lines you cut along, and a front looks like a back.
The other free way is a pen. Print the fronts alone and write each back by hand, as in How to make multiplication flashcards to print on a Mac.
| A table in TextEdit | Flashcard PDF Printer | |
|---|---|---|
| The line to fold on | The line between the columns, like every other line | A dashed line down the middle of the sheet |
| Fronts and backs | They look the same | A thick colored frame on a front, a thin one on a back |
| Size of a card | About 83 × 16 mm at size 36 | 98 × 65 mm with 8 cards per sheet |
| Paper for 8 cards | Under half a page | 2 sheets |
How do you do it with Flashcard PDF Printer?
Flashcard PDF Printer turns a list of words into sheets of cards. It costs $20, paid once.
- Open the app and click Type the Cards Yourself.
- Type a front, press Return, type its back, press Return. Go on until the eighth card, Canada and Ottawa.
- Click the name at the top, New set, press Command-A, type a name and press Return. Here it’s Capitals.
- Open the menu next to Printing. It has three choices: On both sides, Fold and glue and Fronts only.
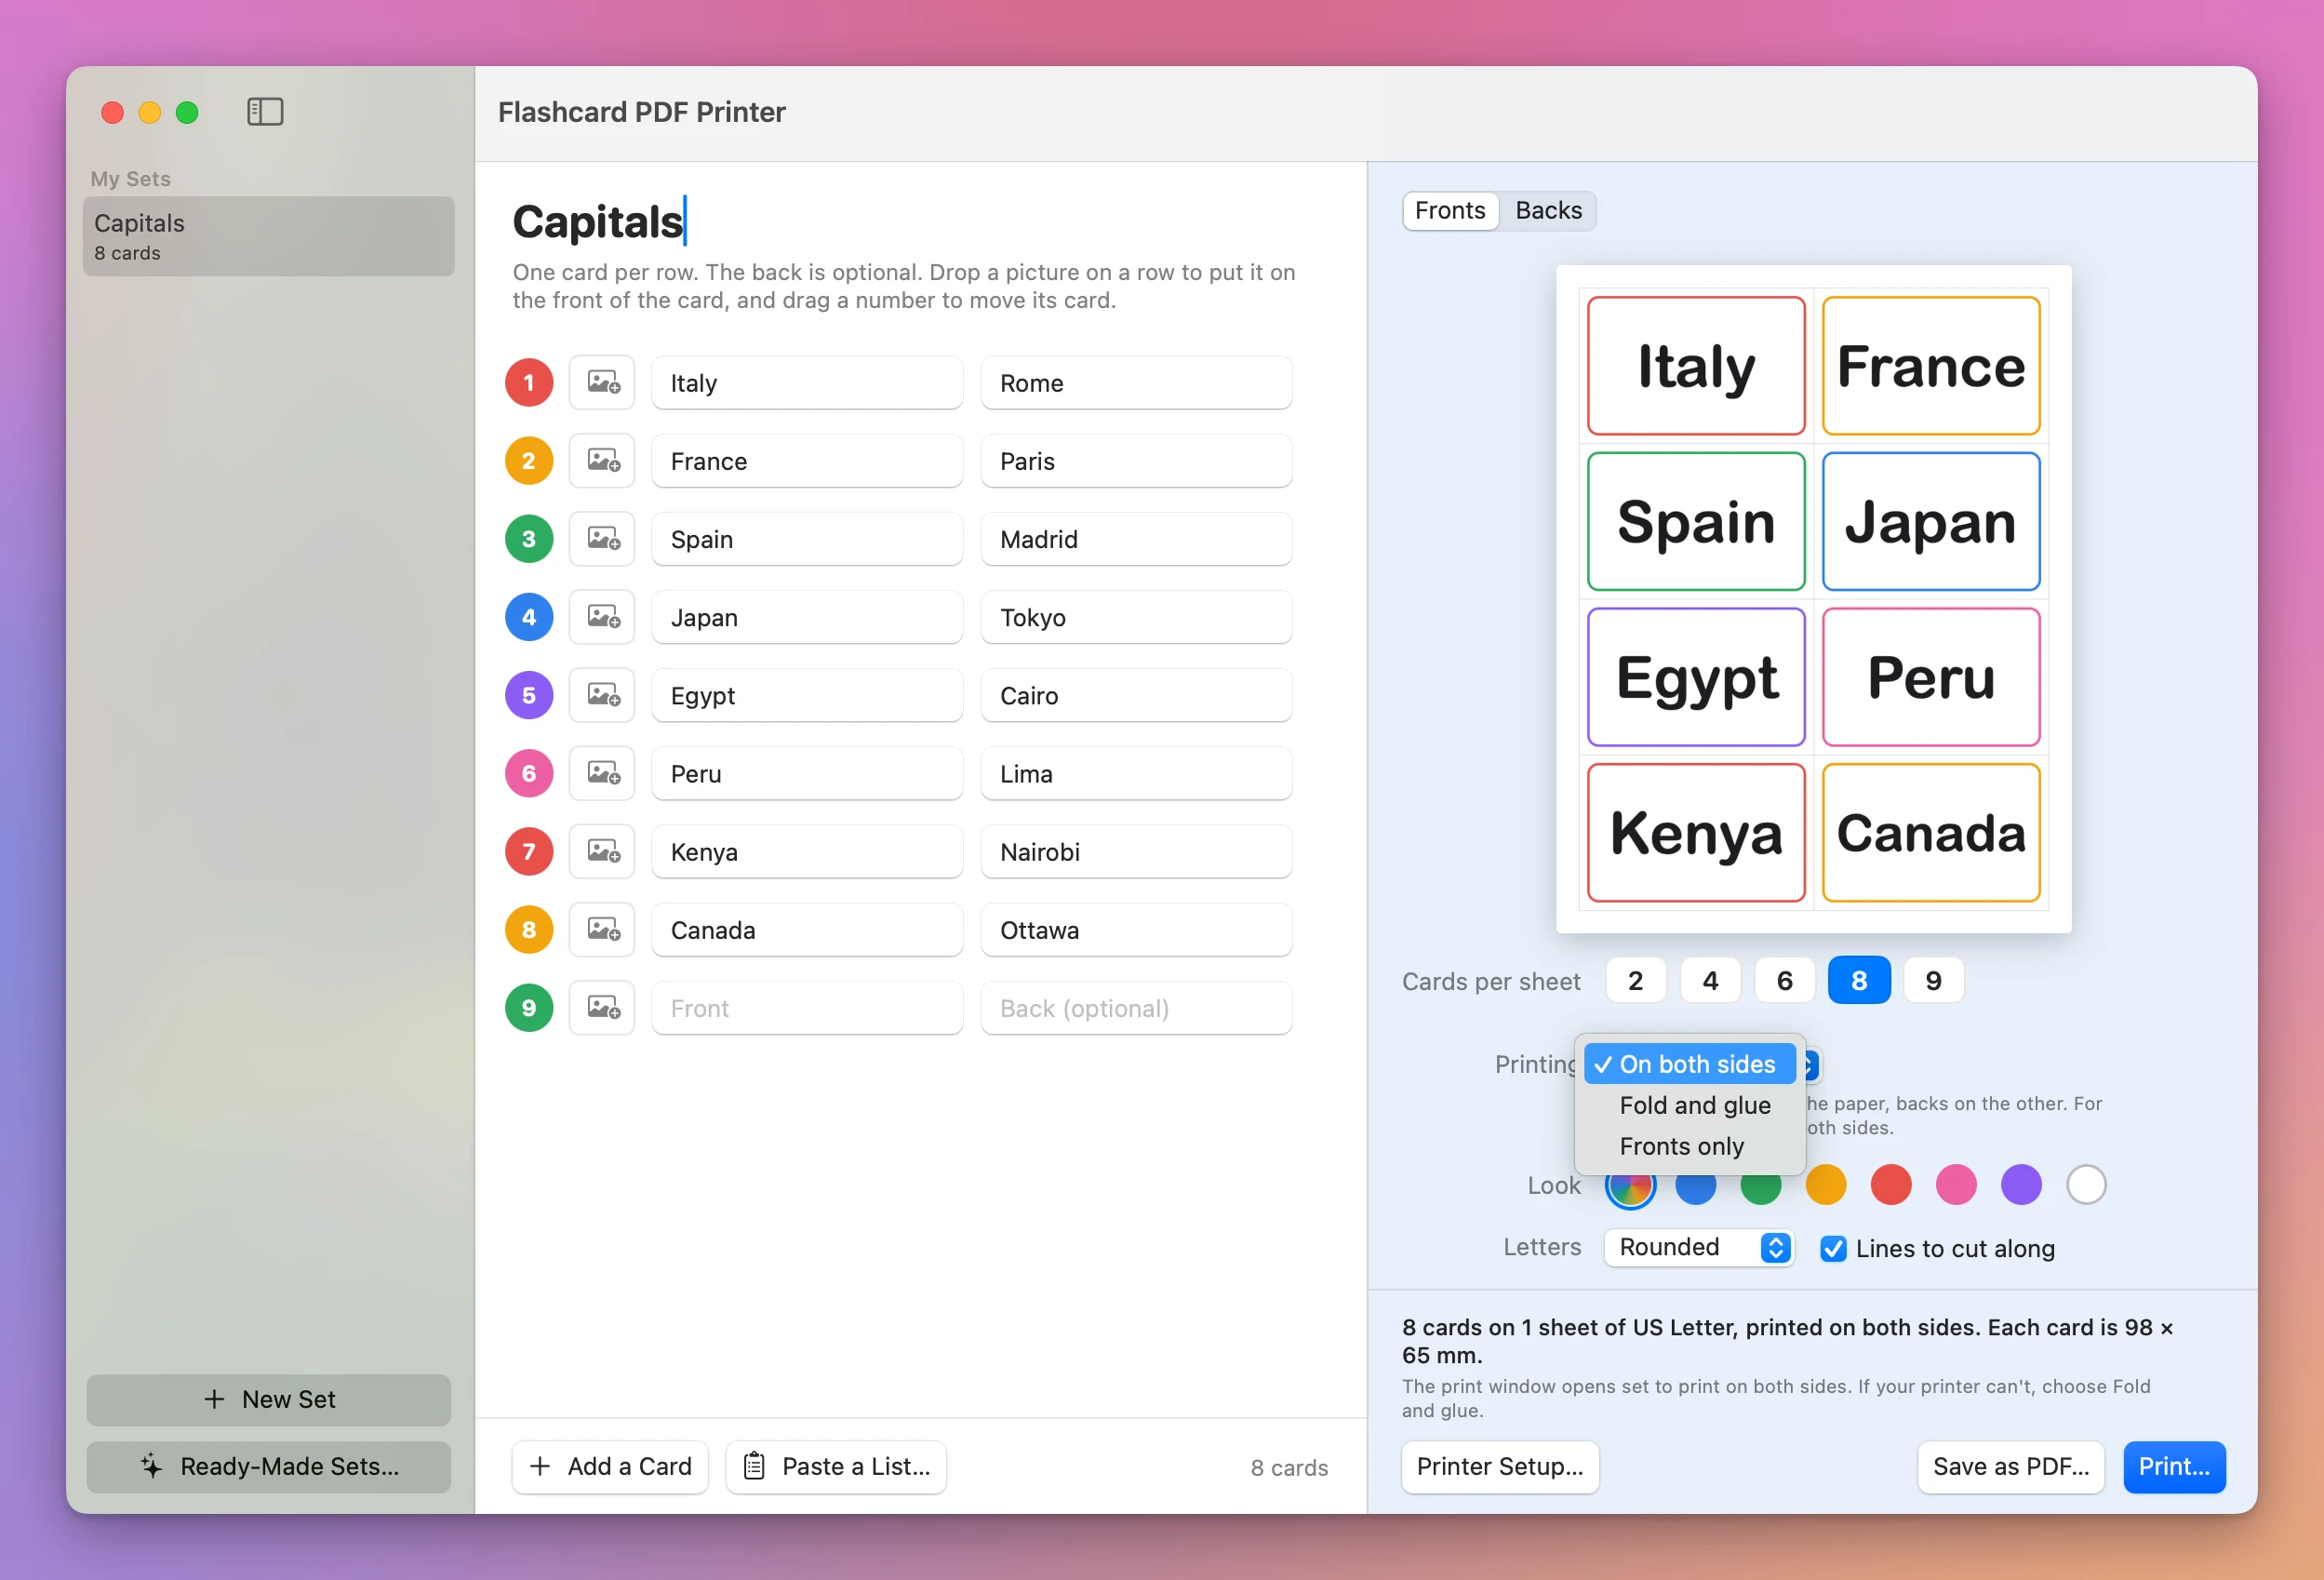
The set opened on On both sides, with a note under the sheet: “The print window opens set to print on both sides. If your printer can’t, choose Fold and glue.”
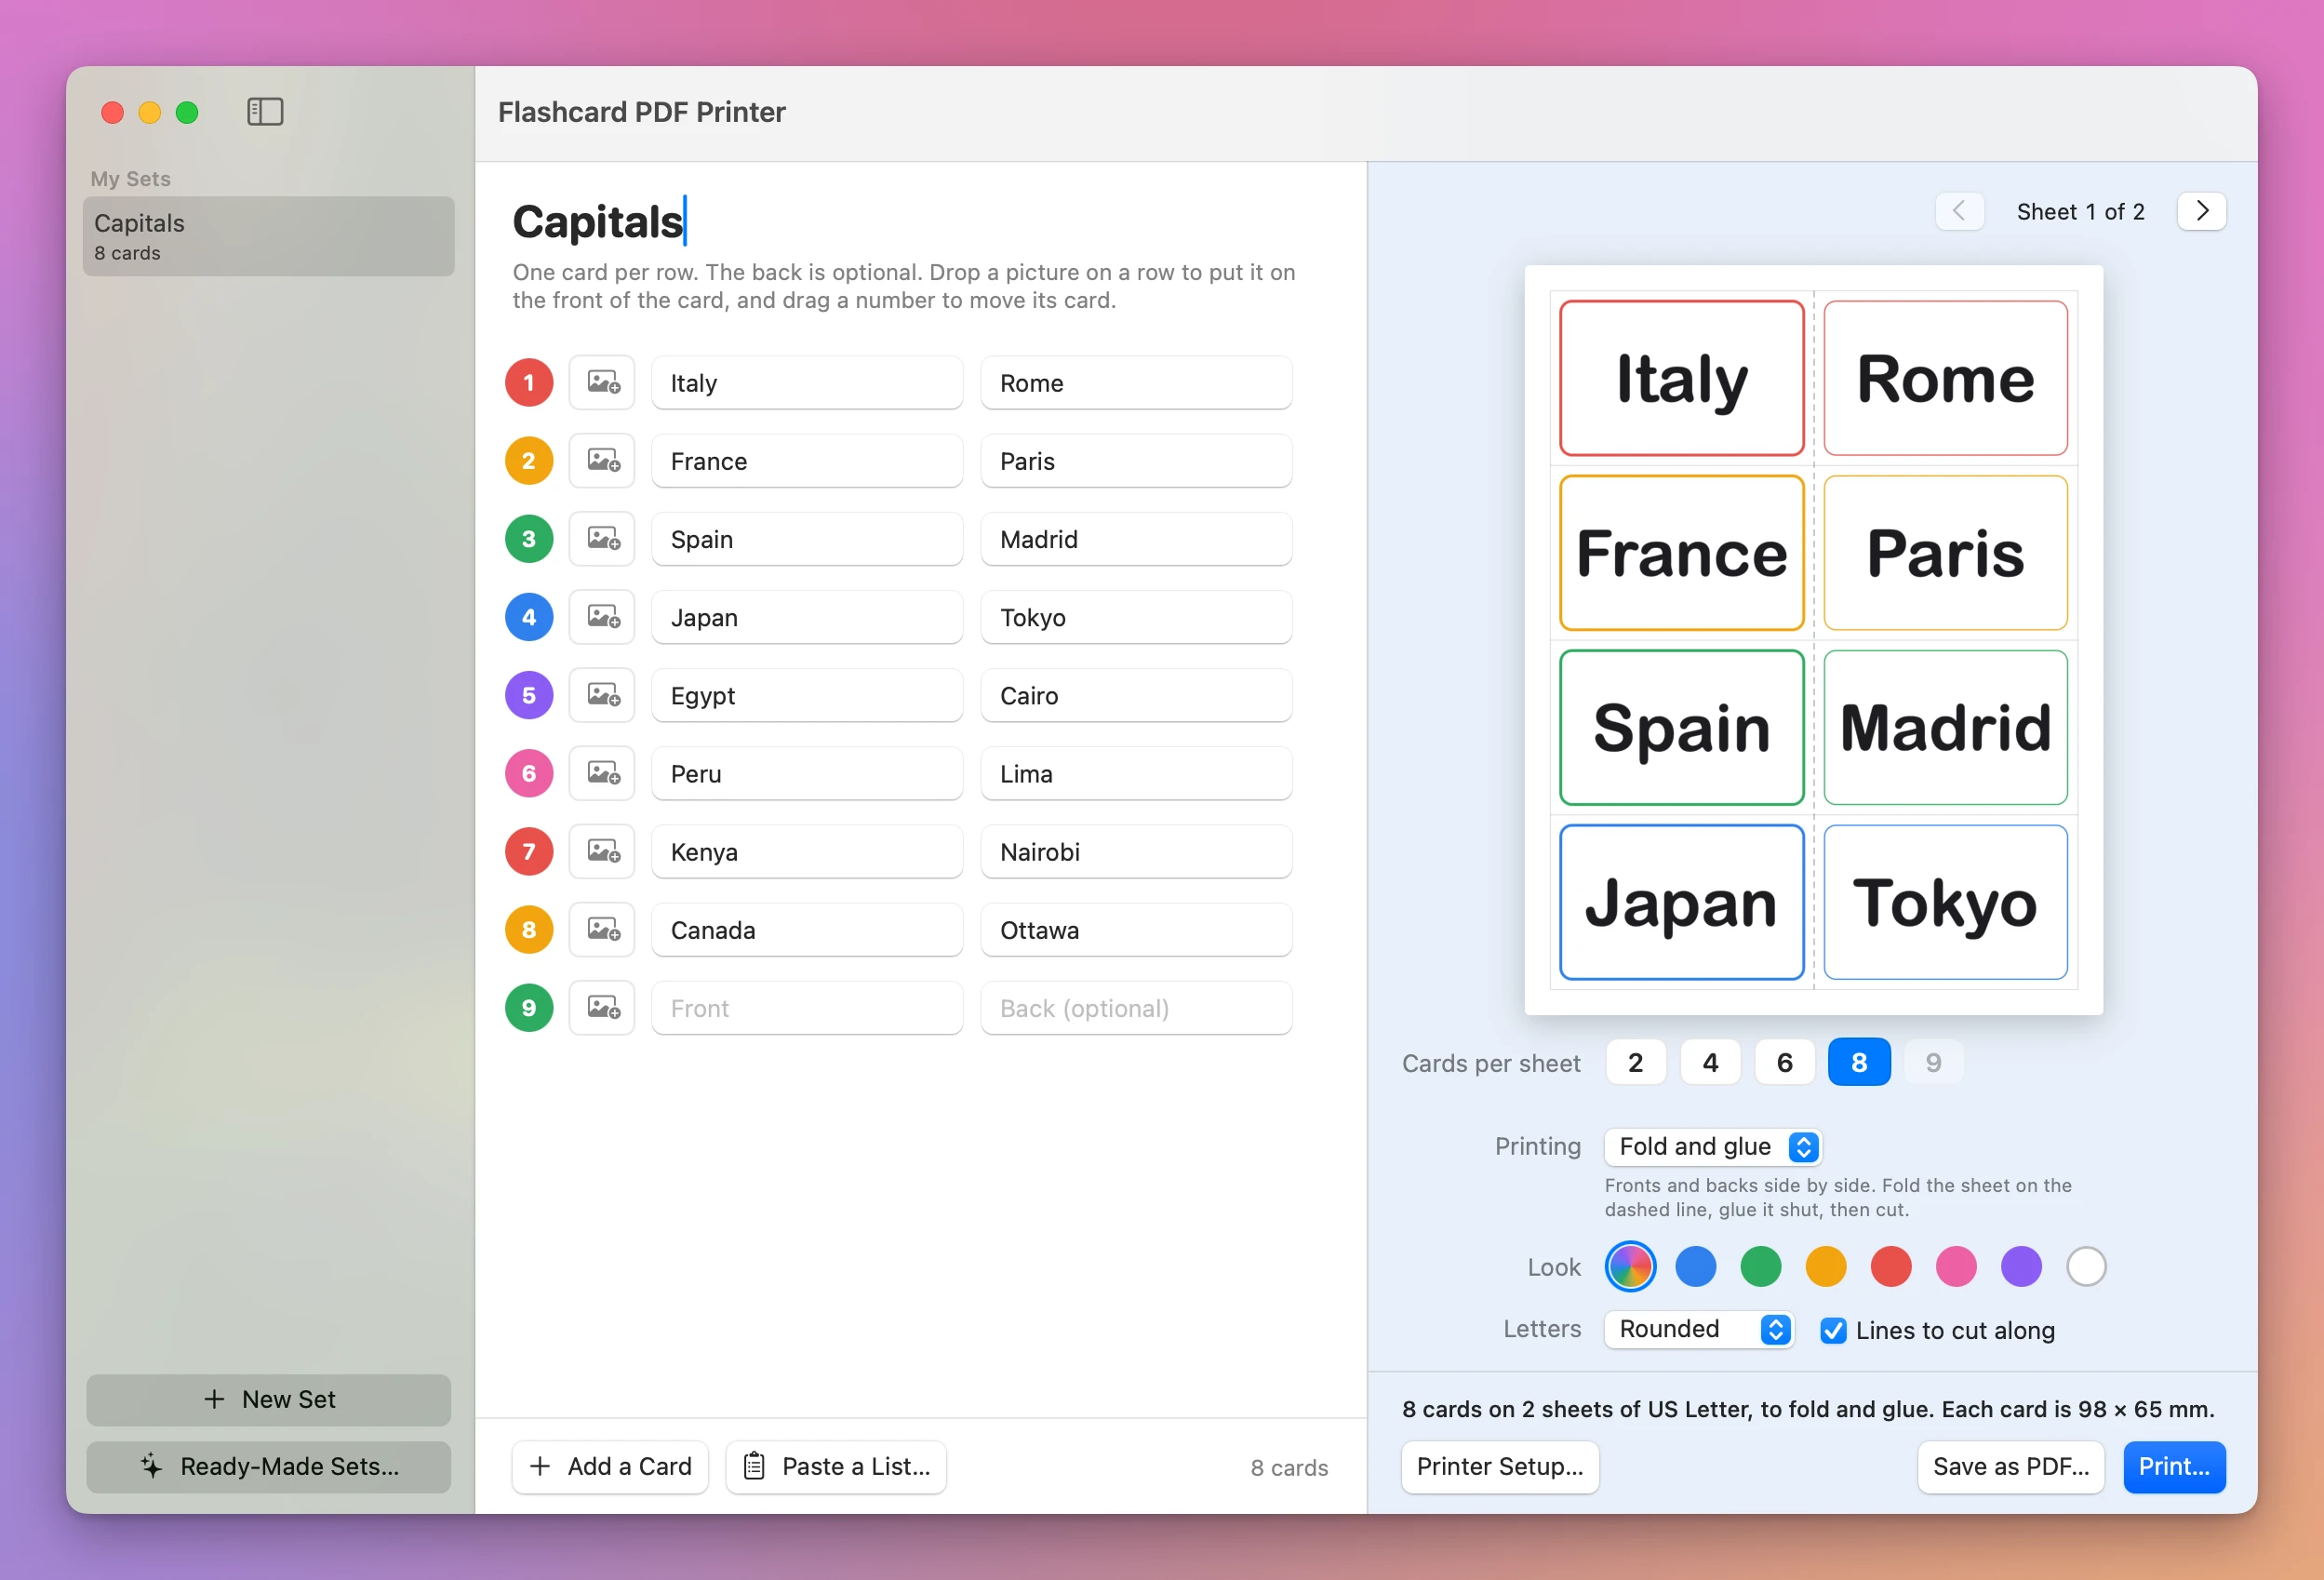
Choose Fold and glue. The sheet now shows the fronts on the left and their backs on the right, with a dashed line down the middle. Under the menu the app says what to do with it: “Fronts and backs side by side. Fold the sheet on the dashed line, glue it shut, then cut.”
How many cards fit on a sheet?
Half as many, because half of the sheet goes to the backs. The cards keep their size. The line under the sheet went from “8 cards on 1 sheet of US Letter, printed on both sides” to “8 cards on 2 sheets of US Letter, to fold and glue. Each card is 98 × 65 mm.”
Click another number next to Cards per sheet and the line changes. For these eight cards, on US Letter paper:
| Cards per sheet | Cards on each folded sheet | Sheets | Size of each card |
|---|---|---|---|
| 2 | 1 | 8 | 197 × 130 mm |
| 4 | 2 | 4 | 130 × 98 mm |
| 6 | 3 | 3 | 98 × 87 mm |
| 8 | 4 | 2 | 98 × 65 mm |
With 2 or 4, the sheet in the window showed the dashed line running across, the fronts above it and the backs upside down below it.
Why is 9 gray?
With Fold and glue chosen, the 9 next to Cards per sheet turns gray. Click it anyway and the app says why, under the list of cards: “Fold and glue needs a sheet that folds in half, so it can’t be used with 9 cards per sheet.”
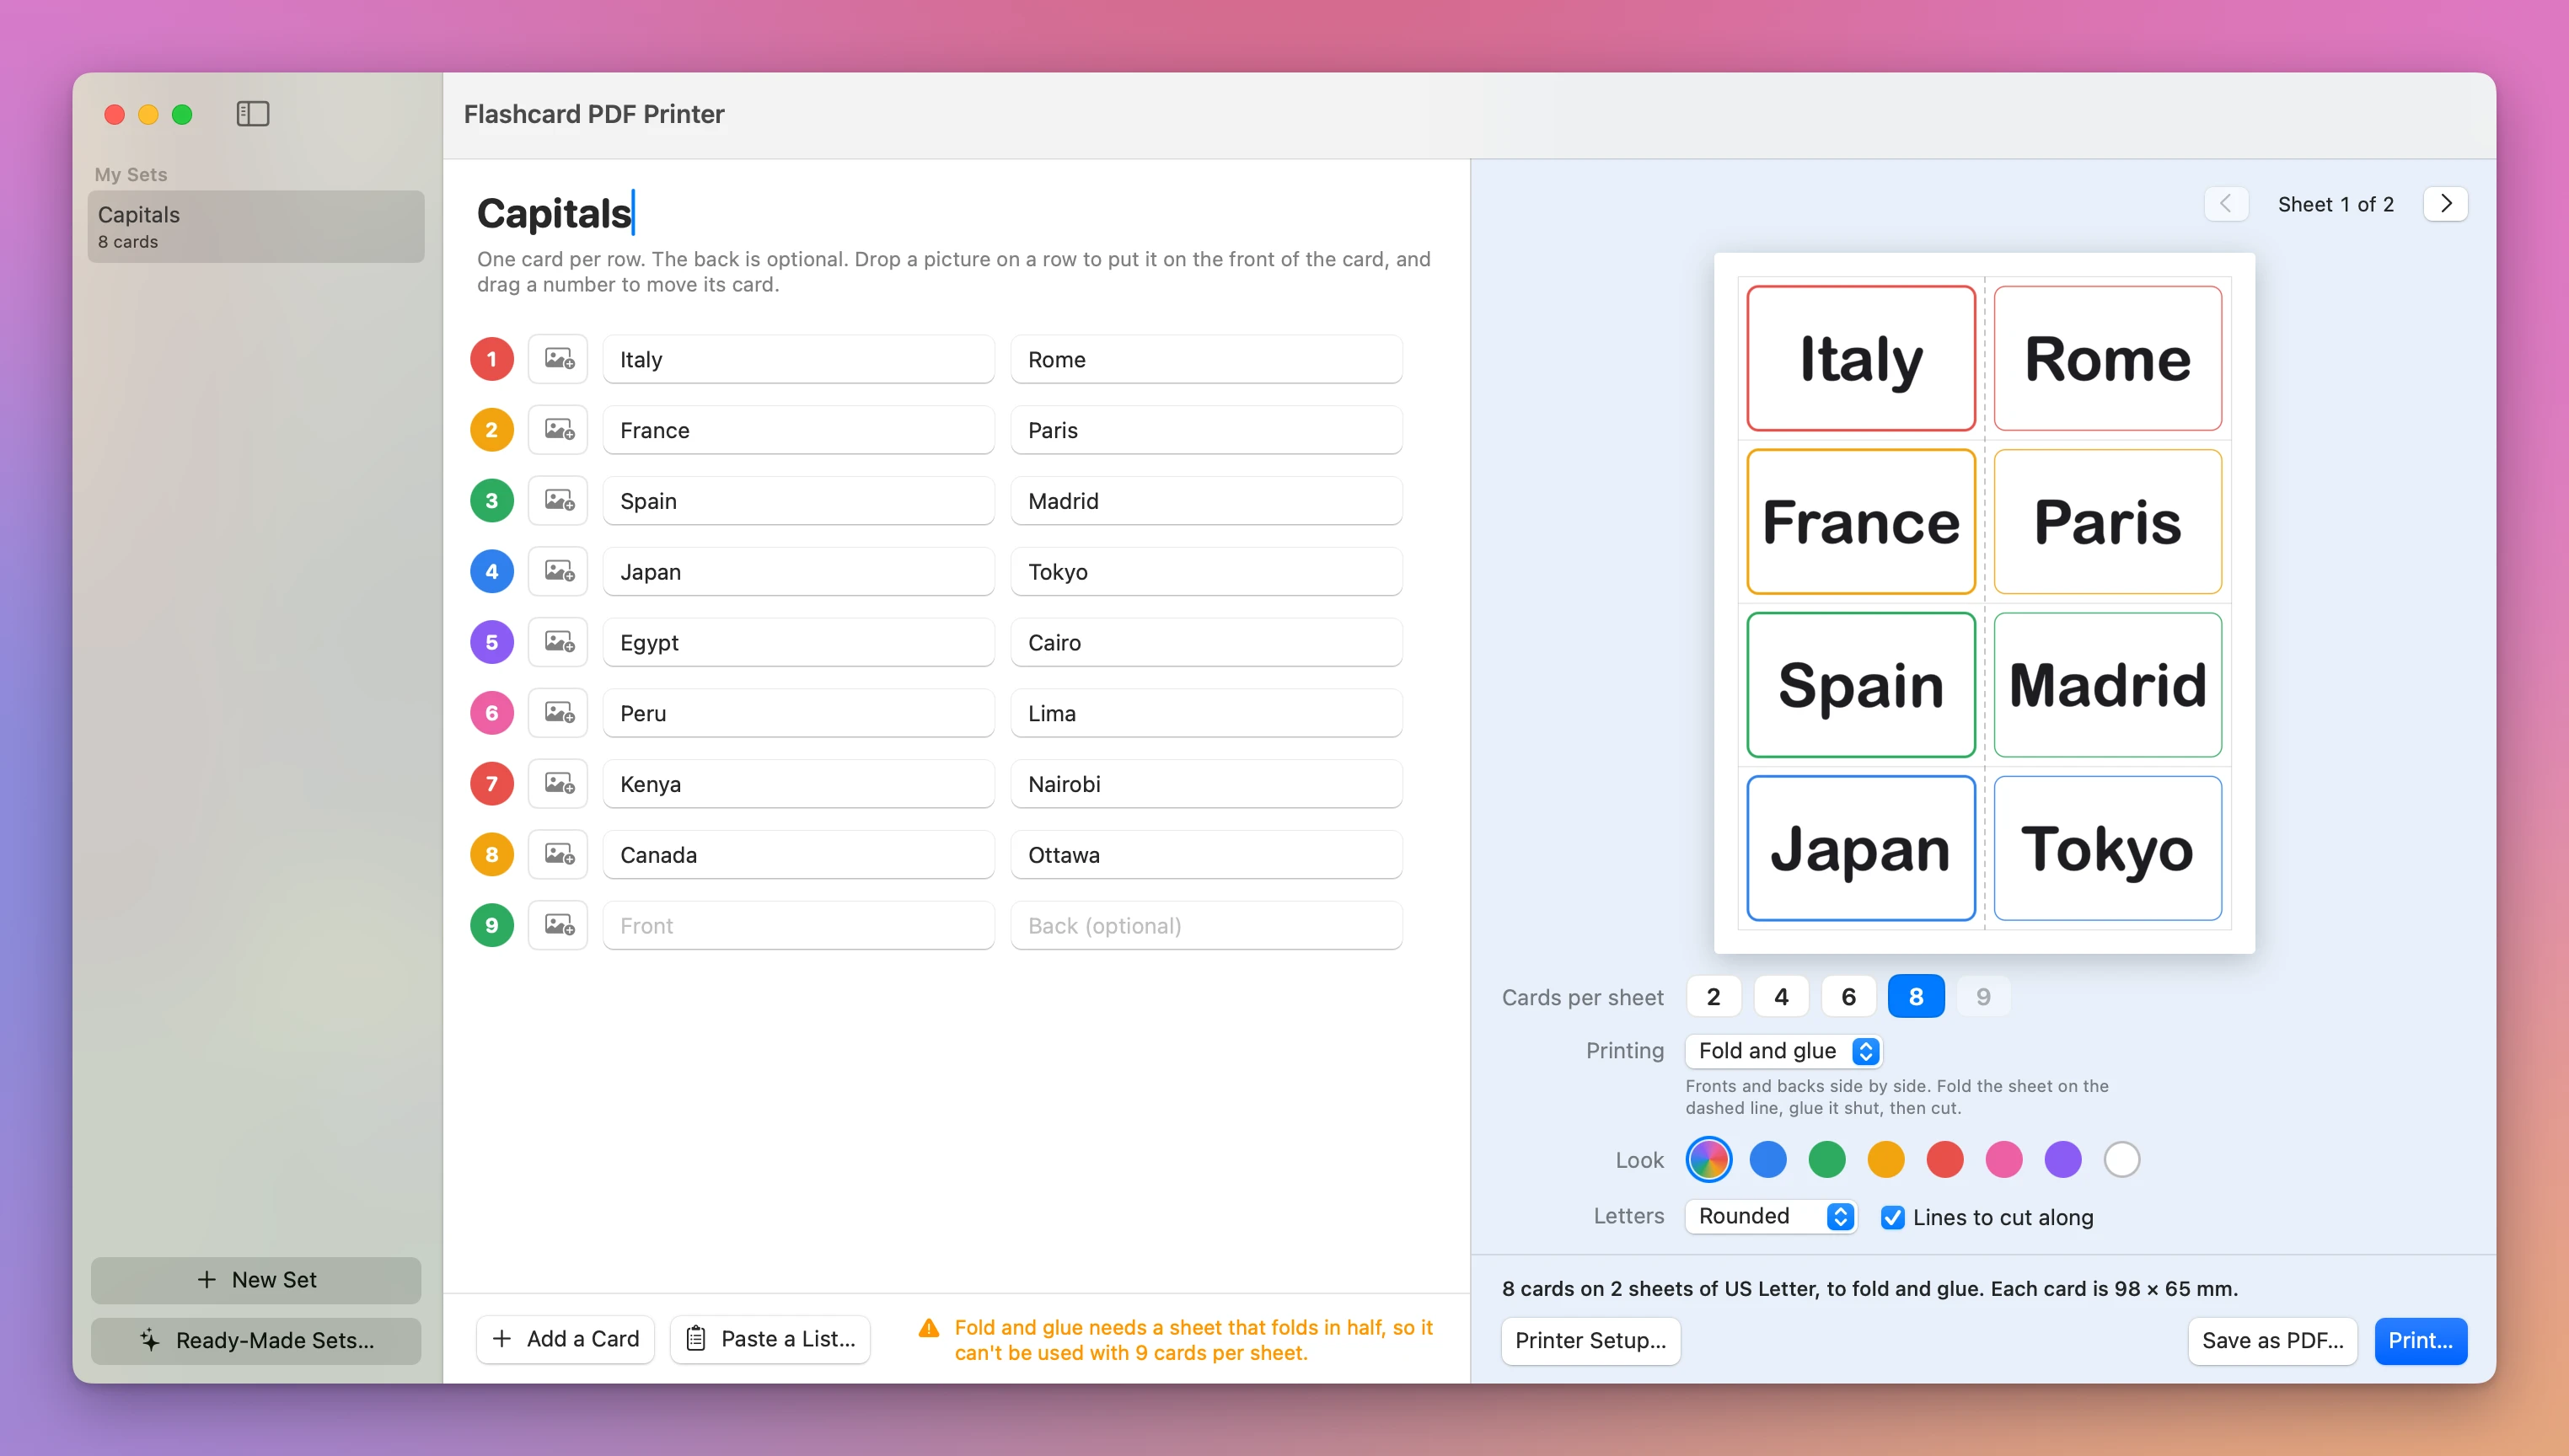
A set that’s on 9 when you choose Fold and glue moves to 8, and the same line ends with “so the sheet now has 8 cards instead of 9.”
How do you print, or save a PDF?
Click Print…. The Mac’s print window opened on All 2 Pages, one page for each sheet. The test Mac has no printer, so its Print button stays gray.
Save as PDF… saves the same pages as a file, to print somewhere else. Opened in Preview, the file has two US Letter pages: Italy to Japan with their capitals, then Egypt to Canada. On both, the dashed line is exactly halfway across the page.
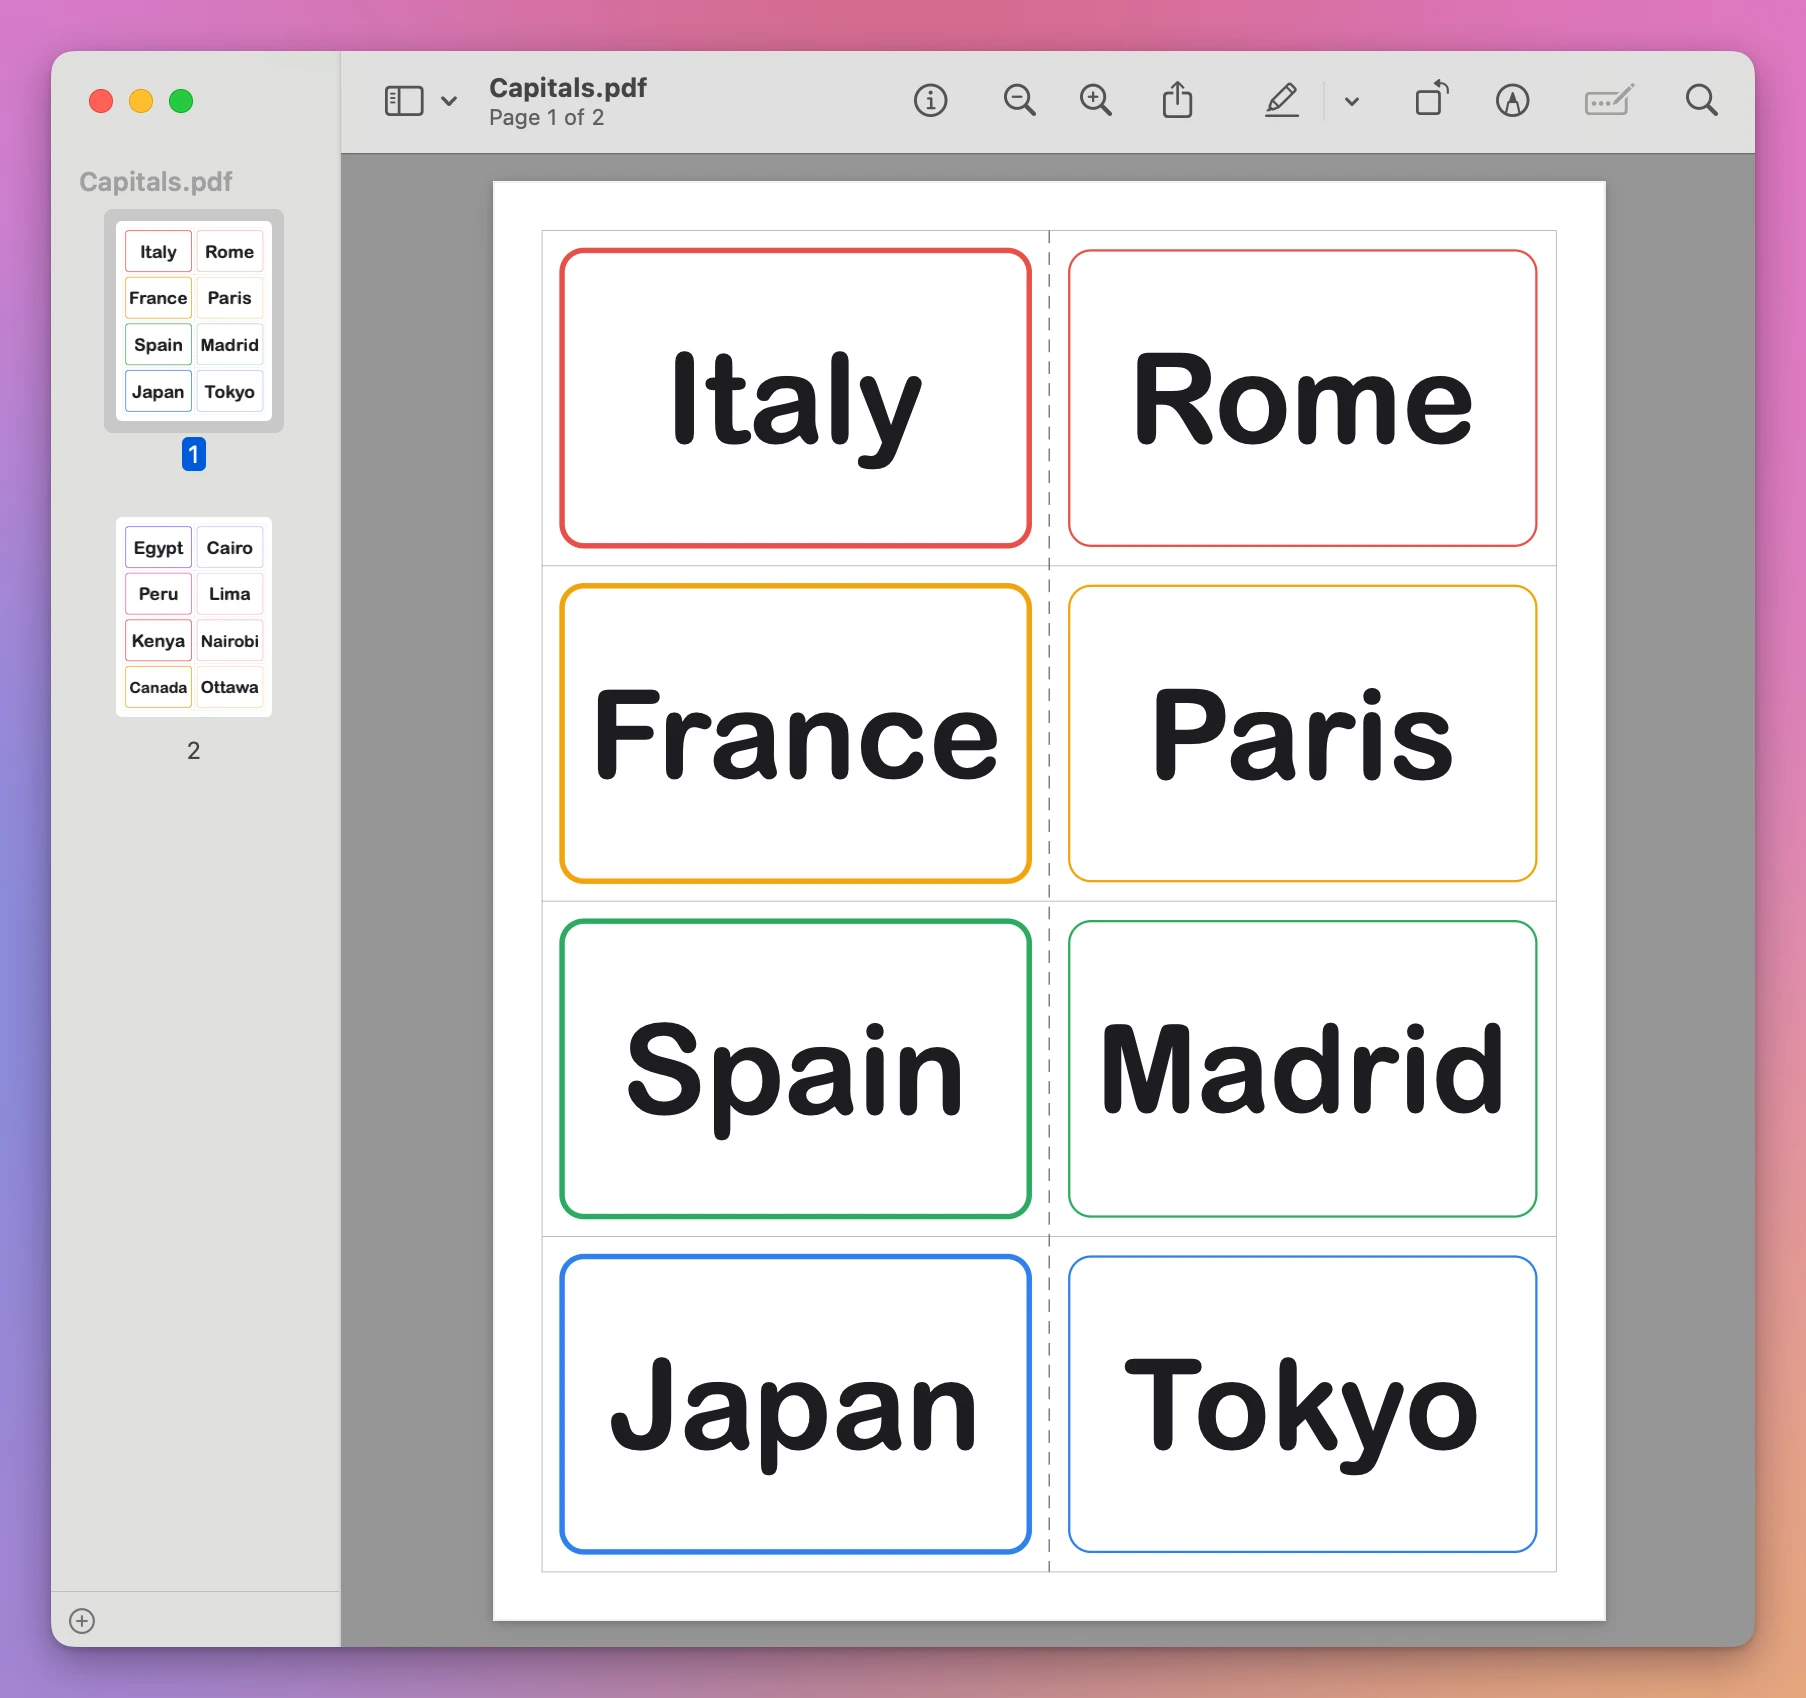
From there it’s the three steps the app gives: fold each sheet on the dashed line, glue it shut, then cut along the thin gray lines.
Get Flashcard PDF Printer
Turn a list of words into paper flashcards. Type or paste the fronts and the backs, or start from a ready-made set, pick how many cards go on a sheet, and print them or save a PDF. Each back is printed exactly behind its front.
See Flashcard PDF Printer → · Read the docs · $20. See the app page for tax details.
Want me to talk about your product? You can sponsor this site.