The complete guide to Cloudflare Quick Tunnels
By Flavio Copes
Put localhost on the internet with one cloudflared command. How quick tunnels work, what your app sees, webhooks, dev servers, local LLMs, scripts, limits and gotchas.
You have a web server running on your laptop. You want someone on the other side of the world to open it in their browser, right now, over HTTPS.
This one command does it:
cloudflared tunnel --url http://localhost:8000A few seconds later you get a public URL like https://kingston-inside-best-graphic.trycloudflare.com. Anyone who opens it reaches the server on your machine. You don’t need an account, a DNS record or an open port on your router, and the URL disappears when you press Ctrl-C.
That is a Cloudflare Quick Tunnel. Cloudflare has offered it in this form since 2021 and a lot of developers still don’t know about it. It landed on the front page of Hacker News in September 2026 when Cloudflare gave it a new landing page at try.cloudflare.com, and a good share of the 300 comments were people finding out it existed.
We’ll start with that one command and build up to scripts, coding agents and the limits you’ll hit along the way. I ran every command in this guide on my Mac on 22 September 2026, with cloudflared 2026.9.1, and the outputs are the ones I got. A later build added --allowed-mail, so update cloudflared before you try that flag.
Why would you put localhost on the internet?
Your dev server listens on localhost, a name that only means something on your own machine. Your phone can’t reach it, and neither can a friend or a payment provider that wants to send you a webhook.
The old way around that is a public IP, a port forwarded on your router, a domain pointing at it and a TLS certificate. It takes an afternoon, and when you’re done your home IP is public too.
A tunnel flips the direction. Your machine opens a connection out to a server on the internet. That server gets a public hostname. When a visitor hits the hostname, the request travels back down the connection you opened and reaches your local server. Nothing is opened on your side.
Things this is good for:
- receiving webhooks from Creem, Paddle, Stripe or GitHub while you develop the handler
- opening your dev server on your phone, on a real HTTPS origin
- showing work in progress to a client or a friend without deploying
- giving a coding agent a real URL to test against
- calling a local LLM from another machine
You could do all of this with ngrok, which did it first. Quick tunnels skip the account, and they skip the warning page ngrok’s free plan shows your visitors.
The difference with regular tunnels
The same cloudflared binary runs two products, and the docs don’t make the line very clear.
A quick tunnel is what this guide is about: no account, a random trycloudflare.com hostname, one local origin, alive until you press Ctrl-C. It’s a demo tool, and Cloudflare says so in the first log line.
A named tunnel, the thing Cloudflare calls Cloudflare Tunnel, needs a free account and a domain on Cloudflare DNS. In exchange you get a hostname you choose that never changes, several services behind one tunnel, cloudflared running as a system service that reconnects on its own, Cloudflare Access in front if you want Google or GitHub, and none of the quick tunnel limits we’ll meet below. That’s the version for a site or app you run from home for months.
A quick tunnel can now stop at an email PIN too, which I cover in Security. Access is still the login that lives on your own hostname.
I wrote a separate guide about named tunnels. Read this one first if your need fits in an afternoon, and that one when you want the URL to survive a reboot.
Install cloudflared
On macOS:
brew install cloudflaredOn Omarchy the package is in the Arch repos:
omarchy pkg add cloudflaredOn Debian and Ubuntu, download the .deb from the releases page and install it:
curl -LO https://github.com/cloudflare/cloudflared/releases/latest/download/cloudflared-linux-amd64.deb
sudo dpkg -i cloudflared-linux-amd64.deb
The downloads page has the .rpm, the Windows MSI and a Docker image too.
Check it worked:
cloudflared --version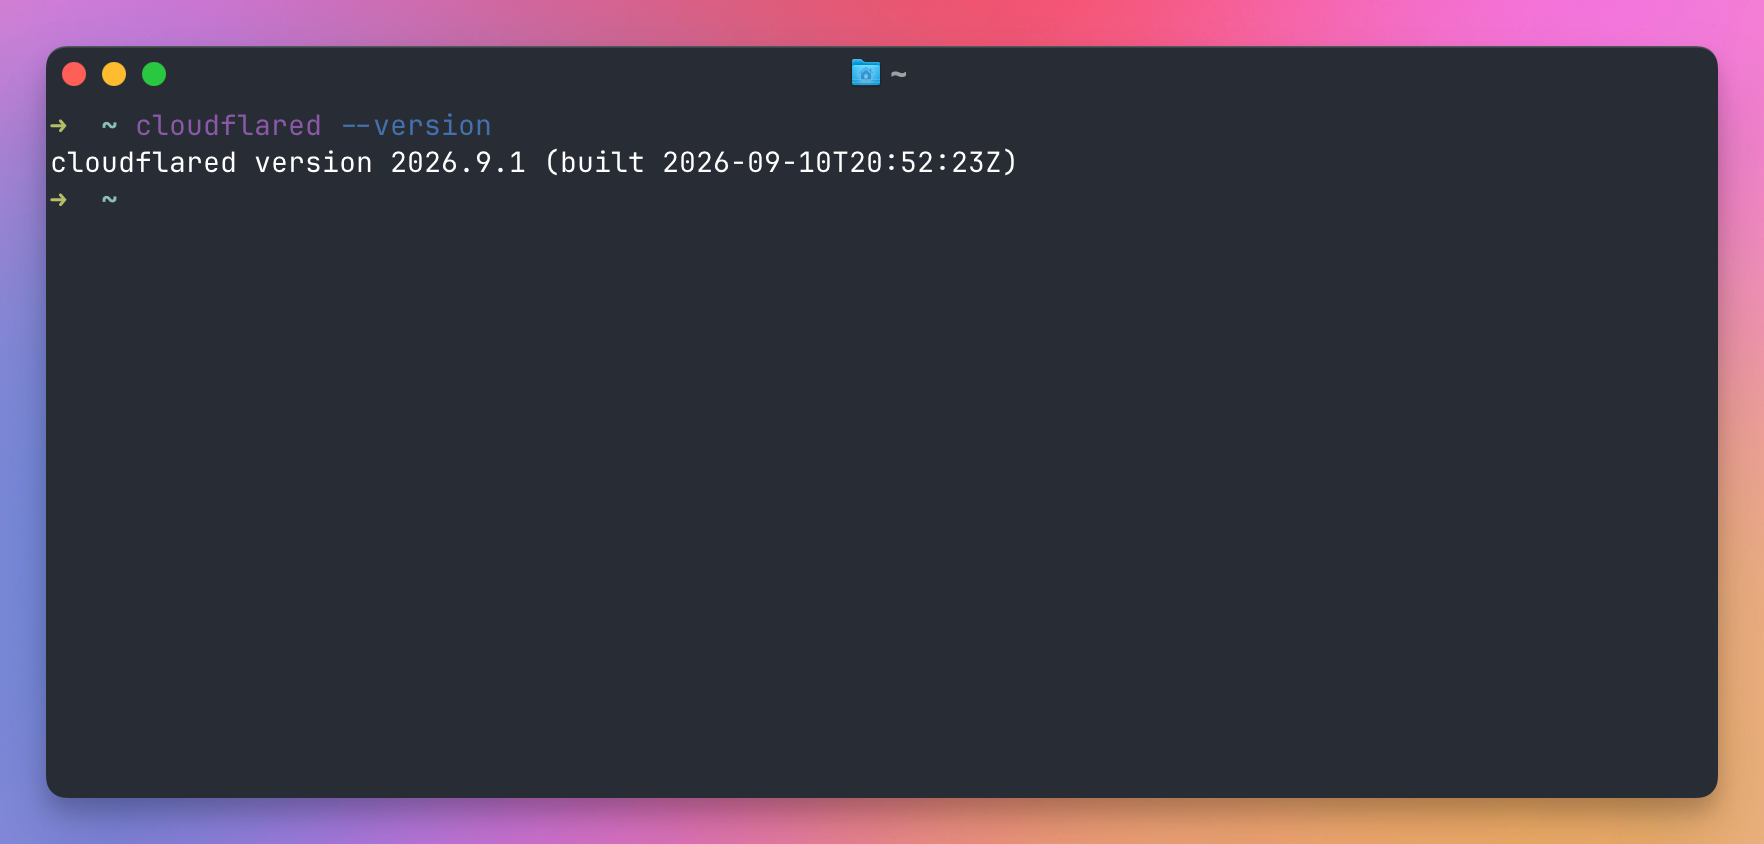
Cloudflare supports versions released within the last year, so update it now and then with your package manager.
Your first tunnel
You don’t even need your own server to try it. cloudflared ships a tiny hello-world server:
cloudflared tunnel --hello-worldIt starts that server on a random local port, opens a tunnel to it, and prints a URL. Open the URL and you get a “Congrats! You created a tunnel!” page, followed by a dump of the request as the hello-world server received it. That page is served from your laptop.
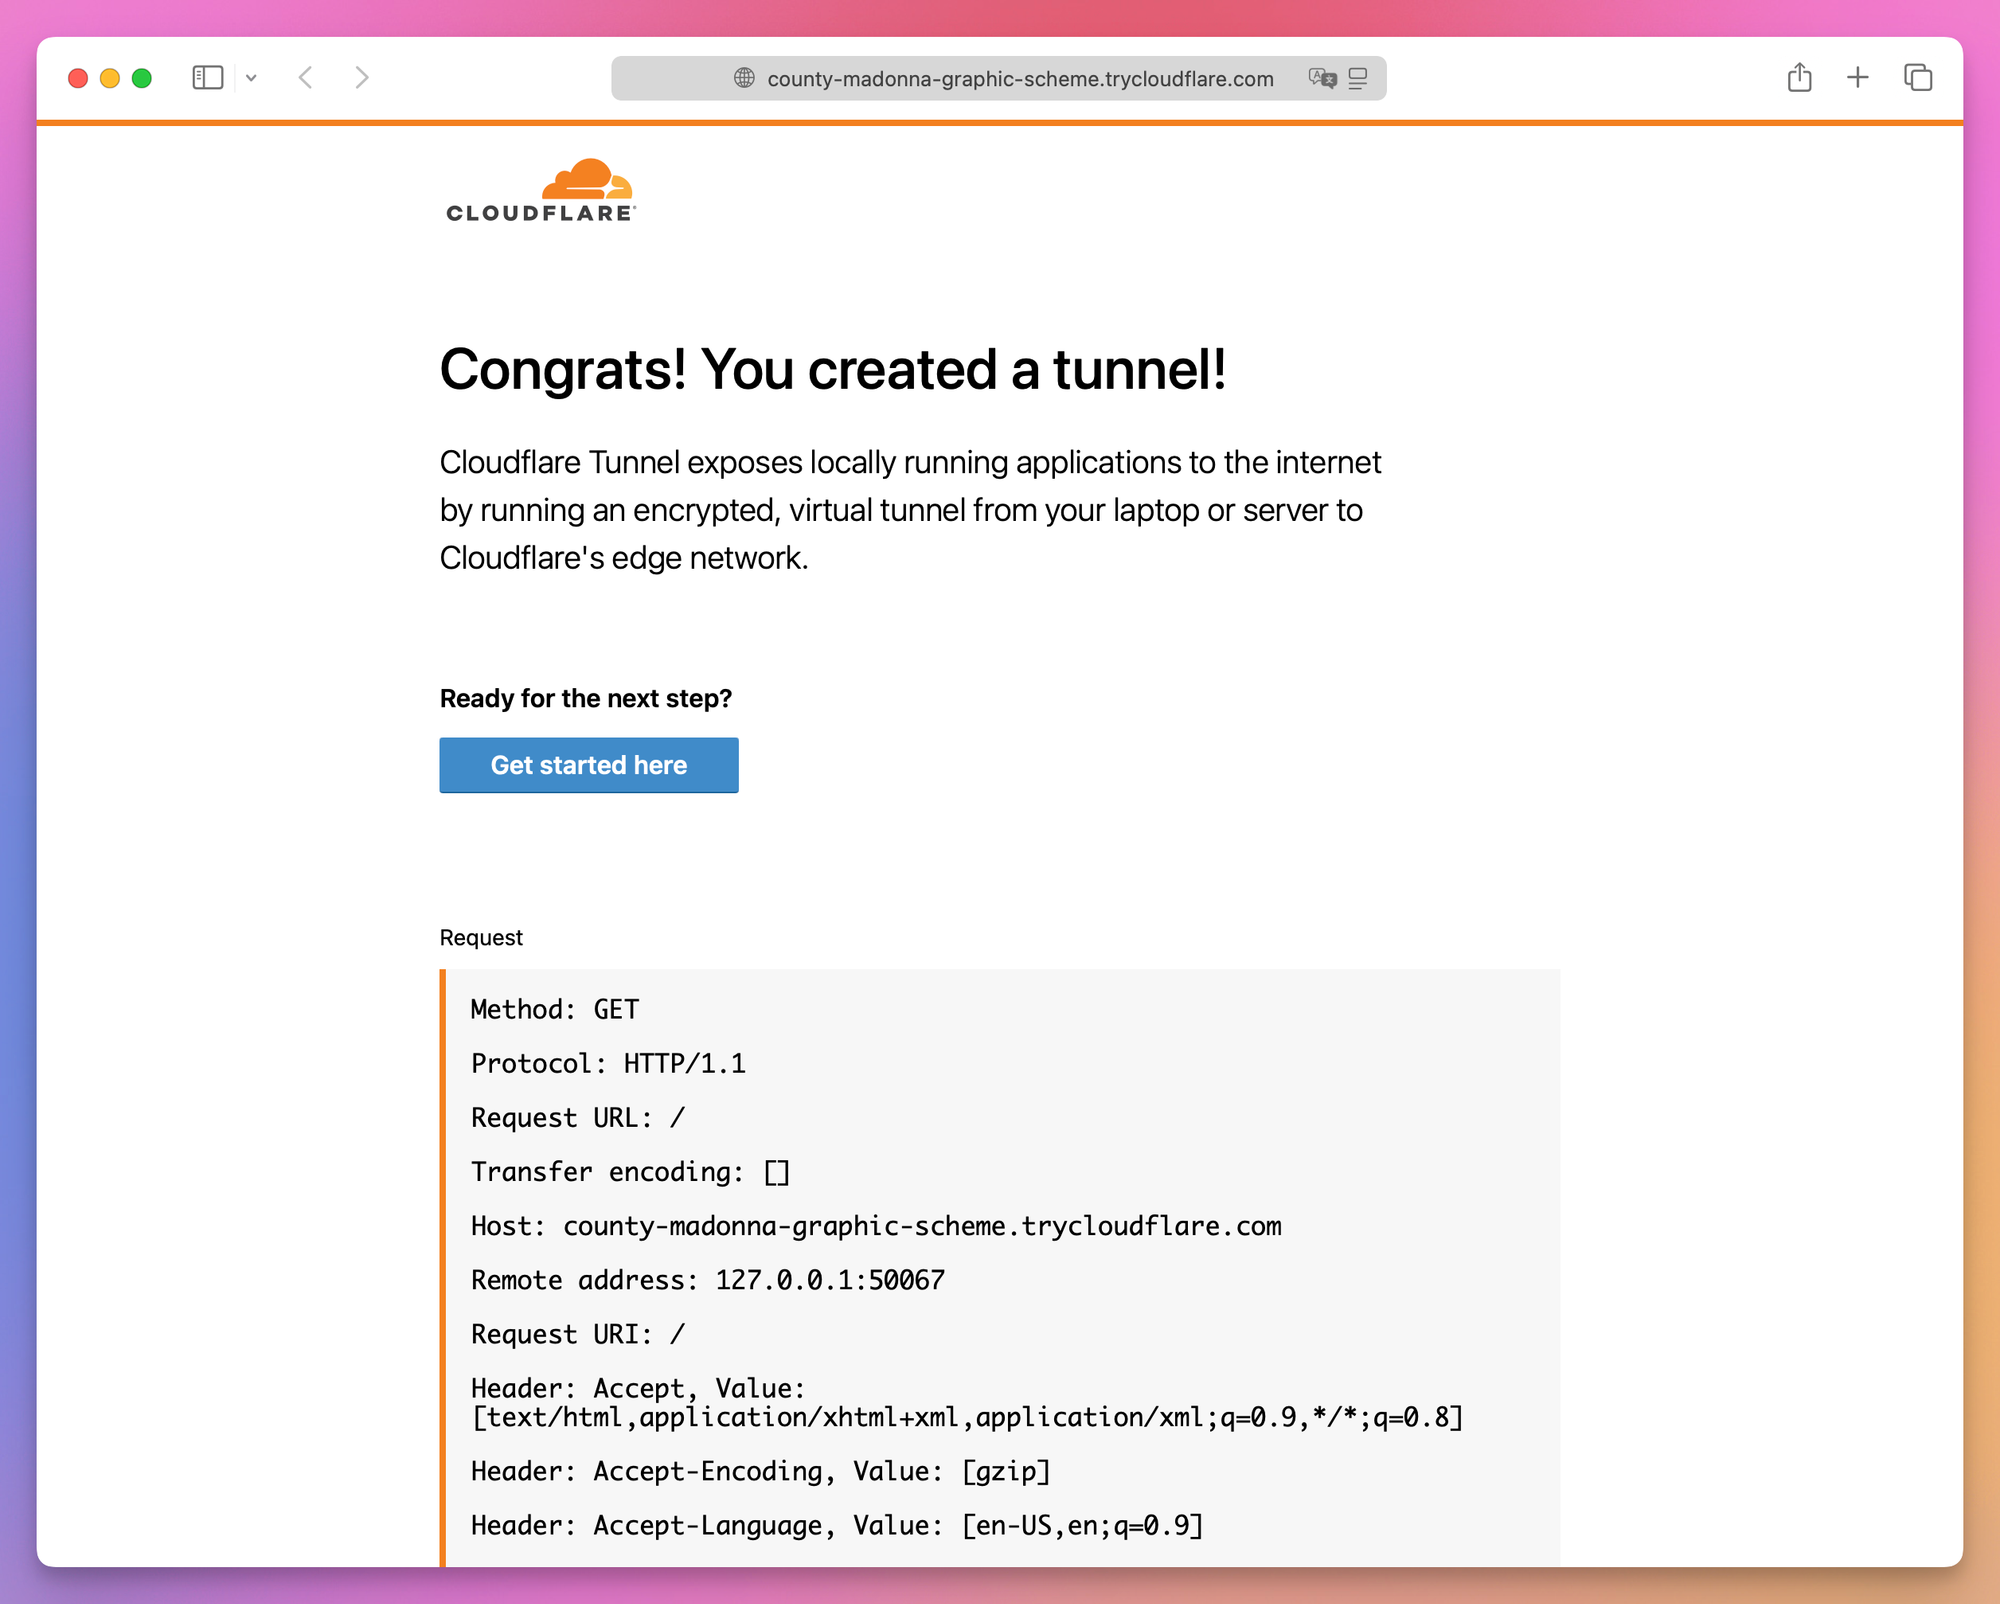
Look at the Remote address line in that dump: 127.0.0.1 with a random port. From the server’s point of view every request comes from cloudflared on the same machine, which is why we’ll need a header to find the visitor’s real address later.
Now the real thing. Start any local server. I’ll use a Node.js one that answers with JSON, because it will help us look at requests later. Save this as server.js:
import { createServer } from 'node:http'

const server = createServer((req, res) => {
  console.log(`${req.method} ${req.url}`)
  res.setHeader('Content-Type', 'application/json')
  res.end(JSON.stringify({ path: req.url, headers: req.headers }, null, 2))
})

server.listen(8000, () => {
  console.log('Listening on http://localhost:8000')
})
Run it with node server.js. In another terminal, open the tunnel:
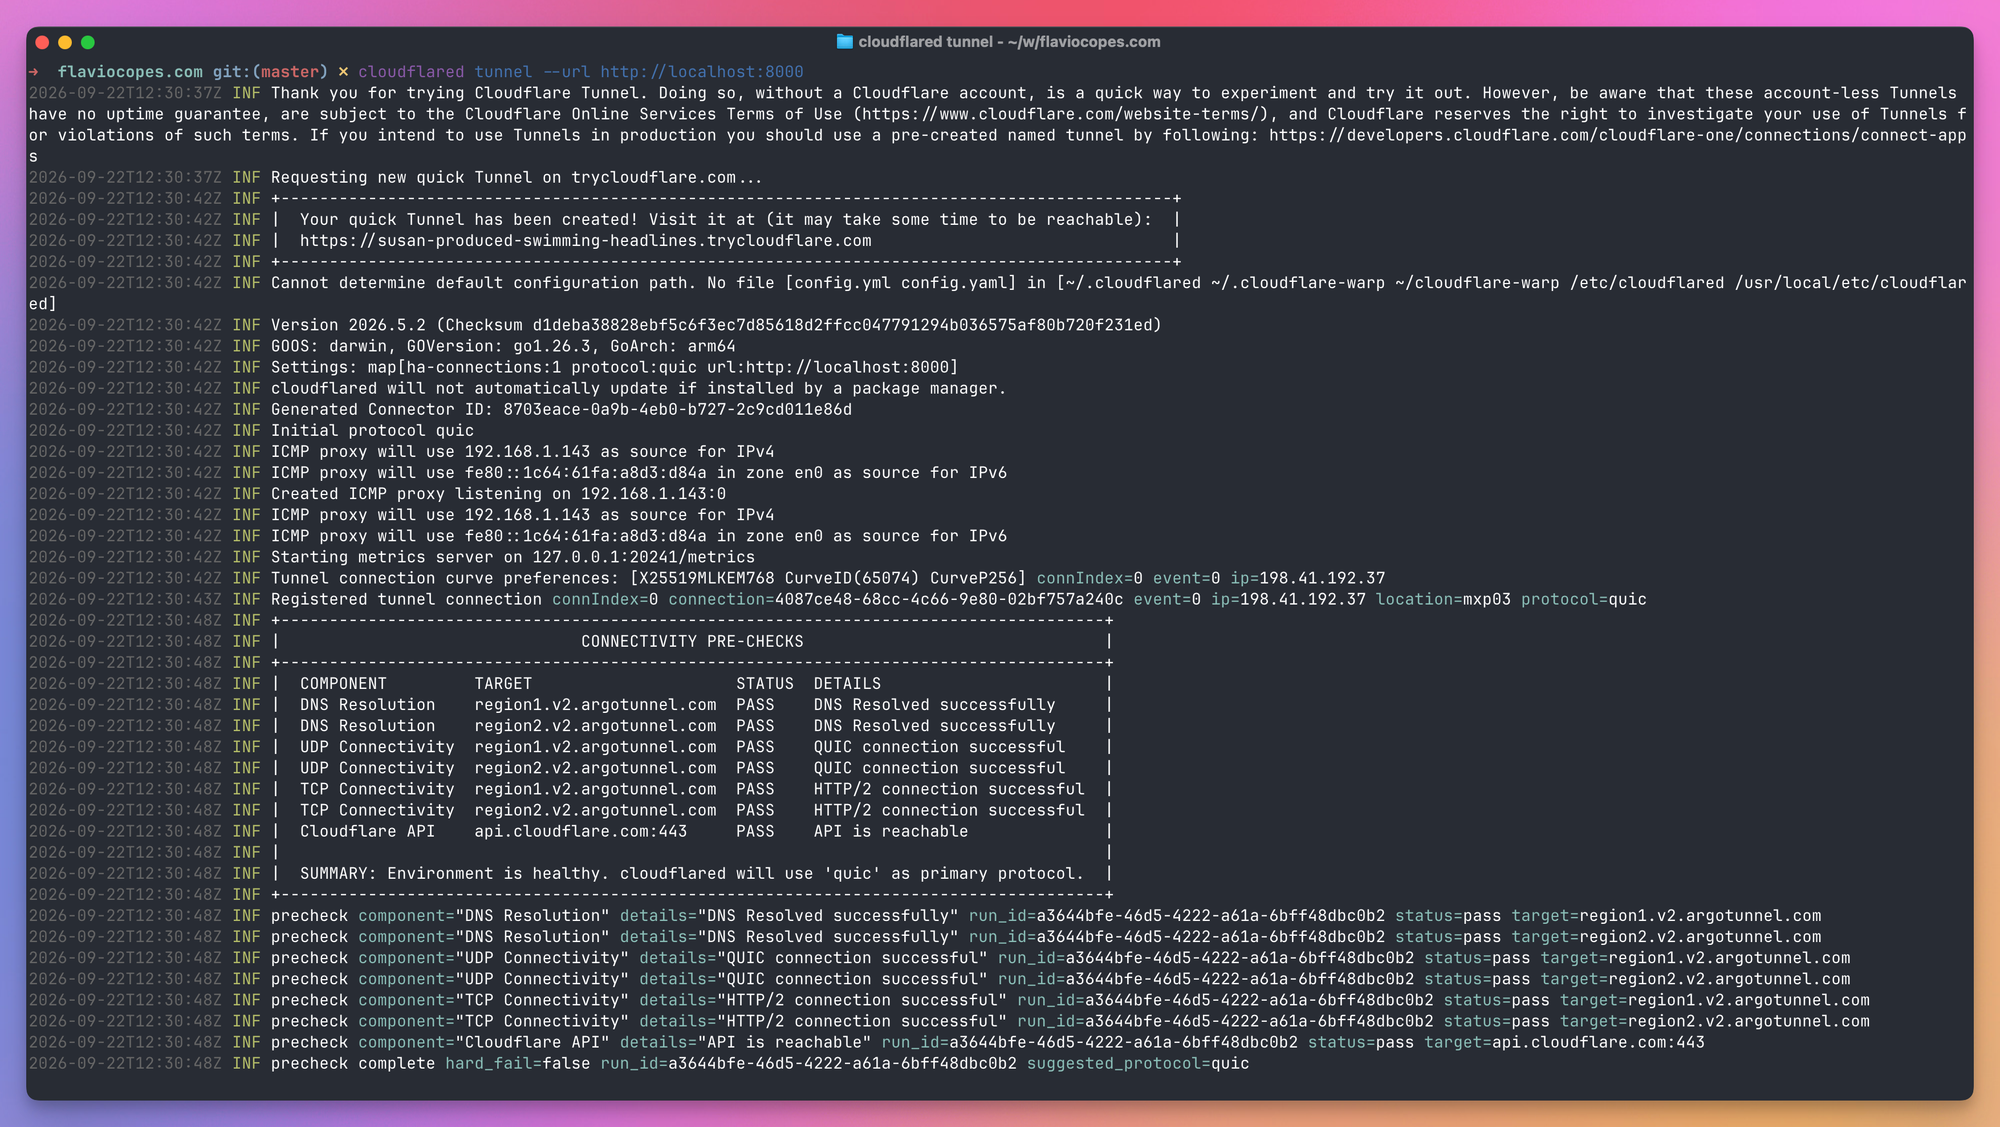
cloudflared tunnel --url http://localhost:8000Here is what it printed for me, trimmed a little:
INF Thank you for trying Cloudflare Tunnel. Doing so, without a Cloudflare account, is a quick way to experiment and try it out. However, be aware that these account-less Tunnels have no uptime guarantee, are subject to the Cloudflare Online Services Terms of Use (https://www.cloudflare.com/website-terms/), and Cloudflare reserves the right to investigate your use of Tunnels for violations of such terms. If you intend to use Tunnels in production you should use a pre-created named tunnel by following: https://developers.cloudflare.com/cloudflare-one/connections/connect-apps
INF Requesting new quick Tunnel on trycloudflare.com...
INF +--------------------------------------------------------------------------------------------+
INF |  Your quick Tunnel has been created! Visit it at (it may take some time to be reachable):  |
INF |  https://kingston-inside-best-graphic.trycloudflare.com                                    |
INF +--------------------------------------------------------------------------------------------+
INF Cannot determine default configuration path. No file [config.yml config.yaml] in [~/.cloudflared ~/.cloudflare-warp ~/cloudflare-warp /etc/cloudflared /usr/local/etc/cloudflared]
INF Version 2026.9.1 (Checksum 9a0b19f67dc7a3011bc6b972c7ce06a5fcea8784ac6bd599ffa382ea4aeb5a6e)
INF GOOS: darwin, GOVersion: go1.26.2, GoArch: arm64
INF Settings: map[ha-connections:1 protocol:quic url:http://localhost:8000]
INF cloudflared will not automatically update when run from the shell. To enable auto-updates, run cloudflared as a service: https://developers.cloudflare.com/cloudflare-one/connections/connect-apps/configure-tunnels/local-management/as-a-service/
INF Generated Connector ID: d88651b0-93ae-4c1a-adc2-648151c2dc32
INF Initial protocol quic
INF Starting metrics server on 127.0.0.1:20241/metrics
INF Registered tunnel connection connIndex=0 connection=ae6d4352-0fe7-43c6-aa96-e997327bfb7a event=0 ip=198.41.192.7 location=mxp03 protocol=quic
Let’s read it top to bottom.
The first paragraph is the deal: no uptime guarantee, Cloudflare’s terms apply, and it’s not meant for production, which is fine for what we’re doing.
Then the URL, in a box: four random words plus .trycloudflare.com, yours until you stop the process.
The line about config.yml is harmless. cloudflared looked for a configuration file and found none, which is what we want. The docs say quick tunnels don’t work if you have a config.yml in ~/.cloudflared, which you would have if you ever set up a named tunnel on that machine. Rename it temporarily if you hit that.
Settings shows one connection (ha-connections:1) over QUIC to the origin you passed.
The auto-update line explains when cloudflared updates itself. It can update once a day and restart, but not when it’s running in a terminal, and not when a package manager installed it. In a terminal, from Homebrew, it stays on the version you have. We’ll come back to this in the scripts section, because a script changes both conditions.
Connector ID identifies this running instance. Cloudflare later sends it back to your app in a header.
Registered tunnel connection, on the last line, means your machine is now connected to a Cloudflare data center. location=mxp03 is Milan, the closest one to me. When I ran it again later I got fco01, Rome. cloudflared picks a nearby location each time.
This is the same command in my terminal, from the Homebrew install on this Mac, a few releases behind. In a terminal you also get a connectivity pre-check table after the registration line, with every DNS, QUIC and HTTP/2 check and its result. When a tunnel refuses to connect, that table is the first place to look.
Now open the URL in a browser, or:
curl https://kingston-inside-best-graphic.trycloudflare.com/helloThe node server.js terminal logs GET /hello, and curl prints the JSON.
If curl says it can’t resolve the host, remember the box said “it may take some time to be reachable”. The DNS record can show up half a minute after the URL, and the scripts section below explains how to deal with that.
How it works
cloudflared never listens for incoming connections. It opens an outbound QUIC connection to the nearest Cloudflare data center and keeps it open. Because you started it without an account, Cloudflare treats it as a quick tunnel: a Worker generates the random hostname, and a DNS record under trycloudflare.com is created pointing at your tunnel. Cloudflare wrote up the internals in the 2021 launch post.
From then on the flow is:
flowchart TB
  V["Visitor's browser"] -->|HTTPS| E["Cloudflare edge"]
  E -->|down the tunnel| C["cloudflared on your machine"]
  C -->|plain HTTP| L["your server on localhost:8000"]
  C -.->|outbound connection, opened first| E
The visitor’s TLS connection terminates at Cloudflare. Cloudflare forwards the request over the encrypted tunnel to cloudflared, which makes a normal HTTP request to localhost:8000. The response goes back the same way.
Your router and firewall never see an inbound connection, so there is nothing to configure and nothing for a port scanner to find. The only thing exposed is the one origin you passed with --url, not the rest of your machine.
Cloudflare also sits in the middle of the plaintext: it terminates the visitor’s TLS, so it can read the traffic. Every Cloudflare-proxied site works this way, and it’s the main difference from Tailscale Funnel, where the relay only forwards encrypted bytes.
When you stop cloudflared, the tunnel disconnects. According to that launch post, a cleanup job deletes tunnels that have been disconnected for more than five minutes, along with their DNS records. In between, a visitor gets Cloudflare’s error 1033 page with a 530 status: “The host is configured as a Cloudflare Tunnel, and Cloudflare is currently unable to resolve it”. After cleanup the hostname stops resolving at all.
If your local server is down but cloudflared is up, visitors get a 502 Bad gateway page from Cloudflare instead, and your cloudflared terminal logs the reason:
ERR Request failed error="Unable to reach the origin service. The service may be down or it may not be responding to traffic from cloudflared: dial tcp [::1]:8000: connect: connection refused"Both pages are Cloudflare’s, with its logo and a Ray ID, so whoever you shared the link with will know the problem is on your end.
What your app sees
Let’s use that JSON server to look at a request that came through the tunnel. Here is the response to curl https://kingston-inside-best-graphic.trycloudflare.com/hello, with my own IP swapped for a made-up one:
{
  "path": "/hello",
  "headers": {
    "host": "kingston-inside-best-graphic.trycloudflare.com",
    "user-agent": "curl/8.7.1",
    "accept": "*/*",
    "accept-encoding": "gzip",
    "cdn-loop": "cloudflare; loops=1; subreqs=1",
    "cf-connecting-ip": "203.0.113.42",
    "cf-ew-via": "15",
    "cf-ipcountry": "IT",
    "cf-ray": "a3f0efa5fa26ee4f-MXP",
    "cf-visitor": "{\"scheme\":\"https\"}",
    "cf-warp-tag-id": "d88651b0-93ae-4c1a-adc2-648151c2dc32",
    "cf-worker": "trycloudflare.com",
    "connection": "keep-alive",
    "x-forwarded-for": "203.0.113.42",
    "x-forwarded-proto": "https"
  }
}
The ones you’ll care about:
hostis the tunnel hostname, notlocalhost:8000. Some servers refuse requests for hostnames they don’t know. We’ll fix that in a minute.cf-connecting-ipis the visitor’s real IP address.req.socket.remoteAddressis useless here, it’s alwayscloudflaredconnecting from the loopback address. Read this header instead.cf-ipcountryis the visitor’s country, resolved by Cloudflare. Free geolocation.cf-rayis Cloudflare’s request ID, with the data center code at the end. Handy when you’re debugging.x-forwarded-protoandcf-visitortell you the visitor used HTTPS, even though your server received plain HTTP.cf-warp-tag-idis the connector ID we saw in the log.cf-worker: trycloudflare.comtells you the request passed through the quick tunnel Worker.
On the way back, Cloudflare adds headers of its own. Here is curl -I on the same URL:
HTTP/2 200
date: Tue, 22 Sep 2026 11:23:11 GMT
content-type: application/json
cf-ray: a3f0efa6ad5755db-MXP
cf-cache-status: DYNAMIC
server: cloudflare
x-robots-tag: none
server: cloudflare is standard, and cf-cache-status: DYNAMIC means Cloudflare didn’t cache the response.
x-robots-tag: none is worth a second look. Cloudflare added it to every response I looked at, and my server never set it. It tells search engines not to index the page and not to follow its links. Your half-finished project won’t end up in Google.
The tunnel also answers on plain http://, with the same content and no redirect to HTTPS, so make sure the link you share starts with https://.
Share a dev server
This is what most people want: you run npm run dev and you want to show the result to someone. Let’s try it with an Astro site. Astro runs on Vite, and Vite has a check that trips up almost every modern dev server behind a tunnel.
cloudflared tunnel --url http://localhost:4321Open the URL and you get this:
Blocked request. This host ("smart-geo-did-crimes.trycloudflare.com") is not allowed.
To allow this host, add "smart-geo-did-crimes.trycloudflare.com" to `server.allowedHosts` in vite.config.js.
Vite only answers requests whose Host header is localhost, a .localhost name, an IP address, or something you allowed. It’s a defence against DNS rebinding attacks, where a malicious page in your browser tricks it into fetching your dev server’s source code. Astro has the same option since 5.4, Next.js has a similar one called allowedDevOrigins.
The first fix is in the config. In astro.config.mjs:
import { defineConfig } from 'astro/config'

export default defineConfig({
  server: {
    allowedHosts: ['.trycloudflare.com'],
  },
})
In a plain Vite project it’s the same server.allowedHosts key in vite.config.js. The leading dot allows every subdomain, so you don’t edit the config every time the random name changes. Vite’s docs warn you to only allow domains whose DNS you control, since anyone who controls the DNS of an allowed name could point it at 127.0.0.1. Nobody can point a trycloudflare.com name at your loopback address, Cloudflare owns that zone and the records only ever point at Cloudflare. I’m comfortable with it in a dev config.
For a Next.js project it’s:
// next.config.js
module.exports = {
  allowedDevOrigins: ['*.trycloudflare.com'],
}
The second fix is in the tunnel. cloudflared can replace the Host header before it hands the request to your server:
cloudflared tunnel --url http://localhost:4321 --http-host-header localhost:4321Now Vite sees Host: localhost:4321, exactly what it would see from your own browser, and it answers. You don’t change any config, and the flag works with any server that checks the hostname. I tested it against my Astro dev server and got the homepage back, title and all.
The downside is that your app no longer knows its public hostname. If it builds absolute URLs from Host, they’ll say localhost. For a quick demo that rarely matters.
What about hot reload? Vite’s HMR client connects back to the page’s host over a WebSocket, and WebSockets go through quick tunnels. I tested a small WebSocket server through one: messages arrived as they were sent, about a quarter of a second behind the local run. HMR uses the same kind of connection, though I didn’t test hot reload itself.
Receive webhooks
A payment provider fires a webhook when something happens, like a purchase or a refund. In production it hits your server, but in development your handler is on localhost, where Paddle can’t reach it. This is the job I used to do with ngrok.
Save this as webhook.js:
import { createServer } from 'node:http'

createServer((req, res) => {
  let body = ''
  req.on('data', (chunk) => (body += chunk))
  req.on('end', () => {
    console.log(`${req.method} ${req.url}`)
    console.log(`from ${req.headers['cf-connecting-ip']} (${req.headers['cf-ipcountry']})`)
    console.log(body)
    res.writeHead(200).end('ok')
  })
}).listen(8000, () => console.log('Waiting for webhooks on http://localhost:8000'))
Run it, open a tunnel to port 8000, and paste https://<your-tunnel>.trycloudflare.com/webhooks into the provider’s dashboard as the webhook URL. In Creem that’s the Developers tab of the dashboard, the same page that holds your webhook secret. Paddle has it under Developer Tools, then Notifications; Stripe calls it Developers, then Webhooks, and a GitHub repository has it in Settings. Full disclosure: Creem sponsors this site.
Before touching a dashboard, test it yourself. This is the shape of a Creem checkout.completed event, cut down to the fields that matter:
curl -X POST https://kingston-inside-best-graphic.trycloudflare.com/webhooks \
  -H 'Content-Type: application/json' \
  -d '{"eventType":"checkout.completed","object":{"order":{"id":"ord_4aDwWXjMLpes4Kj4XqNnUA","amount":1000,"currency":"EUR","status":"paid"}}}'
The receiver prints:
POST /webhooks
from 203.0.113.42 (IT)
{"eventType":"checkout.completed","object":{"order":{"id":"ord_4aDwWXjMLpes4Kj4XqNnUA","amount":1000,"currency":"EUR","status":"paid"}}}
Then trigger a real event in the provider’s test mode and watch it arrive. In Creem, test mode is a toggle at the bottom of the dashboard sidebar, and it has its own API keys, its own API host (test-api.creem.io) and its own webhook URL, so flip the toggle before you register the tunnel. In Paddle the sandbox is a separate account, and its webhook simulator can fire signed test events at your destination without a real purchase.
Anyone who knows the URL can POST to it, and the URL is guessable only in theory but public in practice. Verify the webhook signature in your handler, the same way you must in production. Creem sends a creem-signature header, an HMAC-SHA256 of the raw request body keyed with your webhook secret, and its creem npm package has a verifyWebhookSignature helper that checks it for you. Paddle, Stripe and GitHub sign their payloads too. Do not skip this “because it’s just dev”.
Creem also retries. If your tunnel was down when the event fired, because you closed the laptop or restarted cloudflared, Creem tries again after 30 seconds, then 5 minutes, 30 minutes and 6 hours, five attempts in total, and it can also resend an event by hand from the dashboard. The same event can therefore reach your handler twice, so make it idempotent. You need that in production anyway, and the tunnel is a cheap place to test it.
You don’t always need a tunnel for this. Creem and Stripe both ship a CLI that forwards test events straight to localhost (creem listen --forward-to http://localhost:8000/webhooks, stripe listen), with no public URL involved. If you only ever need one provider’s events, that’s less to set up. The tunnel wins when you want the exact same URL path you’ll use in production, when the provider has no forwarder of its own (Paddle’s docs send you to a tunnel), or when several services need to reach the same handler at once. Creem’s own docs list a tunnel as the alternative to the CLI.
The URL changes every time you restart cloudflared, so every restart means pasting a new URL into the dashboard. Once you’re doing that daily, a named tunnel on your own domain starts to make sense, and the end of this guide covers it.
Test on your phone
Open the tunnel URL on your phone, over mobile data, not Wi-Fi. You are now testing your dev server from a real network, on a real device, on a real HTTPS origin.
The HTTPS part is the reason to do this instead of opening your laptop’s LAN address. Browsers only enable some APIs on a secure context: the camera and microphone, geolocation, service workers, Web Bluetooth, the clipboard API, push notifications. Your phone treats http://192.168.1.20:4321 as insecure and keeps those APIs off, while https://something.trycloudflare.com gets all of them.
Someone in the Hacker News thread had exactly this: they needed HTTPS to test Web Bluetooth in a small app, and their coding agent suggested a quick tunnel on its own.
You can also run the URL through PageSpeed Insights or WebPageTest and get a report on a page that only exists on your laptop. Remember every request takes an extra hop through Cloudflare, so the timing numbers come out worse than in production, while the audit findings still apply.
Expose a local LLM
You run Ollama on a machine with a good GPU. You want to call it from another machine, or from a hosted tool that only accepts HTTPS URLs. Ollama listens on port 11434:
cloudflared tunnel --url http://localhost:11434Then from anywhere:
curl https://<your-tunnel>.trycloudflare.com/api/tagsI got a 403 back. Same problem as Vite: Ollama refuses requests whose Host header isn’t a local address. You can confirm it’s the header and not the tunnel by faking it locally:
curl -H 'Host: whatever.trycloudflare.com' localhost:11434/api/tagsAlso 403. So we use the same fix:
cloudflared tunnel --url http://localhost:11434 --http-host-header localhost:11434Now /api/tags lists your models, and generation works:
curl https://<your-tunnel>.trycloudflare.com/api/generate \
-d '{"model":"gemma3:1b","prompt":"Say hello in five words.","stream":false}'{"model":"gemma3:1b","created_at":"2026-09-22T11:27:39.354483Z","response":"Hi there, how can I help you today?","done":true,...}Streaming works too: with "stream": true the tokens arrived one chunk at a time, at the pace Ollama generated them. A lot of streaming breaks through a quick tunnel, and the streaming section below explains why this one doesn’t.
Be careful here, because Ollama has no authentication. Whoever has the URL can run your models and burn your GPU, and can pull models onto your disk through the API. Keep the tunnel up only while you use it, and don’t post the URL anywhere. If you need it up for longer, start the tunnel with --allowed-mail so only the people you name get a PIN. A small authenticating proxy works too, and a named tunnel with Cloudflare Access is the one that stays up.
Share a folder of files
Sometimes you don’t have a server, you have a directory. Any static file server will do:
cd ~/Downloads/photos
python3 -m http.server 8000
or, with Node.js:
npx serve -l 8000 ~/Downloads/photosThen tunnel port 8000. The person on the other end gets a directory listing and downloads what they need, straight from your disk. I pushed a 105 MB upload through a quick tunnel in the other direction and it arrived in full, so file sizes in that range are not a problem.
Use it from scripts
Everything cloudflared prints goes to stderr, and the URL sits inside that box of pipes. If you want a script to grab it, you have to parse the logs.
In bash or zsh:
cloudflared tunnel --url http://localhost:8000 2> tunnel.log &

until grep -q 'https://.*trycloudflare.com' tunnel.log; do sleep 0.5; done

TUNNEL_URL=$(grep -o 'https://[a-z0-9-]*\.trycloudflare\.com' tunnel.log | head -1)
echo "$TUNNEL_URL"
Use the loop rather than piping cloudflared into grep -m1, because grep exits after the first match, the pipe closes, and cloudflared dies with it.
I prefer a small Node.js module I can import. Save it as tunnel.mjs:
import { spawn } from 'node:child_process'
import { Resolver } from 'node:dns/promises'
import { setTimeout as sleep } from 'node:timers/promises'

const resolver = new Resolver()
resolver.setServers(['1.1.1.1', '1.0.0.1'])

async function waitForDns(hostname) {
  for (let attempt = 0; attempt < 120; attempt++) {
    try {
      await resolver.resolve4(hostname)
      return
    } catch {
      await sleep(1000)
    }
  }
  throw new Error(`${hostname} never became resolvable`)
}

export async function quickTunnel(target) {
  const child = spawn('cloudflared', ['tunnel', '--url', target, '--no-autoupdate'])

  const url = await new Promise((resolve, reject) => {
    child.stderr.on('data', (chunk) => {
      const match = chunk.toString().match(/https:\/\/[a-z0-9-]+\.trycloudflare\.com/)
      if (match) resolve(match[0])
    })
    child.on('exit', (code) => reject(new Error(`cloudflared exited with code ${code}`)))
  })

  await waitForDns(new URL(url).hostname)

  return { url, stop: () => child.kill() }
}
And use it like this:
import { quickTunnel } from './tunnel.mjs'

const { url, stop } = await quickTunnel('http://localhost:8000')
console.log(`Public URL: ${url}`)

const res = await fetch(`${url}/hello`)
console.log(`First request through the tunnel: ${res.status}`)

stop()
Public URL: https://aim-scuba-bloom-clear.trycloudflare.com
First request through the tunnel: 200The --no-autoupdate flag is there because a script changes the rules we saw earlier. With its output piped, cloudflared no longer counts as “running from the shell”, and if the binary came from the releases page rather than a package manager it will update itself once a day and restart. A restart means a new random URL in the middle of whatever your script was doing, and the flag prevents it.
waitForDns handles the DNS race, which needs a section of its own.
The DNS race
cloudflared prints the URL as soon as Cloudflare assigns the name. The DNS record for that name is created separately, and it takes a moment to show up. I timed it over a few runs: the name became resolvable anywhere from 3 to 33 seconds after the URL appeared on screen.
If you, or your script, look the name up before the record exists, your resolver gets a “no such name” answer. Many resolvers cache that negative answer. The trycloudflare.com zone allows negative caching for 30 minutes. So an early lookup can leave your machine insisting the tunnel doesn’t exist long after it does, while everyone else reaches it fine. Someone in the Hacker News thread reported waiting 30 minutes for a hostname to resolve, and this is the most likely reason.
The first version of my script did fetch(url) right after reading the URL. It failed with ENOTFOUND and kept failing for half a minute, even though dig @1.1.1.1 already returned the record. The version above avoids the trap: it asks Cloudflare’s resolver directly, in a loop, and only touches the system resolver once the record exists.
If you’re doing it by hand: wait for Registered tunnel connection in the log, count to ten, then open the URL. If your Mac gets stuck anyway, flush its DNS cache:
sudo dscacheutil -flushcache; sudo killall -HUP mDNSResponderJSON logs, readiness and metrics
--output json switches the log format:
cloudflared tunnel --url http://localhost:8000 --output json{"level":"info","message":"| https://massachusetts-syndicate-effect-principal.trycloudflare.com |","time":"2026-09-22T11:26:24Z"}The new landing page presents this as output for coding agents, but it only changes the log format. The URL is still a string inside a message field, still wrapped in the box characters, so you still need the regex. It does make each line a valid JSON object, which is easier for a program to filter by level.
cloudflared also starts a small local HTTP server, the “metrics server” from the startup log, on 127.0.0.1:20241 (or the next free port up to 20245). Two endpoints are useful:
curl 127.0.0.1:20241/ready{"status":200,"readyConnections":1,"connectorId":"d88651b0-93ae-4c1a-adc2-648151c2dc32"}That’s a proper readiness check for a script: poll it until readyConnections is at least 1. And /metrics is Prometheus-style text with counters like cloudflared_tunnel_total_requests and cloudflared_tunnel_request_errors, if you want to watch traffic without adding logging to your app.
To see every request with headers, run with --loglevel debug. It’s noisy, and it logs headers that may include tokens, so don’t leave it on.
Coding agents
A local coding agent like Cursor or Codex can already open your localhost pages, it’s on the same machine. A tunnel matters when the agent runs somewhere else, in a cloud sandbox, and needs to hit the server on your laptop. Or when you want an external service, a webhook sender, a browser-testing service, to reach the code the agent is working on.
The tunnel.mjs module above is what I’d hand an agent. Or a line in AGENTS.md:
To expose a local port publicly, run `cloudflared tunnel --url http://localhost:<port>`
and read the https://*.trycloudflare.com URL from stderr. Ask before doing this.
Keep that last sentence. Several people in the Hacker News thread worried about agents that can expose your laptop to the internet in one command, with no account to trace it back to. A tunnel exposes only the port you pass, but if that port is a half-built app with no auth in front of a database, the whole internet can now use it, so I want the agent to ask me first.
Streaming: what works and what doesn’t
The docs say quick tunnels don’t support Server-Sent Events. I wanted to know what “don’t support” means in practice, so I measured it.
I gave the JSON server a route that writes one line per second for five seconds. Locally, a client sees a line per second. Through the tunnel, the client saw the headers arrive, then nothing for five seconds, then all five lines at once when the response ended.
That happened whatever I tried: text/event-stream, text/plain, application/x-ndjson, with Cache-Control: no-store, with big chunks, with small chunks. Every GET response was held until it completed.
Then I noticed Ollama’s stream had worked. The difference was the method. When I switched my test route to POST, the chunks came through as they were written, one per second.
So, on 22 September 2026, with cloudflared 2026.9.1, this is the picture:
- GET responses are buffered until the response ends.
EventSource, the browser API for SSE, always uses GET, so SSE arrives all at once at the end. That’s the documented limitation. - POST responses stream as your server writes them. Streaming LLM APIs like Ollama’s
/api/generateand OpenAI-style/v1/chat/completionsare POST, so they work. - WebSockets stream in both directions. Vite HMR, Socket.IO, live dashboards over WebSocket all work.
If your app streams over SSE, and many chat UIs do, it will look frozen through a quick tunnel and then dump everything at once. Switch to a fetch() POST with a readable stream, or use WebSockets, or accept that this particular feature needs a named tunnel.
This is what I observed, not documented behaviour, and it can change on Cloudflare’s side without notice. Test your own stream before you rely on it.
Limits and the rules
From the docs:
- A quick tunnel can have 200 requests in flight at once. The 201st gets a
429. - No SSE, as we just saw in detail.
- No SLA. Cloudflare says it tests new Tunnel features on quick tunnels before they reach its production customers.
- Testing and development only. Not for hosting a production site.
From my own runs:
- One tunnel proxies one origin. Need two ports public? Run two
cloudflaredprocesses, you get two URLs. Ingress rules, the config-file feature that routes paths to different services, are not available without an account. - The URL is random and changes on every start. There is no flag to keep it.
- A 105 MB request body went through. I didn’t look for the ceiling.
- Latency is the visitor’s distance to Cloudflare plus Cloudflare’s distance to you. Mine connected to Milan or Rome, a few milliseconds away. A visitor in Sydney hitting my laptop goes Sydney to a Cloudflare location near Sydney, then across Cloudflare’s network to Milan, then to me.
And the terms: you agree to Cloudflare’s Online Services Terms by running it, and the log says Cloudflare may look at how you use it. Read them if you plan to push anything unusual through. Showing your own projects to a few people is what the tool is for.
Security
A quick tunnel gives you a public URL, and anyone who has it can use it. The four random words make the URL hard to guess, but whoever you send the link to can forward it. If your dev server has an admin page without a password, that page is now on the internet.
A recent cloudflared can put a login in front of that URL. --allowed-mail asks the visitor for an email, sends them a one-time PIN, and only then lets them through. They don’t need a Cloudflare account. The lock ends when you stop the process.
I ran the commands in this guide on a build that didn’t have the flag. Update cloudflared first, then:
cloudflared tunnel --url http://localhost:8000 --allowed-mail [email protected]Share that URL. They type their email, get a PIN, type the PIN, and they’re in.
Repeat --allowed-mail for each extra address, or pass a comma-separated list in quotes. '*@flaviocopes.com' allows every address on that domain. Quote the star so the shell leaves it alone.
cloudflared tunnel --url http://localhost:8000 --allowed-mail '*@flaviocopes.com'To change who can get in, stop cloudflared and start a new tunnel. Cloudflare’s quick tunnels docs cover the flag.
HTTP Basic auth is still useful when you want the password inside the app itself. Here it is in Node.js, around any handler:
import { createServer } from 'node:http'

const USER = 'flavio'
const PASSWORD = 'correct-horse-battery-staple'
const expected = 'Basic ' + Buffer.from(`${USER}:${PASSWORD}`).toString('base64')

createServer((req, res) => {
  if (req.headers.authorization !== expected) {
    res.writeHead(401, { 'WWW-Authenticate': 'Basic realm="demo"' })
    return res.end('Login required\n')
  }
  res.end(`Hello ${USER}, this is the demo.\n`)
}).listen(8000, () => console.log('Listening on http://localhost:8000'))
The browser shows a login prompt. Through the tunnel, a request without credentials gets 401, one with -u flavio:correct-horse-battery-staple gets the page. The credentials travel over HTTPS, so this is fine for a demo.
Other habits worth having:
- Tunnel the one port you mean to share. Never tunnel a reverse proxy that fronts everything on your machine.
- Stop
cloudflaredwhen you’re done. Every minute it runs is a minute your laptop is reachable. - Don’t tunnel anything with real customer data. It’s a laptop on a home connection with a random URL.
- Remember Cloudflare sees the traffic in plaintext. That’s fine for most dev work and a dealbreaker for some of it.
The founder of ngrok showed up in the Hacker News thread to say his company removed anonymous tunnels years ago because they were the largest source of abuse on the platform. Cloudflare has kept its tunnels anonymous since 2021. Its answer to abuse, as far as we can see from outside, is the first log line: terms apply and they may look at what you do. Cloudflare could change that at any time, so I wouldn’t build a workflow that breaks if quick tunnels go away.
When you outgrow it
The moment you find yourself pasting a new webhook URL into a dashboard every morning, or wishing the tunnel survived a reboot, you’ve outgrown quick tunnels. The next step is a named tunnel, and it needs a free Cloudflare account and a domain on Cloudflare DNS.
What you get for that:
- a stable hostname you choose, like
dev.flaviocopes.com - more than one service behind one tunnel, routed by hostname or path
- Cloudflare Access in front of it, so people log in with Google, GitHub or an email PIN on a hostname that stays
cloudflaredrunning as a system service that reconnects on its own- no 200 in-flight limit and working SSE
My complete guide to Cloudflare Tunnel walks the whole setup, dashboard and CLI, with Access in front and SSH through it. The free Cloudflare course on this site has a module on it too. A named tunnel is also how you host a real site from a home machine without opening ports, which I cover in the where to host guide.
Alternatives, if Cloudflare isn’t your thing:
- ngrok is the original. It needs an account. The free plan, checked on 22 September 2026, gives you three endpoints, 1 GB of transfer, 20k requests a month and one static dev domain, and shows your visitors a warning page before your site. Paid plans remove the page and add custom domains.
- Tailscale Funnel exposes a service from a machine in your tailnet to the internet, under your
ts.netname. The relay can’t read your traffic, which is its main argument over Cloudflare. It needs Tailscale installed, works on ports 443, 8443 and 10000 only, and is still in beta. - Pinggy needs no install at all.
ssh -p 443 -R0:localhost:8000 free.pinggy.iogives you a URL from any machine with an SSH client. Free tunnels last 60 minutes, then you get a new URL. - localtunnel is
npx localtunnel --port 8000, open source, no account. Its public servers are run by volunteers and go down from time to time. - Your own server with
ssh -R. Any VPS you already have can forward a port back to your laptop, and Caddy on the VPS gives you TLS. It’s a stable URL you control, with no third party in the middle. The free SSH course covers remote port forwarding.
For webhooks specifically, there’s one more option: don’t tunnel at all. Run the code on a small VM with a public URL, like exe.dev, and point the sandbox webhooks there. It keeps working while your laptop sleeps.
How I would use it
I’ve used ngrok on my Mac to receive Paddle webhooks while working on the purchase flow of this site. That flow runs as a Cloudflare Pages Function, and locally it runs under wrangler pages dev. A quick tunnel does that job with no account, no warning page for Paddle to trip on, and nothing installed beyond cloudflared, so that’s where I’d swap it in first.
I’d also use it to check the blog on my phone. The dev server is Astro, so cloudflared tunnel --url http://localhost:3000 --http-host-header localhost:3000 puts the site on my phone over mobile data, and I could check a layout change on a real device before pushing it, more often than I do today.
And for drafts. My scheduled posts only exist on my dev server until they publish, so a tunnel is a quick way to send one to someone for feedback and close it afterwards. I’d add --allowed-mail with their address so the random URL alone isn’t enough.
Where it doesn’t fit for me:
- Anything that stays up. My Plausible analytics runs on a DigitalOcean droplet, and it belongs there, not on my laptop behind a tunnel that dies when I close the lid.
- Anything that wants a stable origin in an allowlist. LiveKit’s embed widget, which I tried on this site locally, checks the exact origin of the page that loads it. A URL that changes on every restart means editing the allowlist every time. A named tunnel on
flaviocopes.comsolves that, and a quick tunnel can’t. - Anything built on SSE, because of the buffering we measured.
For everything else that lives on localhost for an afternoon, it’s the command I’d reach for first.
Want me to talk about your product? You can sponsor this site.
Related posts about cloudflare: