A deep dive into DeepSec
By Flavio Copes
DeepSec is Vercel's open-source AI security scanner. How it works, how to keep the first run cheap, and what 504 findings on my own repo turned into.
DeepSec is an open-source security scanner from Vercel.
It works in two stages. A fast pattern scanner picks out the code that deserves a look. Then a coding agent, Codex or Claude Code, reads that code, follows the data across files, checks for existing defenses, and writes a finding.
Pull request scanners only see new code. DeepSec can do that too, but it was built for the bigger job: going through a whole repository, including the authentication code written three years ago and the webhook nobody has touched since launch. Most existing code has never been reviewed by a model this good.
I ran it on the entire flaviocopes.com repository. It investigated 729 files and reported 504 potential findings. That sounds terrible. By the end of the post you’ll see how it turned into a short list of things to fix, and how I used Codex to get there.
Before that, we’ll install DeepSec, put a cost limit on the first run, read the files it generates, revalidate and triage the findings, add project context, and run it on branches and in CI.
DeepSec is not a magic command. It can miss bugs, some findings will be wrong, and the AI stage costs real money. What I like is that it treats security review as a repeatable process with saved state, instead of a one-off prompt to a coding agent.
What DeepSec does
A traditional static scanner searches code for known patterns.
For example, it can find a SQL query built from a string, a route without an obvious authentication wrapper, or a call that sends user input to another server.
This is fast and predictable. It also lacks context.
A pattern can tell us that a route reads a user-supplied URL. It cannot always tell us whether another function validates that URL, whether the route is public, or whether the request can reach a private network.
A coding agent can investigate those questions.
DeepSec puts both approaches in one pipeline:
flowchart LR
  A[Repository] --> B[Inventory]
  B --> C[Pattern scan]
  C --> D[AI investigation]
  D --> E[Revalidation]
  E --> F[Report]
The pattern scan narrows the search. The agent does the slower reasoning.
A second agent pass can revalidate the result. This step tries to remove false positives and can adjust the severity.
DeepSec stores every stage inside a .deepsec/ directory. A later run can continue from the saved state instead of starting again.
This is the main difference from giving a coding agent one prompt such as:
Review this repository for security problems.That prompt can be useful. But it does not give us coverage checks, incremental state, resumable work, structured findings, revalidation, or a stable report format.
DeepSec is the harness around the security review.
What DeepSec is not
Before we run anything, let’s set the boundary.
DeepSec does not prove that a repository is secure.
It does not replace:
- a threat model written by people who understand the product
- dependency and secret scanning
- security tests
- runtime monitoring
- manual review of sensitive code
- penetration testing for high-risk systems
It also does not keep all processing on your machine.
The repository lives on your machine during a local run, but the selected model provider receives relevant code and prompts. Review the provider and gateway data policies before scanning private code.
Finally, DeepSec is designed for trusted repositories.
Treat it like a coding agent with access to the project. Do not point a local run at an untrusted pull request and assume that code cannot touch your machine.
We’ll return to this problem in the CI section.
What you need
DeepSec creates its own Node.js workspace inside .deepsec/.
The parent project does not need to use JavaScript. DeepSec can review TypeScript, Go, Python, Lua, Terraform, and other text-based codebases.
You need:
- Node.js 22 or newer
- npm, pnpm, or Yarn
- a Git repository
- access to a supported coding-agent model
- permission to scan the code
You can pay for model calls through Vercel AI Gateway, use your own OpenAI or Anthropic API key, or use an existing local Codex or Claude login.
DeepSec itself is open source under the Apache 2.0 license. Model calls and optional Vercel Sandbox runs are separate costs.
Preview the setup first
DeepSec can explain what setup would do without changing the repository:
npx deepsec init --plan --output jsonThis is a good first command in automation, or when you want to check the plan before running it.
You can also create only the workspace files:
npx deepsec init --scaffold-onlyThis creates the .deepsec/ skeleton and stops.
It does not install packages, sign in, choose a model, scan the repository, or start paid processing.
My advice is to use --scaffold-only on an important repository. Review the new directory, commit the useful configuration files, and then continue.
For a smaller project, the normal interactive setup is more convenient.
Run the first scan
Go to the root of the repository and run:
npx deepsec initDeepSec asks which model to use.
The list includes benchmark results and relative costs. These choices change as models change, so read the current list instead of copying a model name from an old tutorial.
DeepSec then asks how the model calls should authenticate.
The default path uses Vercel AI Gateway. Setup signs in to Vercel when needed and creates a small project for the DeepSec workspace.
After those choices, the command continues on its own.
It creates .deepsec/, studies the repository, writes a short project description, builds an inventory of entry points, checks matcher coverage, runs the local pattern scan, and starts the AI review.
The first run can take minutes or hours. A large repository can take much longer.
Put a hard limit on the first run
The pattern scan is local and free. The AI processing is not.
Do not start an unlimited first run on a large repository.
Set a cost and time limit:
npx deepsec init \
  --max-cost-usd 25 \
  --max-duration 30m
DeepSec stops at a safe point when it reaches either limit.
Run the same command again when you want to continue:
npx deepsec init \
  --max-cost-usd 25 \
  --max-duration 30m
Completed work is skipped.
The limit controls each run, so keep track of the total across resumed runs.
Another good idea is to process a small number of files first. From .deepsec/:
pnpm deepsec process --limit 50Fifty files give you a better idea of cost, speed, and finding quality before you process everything.
The DeepSec FAQ contains current cost examples. Treat those numbers as estimates. File complexity and model choice can change the cost by a lot.
Use a local Codex or Claude login
If Codex or Claude is already authenticated on your machine, you can use that local session:
npx deepsec init --model-auth localDeepSec does not configure a gateway token or API key in this mode.
The selected harness still needs to be logged in. A Codex run needs a working Codex login. A Claude run needs a working Claude login.
I used this path for the flaviocopes.com scan we’ll see later.
It ran through my existing ChatGPT subscription without an OpenAI API key.
This path is useful for evaluating DeepSec.
Subscription limits can be too small for a full scan of a large repository. Move to a gateway or direct provider key when the workload outgrows the local subscription.
Local credentials also cannot be passed into a remote sandbox. Sandbox runs need a real API token.
Use your own API key
You can bypass Vercel AI Gateway and use an OpenAI key directly.
First put the key in a temporary shell variable, so it never appears in your shell history:
read -s MY_OPENAI_KEY
export MY_OPENAI_KEY
Then run setup:
npx deepsec init \
  --agent codex \
  --model-auth direct \
  --ai-provider openai \
  --ai-api-key-env MY_OPENAI_KEY
DeepSec stores the environment variable name, not its value.
You must provide the variable again for later runs. Alternatively, store it in .deepsec/.env.local and keep that file out of Git.
For Anthropic, use the Claude agent and provider:
npx deepsec init \
  --agent claude \
  --model-auth direct \
  --ai-provider anthropic \
  --ai-api-key-env MY_ANTHROPIC_KEY
The complete credential options are in the DeepSec model and Vercel setup guide.
Understand the generated workspace
After setup, the repository contains a new .deepsec/ directory.
The important parts look like this:
.deepsec/
  deepsec.config.ts
  generated-matchers.ts
  package.json
  AGENTS.md
  data/
    my-app/
      INFO.md
      SETUP.md
      project.json
      setup/
      files/
      runs/
      reports/
The directory is isolated from the parent application.
It has its own package.json, dependencies, configuration, and state.
Some files belong in Git. Others do not.
The generated .gitignore keeps credentials and reproducible scan state out of the repository. It leaves files such as INFO.md, SETUP.md, deepsec.config.ts, and generated-matchers.ts available to commit.
Review that policy before committing. Security reports can contain sensitive code paths and vulnerability details.
Review INFO.md
INFO.md tells the coding agent what the repository does.
DeepSec includes this file in every investigation, revalidation, and triage prompt.
Setup writes it automatically. You should still review it.
For my flaviocopes.com scan, setup generated a useful first version:
# flaviocopes.com

## What this codebase does

- Astro 7 site deployed as static output on Cloudflare Pages
- Public browser tools, mostly running in the browser
- Pages Functions for newsletters, sponsorships, course recovery, and purchases
- A scheduled Worker and several local operational scripts

## Auth shape

- There is no user account system or authenticated application area
- Paddle webhook signatures protect the purchase flow
- Public forms use Turnstile and IP-based rate limits
- Course URLs are possession-based credentials

## Known false positives

- Lessons and posts contain security examples that are not production code
- Public IDs and Turnstile site keys are not secrets
- Editor commands and MCP configuration are local tooling
This context helped the agent judge the code it found.
For example, it knew that most of the site is static. It also knew that purchase webhooks, public forms, course links, and scripts crossed more important trust boundaries.
Keep INFO.md short and factual.
Include:
- what the product does
- where untrusted input enters
- how users authenticate
- how authorization works
- which data is sensitive
- important invariants
- known patterns that look unsafe but are intentional
Do not put secrets in this file.
If security concepts are new to you, my free Security Fundamentals course explains assets, attackers, trust boundaries, controls, testing, and incident response.
Understand the surface inventory
During setup, DeepSec also builds a structured inventory of entry points.
These include:
- HTTP routes
- RPC handlers
- queue consumers
- cron jobs
- command-line commands
- webhooks
- agent tools
The inventory is stored under data/<project>/setup/.
DeepSec compares those surfaces with the files reached by its matchers.
A scanner can report zero findings because the code is safe. The same result appears when it never looked at the right files.
You have to check coverage before the result means anything.
If an important surface has no matcher coverage, setup tries to create a project-specific matcher. If coverage still fails, setup stops before the paid AI stage.
That is a good failure mode. It shows you the blind spot instead of returning a reassuring empty report.
What a matcher is
A matcher is a rule that selects security-sensitive code for investigation.
It usually combines file paths with one or more regular expressions.
For example, a matcher might look inside src/rpc/ for calls that register RPC handlers.
The matcher does not need to prove a vulnerability.
Its job is to say:
This file contains an entry point or risky operation. An agent should read it.
DeepSec gives matchers three noise levels:
precisefor a pattern that strongly suggests a specific bugnormalfor a useful candidate that needs agent investigationnoisyfor a narrow family where every file deserves review
The wider the matcher, the more files reach the expensive AI stage.
Review generated matchers
Setup stores accepted project-specific rules in .deepsec/generated-matchers.ts.
These generated matchers are declarative data. DeepSec validates their paths, regular expressions, examples, and candidate counts before using them.
DeepSec does not execute model-written TypeScript during this step.
You should still review the file.
Check that each matcher:
- points to real source directories
- represents a stable code pattern
- does not include generated files
- reaches the surface it claims to cover
- produces a reasonable number of candidates
You can test one matcher from inside .deepsec/:
pnpm deepsec scan --matchers internal-rpc-entrypointUse the real slug from generated-matchers.ts.
Then inspect several matching files. A matcher that selects hundreds of unrelated files will spend money without improving coverage.
The everyday DeepSec workflow
After initialization, work from inside .deepsec/.
Start by checking the current state:
pnpm deepsec statusRun the local matcher scan:
pnpm deepsec scanProcess new candidates with the selected coding agent:
pnpm deepsec processRevalidate the findings:
pnpm deepsec revalidateCreate a summary:
pnpm deepsec reportExport one Markdown file per finding:
pnpm deepsec export \
  --format md-dir \
  --out ./findings
You do not need to run every command after every edit.
The first full review follows the complete pipeline. Later runs are incremental.
What happens during scan
scan reads the repository and applies the active matchers.
It creates candidate records for matching files. It does not call an AI model.
This stage is fast enough to run often.
A candidate is not a finding.
If a matcher sees dangerouslySetInnerHTML, that code deserves review. The value might already be sanitized. The component might render trusted static content. Or it might contain a real stored XSS problem.
The candidate gives the agent a place to start.
DeepSec also detects technologies such as Next.js, React, Express, Fastify, NestJS, and Hono. It can activate framework-specific matchers and add relevant threat hints to the investigation prompt.
Other ecosystems can still use generic matchers. The supported technology page lists the current coverage.
What happens during process
process is where DeepSec starts spending money.
DeepSec takes pending candidate files in batches and gives them to the selected coding-agent backend.
The agent receives:
- the source file
- candidate matches
- the project context from
INFO.md - repository tools for following code across files
- a structured output format
The agent can search for callers, middleware, validation, authorization, and other defenses.
It then returns zero or more findings.
Each finding includes details such as:
- severity
- confidence
- affected lines
- an explanation
- a recommended fix
DeepSec records the model, agent, time, cost when available, and analysis history.
The analysis history is append-only. Running another model later does not delete the earlier analysis.
Revalidate important findings
An AI agent can misunderstand code.
DeepSec’s revalidate command asks another agent pass to inspect the finding again.
The result can be:
true-positivefalse-positivefixeduncertainduplicate
For a large result set, start with high-severity findings:
pnpm deepsec revalidate --min-severity HIGHRevalidation costs money too. It re-reads the code and may inspect Git history.
The current DeepSec documentation reports a noticeable false-positive rate even after revalidation. Expect to review the output yourself.
My advice is simple: never open a production incident or apply a risky patch from the title alone.
Read the code path. Confirm that attacker-controlled input reaches the operation. Check whether a defense exists elsewhere. Then decide.
My free Web Application Security course covers the common bugs a report might mention, including XSS, injection, CSRF, SSRF, unsafe uploads, and broken access control.
Triage the result
Severity and work priority are related, but they are not the same.
A high-severity bug on an unreachable internal prototype may be less urgent than a medium finding on a public payment endpoint.
DeepSec has a separate triage step:
pnpm deepsec triageTriage reads the finding text and assigns a priority such as P0, P1, P2, or skip.
It also considers exploitability and impact.
This is a cheaper classification step. It does not replace revalidation because it does not re-read the source code.
Use revalidation to ask “is this finding real?”
Use triage to ask “when should we work on it?”
Fix one finding at a time
A useful finding should describe a path through the system:
untrusted input -> missing control -> sensitive operation -> impactFor example:
invoice ID from URL
  -> no tenant ownership check
  -> database query by invoice ID
  -> another tenant's invoice is returned
Before changing code, confirm each arrow.
Fix the missing control at the narrowest shared boundary. Add a test for the negative case, then run the normal project tests and DeepSec again:
pnpm deepsec scan
pnpm deepsec process
pnpm deepsec revalidate
The file hash tells DeepSec that the source changed. For an important issue, I would also ask a second agent backend to investigate it. Agreement is useful evidence, but it is not proof.
Add project-specific configuration
The main configuration file is .deepsec/deepsec.config.ts.
A small multi-project setup looks like this:
import { defineConfig } from 'deepsec/config'
import { generatedMatchersPlugin } from './generated-matchers.js'

export default defineConfig({
  projects: [
    {
      id: 'web-app',
      root: '../apps/web',
      priorityPaths: ['src/api/', 'src/auth/'],
    },
    {
      id: 'worker',
      root: '../apps/worker',
      priorityPaths: ['src/handlers/', 'src/queues/'],
    },
  ],
  plugins: [generatedMatchersPlugin],
})
priorityPaths tells processing which paths deserve attention first.
You can also add promptAppend for a project-specific rule:
{
  id: 'worker',
  root: '../apps/worker',
  promptAppend:
    'Webhook handlers must verify signatures before parsing trusted fields.',
}
Keep this factual. A long prompt full of vague security advice makes the important rules harder to see.
You can also ignore paths in data/<id>/config.json:
{
  "ignorePaths": ["**/fixtures/**", "**/generated/**"]
}
Use ignores for files that should not be investigated.
If a matcher is noisy because its scope is wrong, fix the matcher instead of hiding its results with ignores.
Write a custom matcher
Generated matchers cover simple path and regular-expression rules.
Other project rules need code.
Imagine an application registers internal RPC handlers like this:
registerRpc('users.get', getUser)We can create .deepsec/matchers/internal-rpc.ts:
import {
  regexMatcher,
  type MatcherPlugin,
} from 'deepsec/config'

export const internalRpc: MatcherPlugin = {
  slug: 'internal-rpc-entrypoint',
  description: 'Internal RPC entry points',
  noiseTier: 'normal',
  filePatterns: ['src/rpc/**/*.ts'],
  examples: ["registerRpc('users.get', getUser)"],
  match(content) {
    return regexMatcher(
      'internal-rpc-entrypoint',
      [
        {
          regex: /registerRpc\s*\(/,
          label: 'RPC registration',
        },
      ],
      content
    )
  },
}
Then register it in deepsec.config.ts without removing the generated plugin:
import {
  defineConfig,
  type DeepsecPlugin,
} from 'deepsec/config'
import { generatedMatchersPlugin } from './generated-matchers.js'
import { internalRpc } from './matchers/internal-rpc.js'

const projectMatchers: DeepsecPlugin = {
  name: 'web-app-matchers',
  matchers: [internalRpc],
}

export default defineConfig({
  projects: [{ id: 'web-app', root: '..' }],
  plugins: [generatedMatchersPlugin, projectMatchers],
})
Run only that matcher:
pnpm deepsec scan --matchers internal-rpc-entrypointOpen several candidates. Loosen the matcher if it misses real handlers, or tighten it if it catches unrelated files.
The goal is not to write a complete static analyzer. The goal is to select the right files for deeper review.
The matcher guide explains the full plugin contract and the safety rules for generated matchers.
Review only changed files
A full repository scan is useful for the first audit.
After that, you can review a branch or pull request directly.
From .deepsec/, compare the current branch with origin/main:
pnpm deepsec process --diff origin/mainDirect mode does three things:
- finds the changed files
- runs the local matchers on those files
- asks the agent to review every changed file, even when no matcher fires
You can review staged changes:
pnpm deepsec process --diff-stagedOr uncommitted and untracked files:
pnpm deepsec process --diff-workingTo write a pull-request-shaped Markdown summary:
pnpm deepsec process \
  --diff origin/main \
  --comment-out comment.md
The file is created only when the run produces new findings.
Direct mode returns exit code 0 when it finds nothing new and 1 when it produces at least one new finding. Other non-zero codes mean the command failed.
This makes it usable as a CI gate.
Start in advisory mode. Save the report as an artifact and review the quality. Turn it into a blocking check only when the team understands its cost and false positives.
Be careful with pull request CI
A pull request can change more than application code.
It can change package.json, install scripts, DeepSec configuration, and other files that execute during CI.
Do not give a job both untrusted pull request code and powerful repository permissions.
Keep these capabilities separate:
job 1: read code + run review + write artifact
job 2: read sanitized artifact + write PR comment
The first job should not have permission to modify the repository. The second job should never execute pull request code.
Fork pull requests do not receive repository secrets in the normal pull_request event. Skip them or move the review into an isolated environment.
Also remember that the model credential exists in the review job. A malicious change can try to steal any secret available to that job.
For a production setup, start from DeepSec’s official PR mode workflow and apply your repository’s trust policy. Pin third-party GitHub Actions to full commit hashes, limit permissions, and require a trusted approval before running secret-bearing analysis on outside contributions.
My free Software Supply Chain Security course goes deeper into repository permissions, CI secrets, untrusted contributions, artifacts, and release controls.
Run trusted scheduled scans in CI
A scheduled full scan is simpler because it runs the trusted default branch.
The GitHub Actions workflow can follow this shape:
name: deepsec scheduled scan

on:
  workflow_dispatch:
  schedule:
    - cron: '0 6 * * 1'

permissions:
  contents: read

jobs:
  scan:
    runs-on: ubuntu-latest
    timeout-minutes: 60
    steps:
      - uses: actions/checkout@v7

      - uses: pnpm/action-setup@v6

      - uses: actions/setup-node@v7
        with:
          node-version: 24
          cache: pnpm

      - run: pnpm install --frozen-lockfile
        working-directory: .deepsec

      - run: pnpm deepsec scan
        working-directory: .deepsec

      - run: pnpm deepsec process
        working-directory: .deepsec
        env:
          AI_GATEWAY_API_KEY: ${{ secrets.AI_GATEWAY_API_KEY }}

      - run: pnpm deepsec revalidate --min-severity HIGH
        working-directory: .deepsec
        env:
          AI_GATEWAY_API_KEY: ${{ secrets.AI_GATEWAY_API_KEY }}

      - run: pnpm deepsec export --format md-dir --out ./findings
        working-directory: .deepsec
This workflow processes every pending candidate in a clean CI run.
Run a limited scan locally before enabling it. A full scheduled scan can take a long time and cost much more than expected.
DeepSec’s generated state is normally ignored by Git. If you add --limit to spread the work across scheduled runs, persist .deepsec/data/ in private storage. Otherwise each clean runner can process the same first batch again.
The workflow still needs a private artifact step if you want to keep the exported report. Do not publish vulnerability reports to a public build log.
Pin the actions to reviewed commit hashes before using this on a sensitive repository.
Scale with Vercel Sandbox
A local DeepSec run uses your machine.
Large repositories can distribute the work across Vercel Sandbox microVMs:
pnpm deepsec sandbox process \
  --project-id web-app \
  --sandboxes 10 \
  --concurrency 4
Each sandbox processes part of the workload.
The host keeps the real model credential and adds it only to requests going to the model provider. The sandbox never sees the raw credential.
Sandbox mode is useful when:
- a local run would take many hours or days
- the repository contains thousands of candidate files
- you need isolation from the scanned working tree
- a scheduled job should finish within a predictable window
Local execution is easier for small and medium repositories.
Sandbox fanout adds infrastructure, authentication, upload time, and cost. Use it because the workload needs it, not because ten machines look more impressive than one.
My Vercel Sandbox tutorial explains the microVM model, authentication, timeouts, network policies, and credential brokering.
Scan several repositories
One .deepsec/ workspace can manage more than one repository.
From an existing workspace, add another project:
pnpm deepsec init-project \
  ../billing-service \
  --id billing-service
Then run setup for it:
pnpm deepsec setup --project-id billing-servicePass the project ID to later commands:
pnpm deepsec scan --project-id billing-service
pnpm deepsec process --project-id billing-service
This is useful for a product split across a web application, API, Worker, and background service.
Do not combine unrelated repositories only to get one dashboard. Shared state helps when the repositories belong to the same product and you review them together.
How I used DeepSec on flaviocopes.com
I originally thought I would not scan the complete flaviocopes.com repository.
Most of the site is static content. The sensitive part is much smaller: Cloudflare Pages Functions, purchase webhooks, course recovery, public tools, and operational scripts.
Then I decided to run the complete scan anyway.
This taught me the most useful lesson in this tutorial: the number of findings is not the number of changes you need to make.
Starting the scan
I started from the DeepSec page on Vercel:
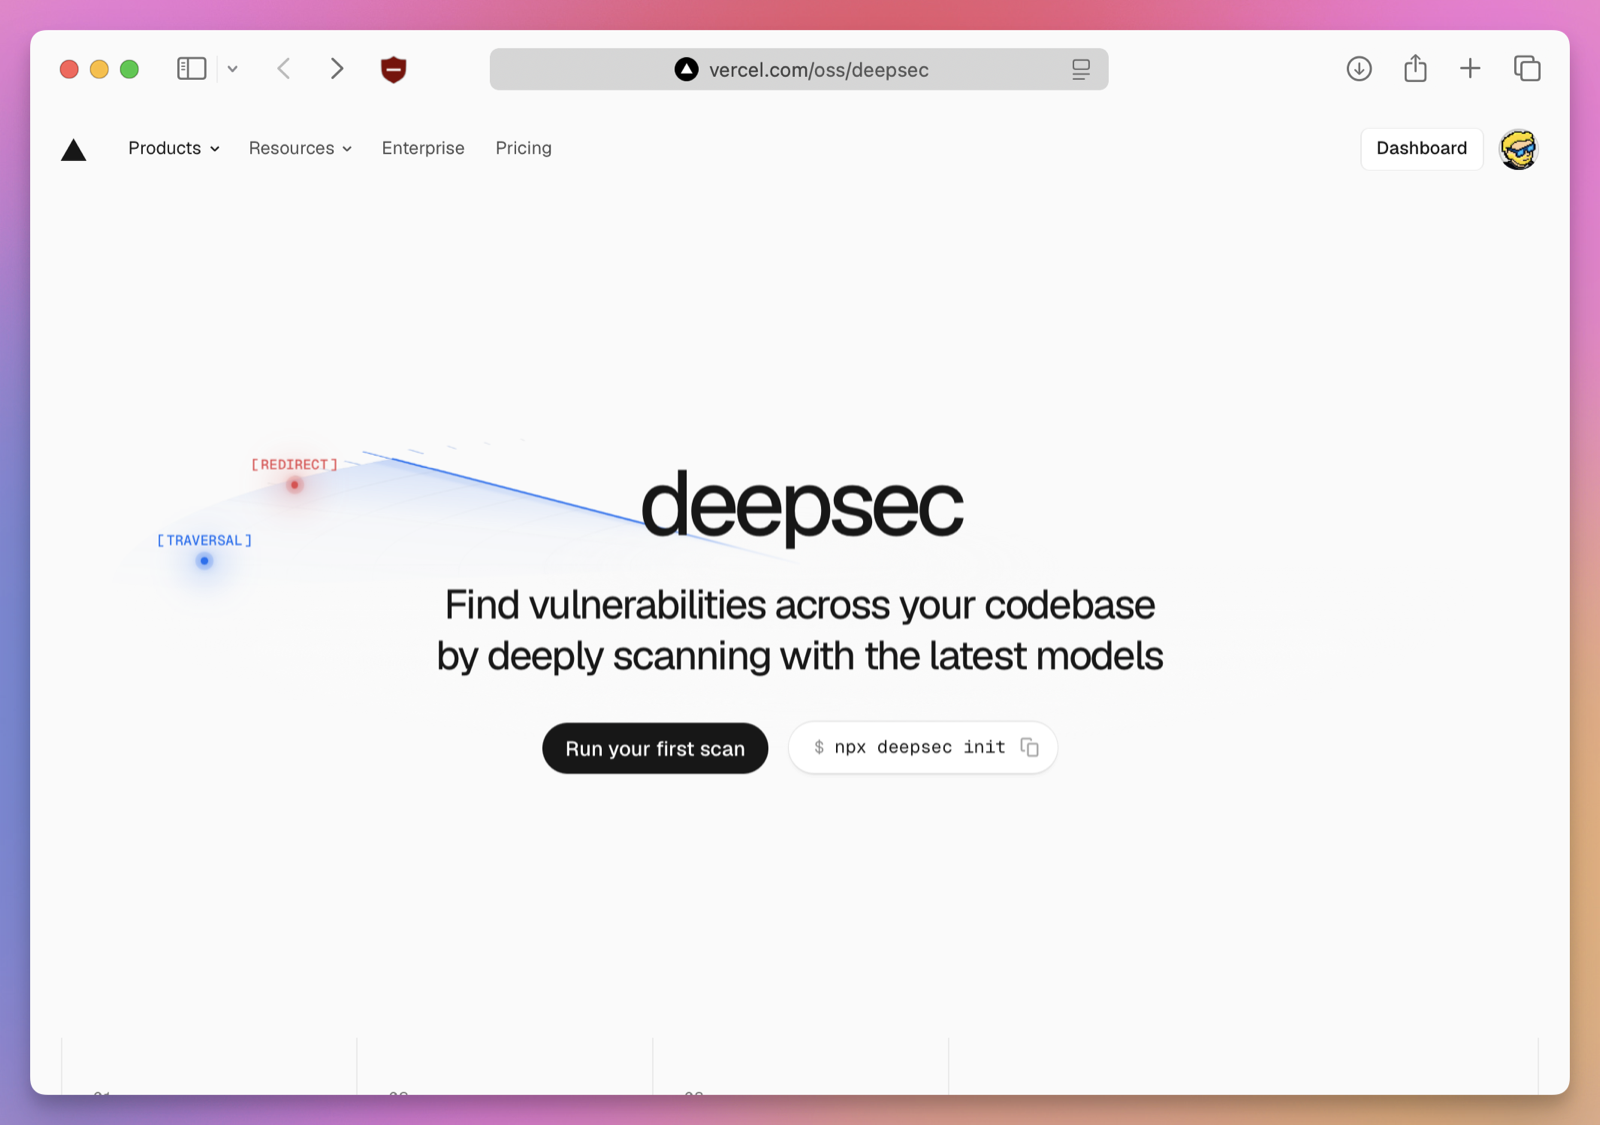
Then I ran the normal setup command from the repository root:
npx deepsec initSetup opened the browser and asked me to authorize Vercel:
For the model, I selected Codex with gpt-5.6-sol and xhigh reasoning.
I used my ChatGPT subscription through the local Codex login. I did not configure an API key.
DeepSec created its isolated workspace and installed the required packages:
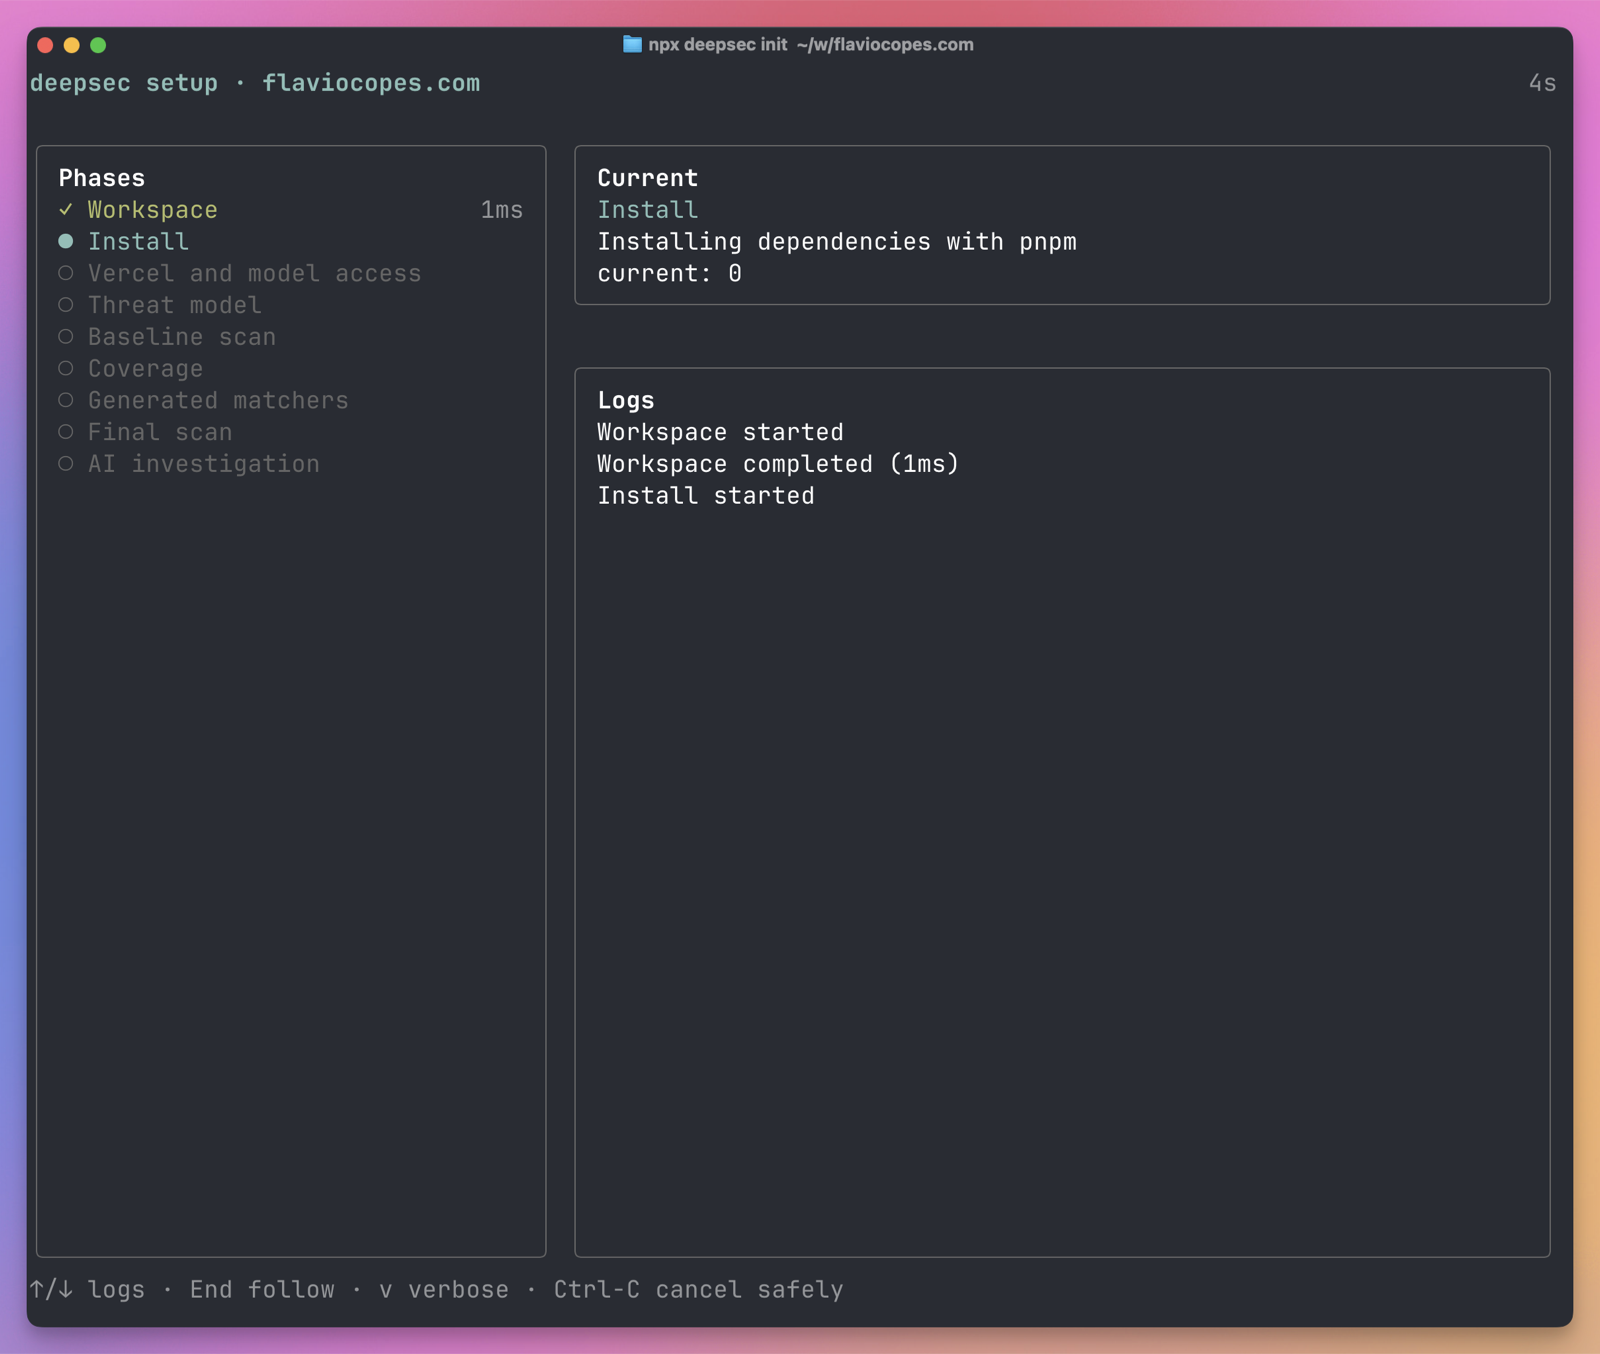
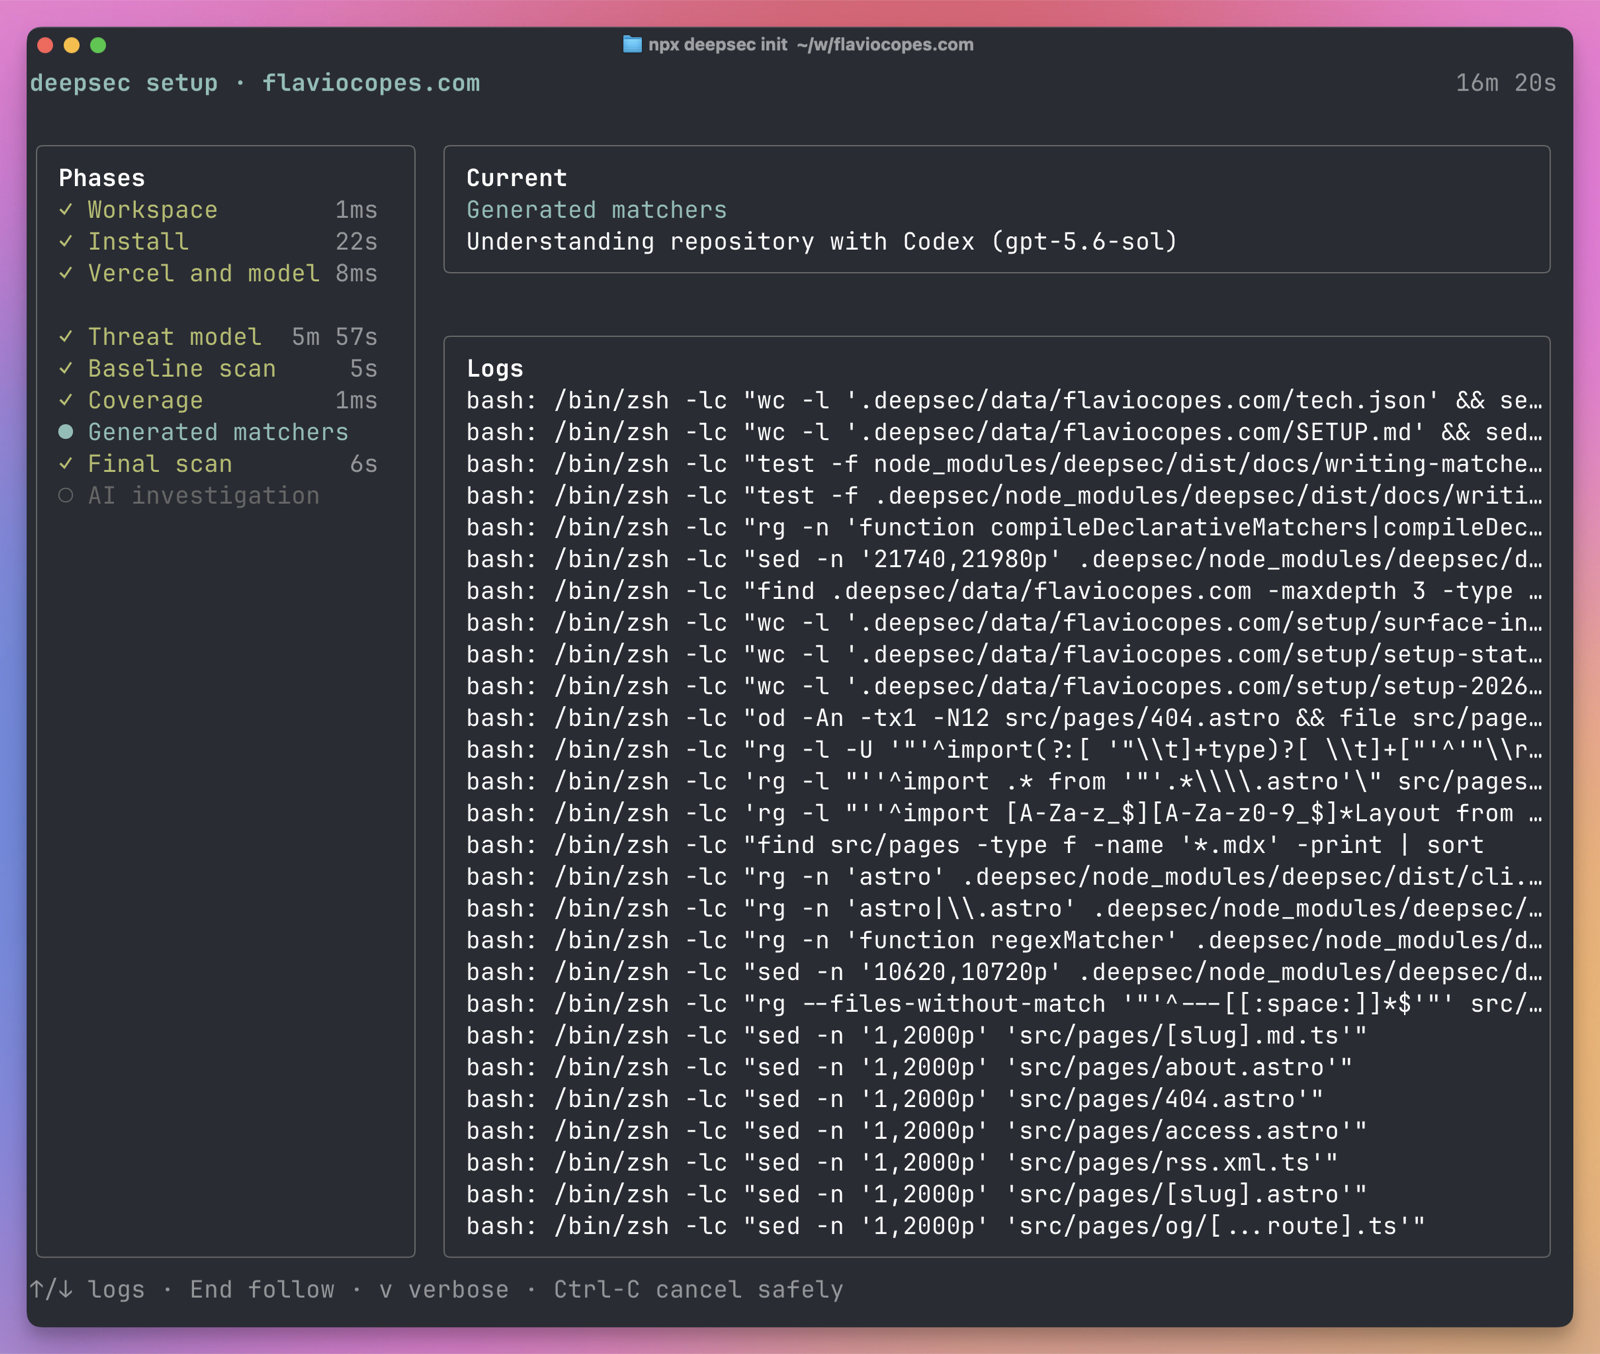
It then studied the repository, wrote the threat model, checked its coverage, and generated four project-specific matchers.
Two matchers found Astro page entry points. Another found local Node.js operator scripts. The fourth found Codex MCP server registrations.
The setup screen showed the work as it happened:
The generated threat model was good.
It understood that the site is statically built, but still has a small server-side surface. It also identified the purchase webhook, public forms, course links, local scripts, deploy credentials, and AI endpoint as the important boundaries.
It even recorded known false positives. For example, the repository contains lessons with deliberately unsafe code. Those examples are text shown to students, not production endpoints.
The result looked alarming
DeepSec investigated 729 files.
It reported 504 potential findings:
- 1 critical
- 16 high
- 67 medium
- 42 high-impact bugs
- 378 bugs
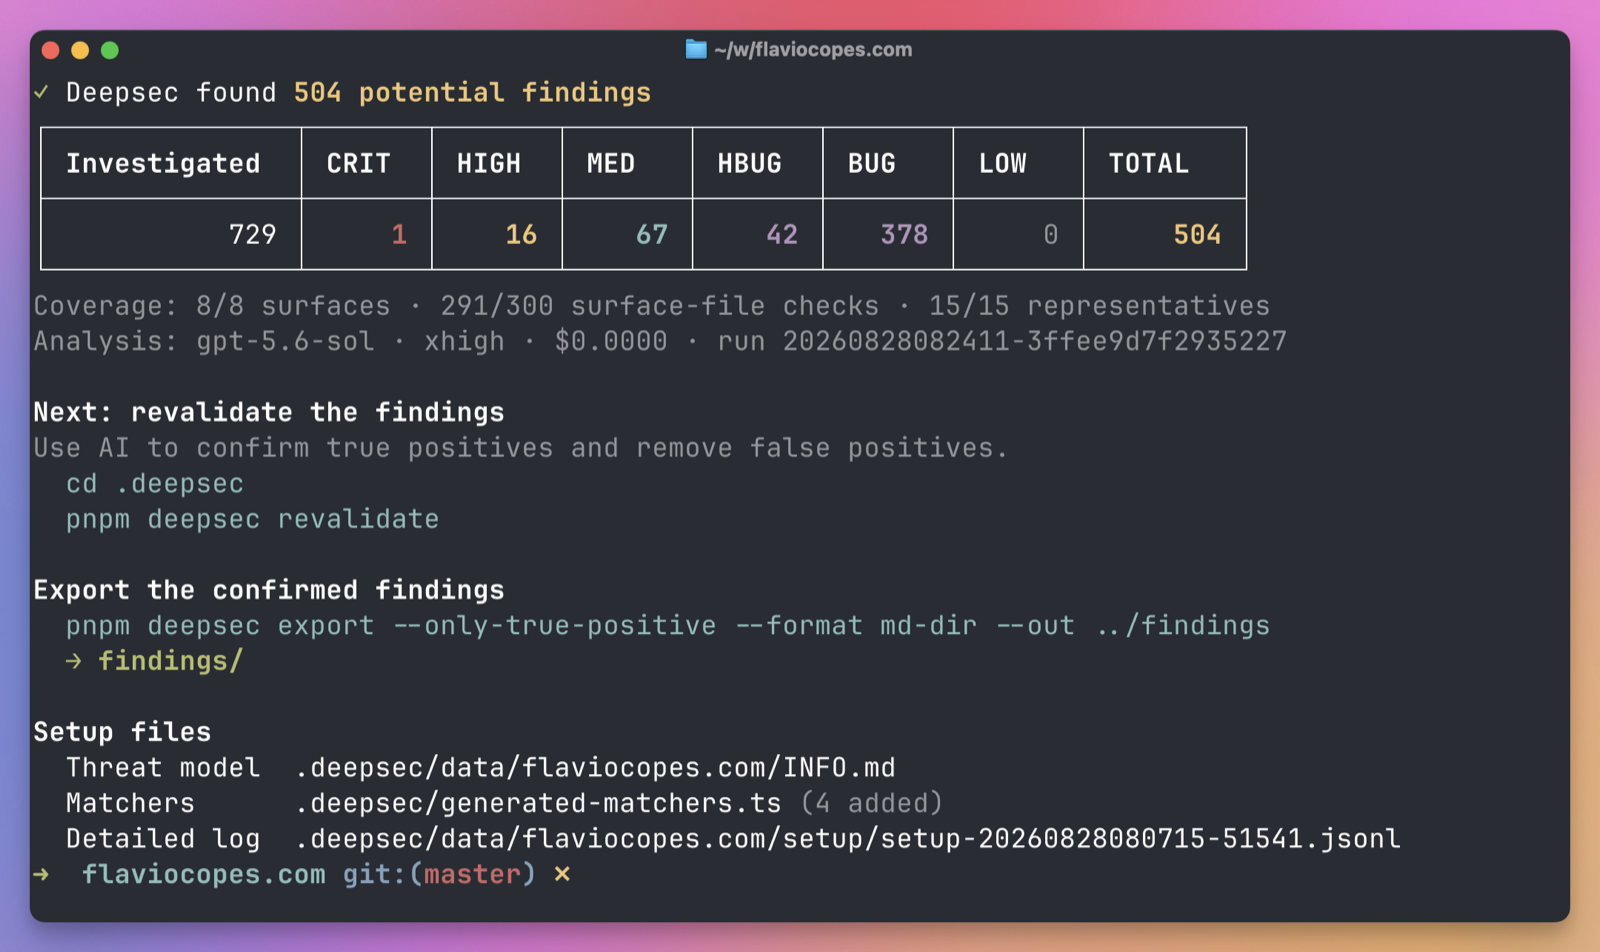
Seeing 504 findings in a security tool is alarming.
But notice the wording in the screenshot: potential findings.
The next instruction from DeepSec was to revalidate them. The first result was never meant to become a 504-item task list.
The saved run also showed the scale of the analysis. Codex processed about 14.4 million input tokens and produced about 1.7 million output tokens.
DeepSec displayed $0.0000 because the model ran through my local ChatGPT subscription. I still used subscription capacity, even if there was no separate API bill.
I asked Codex what to do next
I then opened Codex in the repository and asked it to analyze the DeepSec result.
I did not ask it to fix all the findings.
I asked it to tell me what mattered, what could wait, and what was not a real production risk.
You can ask for this kind of pass with a prompt like this:
Analyze the findings saved by DeepSec in this repository.
Do not change any files.

Group related findings by root cause.
Separate remotely reachable production risks from local scripts,
content examples, and normal product bugs.

Tell me which issues need attention first and explain why.
This second pass had the repository, the DeepSec evidence, and the current architecture. It could answer questions a severity table cannot answer:
- Is this code reachable from the internet?
- Can an attacker control the input?
- Is there already a defense in another file?
- Is this a security issue or a normal product bug?
- Does the same root problem appear in several findings?
- What is the real impact if the code fails?
The raw count quickly became less scary.
Of the 504 findings, 462 came from src/tools and src/pages/tools. These directories contain the many small browser tools published on the site.
Also, 378 findings were classified as regular bugs. They included incorrect calculations, broken generated output, edge cases, and user-interface problems. Those can be worth fixing, but they are not 378 security emergencies.
Some problems also appeared in both the tool implementation and its Astro page. Fixing one shared cause can close more than one report.
After Codex grouped the output by reachability and impact, the work became a short list of areas:
- server-side purchase, course-recovery, and public-form flows
- browser tools that render active content or generate commands and code
- local operator scripts where untrusted data could reach a shell or filesystem operation
Everything else could go into a normal product-quality backlog, wait for manual verification, or be discarded when the reported path was not real.
So I did not end up with 504 urgent changes.
I ended up with a few concrete things to investigate and improve.
What I learned from the run
DeepSec did its job. It searched broadly and kept the evidence.
Codex then helped me turn that evidence into a plan.
I would use the same workflow again:
- Let DeepSec build the threat model and inventory.
- Run a bounded sample first when model calls cost money.
- Treat the first output as potential findings.
- Revalidate the important results.
- Ask a coding agent to group them by root cause and reachability.
- Confirm the important code paths before changing anything.
The practical rule is still the same:
Start where untrusted input meets authentication, private data, money, infrastructure, or an irreversible action.
When DeepSec is a poor fit
DeepSec works best on applications and services.
It is a weaker first choice for:
- a static site with no sensitive server code
- a tiny script with no external input
- a library without project-specific threat context
- generated code
- a repository you do not trust on your machine
- a project where nobody can review and fix the findings
Libraries and frameworks can still be scanned, but they may need custom prompts and matchers. Their dangerous behavior often depends on how another application uses them.
DeepSec is also a poor fit when the goal is a cheap check on every tiny edit. Direct pull request mode can help, but every reviewed file still needs model work.
Use normal linters, tests, dependency scanners, and focused static rules for fast feedback. Use DeepSec where deeper repository reasoning is worth the cost.
If you want a shorter Codex-based path without a .deepsec/ workspace, see How to scan your code with the Codex Security CLI.
How the DeepSec pipeline fits together
DeepSec gives AI security review a repeatable shape:
understand the repository
  -> inventory the exposed surfaces
  -> prove scanner coverage
  -> find candidate files cheaply
  -> investigate them deeply
  -> revalidate the result
  -> keep the history
  -> repeat on changes
Pattern matching alone lacks context. An agent alone can miss parts of the repository. DeepSec connects those pieces and hands you a focused list of code paths to investigate.
Start with:
npx deepsec init --scaffold-onlyRead what it creates. Add the real threat boundaries. Then run a small, bounded scan before giving it the whole repository.
The DeepSec documentation covers the current commands. The complete source is in the vercel-labs/deepsec repository.
Want me to talk about your product? You can sponsor this site.