A deep dive into Pi
By Flavio Copes
Pi is a minimal open source coding agent for the terminal. Install it, pick a model, extend it with TypeScript, and compare it with Claude Code and Codex.
Pi is a small, open source coding agent that runs in your terminal. You give it a task, and the model works on your project with four tools: read, write, edit and bash. Everything else, from subagents to permission prompts, is something you add yourself with a TypeScript extension or a package.
Mario Zechner started it, and it’s MIT licensed. In April 2026 he joined Earendil, the company founded by Armin Ronacher and Colin Daymond Hanna, and brought Pi with him. The code now lives at github.com/earendil-works/pi, and the website is pi.dev.
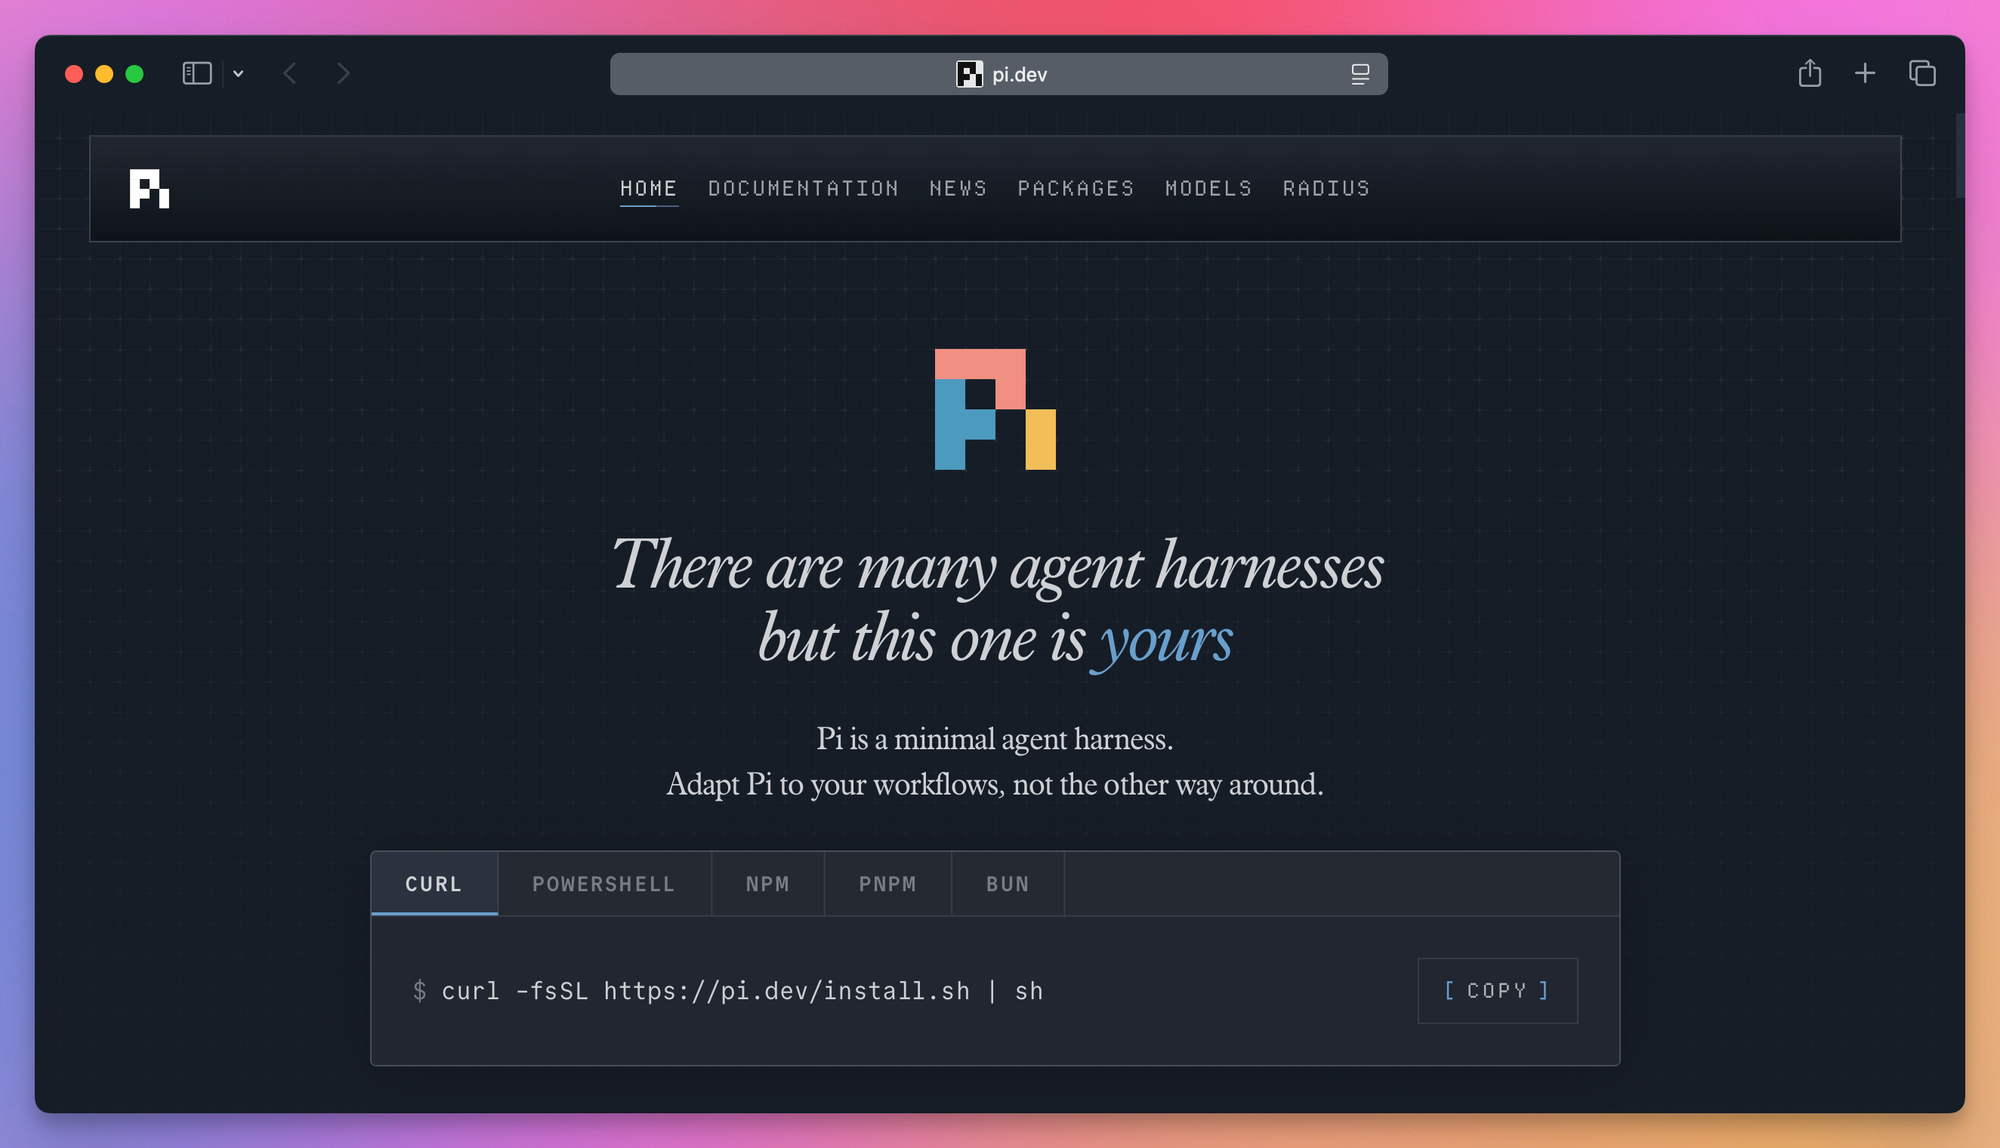
Pi reached 1.0 in October 2026, and Earendil’s announcement calls it a stable version that people and businesses can depend on. It still ships new versions often, so some details here will move. Everything in this post was checked against 1.0, in October 2026.
Why Pi?
Most coding agents try to do everything for you. Claude Code, Codex and OpenCode all come with plan modes, subagents, MCP clients, todo lists and permission dialogs.
Pi leaves most of that out on purpose. In the words of pi.dev, it “skips features like sub-agents and plan mode”, and you build them yourself or install a package that does it your way:
- No subagents. Spawn more Pi instances in tmux, or build your own.
- No permission popups. Run it in a container, or write the confirmation flow you want.
- No plan mode. Write the plan to a file.
- No built-in todos. Use a
TODO.mdfile. - No background bash. Use tmux.
MCP used to be on that list too. The old README told you to write a CLI tool with a README instead, and Earendil said no to MCP more than once. Pi 1.0 ships it built in, and Earendil explains the change of mind in “You said no MCP!”. There’s a section on it further down.
What you get instead is a short system prompt, a model picker that covers most providers, sessions you can branch like a tree, and an extension API that reaches into almost everything.
The idea is that you shape the agent around how you work. And the agent can shape itself: ask Pi to write an extension, type /reload, and the new feature is there.
The pi.dev homepage shows this with a live demo, where you ask Pi to change the website you’re looking at.
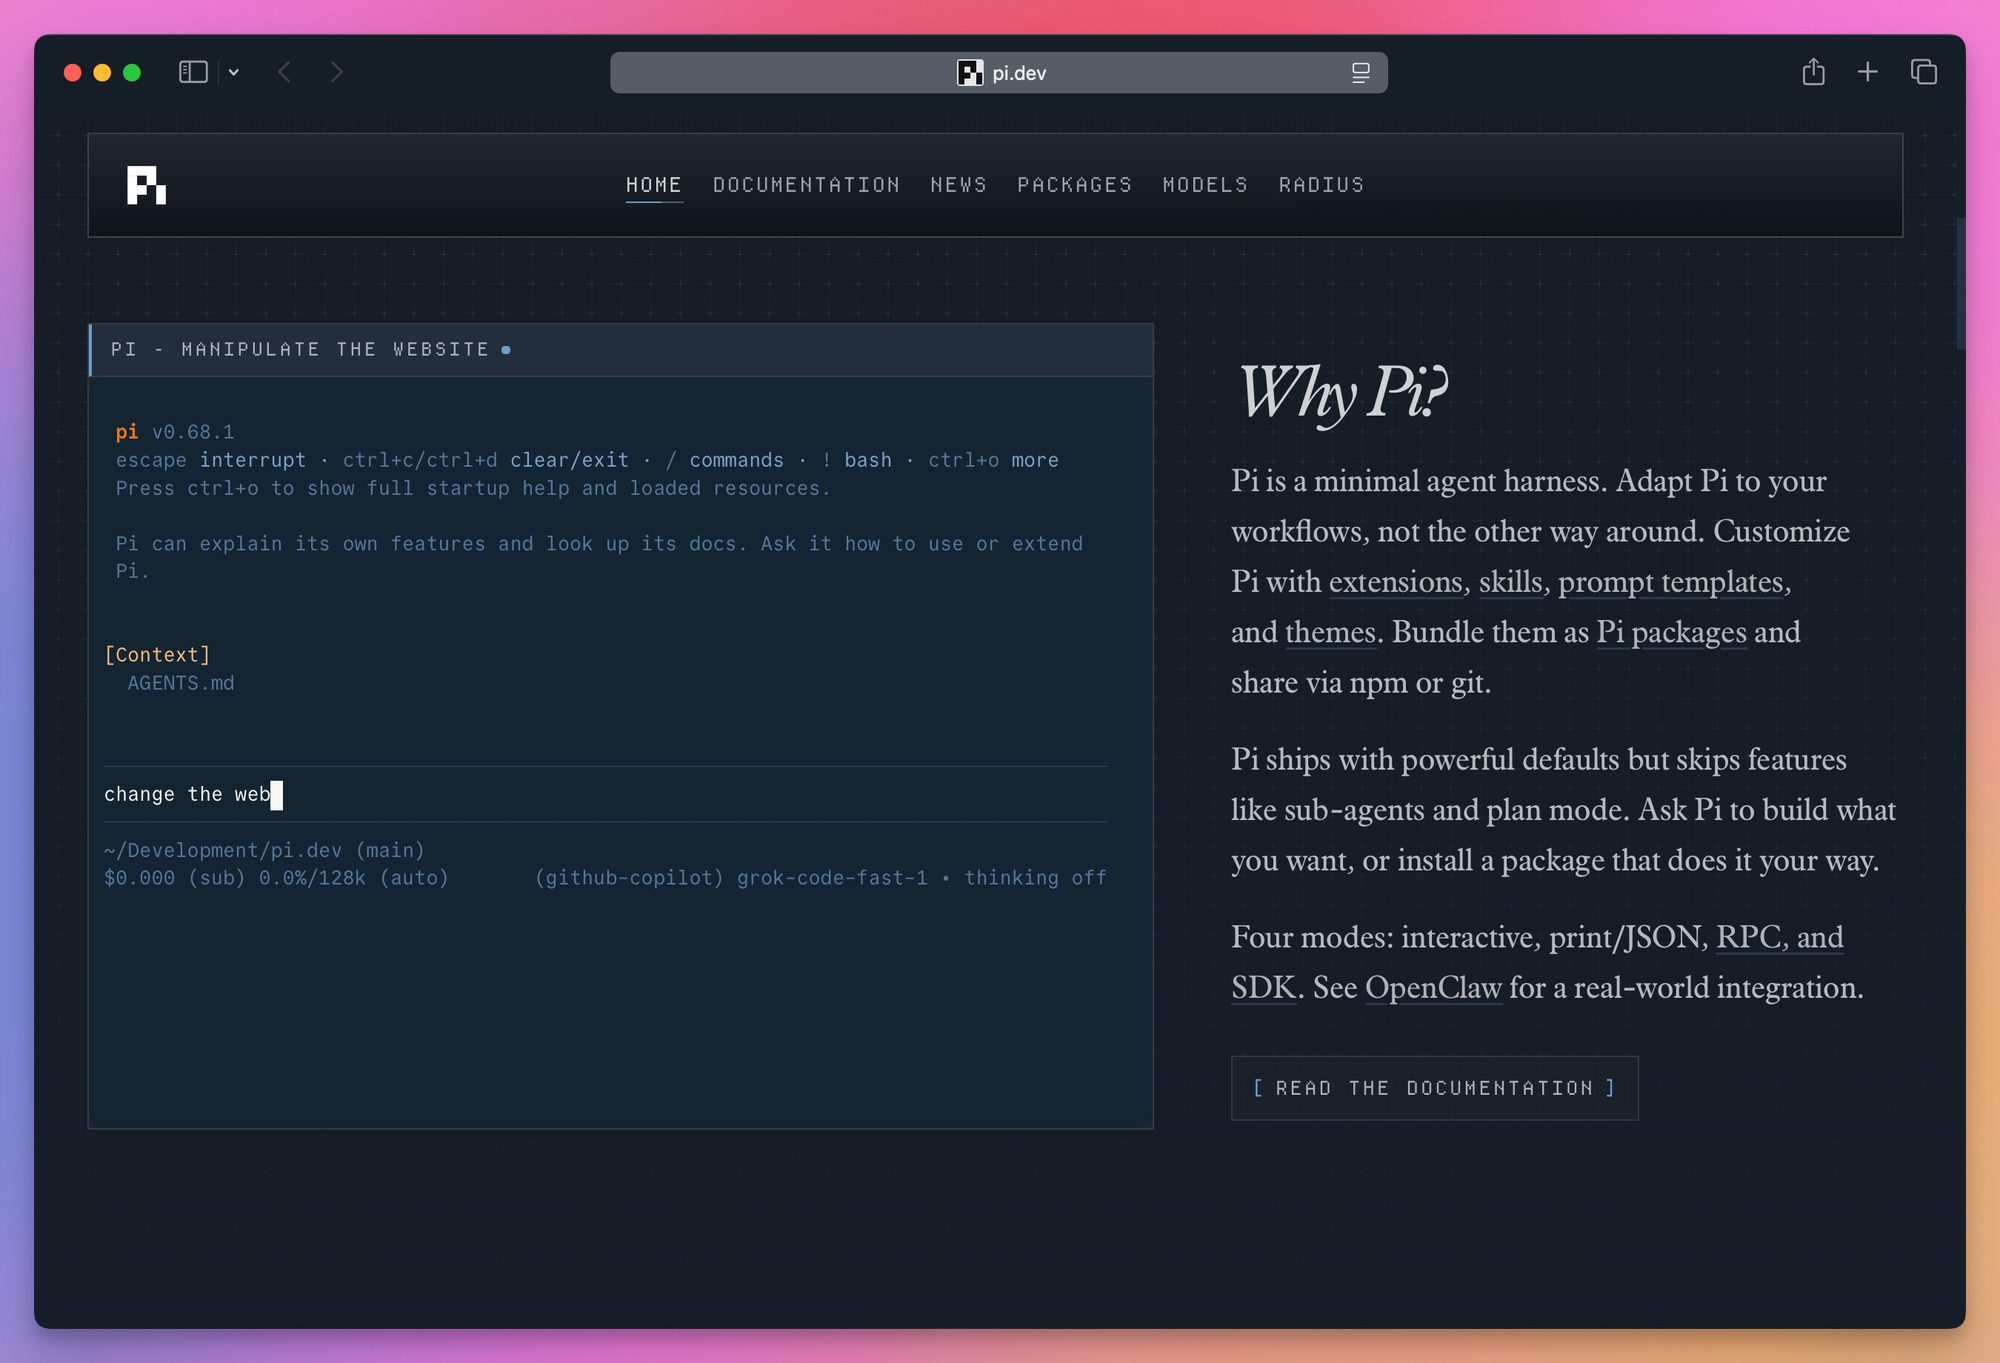
This is also why Pi shows up inside other projects. OpenClaw uses it as its agent, and the Flue framework runs on it. The coding agent is one package in a monorepo that also contains pi-ai (one API for many LLM providers), pi-agent-core (the agent loop) and pi-tui (the terminal UI).
Install it
Pi is a Node.js program, so you need a recent version of Node installed.
The simplest way is npm:
npm install -g --ignore-scripts @earendil-works/pi-coding-agentThe --ignore-scripts flag stops dependency install scripts from running. Pi doesn’t need them, and the project recommends it in every install command.
Alternatively, the official installer checks your setup and offers to install Node if it’s missing. Then it installs the same npm package in its own folder under ~/.pi/agent, with every dependency pinned, and from then on Pi updates itself with pi update. If it finds a Pi you installed with npm, it offers to move it over:
curl -fsSL https://pi.dev/install.sh | shOn Omarchy, install Node and npm with omarchy pkg add nodejs npm, then use the npm command. Pi also has a PowerShell installer for Windows.
Check it worked:
pi --versionIf you installed Pi before May 2026, you have the old package. It was published as @mariozechner/pi-coding-agent, that name is now deprecated, and it gets no new releases. To get current versions, remove it and install the new one:
npm uninstall -g @mariozechner/pi-coding-agent
npm install -g --ignore-scripts @earendil-works/pi-coding-agent
Your settings, logins and sessions live in ~/.pi/agent, and they stay where they are.
Pick a model
Pi works with a model you bring yourself, and you have three options.
Use a subscription you already pay for
Start pi and type:
/loginThen pick a provider. Pi can sign in with a ChatGPT plan, GitHub Copilot, a Grok or X subscription, Meta’s Muse, Kimi Code, OpenRouter and Claude Pro or Max. The list also has Radius, Earendil’s own AI gateway for Pi, which is still in early alpha.
In 1.0, ChatGPT lives under the OpenAI provider, so /login openai takes you straight there. The older sign-in through Codex is still in the list as “OpenAI Codex (legacy)”, and it’s the one you see in my screenshot, taken before 1.0:
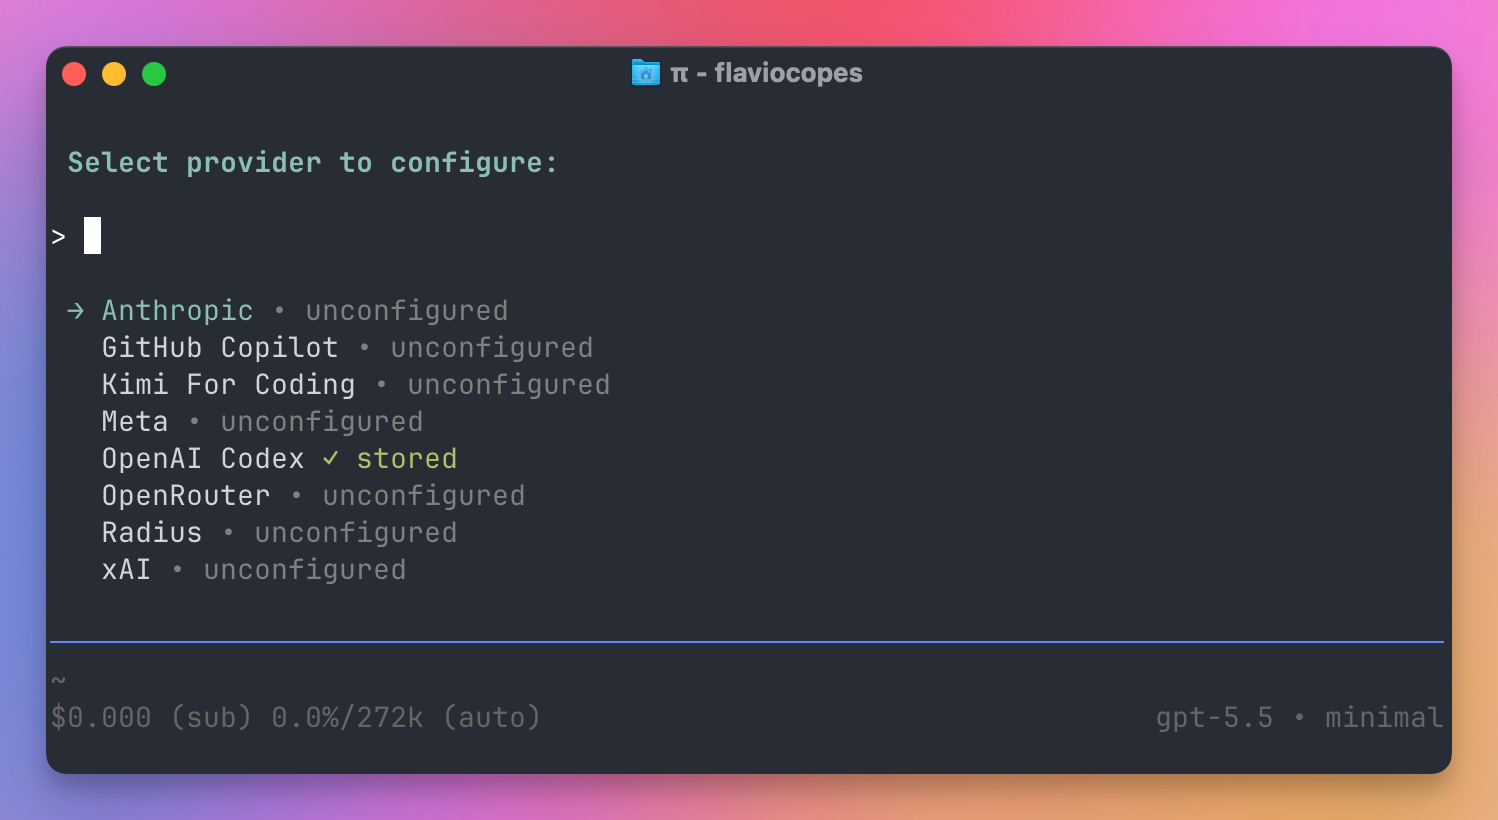
The ChatGPT one is the one I picked. OpenAI officially supports using it from Pi, and requests count against your plan. I explain how that works in how to use your ChatGPT subscription in other apps.
Be careful with the Claude one. When you use a Claude model with that login, Pi warns you that a third-party agent draws from Claude’s extra usage, billed per token, and not from your plan limits. You’ll see it on your bill.
Tokens are saved in ~/.pi/agent/auth.json and refresh by themselves. On a machine where the browser can’t reach Pi, like a server you use over SSH, Pi asks you to paste the final redirect URL or code back into the terminal.
Use an API key
Every provider has an environment variable. Export it and start Pi:
export ANTHROPIC_API_KEY=sk-ant-...
pi
The list is long: Anthropic, OpenAI, Google Gemini and Vertex, Amazon Bedrock, Azure OpenAI, Mistral, Groq, Cerebras, xAI, DeepSeek, OpenRouter, Vercel AI Gateway, Cloudflare Workers AI and AI Gateway, Hugging Face, Fireworks, Together AI and more. pi --help prints most of the variable names, and the Providers page in the docs has all of them.
Use a local model
Pi talks to anything that speaks the OpenAI, Anthropic or Google APIs. That includes Ollama, LM Studio and vLLM running on your own machine.
You add them in ~/.pi/agent/models.json. This is the one I have for LM Studio:
{
  "providers": {
    "lmstudio": {
      "baseUrl": "http://localhost:1234/v1",
      "api": "openai-completions",
      "apiKey": "lmstudio",
      "models": [{ "id": "google/gemma-4-26b-a4b" }]
    }
  }
}
LM Studio ignores the API key, but Pi hides models that have no key, so any value works.
Check that Pi sees it:
pi --list-models lmstudioprovider model context max-out thinking images
lmstudio google/gemma-4-26b-a4b 128K 16.4K no noFor Ollama, set baseUrl to http://localhost:11434/v1. Some local servers don’t understand the developer role that Pi sends to reasoning models, and for those you add "compat": { "supportsDeveloperRole": false } to the provider. If you’re new to local models, start with how to run a local LLM with Ollama, or the free Local AI Models course.
Keep your expectations honest here. With Gemma 4 26B, Pi answered questions about a small project correctly, reading the files it needed. When I asked it to write a test file, the model described the tool calls in its thinking instead of making them, and no file appeared on disk. A local model has to be good at tool calling, and that’s where small models fall behind the hosted ones.
A first session
Go to a project and start Pi:
cd ~/www/flaviocopes.com
pi
The screen has a header that lists the AGENTS.md files, skills and extensions Pi loaded. Below that come the messages, then the editor where you type, then a footer.
Since 1.0, Pi runs full screen by default. The editor and the footer stay at the bottom, and the conversation scrolls above them with the mouse wheel or Page Up and Page Down. Ctrl+Shift+F searches it, and when you quit, Pi prints the transcript to the terminal. If you’d rather keep your terminal’s own scrollback, pick the regular mode in /settings, or start Pi with --tui-mode regular.
Links stay clickable in full screen. In Ghostty, hold Shift+Command (Shift+Ctrl on Linux) if you want Ghostty’s own link preview, because Pi captures the mouse.
Pi also takes its colors from your terminal’s theme, so it matches your palette, and it switches when the terminal goes from light to dark.
Type a request and press Enter:
What does this app do? Don't change any files.The model reads files and runs commands, and you see each tool call as it happens. Ctrl+O folds and unfolds long tool output.
This is what I got when I asked about the repository of this site:
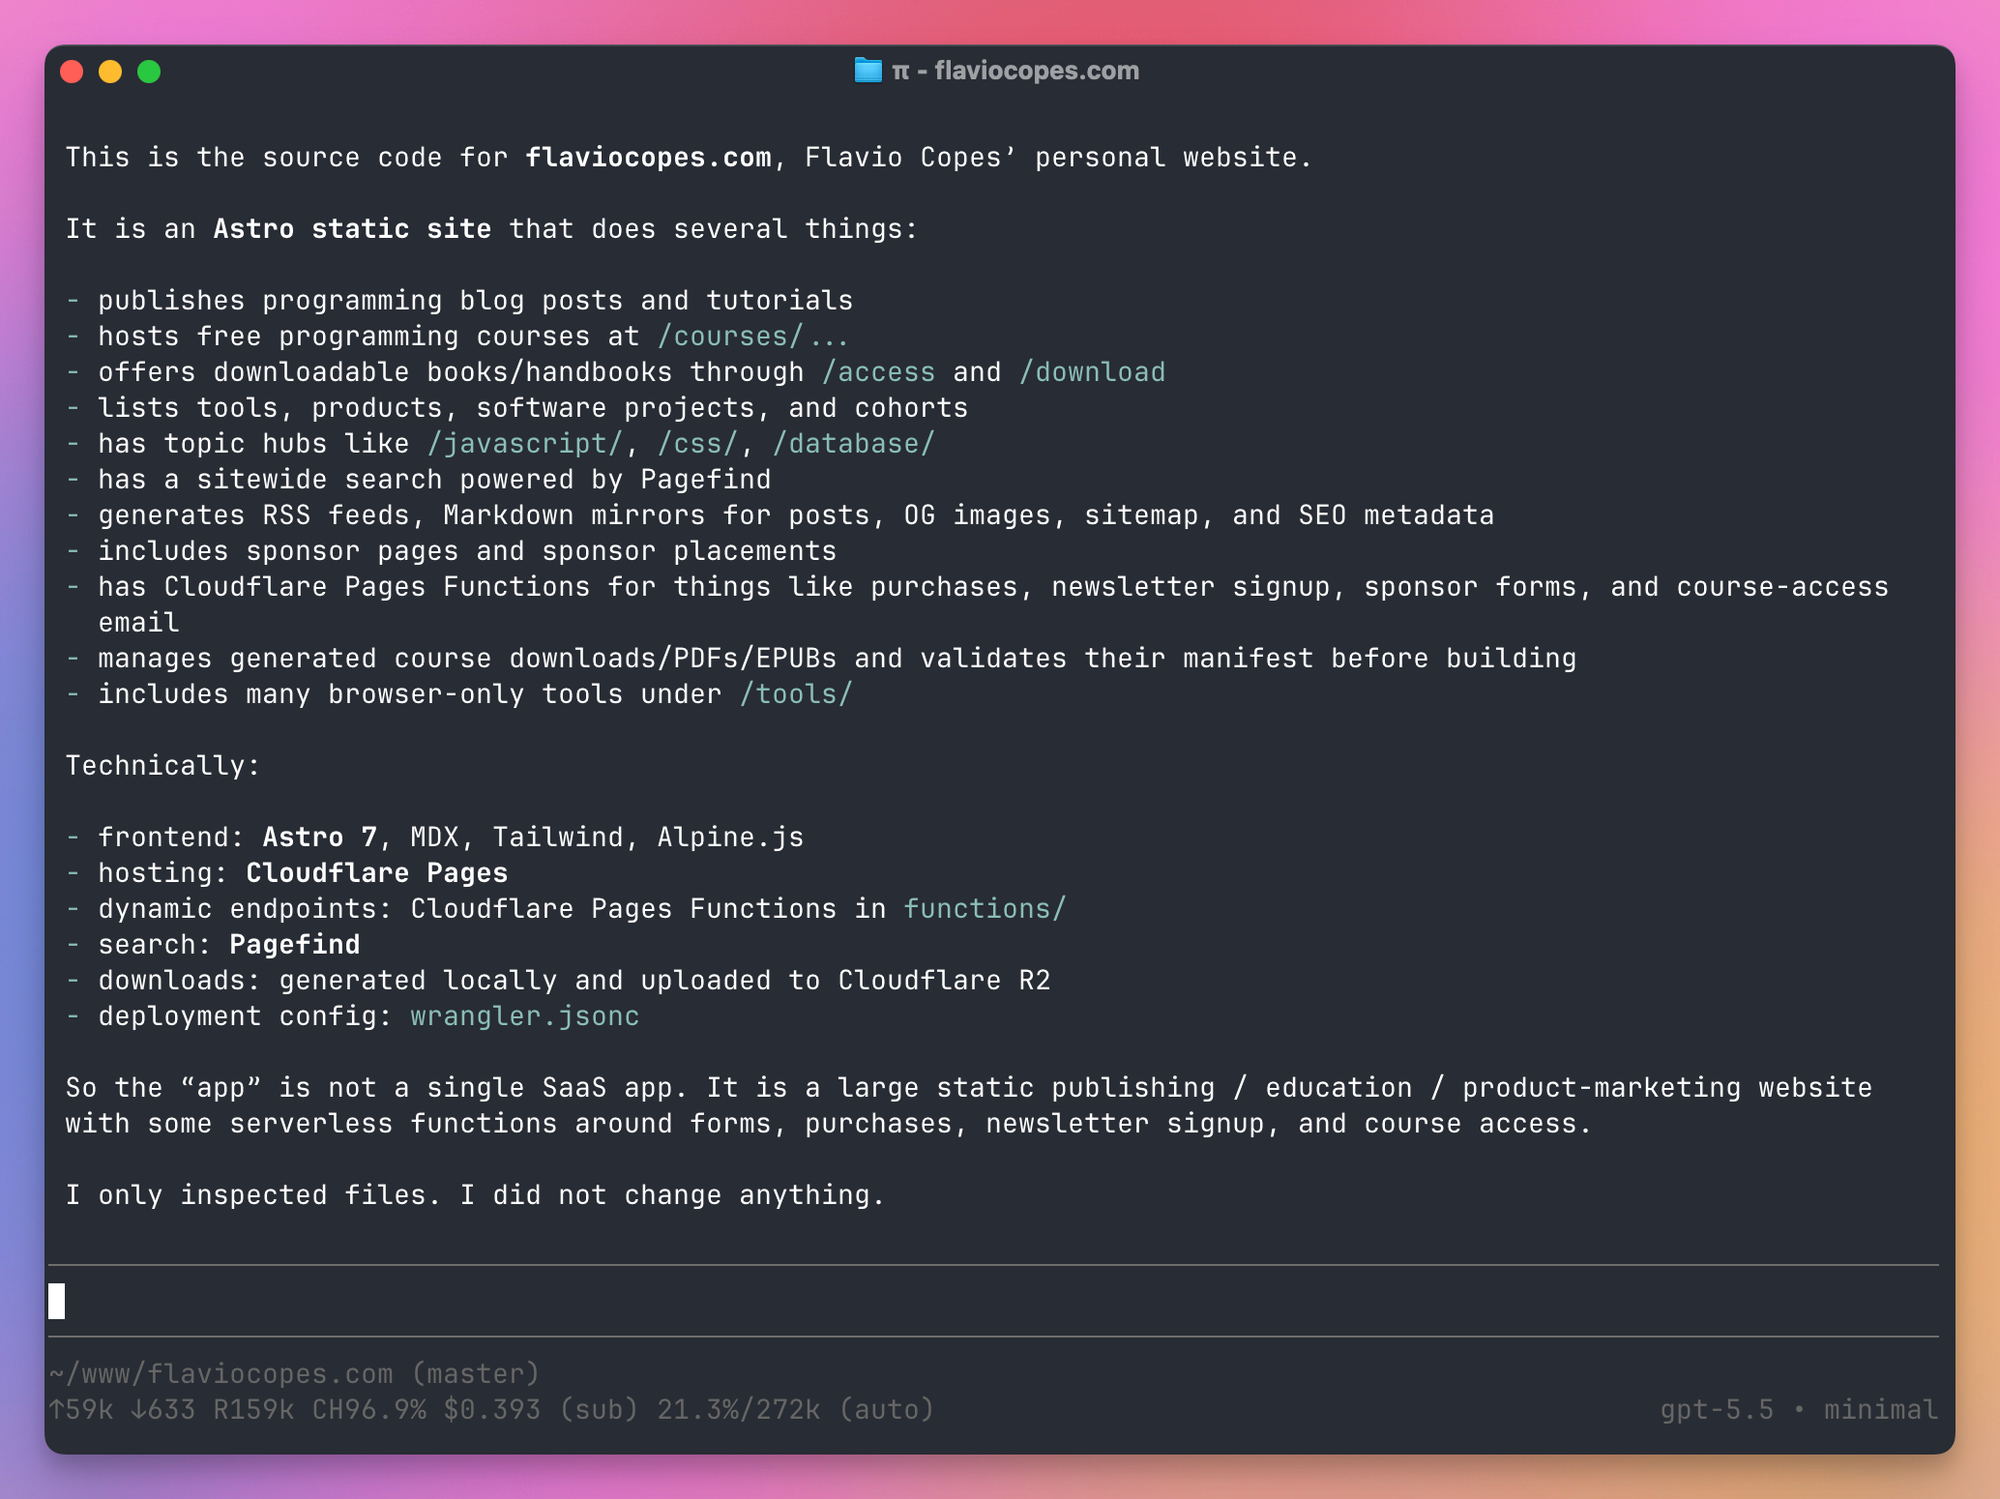
The footer is worth a look. It shows the folder and Git branch, the input and output tokens (↑ and ↓), the cache reads (R) and the cache hit rate (CH), the cost, and how much of the context window is used. (sub) means the cost is covered by a subscription, in this case my ChatGPT plan. On the right you see the model and the thinking level.
Those cache numbers matter with models like Claude, whose prompt cache expires after a few minutes. During a long tool run, Pi refreshes the cache before it expires, but only when it expects the refresh to save money. /session shows the session’s cost and cache use in detail.
A few things make the editor faster:
- Type
@to fuzzy-search a file and attach it to the message. - Start a line with
!to run a shell command and send its output to the model.!!runs it without sending the output. Ctrl+Vpastes an image, or you can drag one onto the terminal.Shift+Enteradds a new line, andCtrl+Gopens your$EDITORfor long prompts.
Steer it while it works
You don’t have to wait for the agent to finish. Type while it’s working and press Enter, and Pi delivers that message as soon as the current tool calls finish. It’s how you say “no, use the existing helper” before it writes three more files.
Alt+Enter queues a follow-up instead, which waits until the agent is done. Escape stops everything and puts your queued messages back in the editor.
Switch models and thinking
Ctrl+L opens the model picker, and you can switch in the middle of a session. Shift+Tab cycles the thinking level, from off to max.
If you use two or three models regularly, run /scoped-models to pick them, then Ctrl+P cycles through that short list.
The commands you’ll use most are /model, /settings, /resume, /new, /compact and /tree. /hotkeys shows every shortcut.
Give it project instructions
When it starts, Pi reads AGENTS.md from ~/.pi/agent/, from every parent folder and from the current folder, and joins them together. If there’s no AGENTS.md, it reads CLAUDE.md, so projects set up for Claude Code work as they are.
This is where you put your conventions, the commands to run tests and the things the agent should never touch. I explain what goes in there in the AGENTS.md post.
Pi also lets you change the system prompt itself. A .pi/SYSTEM.md in the project replaces the default prompt, and an APPEND_SYSTEM.md adds to it. The default prompt is short, so you have room for your own.
Sessions are trees
Pi saves every session as a JSONL file in ~/.pi/agent/sessions/, grouped by folder. Resume the latest one with:
pi -cOr pick an older one:
pi -rWhat’s different from other agents is that a session is a tree, not a line. Each entry points to its parent, so you can go back to any earlier message and continue from there. The old branch stays in the file.
Type /tree (or press Escape twice) to see it. Pick a point, and you continue from there. Press Shift+L on an entry to label it as a bookmark.
The other commands build on the same idea:
| Command | New session? | Starts from | Use it when |
|---|---|---|---|
/new | Yes | An empty conversation | The old context isn’t useful anymore |
/compact | No | The current point | The context is useful but too big |
/tree | No | Any point in this session | You want to try again from earlier |
/fork | Yes | An earlier message of yours | You want to rewrite an old request |
/clone | Yes | The current point | You want a copy before an experiment |
The thing that confused me is that these commands move the conversation, not your files.
I was building a small 3D game with Pi, dogs pulling a sled through the snow. I ran /clone before asking for a change to how the dogs turn, so I could go back if I didn’t like it. Then I asked Pi how to roll back. Going back to the clone restores the conversation, but not the code, because Pi had already written the changes to disk.
To undo files, use Git. Commit before you try something, and git restore . if you don’t like it. Pi ships an example extension, git-checkpoint.ts, that stashes your changes at every turn and restores them when you move in the tree, if you want the two tied together.
A few more session tools:
/compactsummarizes old messages to free up context. Pi also does it automatically when the context gets close to the limit. The full history stays in the file./exportsaves the session as an HTML page, or as JSONL./shareuploads it and gives you a link that renders it. It uses a private GitHub gist, or a Radius artifact if you signed in to Radius.--no-sessionruns Pi without saving anything.
Skills and prompt templates
A skill is a folder with a SKILL.md file that tells the model how to do one job. Pi follows the Agent Skills standard, so the same skills work in Claude Code, Codex and Cursor. If you haven’t written one, the free AI Agent Skills course walks through it.
Pi looks for skills in ~/.pi/agent/skills/, ~/.agents/skills/, and in .pi/skills/ or .agents/skills/ inside the project. It lists the available skills in the prompt, and the model loads the full file only when it needs it. You can also call one directly:
/skill:wranglerThis surprised me the first time. I started Pi in my home folder, and it listed the remotion-best-practices and wrangler skills in the header, because they were already in ~/.agents/skills/ from another agent. To see which skills each agent on your Mac picks up, I use Skill Cabinet.
A prompt template is a Markdown file you expand with a slash command. Save this as ~/.pi/agent/prompts/review.md:
---
description: Review staged git changes
---
Review the staged changes (`git diff --cached`). Look for bugs,
missing error handling and anything that breaks the tests.
Now /review in the editor expands to that prompt. Templates take arguments too, with $1, $2 and $@.
Extensions
Extensions are how you change what Pi does. An extension is a TypeScript file that exports one function. That function gets the Pi API, and with it you can:
- register tools the model can call
- add slash commands and keyboard shortcuts
- listen to events, and block or change tool calls before they run
- ask the user something with a dialog
- replace parts of the UI, like the footer or the editor
- change the system prompt or the active tools in the middle of a conversation
- register virtual models and MCP servers
When an extension changes the prompt or the tools, Pi writes the change into the session. It survives /resume and /tree, and on models that support it the prompt cache stays valid.
Pi loads TypeScript files directly, so there’s no build step.
Block a command
Pi has no permission prompts, so let’s add one where it matters. This extension stops the agent from running git push. When Pi runs with a UI, it asks you first. In a script, it blocks the push.
Save it as .pi/extensions/no-push.ts in your project:
import type { ExtensionAPI } from '@earendil-works/pi-coding-agent'
import { isToolCallEventType } from '@earendil-works/pi-coding-agent'

export default function (pi: ExtensionAPI) {
  pi.on('tool_call', async (event, ctx) => {
    if (!isToolCallEventType('bash', event)) return
    if (!/\bgit\s+push\b/.test(event.input.command)) return

    if (!ctx.hasUI) {
      return { block: true, reason: 'git push is blocked, ask the user to push' }
    }

    const ok = await ctx.ui.confirm('git push', `Run "${event.input.command}"?`)
    if (!ok) return { block: true, reason: 'The user said no' }
  })
}
The tool_call event fires before every tool runs. isToolCallEventType narrows it to the bash tool, so event.input.command is typed. Returning { block: true } cancels the call, and the model receives the reason as the tool result.
I asked Pi to run git push origin main in a script, and the bash tool came back with git push is blocked, ask the user to push.
Add a tool
Now a custom tool. I check how many words of prose a post has, without counting the code blocks. Here’s that as a tool, in .pi/extensions/prose-words.ts:
import { readFile } from 'node:fs/promises'
import type { ExtensionAPI } from '@earendil-works/pi-coding-agent'
import { Type } from 'typebox'

export default function (pi: ExtensionAPI) {
  pi.registerTool({
    name: 'prose_words',
    label: 'Prose words',
    description: 'Count the words in a Markdown file, skipping code blocks',
    parameters: Type.Object({
      path: Type.String({ description: 'Path to the Markdown file' }),
    }),
    async execute(toolCallId, params) {
      const text = await readFile(params.path, 'utf8')
      const prose = text.replace(/```[\s\S]*?```/g, '')
      const words = prose.split(/\s+/).filter(Boolean).length
      return {
        content: [{ type: 'text', text: `${params.path} has ${words} words of prose` }],
        details: { words },
      }
    },
  })
}
The description is what the model reads to decide when to use the tool, so write it for the model. parameters is a TypeBox schema, which Pi turns into the JSON schema the model sees. Whatever you put in content goes back to the model.
Ask “How many words of prose are in README.md?” and the model calls prose_words instead of counting by hand.
Virtual models
An extension can also register a virtual model. You pick it in /model like any other model, and for each request it decides which real model answers, and at which thinking level. A router could send quick questions to a small, cheap model and the hard problems to a big one, while you keep one model selected.
The footer shows both, like auto • high → gpt-5.6-luna • medium, and /session splits the cost by real model. Pi ships a jev-router.ts example that lets TypeSafe’s Jev decide when to switch, and Earendil’s 1.0 announcement shows a router that plans with Claude Opus and hands the implementation to GPT.
Where extensions live
Extensions in ~/.pi/agent/extensions/ load in every project. Extensions in .pi/extensions/ load only in that project, and only once you trust it (more on that in a minute). For a quick test, load a file directly:
pi -e ./no-push.tsEdit an extension and type /reload, and Pi picks up the change without a restart.
Remember you can ask Pi to write extensions for you. Its docs are part of the npm package, and the agent knows where to find them. Pi also ships more than 50 example extensions, including a plan mode, subagents, a permission gate, protected paths, SSH execution, a todo list and, yes, Doom.
Project trust
A cloned repository could ship a .pi/extensions folder, and an extension runs with your full permissions. So the first time you start Pi in a folder that has project settings, MCP servers, extensions, skills or prompts, it asks whether you trust it. The answer is saved in ~/.pi/agent/trust.json, and /trust changes it later.
Scripts don’t get the prompt. In print mode, Pi skips project extensions unless you pass --approve (or -a). I tripped on this with the prose_words tool. Without -a the tool didn’t exist, and the model counted the words on its own. With -a it called the tool.
Note that AGENTS.md and CLAUDE.md load either way. Trust only guards the files that can run code or change settings.
Pi packages
A package bundles extensions, skills, prompt templates and themes, so you can share them through npm or Git:
pi install npm:@foo/pi-tools
pi install git:github.com/badlogic/pi-doom
Add -l to install into the project instead of globally. pi list shows what’s installed, pi config turns single resources on and off, and pi update --all updates Pi and every package.
Creating a package means adding a pi key to package.json that points to your folders. You’ll find packages on npm under the pi-package keyword.
Be careful with packages. Extensions run arbitrary code, and a skill can tell the model to run anything. Read the source before you install, and pin the version you reviewed by adding @ and a version or Git tag after the source.
Connect MCP servers
MCP (the Model Context Protocol) is the common way agents connect to other apps and services. Pi used to leave it to extensions, and since 1.0 it’s built in. It reads the same mcpServers format as Claude Code and Cursor, so you can copy an entry from their config files.
You add servers from the shell. This one is Cloudflare’s documentation server, which needs no login:
pi mcp add cloudflare-docs --url https://docs.mcp.cloudflare.com/mcp
pi mcp list
pi mcp list connects to every server and prints what it found:
cloudflare-docs: connected, 2 tools (codemode, global)
  https://docs.mcp.cloudflare.com/mcp
  tools: search_cloudflare_documentation, migrate_pages_to_workers_guide
Servers are saved in ~/.pi/agent/mcp.json. With -l they go in the project’s .pi/mcp.json instead, which Pi reads only after you trust the project. For a local server, put its command after --, like pi mcp add filesystem -- npx -y @modelcontextprotocol/server-filesystem .. For one that needs a login, like Sentry’s, pi mcp login <name> opens the browser. Inside a session, /mcp lists the servers and lets you sign in, reconnect, and turn them on and off.
By default, Pi doesn’t list the MCP tools in the prompt. When you configure a server, it turns on a tool called codemode, where the model writes a short JavaScript script and calls tools as functions, like tools.mcp__cloudflare_docs__search_cloudflare_documentation({ query: '...' }). Only what the script outputs goes back to the model. A script can run several searches in parallel and filter the results, so a big JSON response never fills the context.
If you want the model to see a server’s tools directly, add it with --exposure direct. With --exposure deferred, the model loads a tool only when it finds it with a tool_search tool.
The scripts run in a QuickJS sandbox with no file system, network or Node APIs. They reach the outside world only through Pi’s tools, and those tools still run with your permissions. A script that calls tools.bash() runs the command like any other bash call.
Codemode is useful without MCP too. To turn it on everywhere, add it to the default tools in ~/.pi/agent/settings.json:
{
  "defaultTools": ["+codemode"]
}
The + adds it next to read, bash, edit and write instead of replacing them. Scripts also get a models object that runs classifier models like Jev and image models with the logins you already have. Earendil’s “You said no MCP!” post has an example that pulls the issues from Linear’s MCP server and asks Jev how frustrated each commenter is.
If you’d rather not have any of this, pi config has a Built-in section where you turn off the MCP and codemode extensions.
Use Pi from scripts
You can also run Pi without the interactive screen. -p (print mode) runs one request and prints the answer:
pi -p "What does this project do? Answer in two sentences."You can pipe text in, and Pi adds it to the prompt:
git diff | pi -p "Write a commit message for this diff"--tools limits what the model can use. This gives it read-only access, which is what I want for a review in a script:
pi --tools read,grep,find,ls -p "Review the code in src/"--mode json prints every event as one JSON object per line: the session, each turn, every streaming update, every tool call and its result. It’s useful when another program needs to follow what the agent does, like a CI job that stores the tool calls.
For programs that aren’t written in Node, --mode rpc keeps Pi running and speaks a JSON protocol over stdin and stdout. The docs have one warning about it: split records on \n only. Node’s readline also splits on Unicode line separators that can appear inside JSON strings.
Embed Pi in your app
The npm package is also an SDK. Install it in a project:
npm install @earendil-works/pi-coding-agentThis script creates a session with the LM Studio model from earlier, gives it two read-only tools and streams the answer:
import { createAgentSession, ModelRuntime, SessionManager } from '@earendil-works/pi-coding-agent'

const modelRuntime = await ModelRuntime.create()
const model = modelRuntime.getModel('lmstudio', 'google/gemma-4-26b-a4b')

const { session } = await createAgentSession({
  cwd: '/Users/flavio/dev/tip-calculator',
  model,
  modelRuntime,
  tools: ['read', 'ls'],
  sessionManager: SessionManager.inMemory(),
})

session.subscribe((event) => {
  if (event.type === 'message_update' && event.assistantMessageEvent.type === 'text_delta') {
    process.stdout.write(event.assistantMessageEvent.delta)
  }
})

await session.prompt('What does tip.js export? One sentence.')
console.log()
session.dispose()
ModelRuntime reads the same models.json and logins as the CLI. SessionManager.inMemory() means nothing gets saved to disk. The answer I got was “tip.js exports a function named tip that calculates the tip amount based on a bill and a percentage.”
A session has more methods than prompt(): steer() and followUp() do what Enter and Alt+Enter do in the terminal, setModel() switches models, and compact() shrinks the context. Extensions and skills load in SDK sessions too.
The SDK gives you the same agent you use in the terminal, built for one person who’s there to restart it if the process dies. For agents that run for a long time on a server, Earendil released Pi Durable next to 1.0, as a separate experimental package. It stores each conversation (in SQLite, for example), so an agent picks up where it left off after a crash or a redeploy, and more than one person or app can steer the same agent.
Keep it contained
Pi runs with your user’s permissions. It can read your SSH keys, delete your home folder and push to any repository you can push to. There’s no sandbox, and the docs are clear that project trust isn’t one either. Prompt injection from a README or a build log is a risk they don’t try to solve inside Pi.
For your own projects, with you watching, that’s the same deal you get from most agents in “full access” mode. For anything else (a repository you don’t know, a long run you won’t watch), the docs describe a few ways to isolate it:
- Run the whole
piprocess in a Docker container, mounting only the project folder. The downside is that your API keys go inside the container too. - Use the Gondolin extension, which keeps Pi and your logins on the host and runs the tools inside a small Linux virtual machine, with the project mounted at
/workspace. - Run it in a policy-controlled sandbox like OpenShell or Docker Sandboxes.
A remote machine is another option. I tried a few of those in my exe.dev deep dive. Fun fact: exe.dev donated the pi.dev domain.
Pi also contacts pi.dev at startup to check for a newer version and to refresh its list of models, and it sends an anonymous ping after installs and updates. PI_OFFLINE=1 (or --offline) turns off all of that automatic network activity.
How does Pi compare to other coding agents?
The closest agent to Pi is fx, Vercel Labs’ agent. Both are open source, both run in the terminal, both read AGENTS.md and skills, and both can be embedded in your own app. Since Pi 1.0, both have MCP built in too. fx also ships subagents and permission modes, while Pi leaves those to extensions.
Claude Code and Codex come from model companies, so they’re built around their own models and plans. They both have plan modes, subagents, MCP, hooks, plugins and permission controls out of the box. Codex also runs commands in a sandbox by default.
OpenCode is the other big open source terminal agent. It supports many providers like Pi does, but it comes with more: Build and Plan agents you switch with Tab, built-in subagents, per-tool permission rules, and an /undo command that reverts the file changes.
| Pi | fx | Claude Code | Codex CLI | OpenCode | |
|---|---|---|---|---|---|
| License | MIT | Apache-2.0 | Closed source | Apache-2.0 | MIT |
| Models | 15+ providers, several subscriptions, local | Vercel AI Gateway, Codex or Grok plan, local preview | Claude | OpenAI | Many providers, local |
| MCP | Built in, codemode by default | Built in | Built in | Built in | Built in |
| Subagents | Extension or package | Built in | Built in | Built in | Built in |
| Permission prompts | Extension | Built in | Built in | Sandbox and approvals | Built in |
| Customize with | TypeScript extensions, packages, MCP | Skills, MCP, libfx | Hooks, plugins, skills, MCP | Plugins, hooks, skills, MCP | Plugins, agents, MCP |
| Embed in your app | SDK and RPC | libfx | Agent SDK | SDK | Server and SDK |
Cursor’s agent is a different kind of tool. It lives in an editor first, the terminal version comes with it, and both run on your Cursor plan. I wrote about how these fit together in IDE, CLI or vibe coding tool.
My advice is to pick Pi if you like tuning your tools and want every model provider in one place, including your ChatGPT plan and local models. Pick Claude Code or Codex if you want the most polished experience with one vendor’s models and a sandbox you don’t have to set up. Pick OpenCode if you want an open source agent with the features already included.
Pi also works well next to the others. It’s a normal terminal program, so a terminal workspace like Herdr can run Pi, Claude Code and Codex in panes side by side. Herdr installs a small extension into ~/.pi/agent/extensions/ so it can show whether Pi is working or waiting for you.
How I use Pi
I started using Pi at the end of April 2026, still on the old @mariozechner package.
I logged in with my ChatGPT subscription and made GPT-5.5 the default, with the thinking level at minimal because most of what I asked was small. I added Claude Opus 4.7 to the scoped models, so Ctrl+P switched to it when a task needed more.
The first thing I did was ask Pi about itself. I wanted to know why the remotion-best-practices and wrangler skills showed up in the header, and where they were stored. Then I used it to reorganize my skills. It copied a few of them into ~/.agents/skills and replaced the old copies with symlinks, so each skill lives in one place.
Then the sled game. I started an empty folder and asked for “a 3D game about running dogs on sleds in the snow”. Pi set up Vite, TypeScript and Three.js, wrote the game with lane steering, obstacles, fish to collect and a score, and ran the build. I kept going from there, asking for the dogs to turn when they change lane and for an endless world to move around in. That’s also the session where I learned that /clone doesn’t bring your files back.
After that, Pi became my agent for small jobs:
- In Backpack, an Astro and PocketBase app, I asked why login failed with “Something went wrong while processing your request”, and what the dozens of
cli_migration_snapshot_*collections were. Then I had it delete them. - In a small CLI I wrote to find and kill local dev servers, I asked it to kill the leftover Netlify Edge Functions helper processes.
- In another project, “create a GitHub repo here” was the whole prompt.
- In my Notion skill, I asked it to switch from the Notion MCP server to Notion’s
ntnCLI.
The Notion change was Pi’s old philosophy in action. Pi had no MCP back then, and a CLI with good docs did the same job as an MCP server.
I also added the LM Studio provider you saw earlier, so I could switch to Gemma 4 from the same picker. It’s fine for questions about code on my machine. For changes, I stayed on GPT-5.5.
Pi isn’t the right tool for everything. I wouldn’t give it a repository I don’t know without a container, because nothing stops a command I didn’t expect. When I want a plan I can review before any file changes, Codex’s Plan mode is already there, while Pi needs a package. And for long unattended runs I’d rather have an agent with a real sandbox.
Where Pi fits me is small jobs in projects I know, plus the times I want the agent to behave differently. Then I write an extension, or ask Pi to write it, and /reload.
Want me to talk about your product? You can sponsor this site.
Related posts about ai: