SwiftUI: the NavigationView view
AI workshop
join cohort #1
The NavigationView view is a very important view, and one you’ll use all the time.
NavigationView {

}
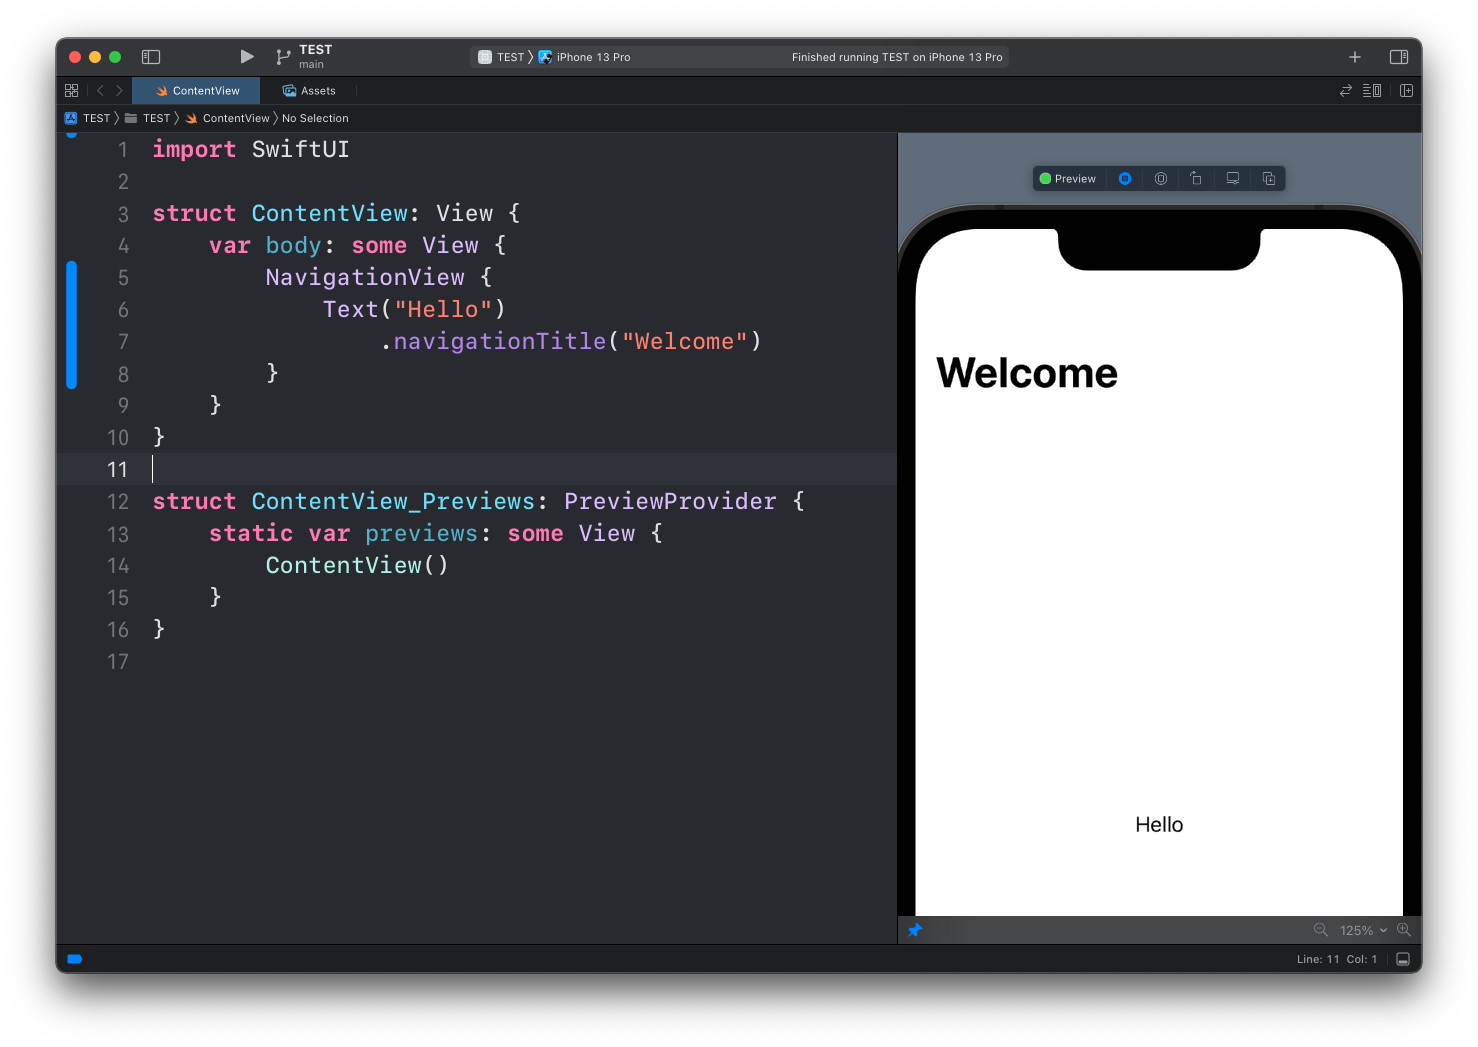
Once you wrap a view into a NavigationView you can add a title to the view with the navigationTitle() modifier:
NavigationView {
    Text("Hello")
        .navigationTitle("Welcome")
}
The main benefit, however, is that now we can make views be links that bring the user to other views.
First thing we do is creating another view. You an add it to the same file, or to another file in your project:
struct ThanksView: View {
    var body: some View {
        Text("Thanks for checking out the app!")
    }
}
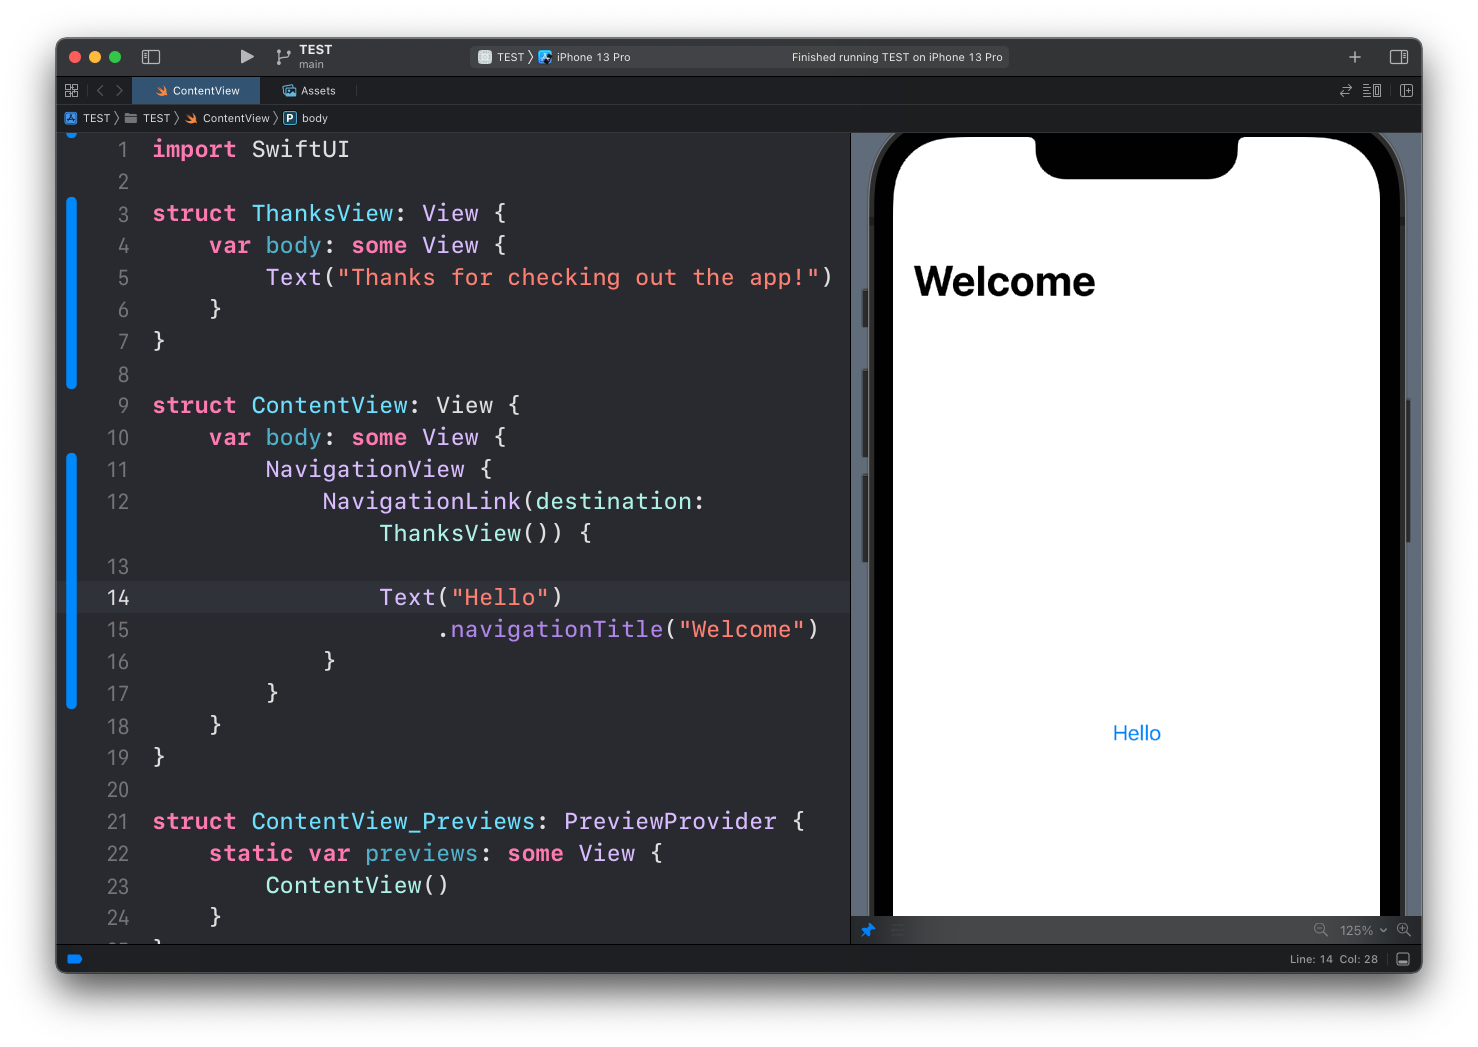
Then, wrap the “Hello” Text view into a NavigationLink view, where we set the destination parameter to ThanksView:
NavigationView {
    NavigationLink(destination: ThanksView()) {
        Text("Hello")
            .navigationTitle("Welcome")
    }
}
Now a lot of things are happening automatic: the Hello text turns blue and tappable:

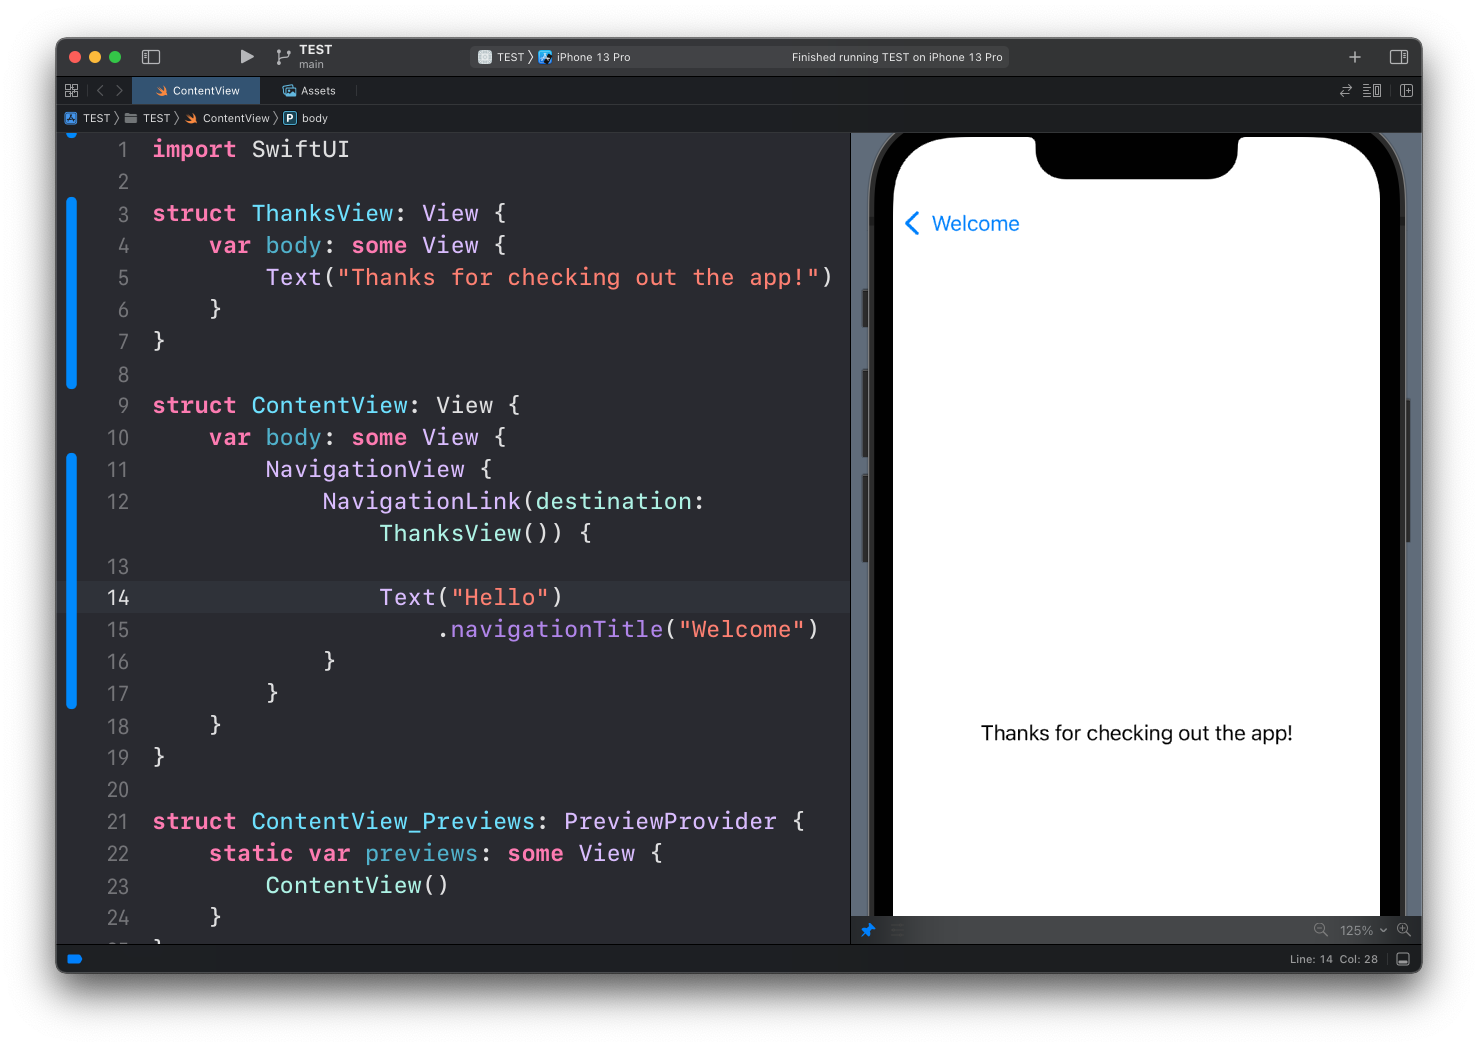
And once we tap on it, we’re shown the ThanksView and a link to get back to the original view. The text shown in the top left button comes from the navigationTitle modifier we set:

Here’s the full code used in the example:
import SwiftUI

struct ThanksView: View {
    var body: some View {
        Text("Thanks for checking out the app!")
    }
}

struct ContentView: View {
    var body: some View {
        NavigationView {
            NavigationLink(destination: ThanksView()) {
                Text("Hello")
                    .navigationTitle("Welcome")
            }
        }
    }
}
That’s one way to navigate between views, and I’d say the simplest one.
Sometimes before navigating to another view you want to perform some action. In this case, we can have a boolean property showThanks that we can set to true when we want the ThanksView to appear. We do so when the user taps a button:
struct ContentView: View {
    @State private var showThanks = false

    var body: some View {
        NavigationView {
            VStack {
                NavigationLink(destination: ThanksView(), isActive: $showThanks) {}

                Button("Hello") {
                    showThanks = true
                }
                .navigationTitle("Welcome")
            }
        }
    }
}
The app looks exactly the same as before, but now when the user taps the button, we can do something, like logging the transition or anything else:
Button("Hello") {
    showThanks = true
    print("Transitioned to ThanksView")
}
Remember that
print()does not log in preview mode, only in the Simulator
I wrote 20 books to help you become a better developer:
- Astro Handbook
- HTML Handbook
- Next.js Pages Router Handbook
- Alpine.js Handbook
- HTMX Handbook
- TypeScript Handbook
- React Handbook
- SQL Handbook
- Git Cheat Sheet
- Laravel Handbook
- Express Handbook
- Swift Handbook
- Go Handbook
- PHP Handbook
- Python Handbook
- Linux Commands Handbook
- C Handbook
- JavaScript Handbook
- CSS Handbook
- Node.js Handbook