HTML Canvas API Tutorial
A guide to the Canvas API, one way offered by browsers to draw to the screen
AI workshop
join cohort #1
Tip: also check my tutorials how to print a canvas to a data URL, how to write text into to an HTML canvas, how to load an image in an HTML canvas and how to create and save an image with Node.js and Canvas
The HTML canvas is an HTML tag, <canvas>, which is an element where we can draw to using the Canvas API.
Create a canvas
Creating a canvas is as simple as dropping a <canvas></canvas> in a blank HTML file:
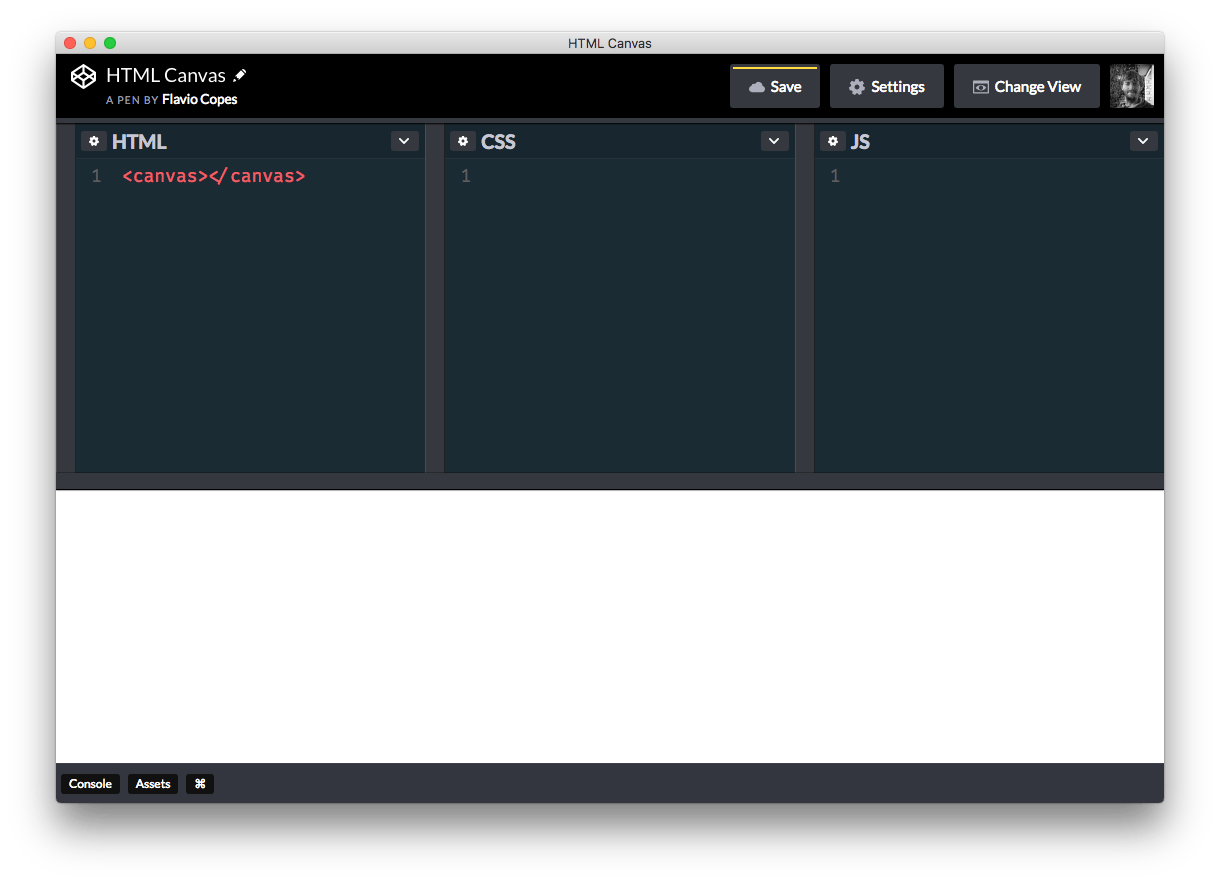
You don’t see anything in the page because the canvas is an invisible element. Let’s add some border:
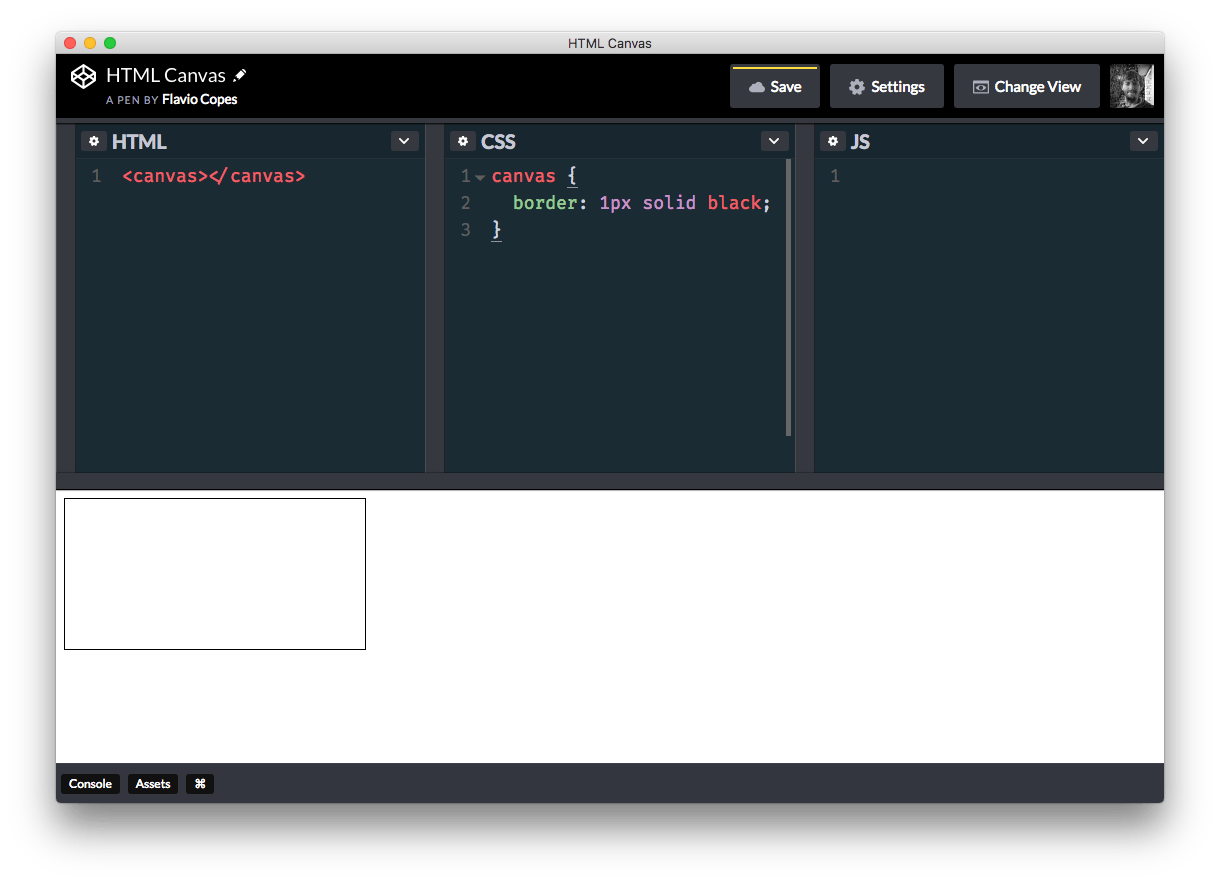
Chrome automatically adds an 8px margin to the body element. This is why our border looks like a frame, and you can remove that margin by setting
body {
  margin: 0;
}
We’ll leave the default for now.
Our canvas is now reachable from JavaScript using the DOM Selectors API, so we can use document.querySelector():
const canvas = document.querySelector('canvas')Change the background color of a canvas
You do that in CSS:
canvas {
  background-color: lightblue;
}
Resize a canvas
You can set the width and height in CSS:
canvas {
  border: 1px solid black;
  width: 100%;
  height: 100%;
}
and in this way the canvas will expand to fill all the outer element size.
If you put the canvas as a first level element in the HTML, the above code will expand the canvas to fit the entire body.
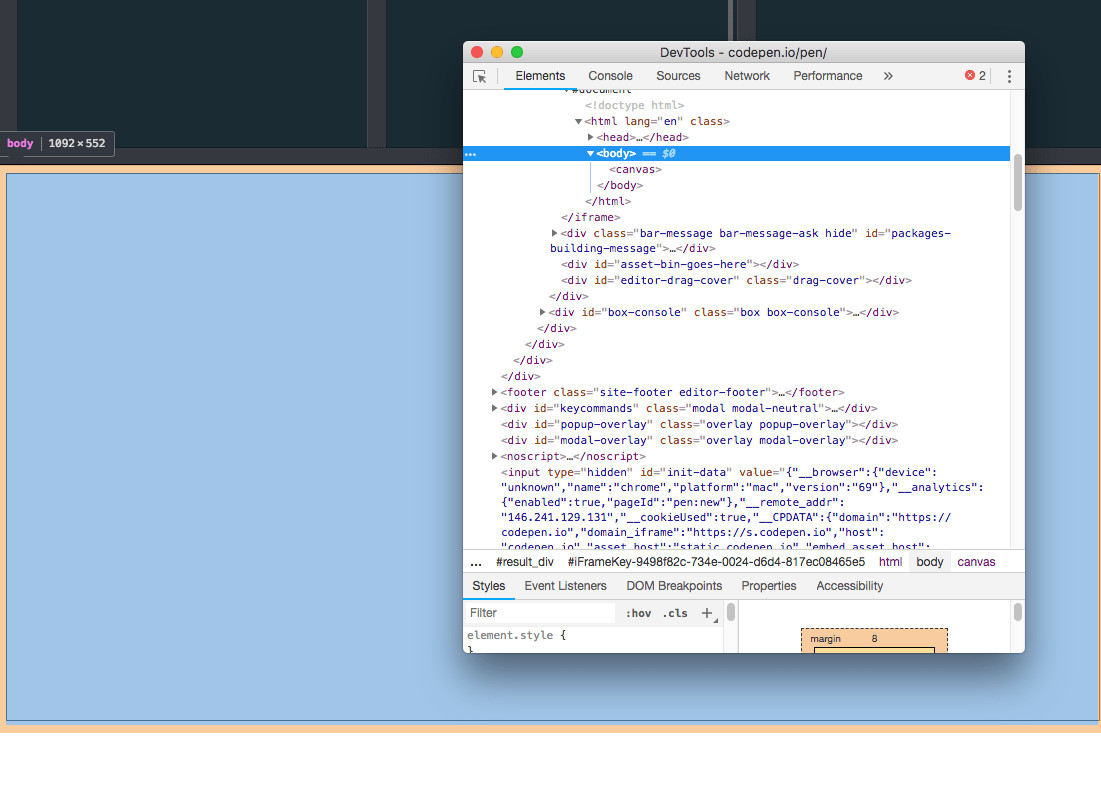
The body is not filling the entire window size. To fill the entire page instead we need to use JavaScript:
canvas.width = window.innerWidth
canvas.height = window.innerHeight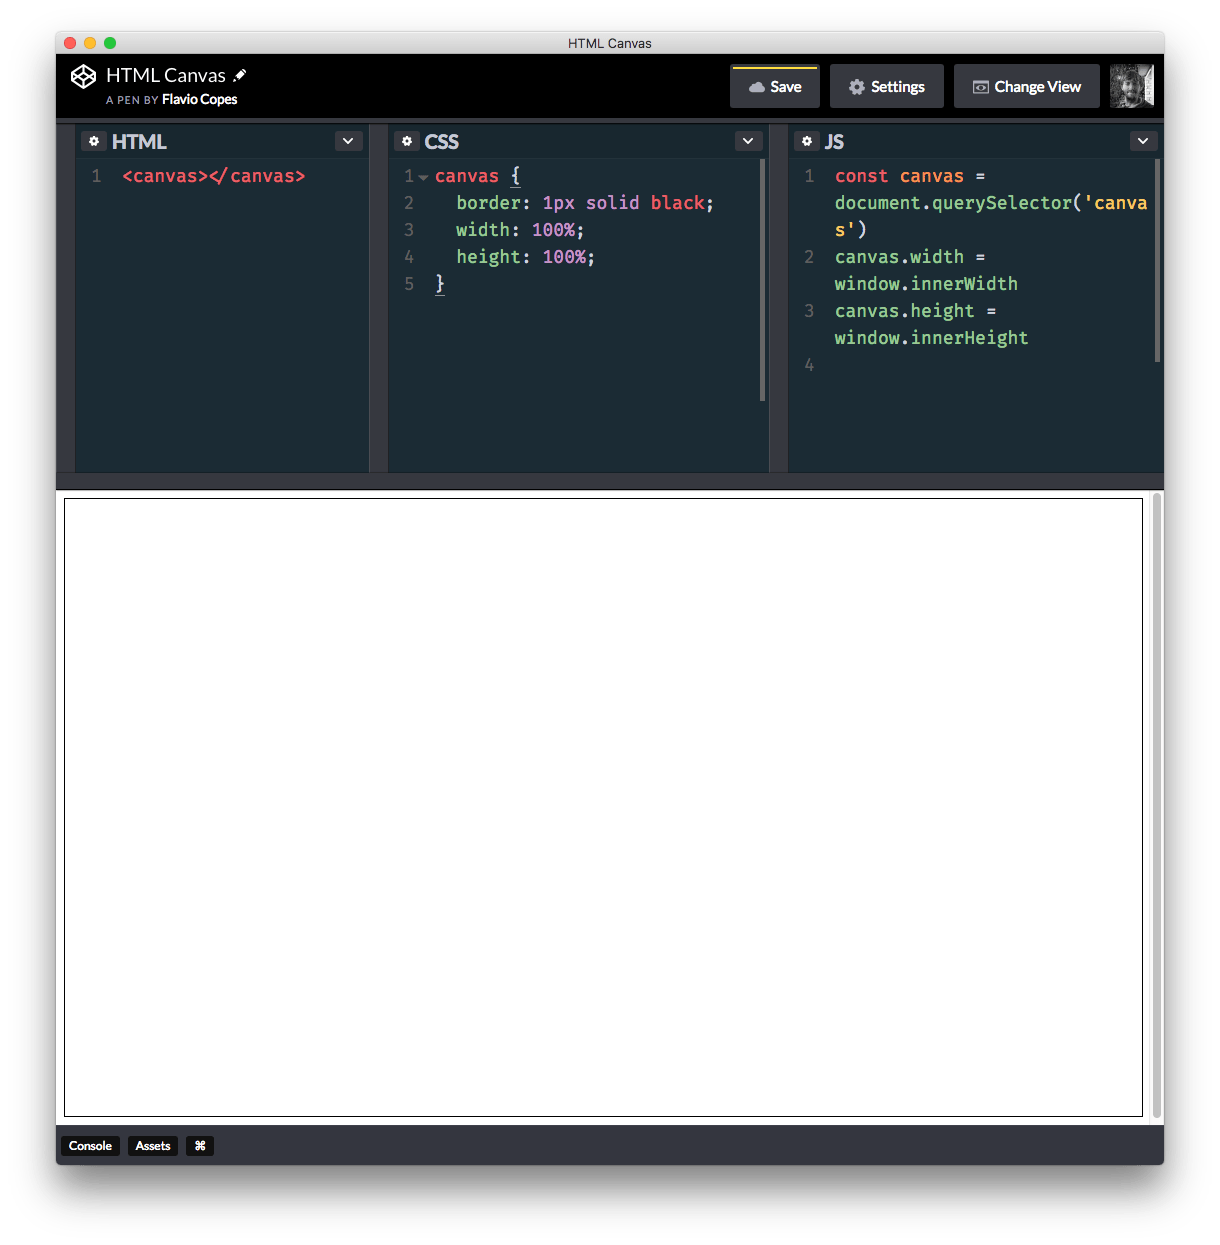
If you now remove the body margin and set the background of the canvas using CSS, we can fill our entire page with the canvas and we can start drawing on it:
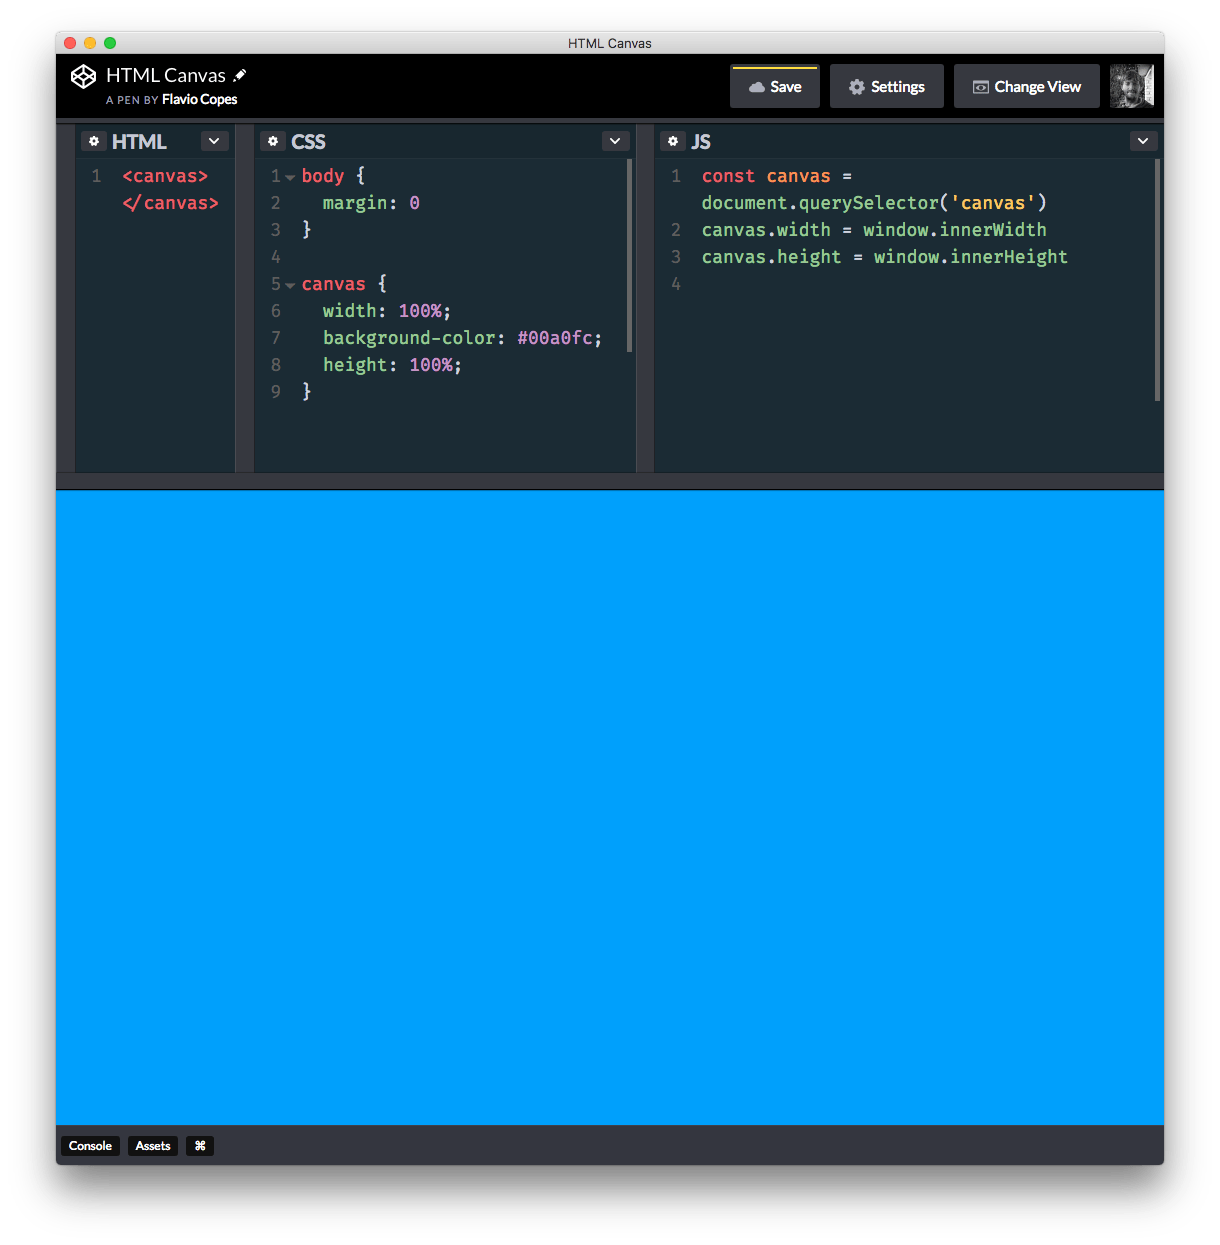
If the window resizes we need to recalculate the canvas width as well, using a debounce to avoid calling too many times our canvas resizing (the resize event can be called hundreds of times as you move the window with the mouse, for example):
const debounce = (func) => {
  let timer
  return (event) => {
    if (timer) { clearTimeout(timer) }
    timer = setTimeout(func, 100, event)
  }
}

window.addEventListener('resize', debounce(() => {
  canvas.width = window.innerWidth
  canvas.height = window.innerHeight
}))
Get a context from the canvas
We want to draw to the canvas.
To do this, we need to get a context:
const c = canvas.getContext('2d')Some assign the context to a variable named
c, somectx- it’s a common way to shortcut “context”
The getContext() method returns a drawing context on the canvas, according to the type that you pass as parameter.
Valid values are
2d, the one we’ll usewebglto use WebGL version 1webgl2to use WebGL version 2bitmaprendererto use with ImageBitmap
Based on the context type, you can pass a second parameter to getContext() to specify additional options.
In the case of the 2d context, we basically have one parameter we can use in all browsers, and it’s alpha, a boolean that defaults to true. If set to false, the browser knows the canvas does not have a transparent background and can speed up rendering.
Draw elements to a canvas
With the context we can now draw elements.
We have several methods to do so. We can draw:
- text
- lines
- rectangles
- paths
- images
and for each of those elements we can alter the fill, the stroke, the gradient, the pattern, the shadow, rotate them, scale and perform a lot of operations.
Let’s start with the simplest thing: a rectangle.
The fillRect(x, y, width, height) method serves this purpose:
c.fillRect(100, 100, 100, 100)This is going to draw a black rectangle of 100 x 100 pixels, starting from position x 100 and y 100:
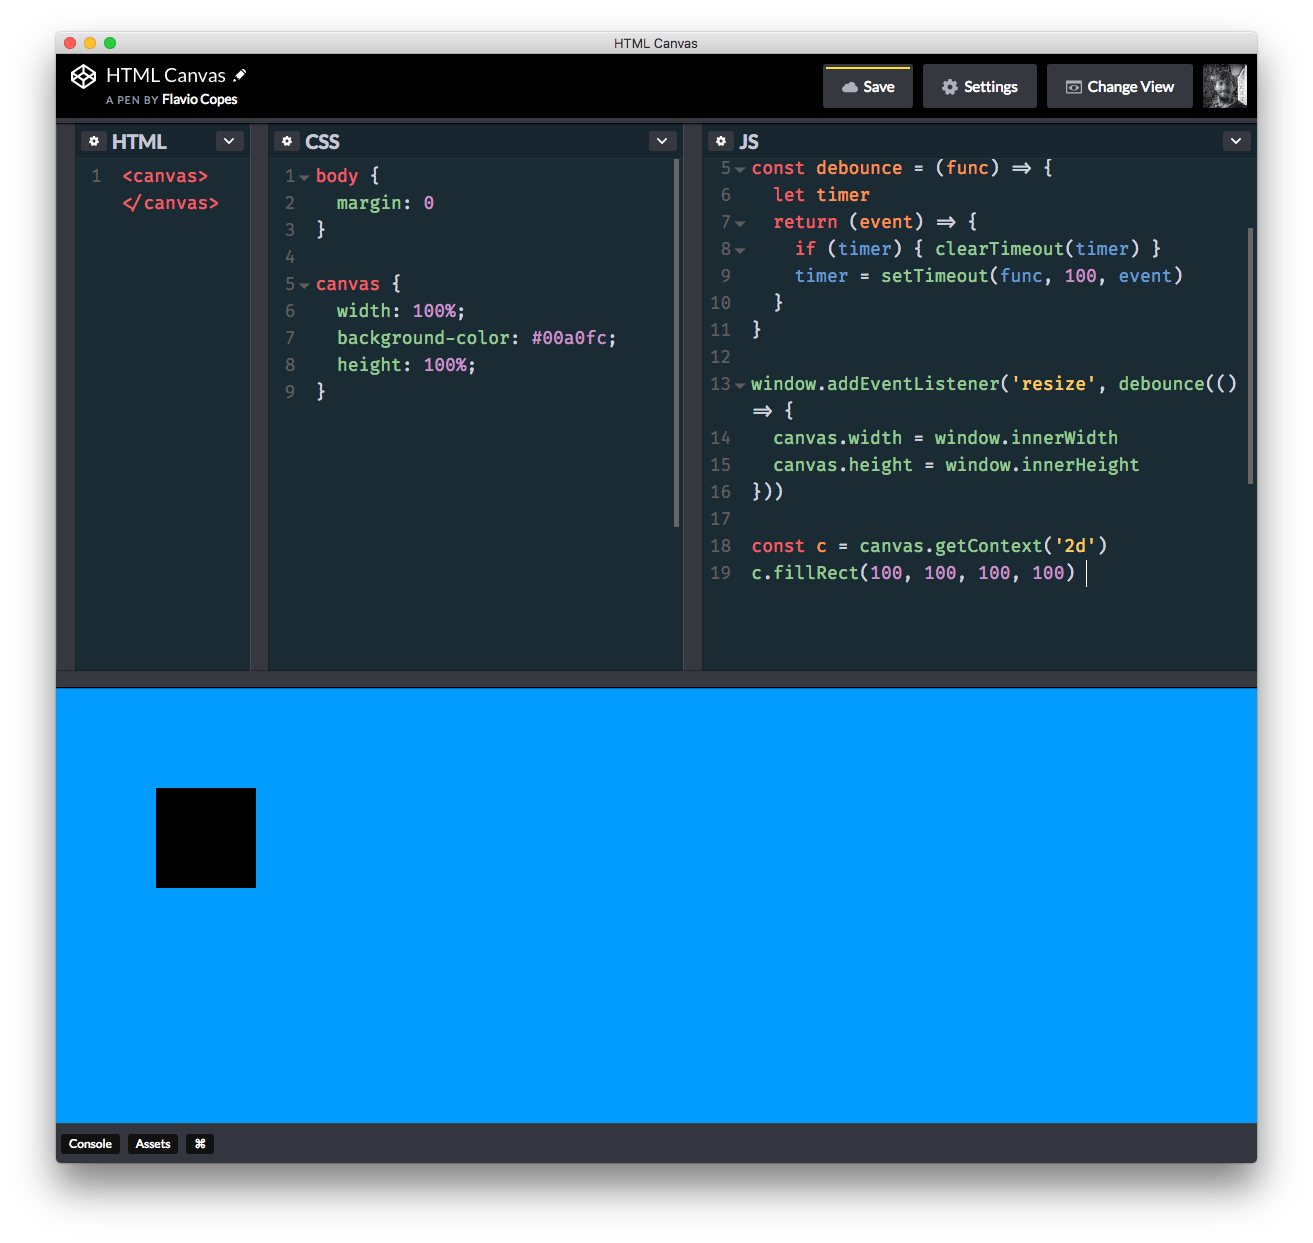
You can color the rectangle by using the fillStyle() method, passing any valid CSS color string:
c.fillStyle = 'white'
c.fillRect(100, 100, 100, 100)
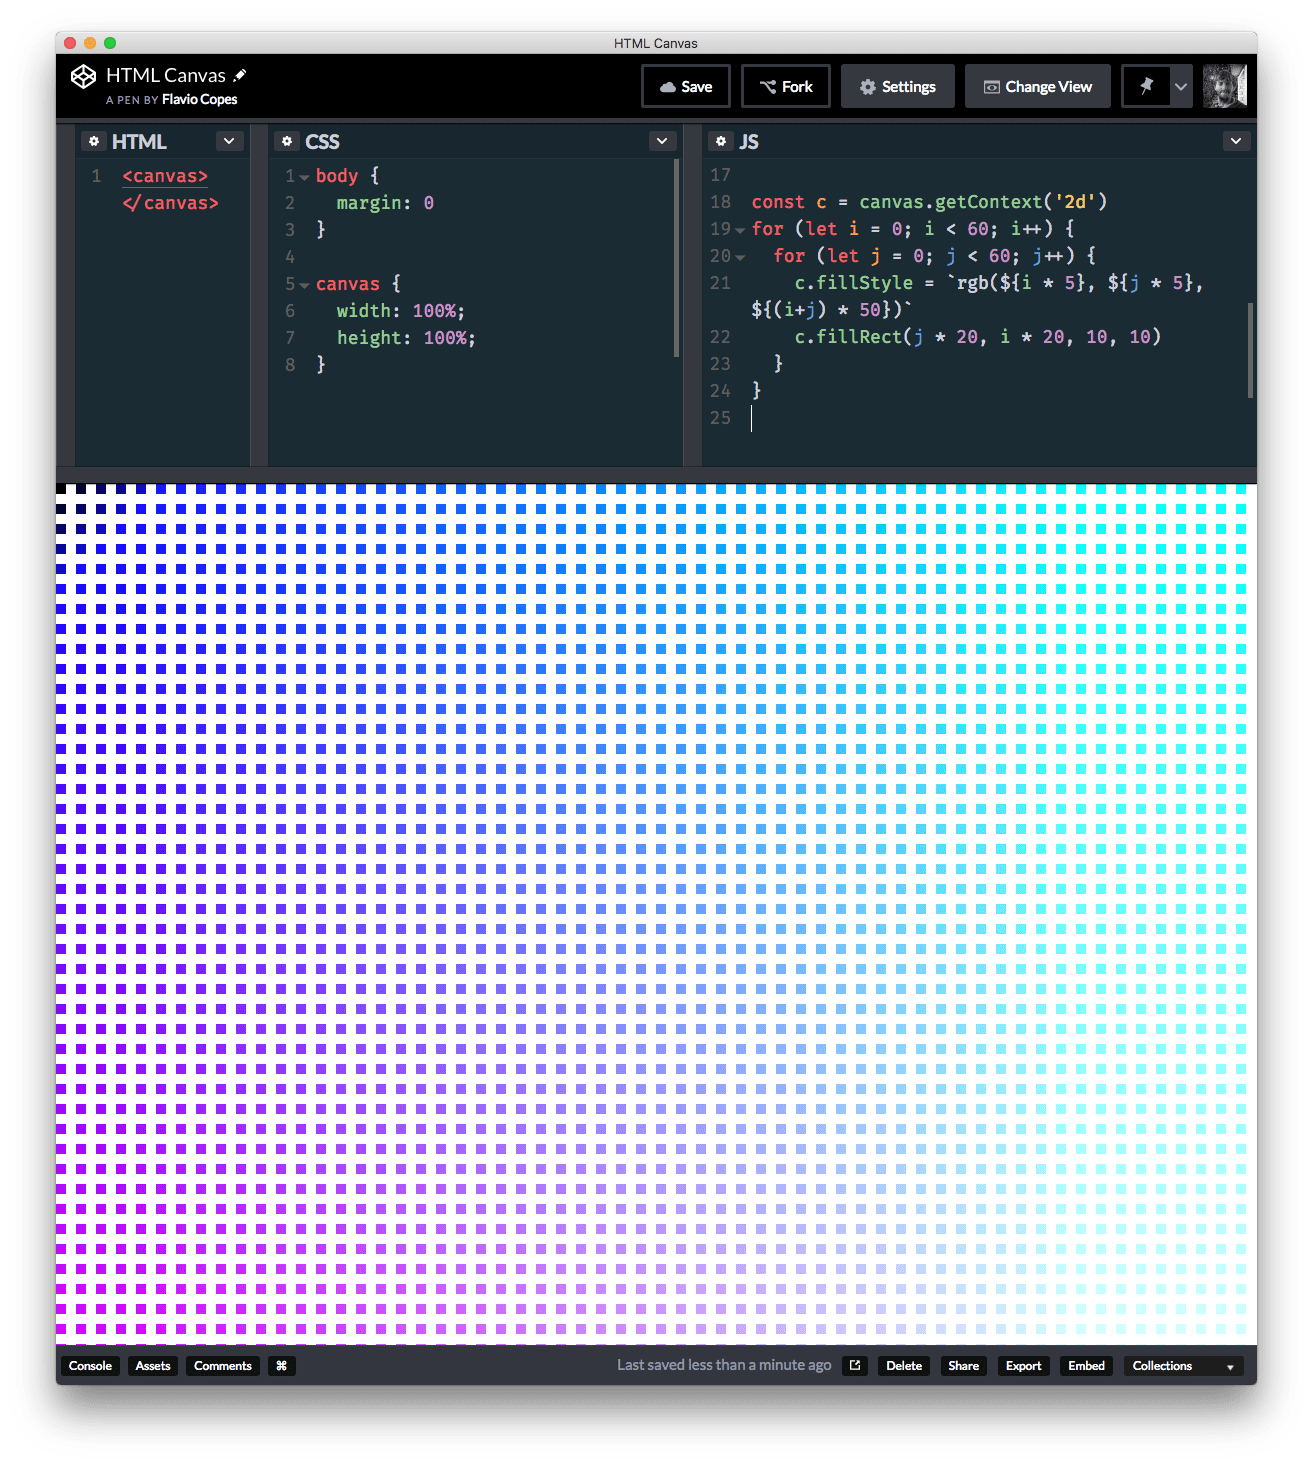
You can get creative now and draw many things in this way:
for (let i = 0; i < 60; i++) {
  for (let j = 0; j < 60; j++) {
    c.fillStyle = `rgb(${i * 5}, ${j * 5}, ${(i+j) * 50})`
    c.fillRect(j * 20, i * 20, 10, 10)
  }
}
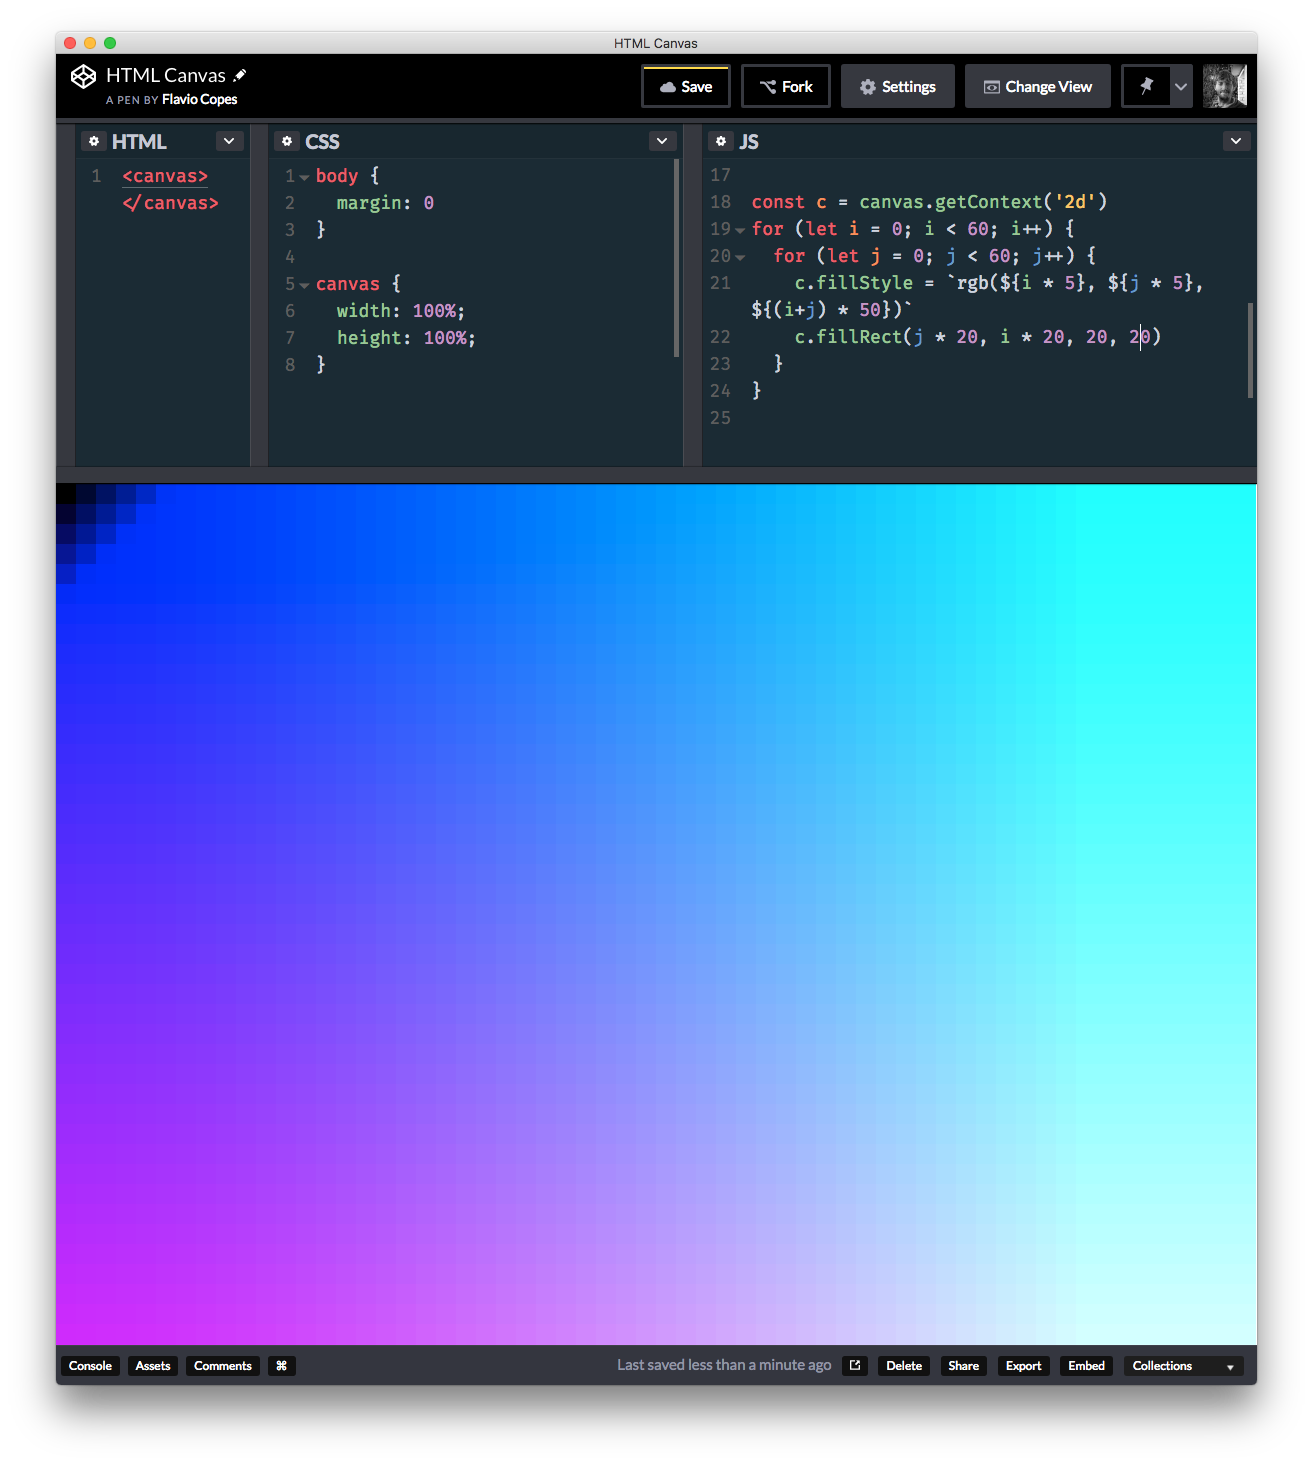
or
for (let i = 0; i < 60; i++) {
  for (let j = 0; j < 60; j++) {
    c.fillStyle = `rgb(${i * 5}, ${j * 5}, ${(i+j) * 50})`
    c.fillRect(j * 20, i * 20, 20, 20)
  }
}
Drawing elements
As mentioned you can draw many things:
- text
- lines
- rectangles
- paths
- images
Let’s just see a few of them, rectangles and text, to get the gist of how things work. You can find the API for all the rest that you need here.
Changing the colors
Use the fillStyle and strokeStyle properties to change the fill and stroke colors of any figure. They accept any valid CSS color, including strings and RGB calculations:
c.strokeStyle = `rgb(255, 255, 255)`
c.fillStyle = `white`
Rectangles
You have 3 methods:
- clearRect(x, y, width, height)
- fillRect(x, y, width, height)
- strokeRect(x, y, width, height)
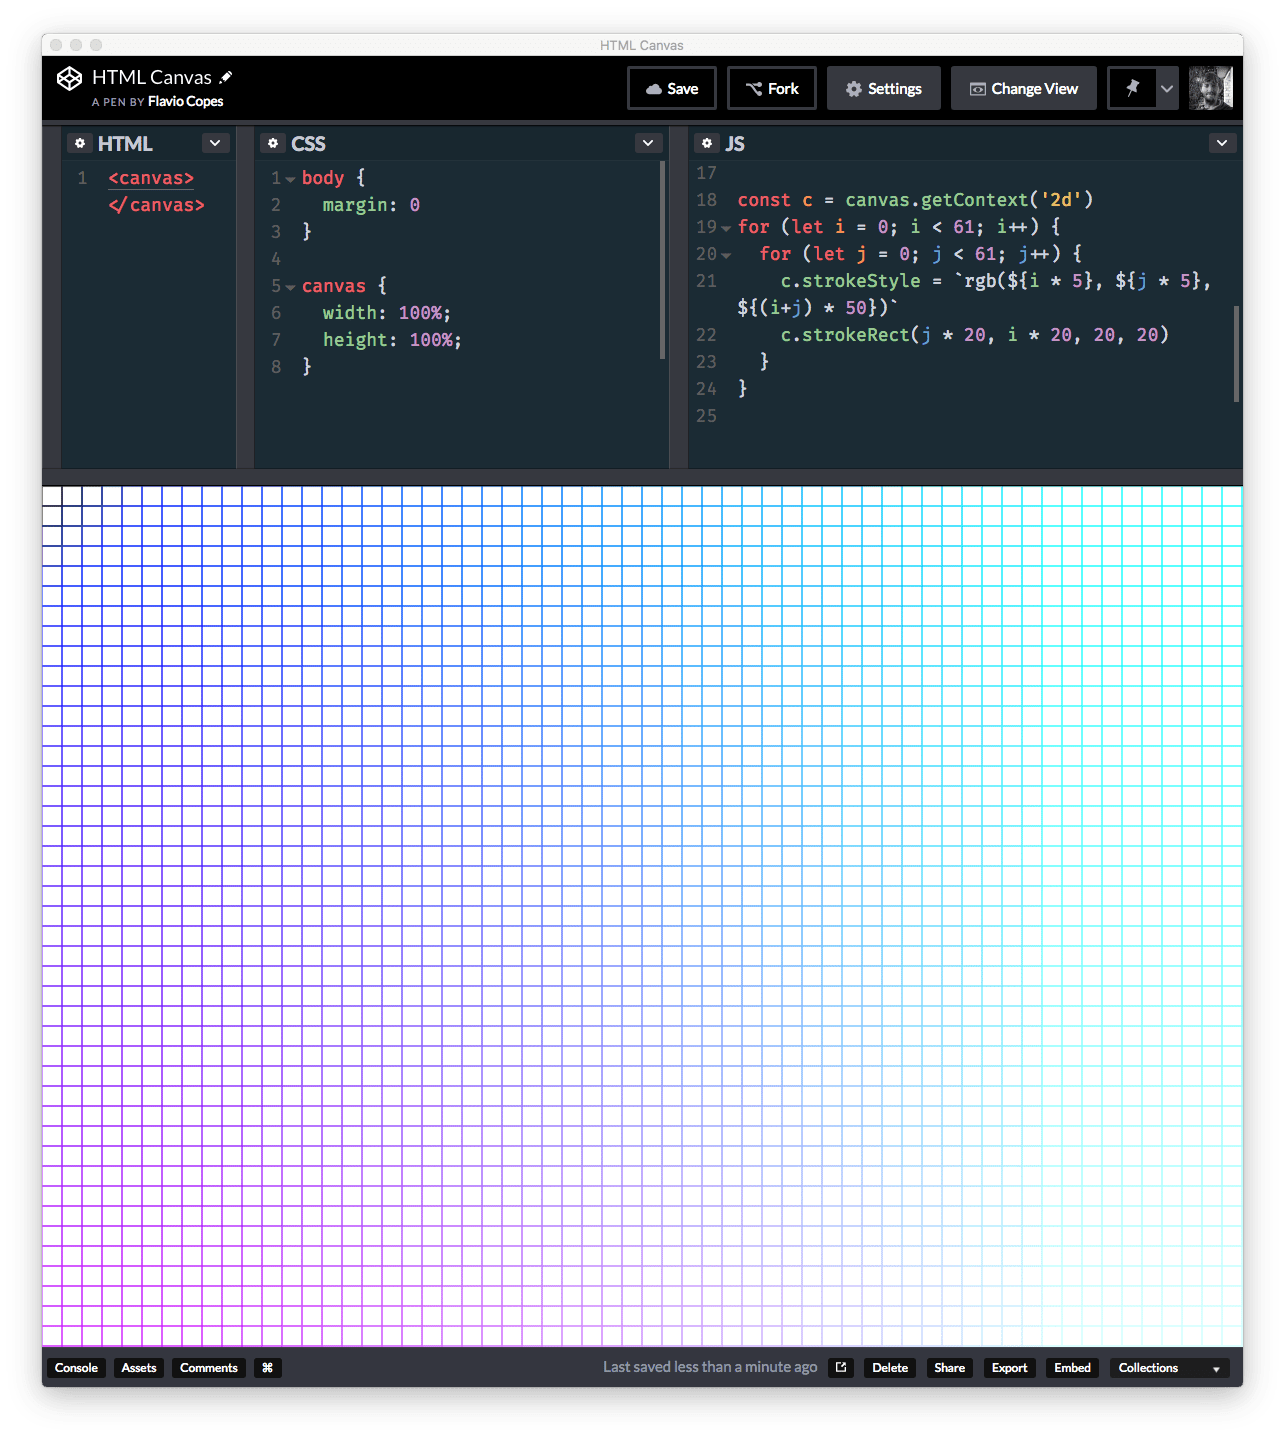
We saw fillRect() in the previous section. strokeRect() is similar in how it’s called, but instead of filling a rect, it just draws the stroke using the current stroke style (which can be changed using the strokeStyle context property):
const c = canvas.getContext('2d')
for (let i = 0; i < 61; i++) {
  for (let j = 0; j < 61; j++) {
    c.strokeStyle = `rgb(${i * 5}, ${j * 5}, ${(i+j) * 50})`
    c.strokeRect(j * 20, i * 20, 20, 20)
  }
}
clearRect() sets an area as transparent:
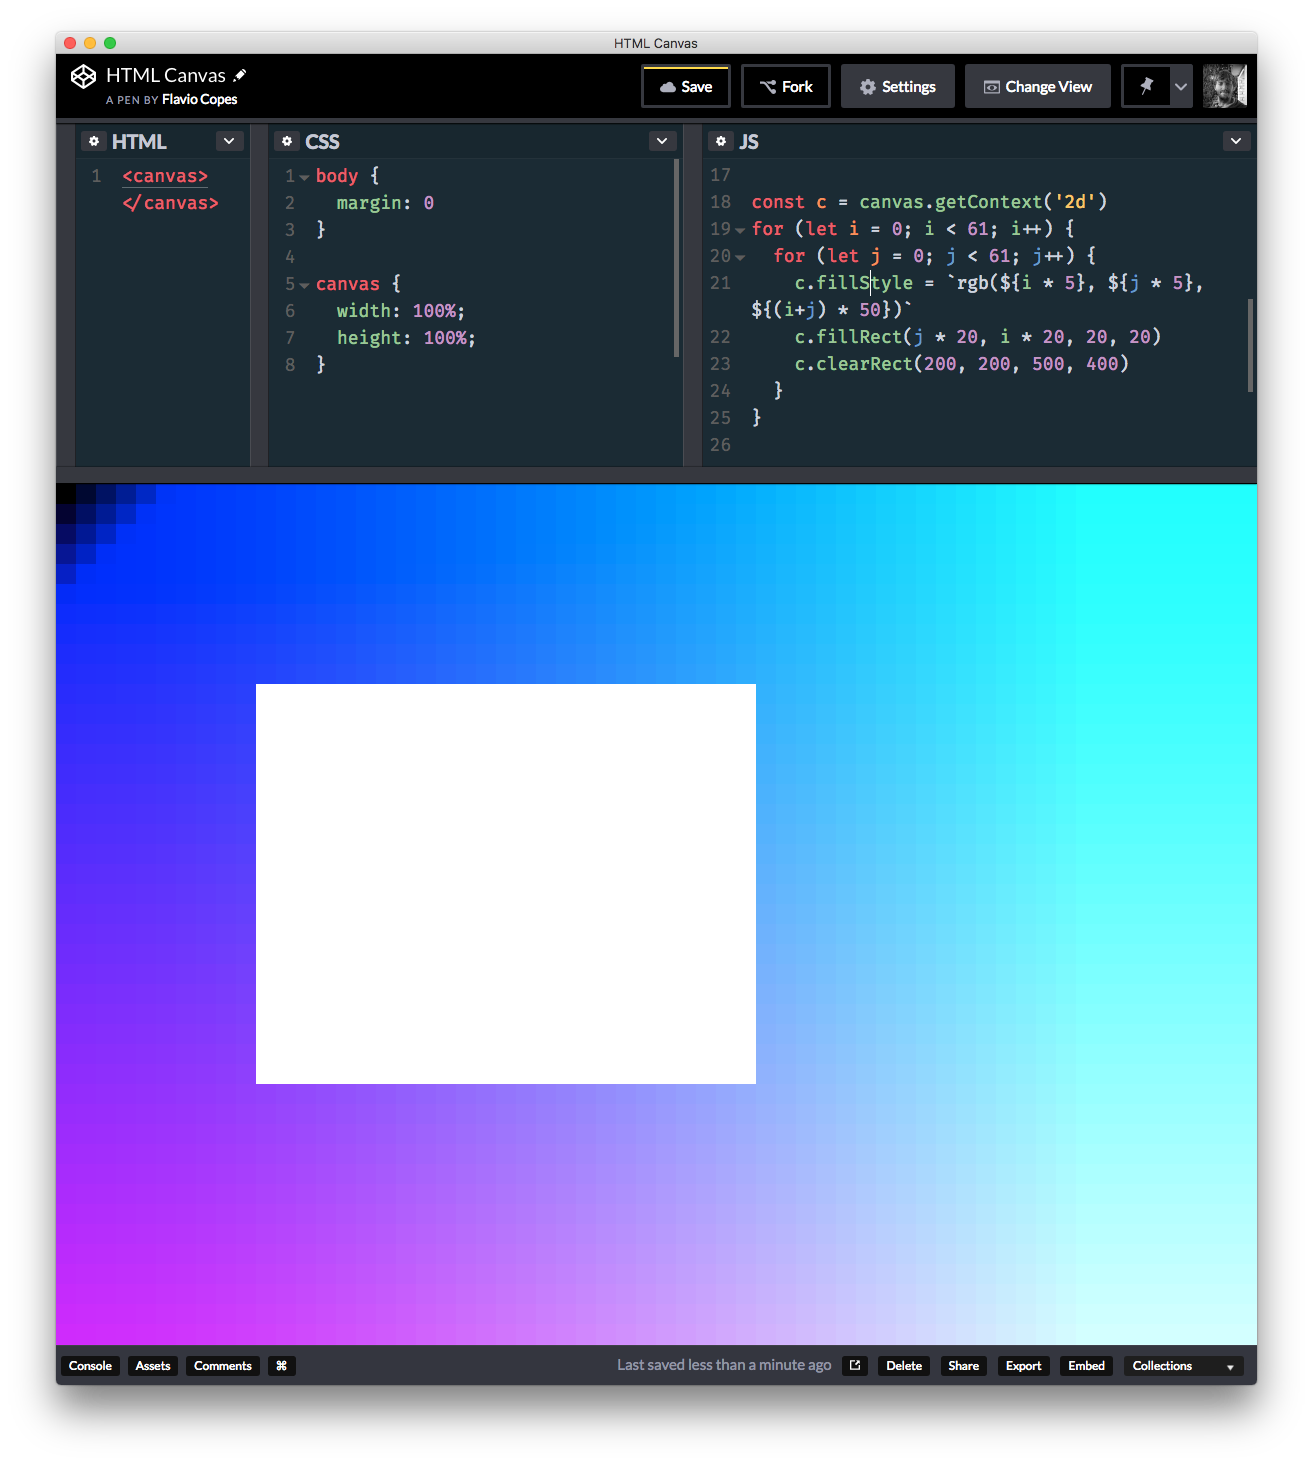
Text
Drawing text is similar to rectangles. You have 2 methods
- fillText(text, x, y)
- strokeText(text, x, y)
which let you write text on the canvas.
x and y refer to the bottom-left corner.
You change the font family and size using the font property of the canvas:
c.font = '148px Courier New'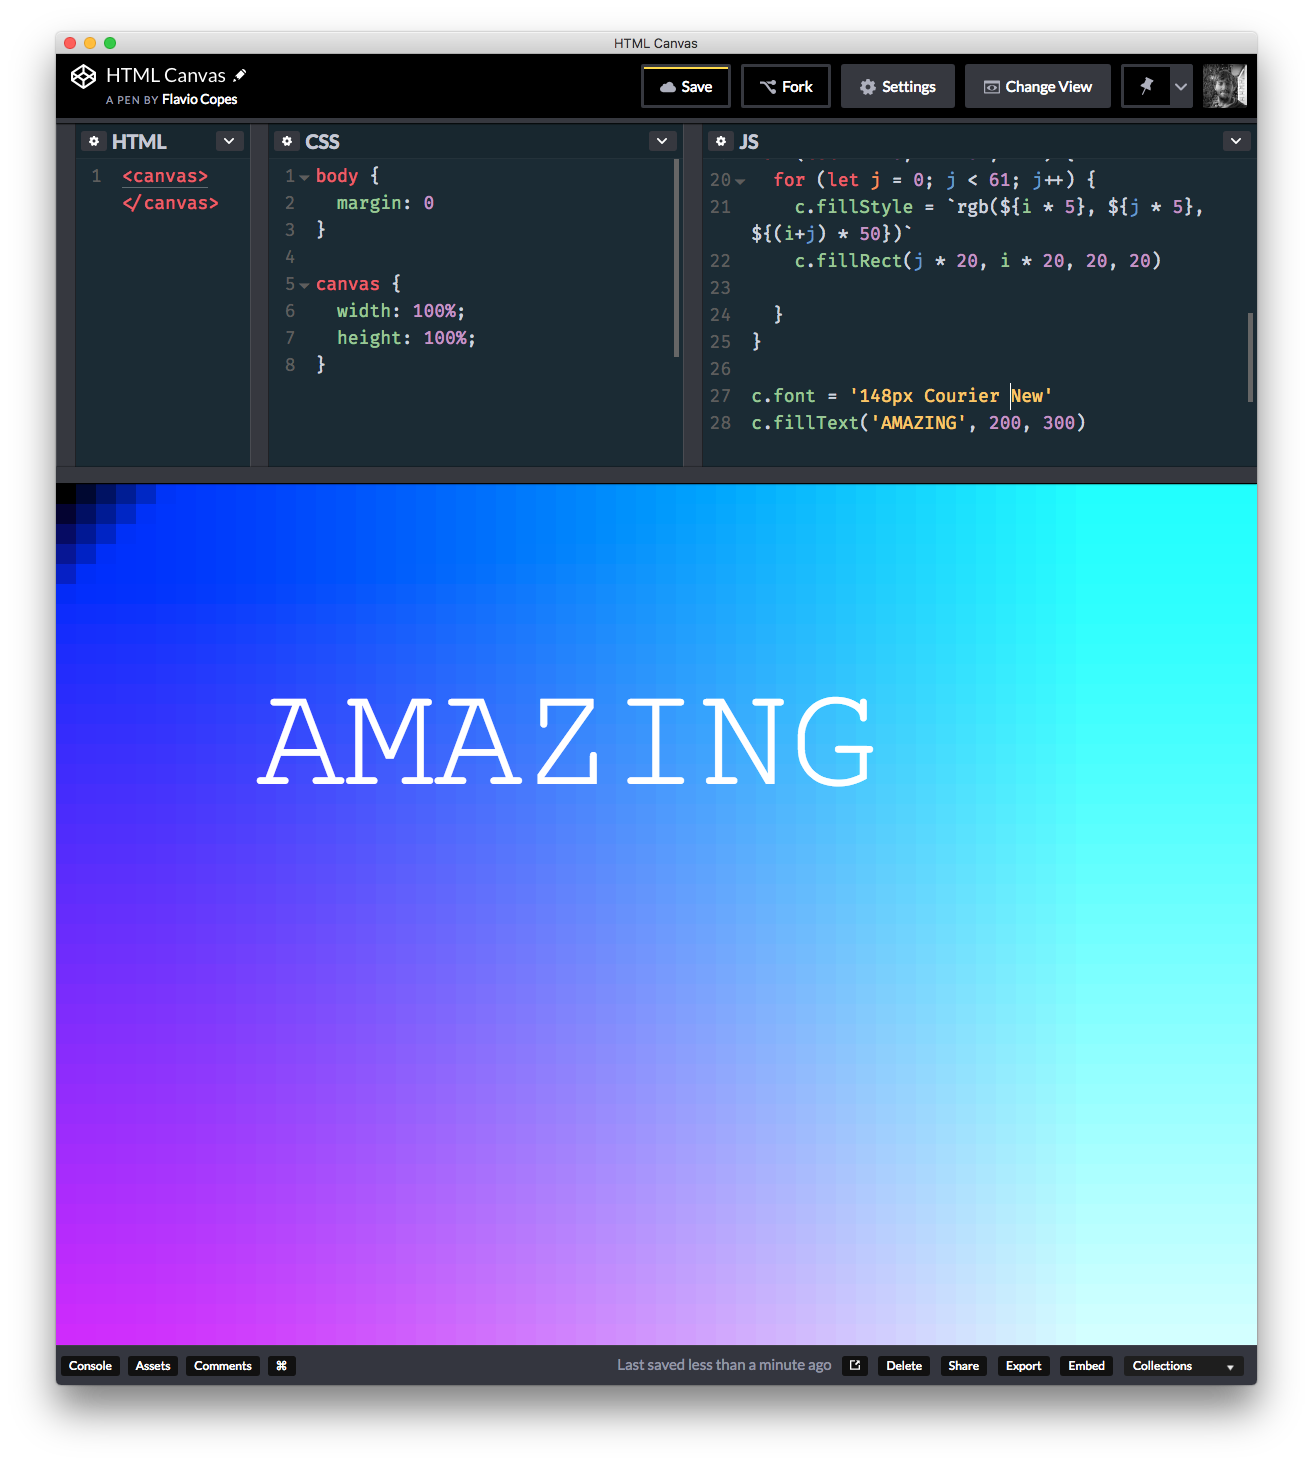
There are other properties you can change, related to text (* = default):
textAlign(start*, end, left, right, center)textBaseline(top, hanging, middle, alphabetic*, ideographic, bottom)direction(ltr, rtl, inherit*)
Lines
To draw a line you first call the beginPath() method, then you provide a starting point with moveTo(x, y), and then you call lineTo(x, y) to make the line to that new coordinates set. You finally call stroke():
c.beginPath()
c.moveTo(10, 10)
c.lineTo(300, 300)
c.stroke()
The line is going to be colored according to the c.strokeStyle property value.
A more complex example
This code creates a canvas that generates 800 circles:
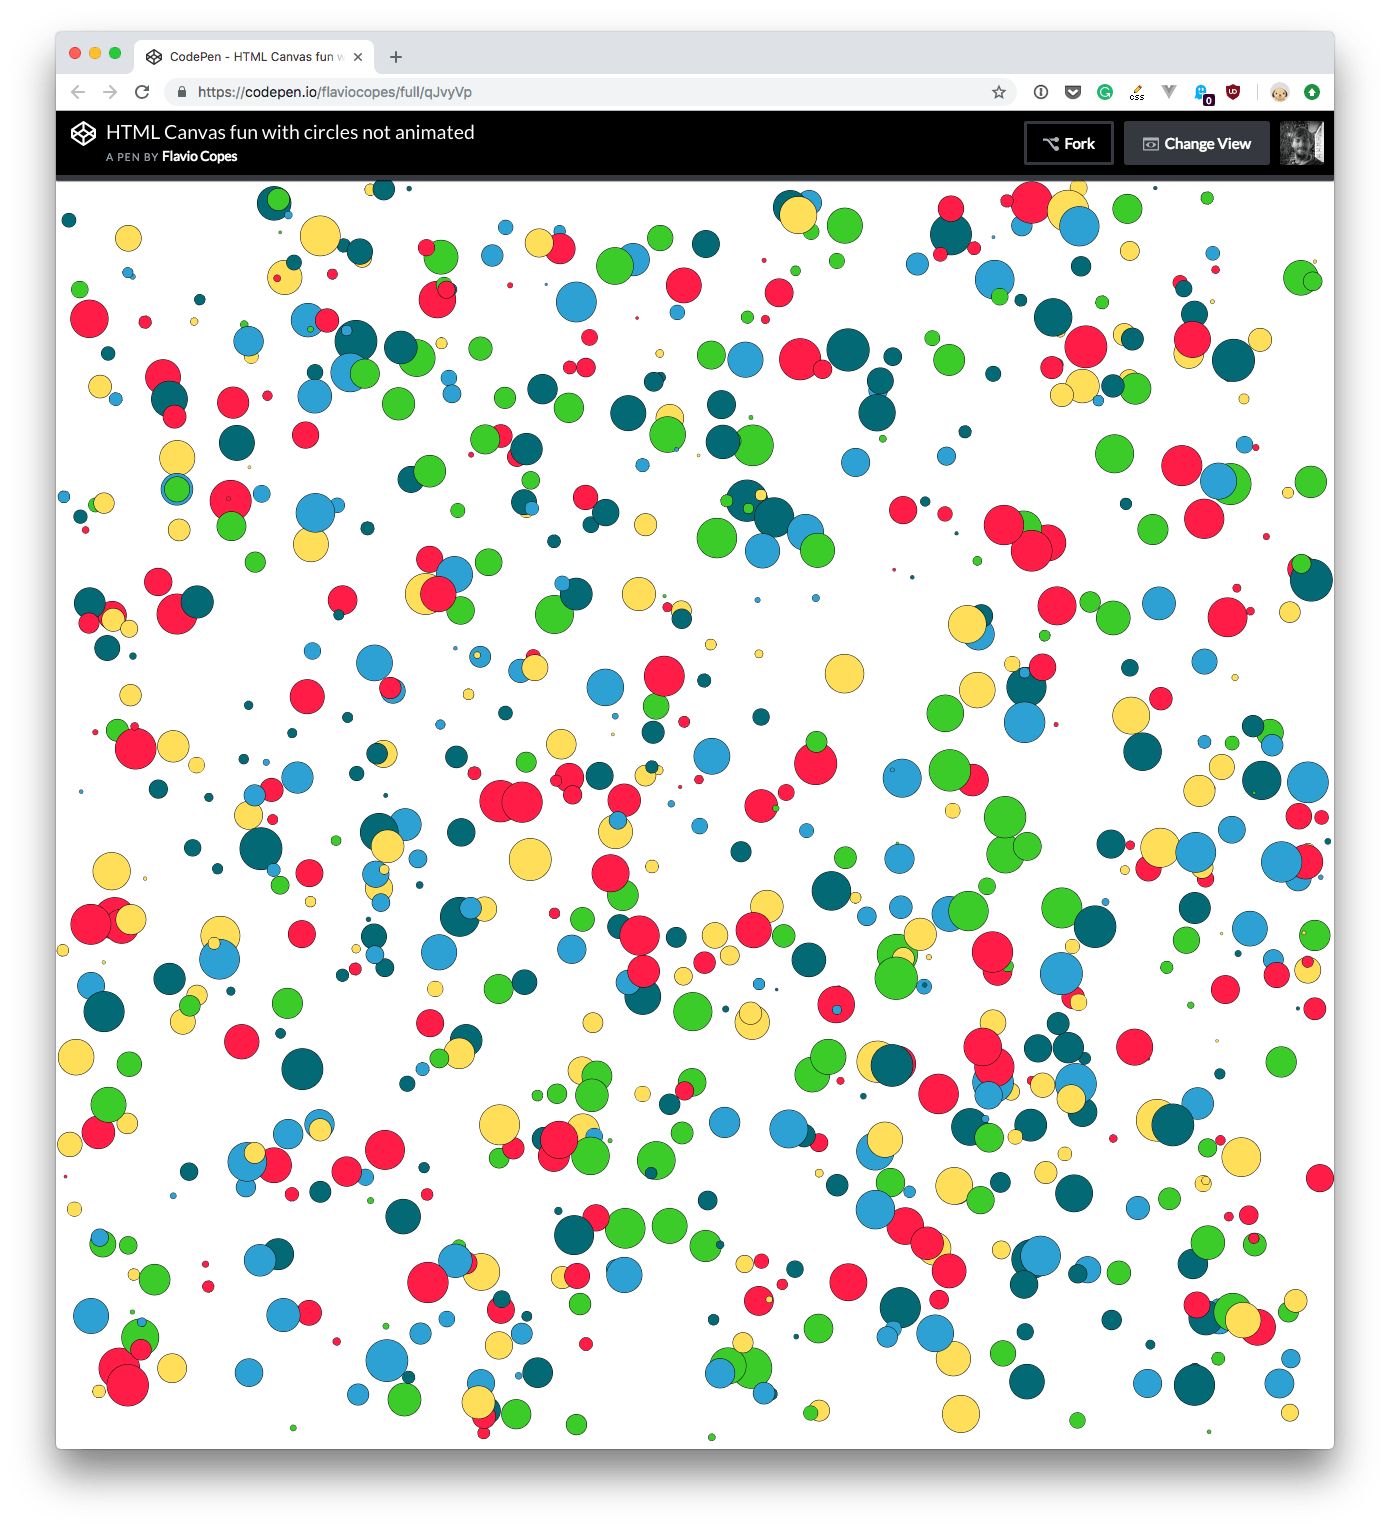
Every circle is perfectly contained in the canvas, and its radius is randomized.
Any time you resize the window, the elements are regenerated.
You can play around with on Codepen.
const canvas = document.querySelector('canvas')
canvas.width = window.innerWidth
canvas.height = window.innerHeight
const c = canvas.getContext('2d')

const circlesCount = 800

const colorArray = [
  '#046975',
  '#2EA1D4',
  '#3BCC2A',
  '#FFDF59',
  '#FF1D47'
]

const debounce = (func) => {
  let timer
  return (event) => {
    if (timer) { clearTimeout(timer) }
    timer = setTimeout(func, 100, event)
  }
}

window.addEventListener('resize', debounce(() => {
  canvas.width = window.innerWidth
  canvas.height = window.innerHeight

  init()
}))

const init = () => {
  for (let i = 0; i < circlesCount; i++) {
    const radius = Math.random() * 20 + 1
    const x = Math.random() * (innerWidth - radius  * 2) + radius
    const y = Math.random() * (innerHeight - radius  * 2) + radius
    const dx = (Math.random() - 0.5) * 2
    const dy = (Math.random() - 0.5) * 2

    const circle = new Circle(x, y, dx, dy, radius)
    circle.draw()
  }
}

const Circle = function(x, y, dx, dy, radius) {
  this.x = x
  this.y = y
  this.dx = dx
  this.dy = dy
  this.radius = radius
  this.minRadius = radius
  this.color = colorArray[Math.floor(Math.random() * colorArray.length)]

  this.draw = function() {
    c.beginPath()
    c.arc(this.x, this.y, this.radius, 0, Math.PI * 2, false)
    c.strokeStyle = 'black'
    c.stroke()
    c.fillStyle = this.color
    c.fill()
  }
}

init()
Another example: animating elements on the canvas
Based on the example above, we animate the elements using a loop. Every circle has its own “life” and moves within the borders of the canvas. When the border is reached it bounces back:
See the Pen HTML Canvas fun with circles, not interactive by Flavio Copes (@flaviocopes) on CodePen.
We achieve this by using requestAnimationFrame() and slightly moving the image at every frame rendering iteration.
Interact with the elements on the canvas
Here is the above example expanded to let you interact with the circles using the mouse.
When you hover the canvas, the items near your mouse will increase in size, and they will return back to normal when you move somewhere else:
See the Pen HTML Canvas fun with circles by Flavio Copes (@flaviocopes) on CodePen.
How does it work? Well, first I track the mouse position using 2 variables:
let mousex = undefined
let mousey = undefined

window.addEventListener('mousemove', (e) => {
  mousex = e.x
  mousey = e.y
})
Then we use those variables inside the update() method of Circle, to determine if the radius should increase (or decrease):
if (mousex - this.x < distanceFromMouse && mousex - this.x > -distanceFromMouse && mousey - this.y < distanceFromMouse && mousey - this.y > -distanceFromMouse) {
  if (this.radius < maxRadius) this.radius += 1
} else {
  if (this.radius > this.minRadius) this.radius -= 1
}
distanceFromMouse is a value expressed in pixels (set to 200) that defines how far we want the circles to react to the mouse.
Performance
If you try to edit those projects above and add a bunch more circles and moving parts, you’ll probably notice performance issues. Browsers consume a lot of energy to render the canvas with animations and interactions, so pay attention so that the experience is not ruined on less performant machines than yours.
In particular I had issues when trying to create a similar experience with emojis rather than circles, and I found that text takes a lot more power to render, and so it was sluggish pretty quickly.
See the Pen HTML Canvas fun with Emojis by Flavio Copes (@flaviocopes) on CodePen.
This page on MDN lists many performance tips.
Closing words
This was just an introduction to the possibilities of Canvas, an amazing tool that you can use to create incredible experiences on your web pages.
I wrote 20 books to help you become a better developer:
- Astro Handbook
- HTML Handbook
- Next.js Pages Router Handbook
- Alpine.js Handbook
- HTMX Handbook
- TypeScript Handbook
- React Handbook
- SQL Handbook
- Git Cheat Sheet
- Laravel Handbook
- Express Handbook
- Swift Handbook
- Go Handbook
- PHP Handbook
- Python Handbook
- Linux Commands Handbook
- C Handbook
- JavaScript Handbook
- CSS Handbook
- Node.js Handbook